ML Kit by google is yet another very efficient and clean way of integrating basic machine learning into your mobile apps. It offers some easy to use prebuilt base APIs:
- Barcode scanning
- Image labelling
- Text recognition (see how text recognition compares on iOS and Android)
- Face detection (check out a nice tutorial here)
- Landmark detection.
The best part is that you can use these services on-device (without needing any internet connection for external server calls) or on-cloud (wider training base requiring server calls). Most importantly, this can be integrated in both iOS and Android apps.
I’ll walk you through the iOS integration process. What we’ll build is a very basic app to recognize English text from an image. We will then extend it to translate the recognized text into our language of choice.
From this basic function, we can imagine a varied range of applications: digital documents reading, text extraction from real-world objects, and then translation layered on top. Our app will take the input image from our phone camera or photos gallery. Without further ado, let’s go!
UI Setup
For the initial setup for image input, we need a mechanism to snap a picture from our phone’s camera or select one from photos and display it on the app screen. Please refer to my detailed blog with all steps to achieve this. The exact same mechanism will be used here.
After this basic setup, we need to make some additional arrangements for the translation bit that we’re adding in this app. So as of now, our Main.storyboard should look something like this:
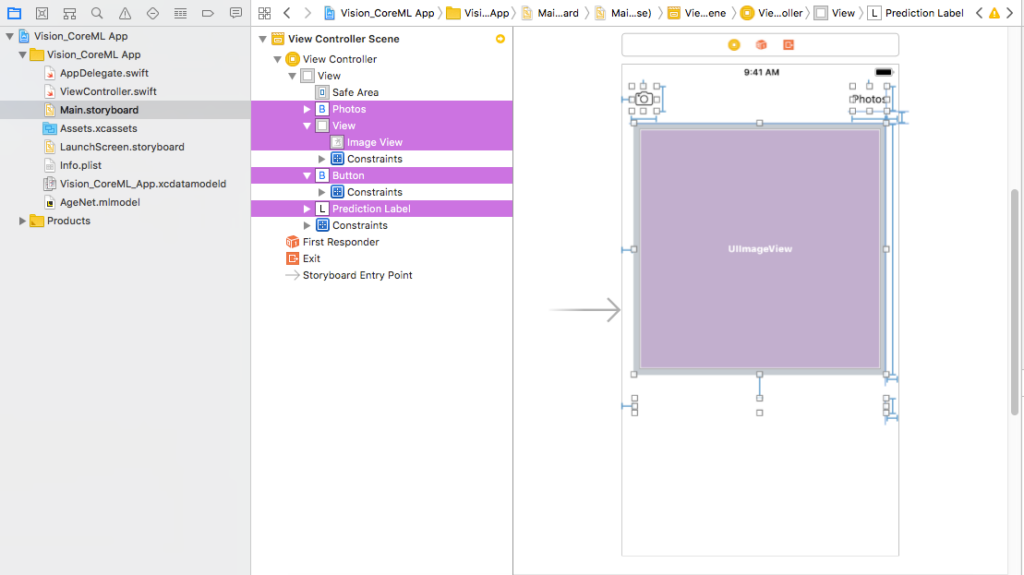
We have the following components on screen:
- 2 UIButtons: Camera and Photos — These will help you input an image, either with the phone’s camera or photos library respectively.
- UIImage — This will display your input image.
- UILabel — This will display the detected text.
We will now go ahead and add a few more components, below those initial ones listed above:
- UILabel — This will display the translated text.
- UIButton — To pop and dismiss the language options view.
- UIPickerView — To display the set of language options to choose from.
The storyboard should now look like this.
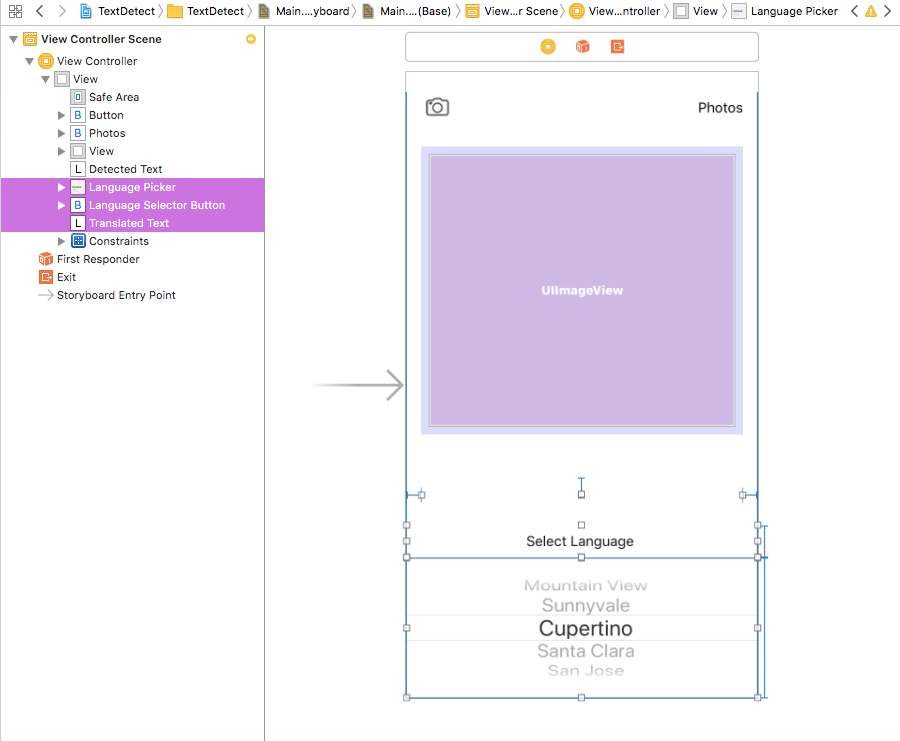
Observe the constraints given to all the newly-added components:
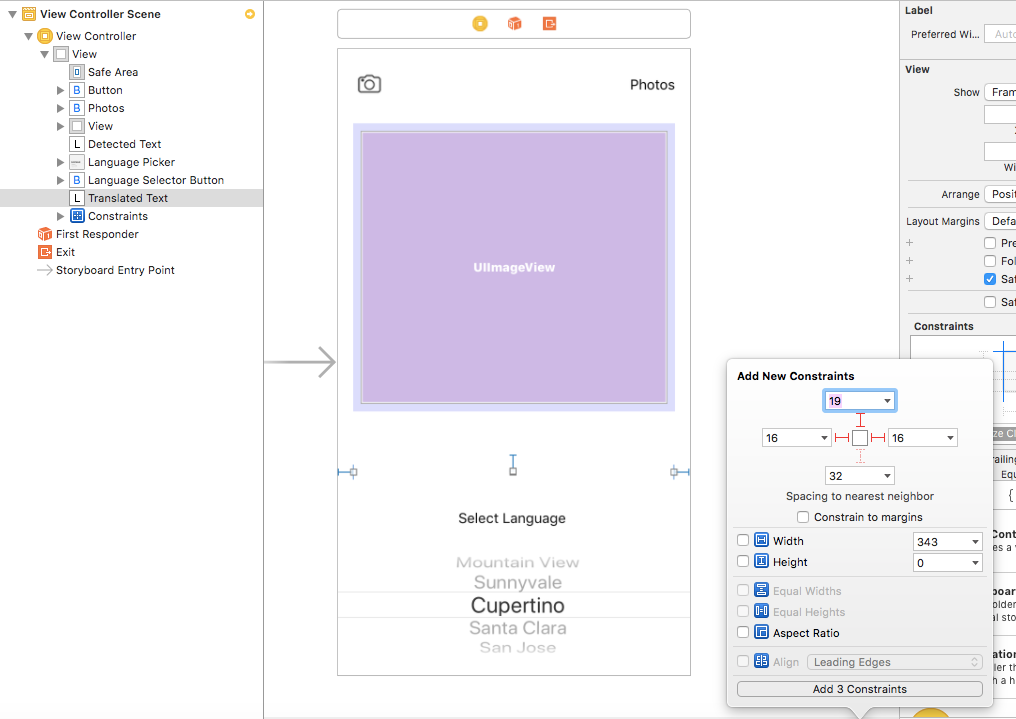
1. UILabel for translated text
Create an IBOutlet for the translated text label so that we can show translated text—you can constrain it as follows:
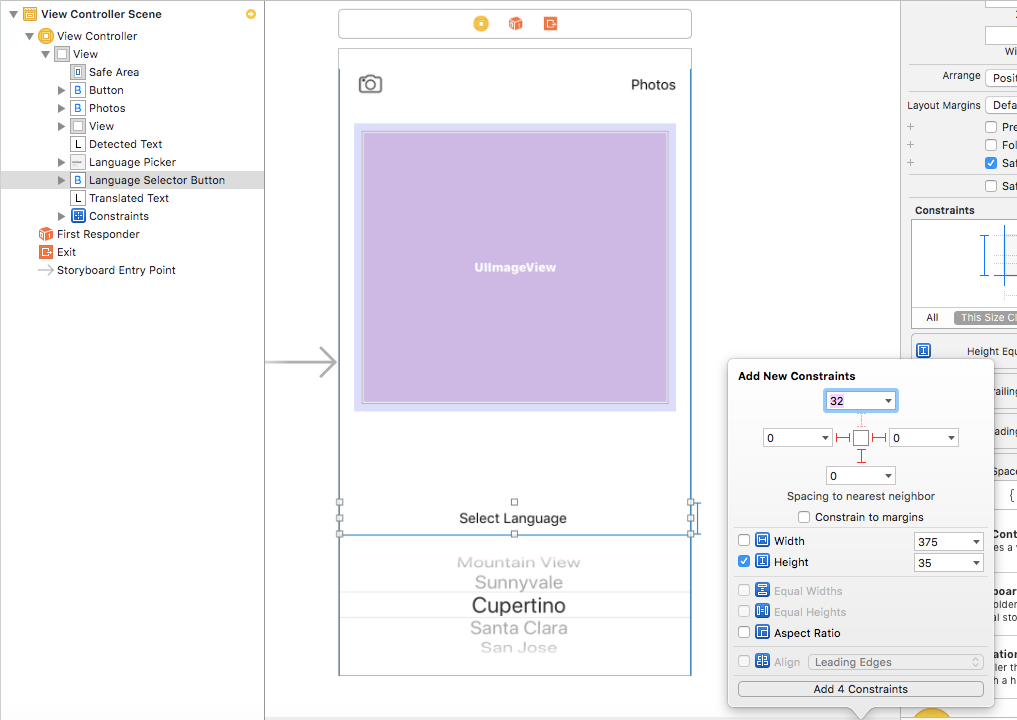
2. UIButton for the language selector
This button will control the language selector’s hide and show actions on the screen. Create an IBOutlet as well as IBAction outlet on this button. You can use the following constraints with respect to superview and picker view:
3. UIPickerView for the list of languages
This view will display the list of languages for translation. The height constraint of the picker view can be manipulated to hide and show it on screen. Pull out an IBOutlet for the height constraint. The rest of the constraints on IB are as follows:
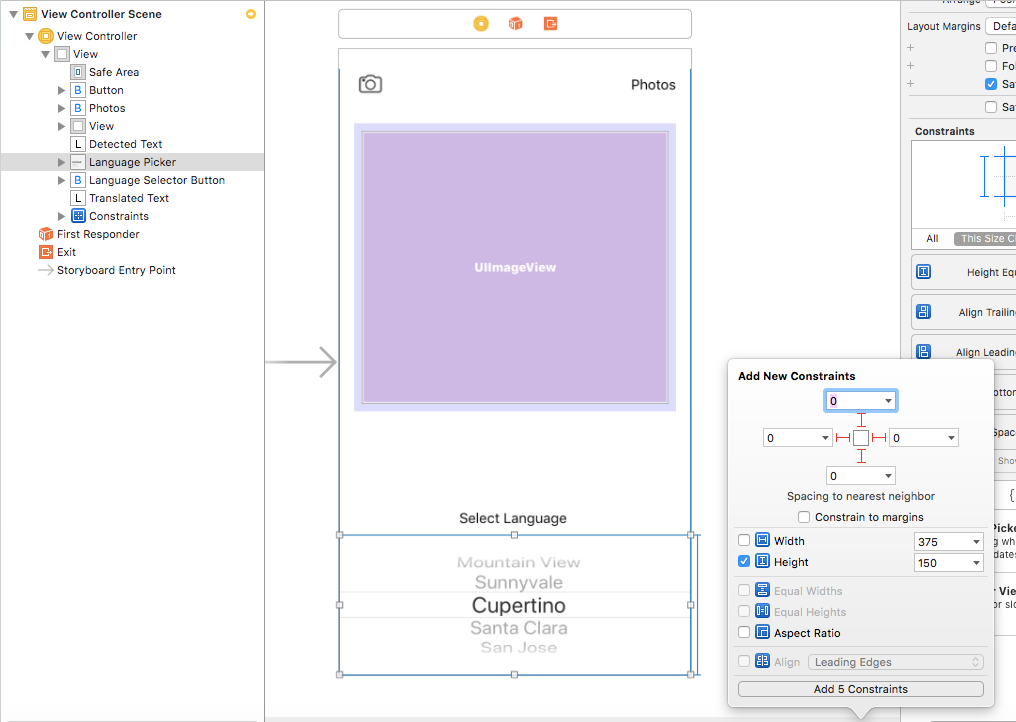
Now that we have the UI in place, let’s move to the ViewController code.
Image Input Flow
There are two ways to input images to our app for text recognition — through photos or through direct camera capture. The setup with the code for the same can be found from the same blog referred above for UI setup.
Once we have this boilerplate code in place, we can begin our text recognition. More on that in the following sections.
Language Selection Flow
For this new flow (as we saw in the UI setup) we have outlets for:
- UIButton and its IBAction to control the language selection list — languageSelectorButton and languageSelectorTapped
- UIPickerView for language selector — languagePicker
- UILabel for translated text — translatedText
When languageSelectorButton is tapped, the languagePicker pops up on the screen if not already present; otherwise, it dismisses. We play with the height constraint of picker view to achieve this.
Whenever we dismiss the selector by tapping languageSelectorButton we call the translate method with the recognized text as a parameter so that it’s translated to the selected language, which causes the button text to change to the language selected.
In the translate method, we call the Google Translate API to translate the most recent detected text to the desired language. More about how we deal with the API for translation in the following sections.
@IBAction func languageSelectorTapped(_ sender: Any) {

        if pickerVisible {
            languagePickerHeightConstraint.constant = 0
            pickerVisible = false
            translateText(detectedText: self.detectedText.text ?? "")
        } else {
            languagePickerHeightConstraint.constant = 150
            pickerVisible = true
        }

        UIView.animate(withDuration: 0.3) {
            self.view.layoutSubviews()
            self.view.updateConstraints()
        }
    }
To populate the data in the UIPickerView, we extend the ViewController with UIPickerViewDataSource.
We can use two arrays to keep track of the language label and its code for passing to the translation API. See the declaration of the same below. You can add as many languages and their respective codes supported by the Google Translate API. The default language for translation in the below code is Hindi, and there are four more languages available for translation (French, Italian, German, and Japanese.
Whenever a row in the language selector list is selected, we store the code for the selected language of translation in the targetCode variable and change the button title to name of the selected language.
let languages = ["Select Language", "Hindi", "French", "Italian", "German", "Japanese"]
let languageCodes = ["hi", "hi", "fr", "it", "de", "ja"]
var targetCode = "hi"


// MARK :- UIPickerViewDelegate

extension ViewController: UIPickerViewDataSource, UIPickerViewDelegate {

    func numberOfComponents(in pickerView: UIPickerView) -> Int {
        return 1
    }

    func pickerView(_ pickerView: UIPickerView, numberOfRowsInComponent component: Int) -> Int {
        return languages.count
    }

    func pickerView(_ pickerView: UIPickerView, titleForRow row: Int, forComponent component: Int) -> String? {
        return languages[row]
    }

    func pickerView(_ pickerView: UIPickerView, didSelectRow row: Int, inComponent component: Int) {
        languageSelectorButton.setTitle(languages[row], for: .normal)
        targetCode = languageCodes[row]
    }
}
Text Detection Using Google’s ML Kit
ML Kit offers a lot of ready to use APIs (see the intro of this post for more) for integration in our mobile apps, which are both on cloud and on-device. For this tutorial, we’re going to implement the on-device text recognition API in this project.
For integrating ML Kit, we first need to setup Firebase for our iOS app. Follow these precise and simple steps from google’s documentation to do the setup:
Once Firebase is in place, we can begin with our text detection API integration. We’ll use pods for the same. Go ahead and add the following pods to your PodFile:
# Pods for TextDetect
  pod 'Firebase/Core' , '~> 5.2.0'
  pod 'Firebase/MLVision', '~> 5.2.0'
  pod 'Firebase/MLVisionTextModel', '~> 5.2.0'
If you haven’t added any pods from the firebase setup yet, follow the steps below to use pods in your project.
- Open terminal and cd to your project’s root folder
- Type pod init
- This will create a PodFile for your project. Add the above pods to it and save.
- Type pod install
- This will install all the mentioned pods and create a new Xcode workspace with pods framework. We’ll only be using this workspace going forward. Open the workspace.
Let’s import Firebase in our ViewController.swift file.
Now we’ll write the code for the recognizer. First we initialize the text detector/recognizer. The declaration is done as follows:
import Firebase

class ViewController: UIViewController {

  lazy var vision = Vision.vision()
  var textDetector: VisionTextDetector?
}
We’ll now initialize the detector and prepare a recognition request with UIImage as the input. The request returns all the features/words detected and recognized by the API. To output the entire detected text we loop through the features array and make an appended string to display the entire detected text.
func detectText (image: UIImage) {

        textDetector = vision.textDetector()

        let visionImage = VisionImage(image: image)

        textDetector?.detect(in: visionImage) { (features, error) in
            guard error == nil, let features = features, !features.isEmpty else {
                return
            }

            debugPrint("Feature blocks in the image: (features.count)")

            var detectedText = ""
            for feature in features {
                let value = feature.text
                detectedText.append("(value) ")
            }

            self.detectedText.text = detectedText
            self.translateText(detectedText: detectedText)
        }
    }
Google Cloud’s translate API
Now that we have our recognized text in place, let’s move on to translation. Google’s Translation API needs you to setup a project in the Google Cloud console and get an API Key for translation. Follow the steps below to get your API key:
- Open the console and login to your gmail account.
- Your first project is already present in the console. You can use the same project or create a new project.
- Now select API and Services from the left slider menu. That will take you to the API dashboard.
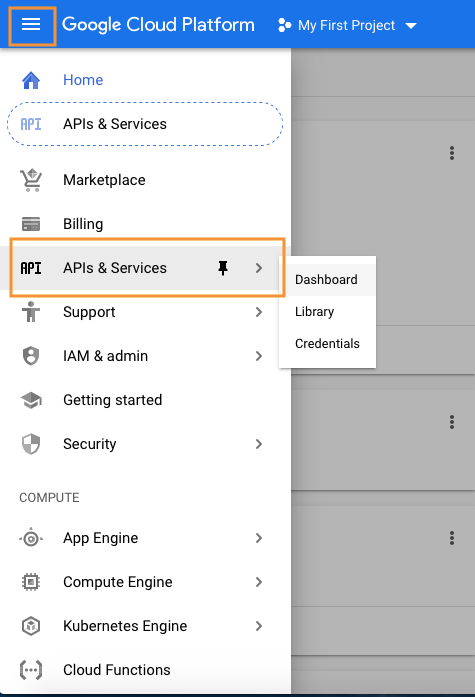
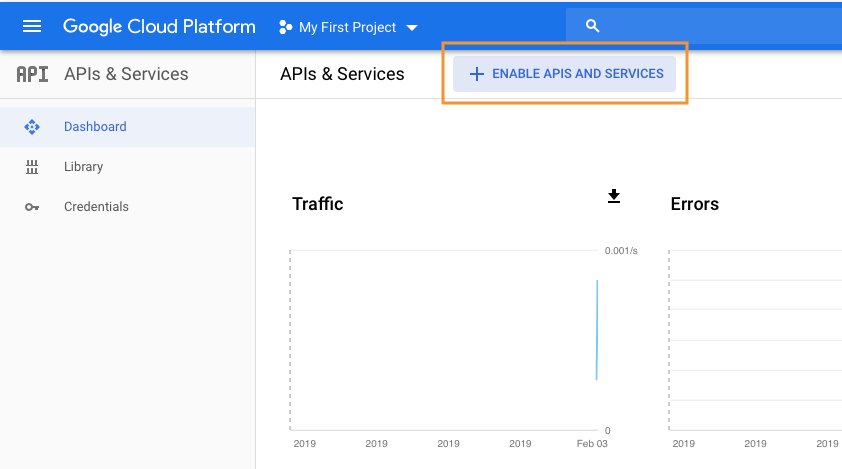
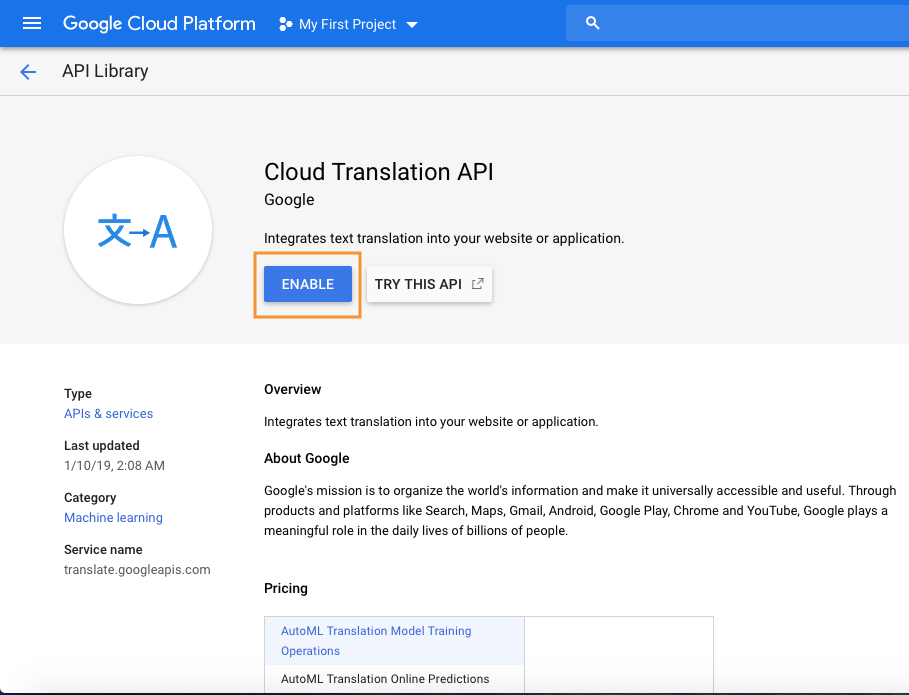
4. Click on ENABLE APIS AND SERVICES button and search for ‘Cloud Translation API’.
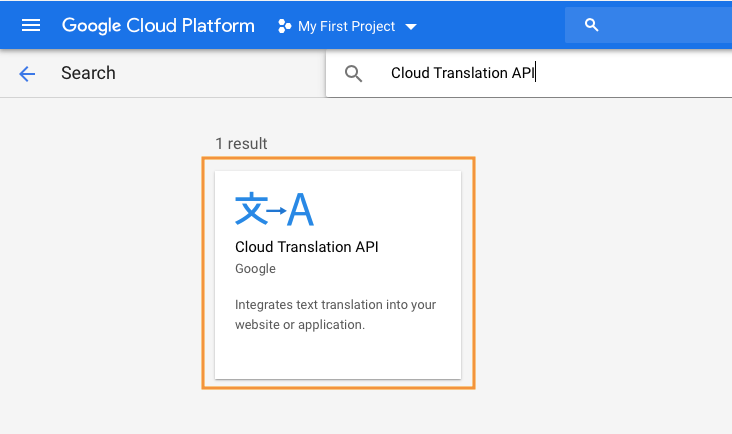
5. Click on the API from the search results and hit the ENABLE button. You’ll now need to add your billing info for using the Cloud API. Google offers a free one year trial without auto debit from your credentials. So go ahead and add your info without worrying about that (But make sure to set a reminder!).
6. We’ll then land on the credentials page with the API key. We’ll need this key in our code.

Now that we have the API key, let’s move back to our Xcode project. Let’s create a new Swift file to write our API request for translation. You can check the API documentation here for the API request parameters and response format details.
Check out the code for the same in GoogleTranslate.swift file. We’ve written a simple class for making the API call for translation. We’ll use this URLSessionTask to call the translate function as follows:
func translateText(detectedText: String) {

        guard !detectedText.isEmpty else {
            return
        }

        let task = try? GoogleTranslate.sharedInstance.translateTextTask(text: detectedText, targetLanguage: self.targetCode, completionHandler: { (translatedText: String?, error: Error?) in
            debugPrint(error?.localizedDescription)

            DispatchQueue.main.async {
                self.translatedText.text = translatedText
            }

        })

        task?.resume()
}
The target language for translation is the one selected from the language selector. We basically make a call to the Google Translate REST API with the source language as English (code: en); the target language as selected by the user, in this case Hindi (code: hi); and the text to be translated (which in our case is the text recognized from our image).
Once all these pieces are put together, we’ll have a running app that looks and works something like this:
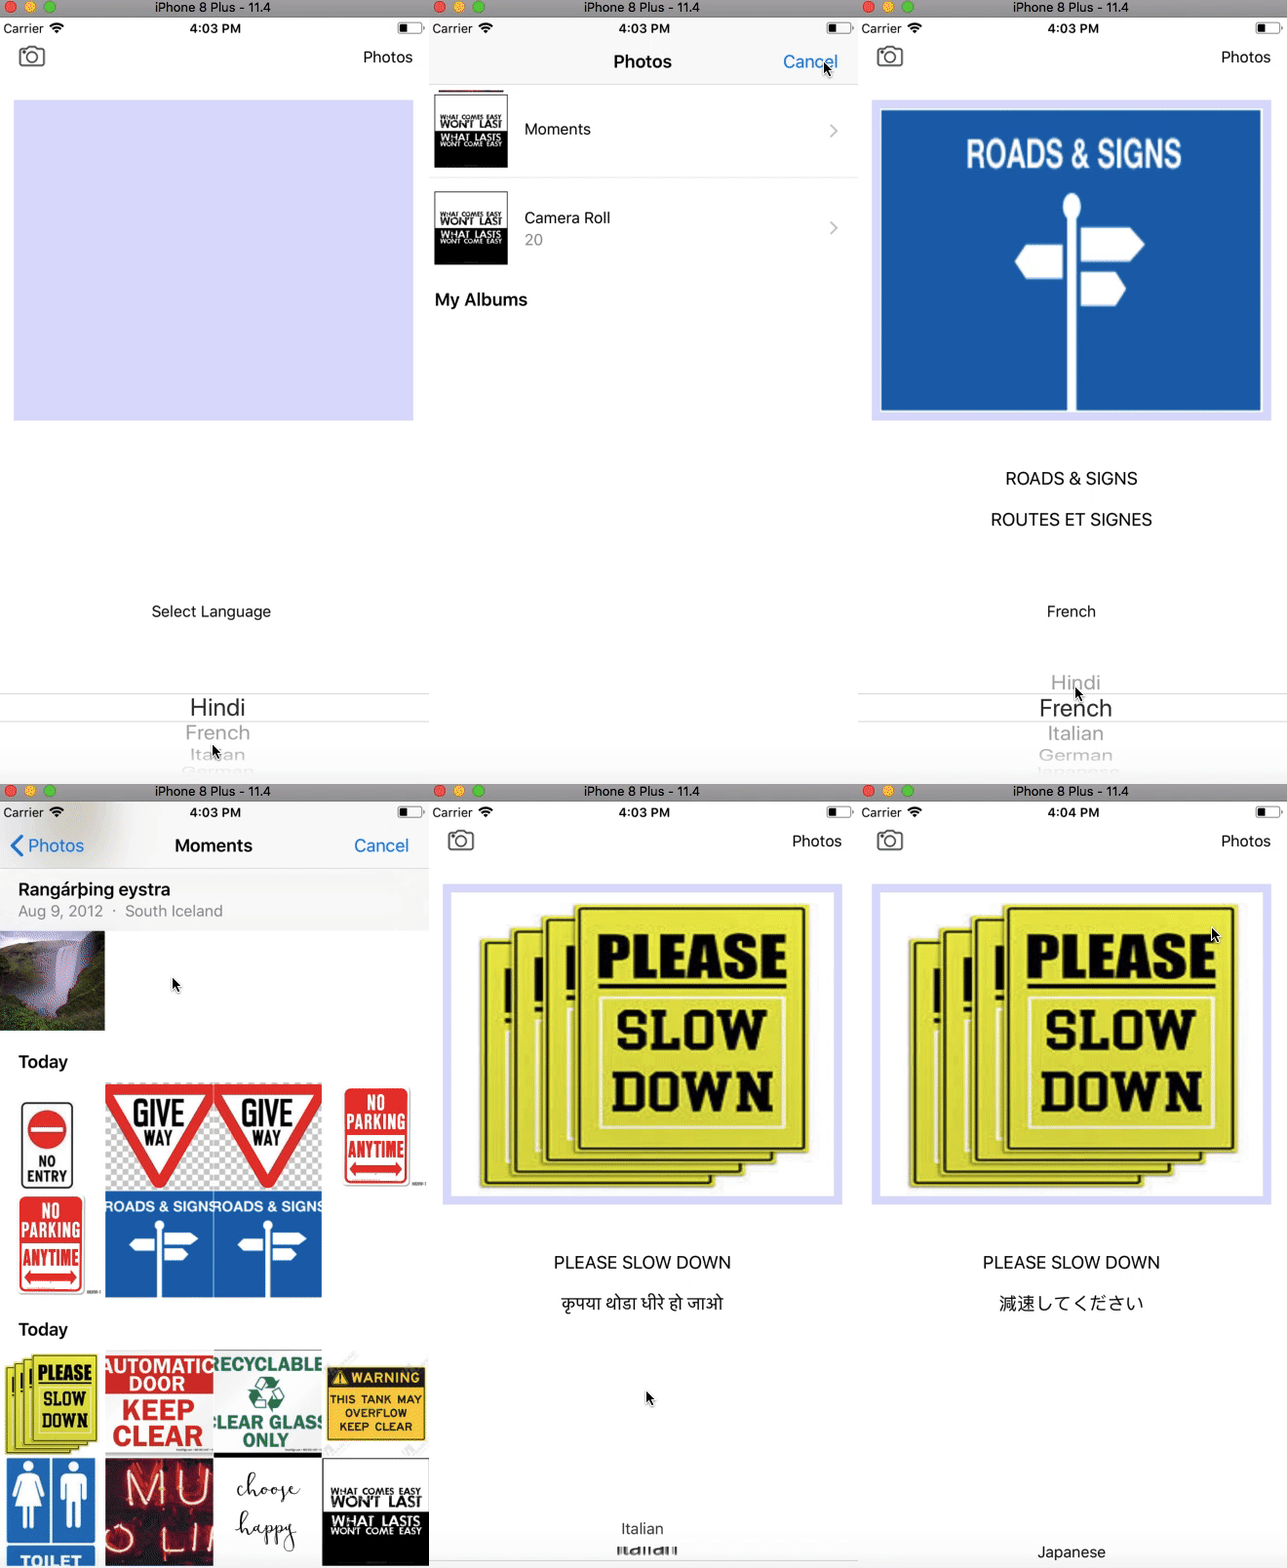
You can find the entire source code on this GitHub repository:
All-in-all, it’s a fairly simple set of steps that leads us to integrating some really cool ML Kit implementations in our mobile apps. Apart from the pre-existing APIs, we can also have our own custom trained model from TensorFlow and integrate the same in iOS apps. This can be achieved using the direct SDKs for ML Kit TensorFlow integration, or the TensorFlow model can be converted to Core ML model externally using coremltools and then fed to your app.
Apple and Google are coming up with some really great development in terms of accommodating machine learning inside apps and on-device, with the goal of ultimately making them more user-friendly and intelligent.
Feel free to leave a comment if you need any help!
Discuss this post on Hacker News and Reddit.

Comments 0 Responses