
The promise of being able to drop your own custom neural networks into Lens Studio as Lenses, which can then be deployed to millions of devices, is potentially game-changing.
But working with a tool this powerful and versatile inevitably involves some nuances you’ll need to consider while building.
While working through a demo project (stay tuned for a tutorial soon), I was able to identify some key areas where working with custom ML models required some tweaking, fine-tuning, and adaptation.
Last time, we covered SnapML at a high-level — how it works, the benefits we think it can provide ML teams, and some strengths/areas for improvement.
This time, we’ll dive into a few particular considerations you’ll need to keep in mind when doing custom work with SnapML and Lens Studio. Specifically, the following are considerations I came across while working to customize a SnapML template for my own use case, which seems to be a good place to start.
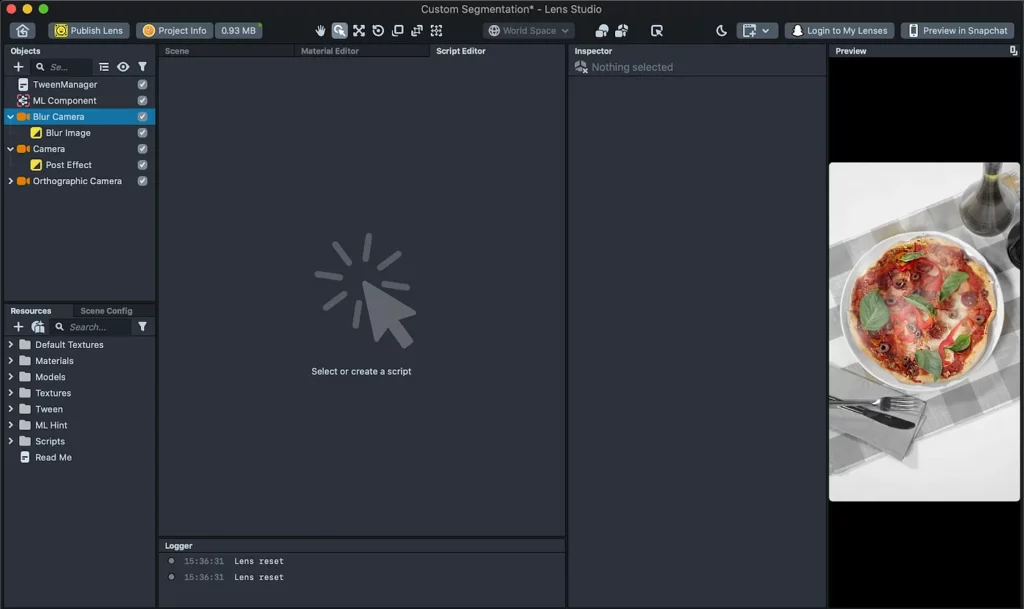
The Project
To help make this more tangible, I’ll be discussing my process while trying to implement a custom segmentation model in Lens Studio. Luckily, Snap includes some template projects to get started — and for my use case, they have a pizza segmentation template that I figured I’d be able to use as an easy starting point.
As I’d mentioned in the overview, the SnapML docs make it seem pretty easy to use a custom model built from a template in a Lens. They have a drag-and-drop interface and tools to adjust the inputs (e.g. stretching/scaling the camera feed, applying basic pre-processing) and outputs. But in reality, I ended up struggling once it came time to integrate the model into my Lens Studio project. These difficulties centered on two areas:
- Model Input and Output Formatting
- Selecting Channels
Model Input and Output Formatting
I wanted to use a custom segmentation model that I’d previously trained. I was hoping to use their pizza segmentation demo Lens for my project as a starting point.
The only difference between Snap’s model and mine was that mine has two output channels. But with my lack of Lens Studio / computer graphics knowledge, it ended up being very difficult to use the output from the one channel I wanted to.
My model expects as input a 3-channel image with the RGB values transformed to floats between -0.5 and 0.5, instead of ints from 0–255. It outputs a 2-channel segmentation map, whose values are floats between 0 and 1.
The first channel represents a background class (which enables me to train models with multiple classes of objects), and the second channel contains predictions for the class of objects I’m segmenting.
Lens Studio expects output values to be between 0 and 255, so I needed to both scale my outputs and select only the second channel.
We can handle the input/output value transformations either in Lens Studio or in the model architecture, but the output channel must be selected in Lens Studio, because the Slice layer is not currently supported.

Option 1: Transform inputs and outputs in Lens Studio
In Lens Studio, it’s possible to adjust scale and bias parameters when you import the model. In my case, I wanted values from 0–255 to be transformed into values from -0.5 to 0.5, so I set the input scale parameters to be 0.0039… (= 1 / 255) and the bias parameters to be -0.5 for all 3 channels.
For the outputs, I set the scale parameters to be 255 to stretch my output values so they ended up between 0 and 255 instead of 0 and 1. This way of importing models was convenient for testing whether or not my model was importing correctly and making reasonable predictions.
After a few times though, it felt tedious to set all these parameters manually (and something about approximating 1 / 255 as 0.0039 bugs me, but I digress..), so I decided to work around this by using Option 2.
Option 2: Bake input/output transformations into the model architecture.
Once I was confident that my model architecture would import successfully, I wrapped the model with Lambda layers to transform my inputs and outputs:
def adjust_inputs_and_outputs_for_snapml(model: tf.keras.Model) -> tf.keras.Model:
    """Applies scale and bias normalizations.

    This is done here so that Lens Studio users do not have to manually set these
    adjustments.

    Args:
        model: The inference model to be wrapped.
    Returns:
        A model wrapped with lambda layers to process the inputs and outputs.
    """
    model_input = model.input

    # Change pixel values so they are between -0.5 and 0.5 as the model expects
    output = tf.keras.layers.Lambda(lambda x: x / 255 - 0.5)(model_input)

    # Run inference
    output = model(output)

    # Change output values so they are between 0 and 255 as Snap ML expects
    output = tf.keras.layers.Lambda(lambda x: x * 255)(output)

    return tf.keras.models.Model(model_input, output)
Selecting channels
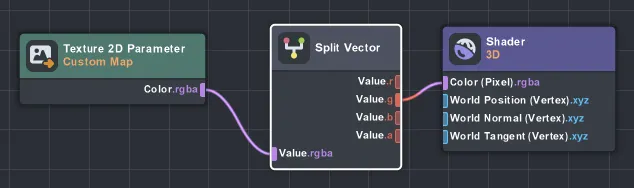
Segmentation models output data arrays, which contain probabilities of each pixel belonging to a certain class (e.g. pizza). Effects in Snap Lenses, however, are composed of various filters that operate on images in standard RGB color spaces.
One of the most confusing parts I had working with Lens Studio was mapping model outputs to the image effects inside Lens Studio. To make model outputs useful in your Lenses, you’ll need to adopt the language of 3D graphics and learn a bit about textures, materials, and shaders. It’s worth familiarizing yourself with these concepts before getting started:
Essentially, output is treated as a texture by Lens Studio. Textures have four channels (RGBA), and a material can be applied to manipulate their values.
In my specific case, I had to use this Split Vector node in the Material Editor to select the second channel of my model output. Unfortunately, it appears to be set up to handle inputs with 4 channels. As such, it seemed to simply repeat my two channels to fill up the 4 channels it expected. This ended up working for me this time around, but I don’t know if it could handle a model with 10 output channels, just as an example.
It remains to be seen how this dynamic might affect different project and model types, but it’ll be important to understand these concepts and how they interact with your custom models.
Conclusion
ML engineers looking to work with SnapML should be encouraged — though there are parts of the framework that are a bit difficult to work with, it’s a powerful set of tools once you’ve cracked the code a bit, so to speak.
But these same ML engineers would also be well-served by digging a bit deeper into Lens Studio, as it has some unique concepts and processes that might not be as familiar for some. Additionally, a thorough understanding of your own model’s input/output parameters, along with a strong sense of what you want to ultimately do with that model, will help ease the challenges I’ve identified here.
Stay tuned for more from our team, including closer looks at Snap’s template projects, and more specifics on working with ML inside SnapML and Lens Studio.
Comments 0 Responses