Just last month (June 2020) Snapchat released a major update for its Lens creation software — Lens Studio 3.0. Out of all the new things that came along with the release, one feature that stood apart was SnapML.
SnapML allows lens creators to use their own custom machine learning models inside filters. Snapchat filters already use ML for a variety of things like face tracking, surface tracking, segmentation, facial gestures, and more.
But with SnapML, developers can now go beyond those limits, using the breadth of their imaginations to combine custom ML models with Snapchat’s feature-rich augmented reality tools—and an audience of millions!
Table of contents
Getting started with SnapML in Lens Studio
Snapchat has made a lot of initial efforts to make the experience of implementing ML models as smooth and straightforward as possible. To do this, they’ve provided several ready-to-use templates that could be turned into AR experiences in only a few minutes. Let’s explore these templates and learn how to use them to create filters.
Lens Studio Templates
There are 5 main Lens Studio templates provided by Snap that cover some of the most common mobile machine learning tasks. We’ll cover the ML side of things a bit later, but first, here’s a look at the template projects inside Lens Studio:
Style Transfer
Style transfer is used to modify the overall visual appearance of the camera texture. Essentially, this task allows us to recompose the content of one image in the style of another.
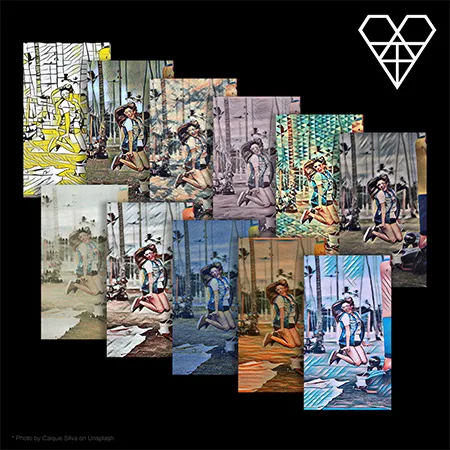
This could be used to create unique artistic styles or color filters. Imagine a selfie in the style of your favorite visual artists. This is similar to what we see in many image and video editing apps like Prisma or Looq.
This project template contains an example ML model with a style transfer visual effect. We’ll discuss in more detail below how to implement your own custom style transfer model.
Classification
This template uses the image classification ML technique, which is used to classify images into different labels. This task is also sometimes referred to as image labeling or image recognition.
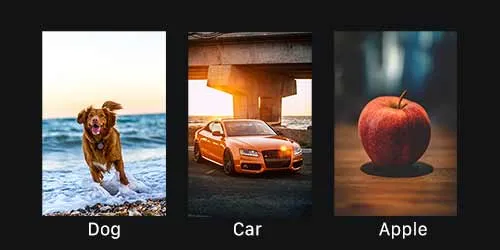
This could be used to tell, for example, whether user is wearing a hat or not in a given image or video frame. However, to create this kind of model, you’ll need to train it on a large dataset. There’s a wide variety of image classification datasets out there, but if there’s no dataset available for your use case, you’ll need to collect and label one.
This template contains an example ML model that can tell if the user is wearing glasses or not, showing a particle effect if true. We’ll discuss in more detail below how to implement your own custom image classification model.
Object Detection
The object detection template could be used to identify and locate one or more target objects in a given image or video frame. Object detection is somewhat similar to image classification, but it’s important to quickly distinguish the two:
- Image classification assigns a label to an image. A picture of a dog receives the label “dog”. A picture of two dogs, still receives the label “dog”
- Object detection, on the other hand, draws what’s called a bounding box around each dog and labels the box “dog”. The model predicts where each object is and what label should be applied. In that way, object detection provides more information about an image than recognition.
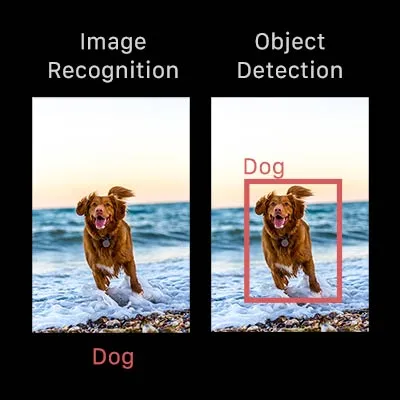
In Lens Studio, you could use this template to identify the location of the ring finger in an image or video frame, and use that prediction to place an AR ring for virtual product try-ons.
Again, here you’ll need a large dataset of objects you want to detect—and their bounding box coordinates—to create a custom model for this effect. Here are some available datasets to consider working with.
This template contains an example ML model that recognizes cars from the COCO dataset and draws bounding boxes around them. We’ll discuss in more detail below how to implement your own custom object detection model.
Custom Segmentation
Segmentation is an ML technique used to differentiate between the specific parts or elements of an image. Specifically, it works at a pixel-level—the goal is to assign each pixel in an image to the object to which it belongs (i.e. class label).
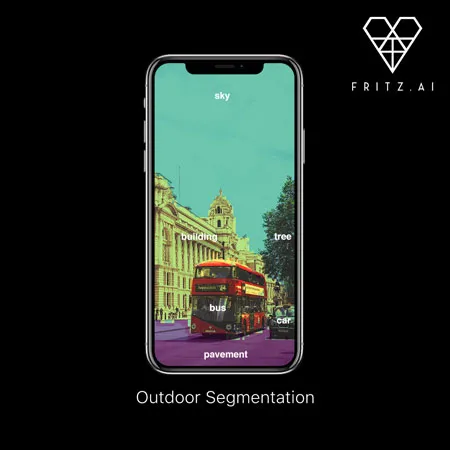
Segmentation could be used to add effects to a given segmented region. Snap Lense already had built-in segmentation to separate the user from the background, but with custom ML models you extend this task to anything you can think of—for example, segmenting the sky and changing it to into a beautiful, sunset-like pink-orange color.
This template contains an example ML model that recognizes a pizza and adds a sizzling effect to it. We’ll discuss in more detail below how to implement your own custom segmentation model.
Ground Segmentation
Very similar to the above template, but this one is designed to segment the ground and floor surfaces and can be used to change the ground to anything you’d like—i.e. hot lava, a frozen tundra, etc
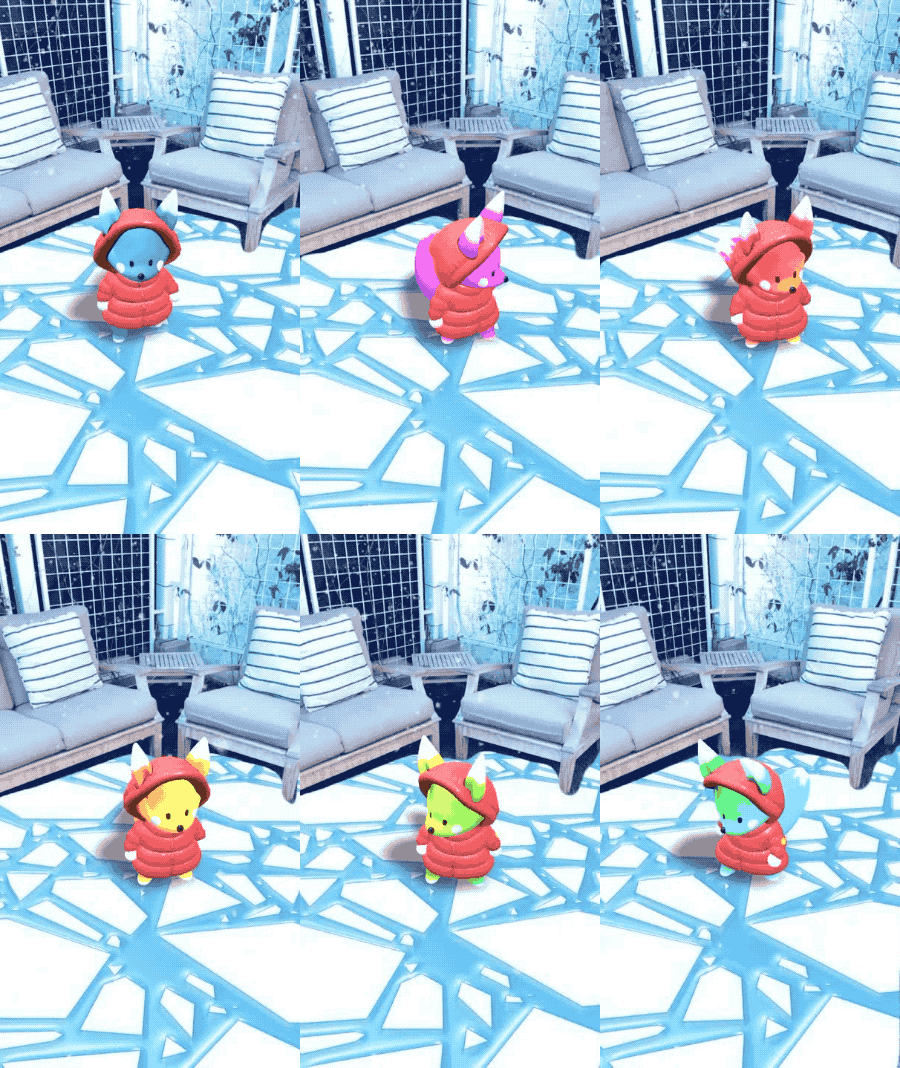
This template contains an example ML model that recognizes the ground and masks it with a frozen ice texture, as seen above.
Third-Party Templates
Apart from these 5 ready-to-use templates from the Snap team, Snapchat and a few third-party creators have partnered to provide some more templates that could be used as a starting point for your effects, or could give you ideas and serve as inspiration for building your own custom models with SnapML!
Let us take a look at what they offer:
- Foot Tracking by Wannaby – Using this template you could attach 3D or 2D objects to the feet. You can also detect their location on the screen and when the feet touch each other.
- Multi-Segmentation- whats’s better than segmentation? Multi-segmentation, this template allows you to segment more than 1 region on the image and add your texture/effect mask on it
- Eyebrow Addition/Removal- as the name suggests you could remove the user’s eyebrow or add a new silly one using this template
- Face Mask Classification and Segmentation- this template is super useful in context with the COVID-19 pandemic situation where wearing a face mask has become essential for safety. This template could detect if the user is wearing a face mask and will allow you to give the mask a custom style and texture.
- Beard Addition/Removal- just like the eyebrow template, this one will allow you to remove a person’s beard or add a new virtual one
ML Templates & Notebooks
All of the above Lens Studio templates include not just a pre-configured project in Lens Studio, but also resources for actually creating and implementing the specific ML Components (Lens Studio’s word for model files) in the given project.
To do this, Snap has provided Jupyter Notebooks for each template that could be imported directly into Google Colab. As such, they can all be tweaked easily to create a variety of effects—but if you’re trying to create something unique and more specific, you’ll need to train your own custom machine learning model.
These Notebooks contain model training code and step-by-step instructions to create custom ML models for your own dataset. On running the code in these Notebooks, you will get a .onnx or .pb model file as output after the training is complete. You can then import this model as an ML Component into the Lens Studio project templates we discussed above.
Let’s take a look at what you need to provide as an input to each of these ML templates to get the desired model output:
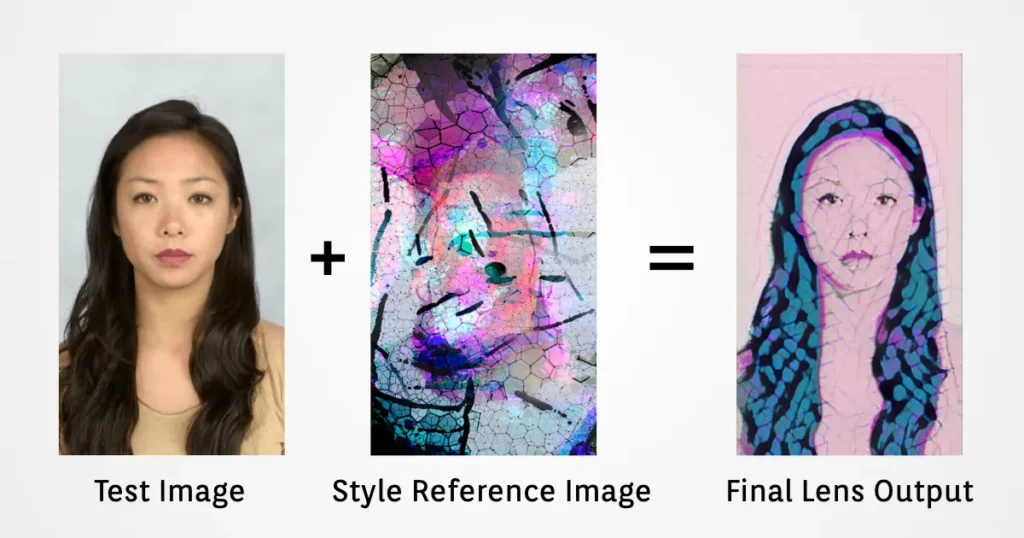
- Style transfer: This is one is the simplest to accomplish, because you only need to provide a single style reference image and a test image (one is already provided for you upon download). The trained model attempts to apply the artistic style of the reference image to the test image.
- Image Classification: To train a classification model, you’ll need to create a dataset of a large number of images that are divided into different target class labels. For example, a dataset of 500 images, containing 250 images each of people wearing a hat, and 250 images of people not wearing one. You can use publicly available datasets for this purpose, like ImageNet.
- Object detection: For object detection, the dataset should contain a large number of images of a particular object and an accompanied annotations file that contains the label and the coordinates of each object’s bounding box. This info needs to be included for every image. Here’s a publicly-available object detection dataset provided by Google
- Segmentation: Datasets for segmentation looks similar to the ones required for object detection. The difference here is that the coordinates mentioned are for the segmentation mask surrounding a particular region, instead of a bounding box. The classic COCO Dataset is a popular public dataset for segmentation tasks.
Snapchat has also provided some pre-trained models that you can import into Lens Studio Templates, you can find them in their model zoo. Keep an eye on this, as we can expect that collection of models to grow over time.
What’s Next?
In this post, we explored everything you’ll need to know to get started with SnapML and Lens Studio templates.
Next time, we’ll use the Object Detection template and a custom model to create a Snapchat Lens from start to finish.

Comments 0 Responses