Python remains the most popular language for building and training machine/deep learning models. This is because of the numerous libraries and tools built around it, that enables developers and researchers to quickly build models.
But in terms of deployment of these models created in Python, there is a trend towards using a different language. Some of the reasons behind this are:
- Speed: Python is not really a fast language compared to languages like Java, Scala, Go, or C
- Client-serving: This is easier when using more established languages like JavaScript that has access to numerous frontend tools.
In this tutorial, I’ll show you how to easily convert any TensorFlow/Keras model built and trained in Python to a JavaScript model. This can then be easily embedded into any web app built using JavaScript. This solves the issue of compatibility and also ensures that your application is built using a single stack.
Now let’s get started!
Create and Save a Python Model
To demonstrate model conversion, I’m going to create, train, and save a convolutional neural network (CNN) that classifies handwritten digits. This is a simple model—one of the reasons I chose it is due to the fact that I already created a JavaScript version here. So we can easily leverage the code there to test the converted model.
The code below creates a CNN to classify MNIST handwritten digits in Python:
import numpy as np
from tensorflow.keras.datasets.mnist import load_data
from tensorflow.keras import Sequential
from tensorflow.keras.layers import Dense,Conv2D,MaxPool2D,Flatten,Dropout

# load dataset
train_data, test_data = load_data()
x_train = train_data[0]
y_train = train_data[1]
x_val = test_data[0]
y_val = test_data[1]

# reshape data to have a single channel
x_train = x_train.reshape((x_train.shape[0], x_train.shape[1], x_train.shape[2], 1))
x_val = x_val.reshape((x_val.shape[0], x_val.shape[1], x_val.shape[2], 1))


INPUT_SHAPE = x_train.shape[1:]
NCLASSES = 10

# normalize values
x_train = x_train.astype('float32') / 255.0
x_val = x_val.astype('float32') / 255.0


# define model
model = Sequential()
model.add(Conv2D(32, (3,3), activation='relu', kernel_initializer='he_uniform', input_shape=INPUT_SHAPE))
model.add(MaxPool2D((2, 2)))
model.add(Flatten())
model.add(Dense(100, activation='relu', kernel_initializer='he_uniform'))
model.add(Dropout(0.5))
model.add(Dense(NCLASSES, activation='softmax'))


# define loss and optimizer
model.compile(optimizer='adam', loss='sparse_categorical_crossentropy', metrics=['accuracy'])

# fit the model
model.fit(x_train, y_train, epochs=3, batch_size=128, verbose=1)

# evaluate the model
loss, acc = model.evaluate(x_val, y_val, verbose=0)
print('Accuracy: %.3f' % acc)
print('Loss: %.3f' % loss)

# Save model
model.save("mnist-model")
Now, let’s quickly understand the code above:
- First, we import the Keras module (tf.keras) from TensorFlow, then we import the sequential module, which helps us structure and define our model layers. Next, we import some layers: Conv2D, maxpool, flatten, and dropout layers.
- Next, we load the MNIST dataset from TensorFlow. The dataset comes prepackaged in TensorFlow, and we can easily load it by first importing mnist from the datasets module and calling the load_data function. This function returns a tuple pair- (train, train target), (validation, validation target )— for train and validation datasets.
- Next, we reshape the dataset to have a single channel (batch, width, breadth, channel). The MNIST data contains black and white images, so by default has a single channel.
- Next, we normalize the images by dividing by 255. This ensures that the data has zero mean and unit variance. It helps in speeding up model training.
- Next, we define the model architecture. This is a pretty simple model, with just two conv2D layers, a maxpool2D layer before the single dense layer. Notice we also add a dropout layer to help curb overfitting.
- Next, we compile and fit the model by specifying the optimizer, training metric, epoch, and batch size.
- In the last part, we save the model. Note that since we’re using a tf.keras model, we can simply use the .save function by specifying a folder name.
Running the script above begins model training for just 3 epochs. The model is also saved to the specified folder.

If you see the information below, then you know your model has been saved successfully.
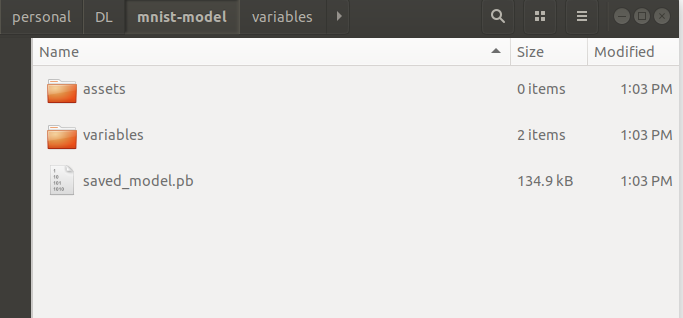
Open the folder (mnist-model) to see the saved files:

The variables folder holds all learned variables, while the saved_model.pb file defines the network graph. Note this folder, because you’ll specify it during the model conversion.
Model Conversion (TensorFlow.js-Converter)
The TensorFlow.js converter is an efficient library that can easily convert any saved TensorFlow model into a compatible format that can run in JavaScript. Not only can it convert TensorFlow SavedModel, but Keras default HDF5 models, TensorFlow Hub modules, and tf.keras SavedModel files as well.
Below, I’ll walk you through the steps to convert your model.
Step 1: Install the TensorFlow.js converter using Python pip.
- Create a new Python environment using your preferred method. I used conda, as shown below:
- Activate your environment:
- Install TensorFlow.js via pip:
There are two ways of converting your model—the first and easier method is to use the conversion wizard that comes with TensorFlow.js, and the other method is to us tensorflowjs-converter directly and specify the flags. We’ll go with the wizard 😉.
To start the wizard, open a command prompt and type the command below:
The wizard first asks for the directory where the model is saved. Here you can specify the full/relative path. Next, it asks for the model format. It has auto-detected that we used a Tensorflow Keras SavedModel. This is true because we used the TensorFlow implementation of Keras. You can click Enter to select it.

Next, you can specify if you want to compress your model or not. Since this is a small model, I’m choosing not to compress. Finally, it asks for a directory to save the converted model. Here I specified converted.

If you navigate to the folder you specified, you will find the files below:

These are the files you can copy to your JavaScript application and read with TensorFlow.js.
And that’s it! You’re done and have successfully converted your model from a Python version to JavaScript. You can use this for other TensorFlow model types as well, by following the same procedure.
Bonus! Embedding and Deploying Converted Model in a Web Application
In this extra session, I’m going to embed the converted model into an existing application I created in a previous tutorial.
You can clone the app from GitHub.
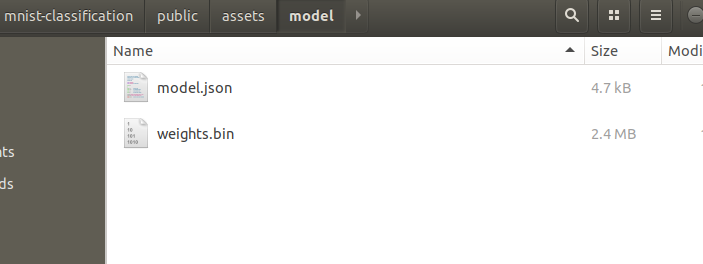
In that tutorial, we built and trained a CNN model to also classify MNIST handwritten digits—all training and saving were done in JavaScript. The model was saved in the public/assets/model directory of the application, as shown below:

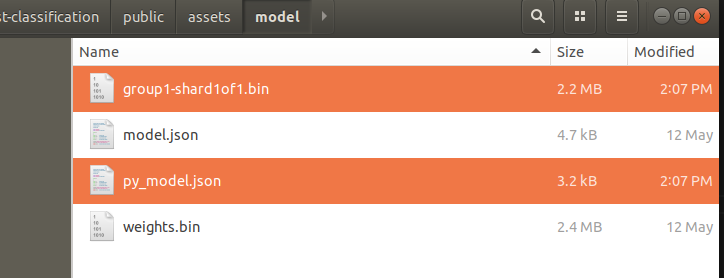
We’re going to copy our newly-converted files into this public/assets/model folder and then change the line of code that reads the model for prediction.
- First, rename the converted model to py_model.json, and then copy it to the application’s public directory.

Next, navigate to the index.js script, also in the public folder, and change the name of the model imported to py_model.json.

Next, build and start the application:
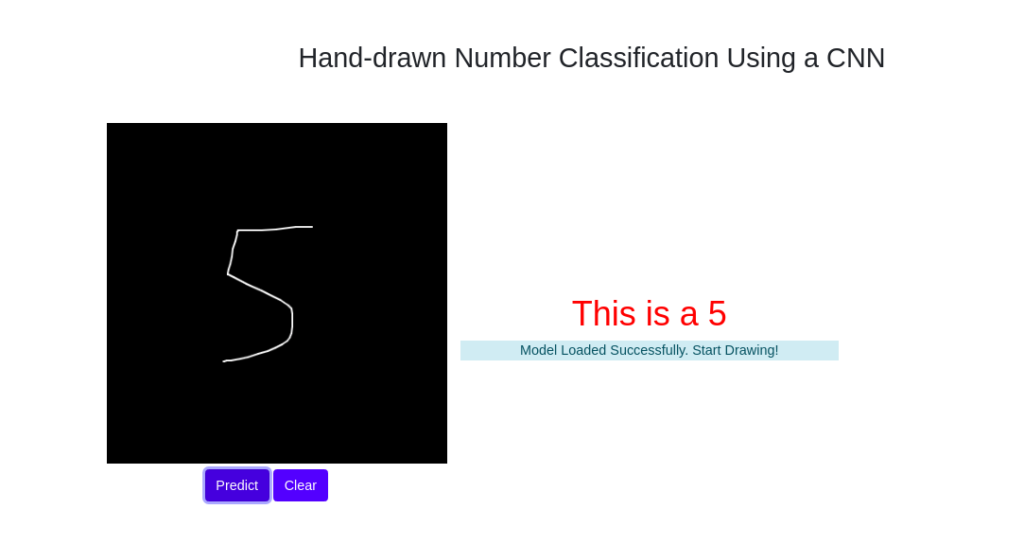
This installs all necessary packages needed to run the application in node and then starts a local server on port 3000. To see the app in action, navigate to“localhost:3000” in your preferred browser.

Congratulations! You now know how to convert your Python deep learning models in TensorFlow/Keras to a JavaScript-compatible format that can be embedded in any existing application. I’m sure you can begin to imagine the numerous use cases of the tool.
If you need to understand more about deep learning using JavaScript, check out my on-going series:

Connect with me on Twitter.
Connect with me on LinkedIn.

Comments 0 Responses