AR (augmented reality) is the next-gen thing. It provides an interactive experience of a real-world environment where the objects that reside in the real world are enhanced by computer-generated perceptual information, sometimes across multiple sensory modalities including visual, auditory, and haptic.
Facebook’s Spark AR Studio is a tool for creators to create, publish, and manage AR Apps. It is an open-source tool by Facebook and anyone with a Facebook account can easily access this studio. Nowadays, it is mostly used for creating AR filters for Facebook and Instagram.
In this blog, we will create a simple, funny clown filter using it. We will first install the studio, understand all the components, and then create a simple filter using one of the easiest methods.
1. Downloading and Installing Spark Studio
1. Visit Their Official Download Page and simply click on download. A file around 575MB will start the download.
2. Open the setup file and click next. Then choose a location for Spark AR Studio to install. By default it will install in C: drive.
3. Now open it from the desktop by double-clicking it.
4. Now it will ask for ID and password. Simply enter your Facebook email ID and password.
5. Click on login and a new window will appear.
2. Understanding the Interface
In the new window, you will see many example projects provided by Spark AR Studio. You can click on any one to see how they work.
To start a new project, simply click on New Project and then choose Blank Project.
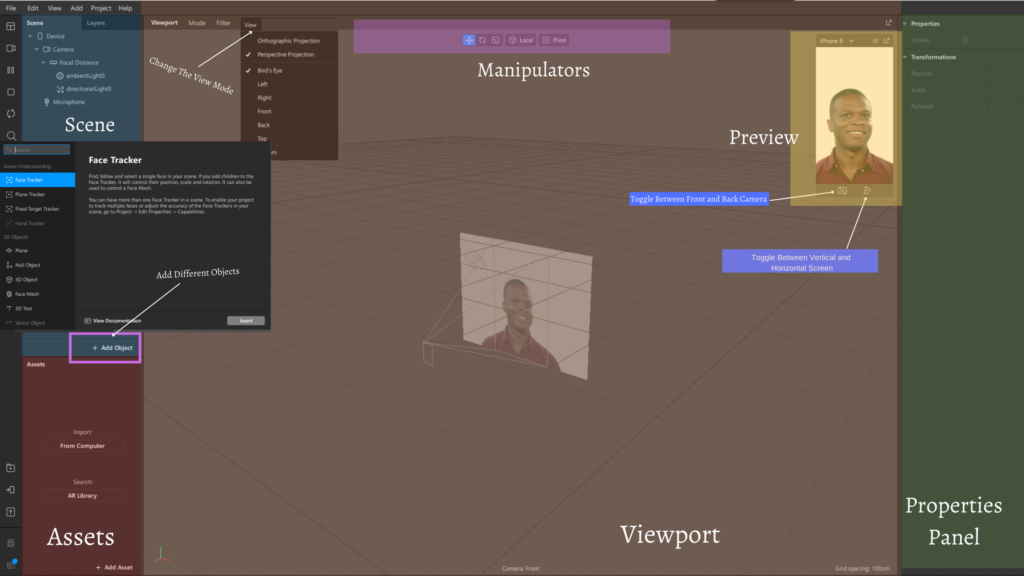
I have divided the interface into many different sections so that you can understand it better.
Viewport: This is the middle section of the studio. You can see and work with all the effects. The viewport has three main sections. At the top-left corner of the viewport, there is a navbar. Using it you can change the modes, apply different filters, and also change the view like top, right, left, or birds eye. It is better to always keep it at a bird’s eye view. In the top-middle of the viewport, there are manipulators which help to manipulate objects in the viewport. For example, scaling the objects, adjusting the position, rotating, and more. At the right side of the viewport, a preview section is used to provide a preview of the camera. It simulates a device screen. You can choose different phones based on os and size. You can even switch between cameras and orientation.
Scene: It represents the scenery that is showing in the camera. You can add different objects to the scene, like adding a face tracker. Adding objects to the scene panel will automatically add them to your effect. Click on ‘add object’ to add an object to the panel.
Assets: This is the section where you can add your own assets to the studio, like a different image or text. You can also use different AR Libraries to add more additional effects.
Properties Panel: This represents the properties of every functionality you add to your effect. After adding an effect many properties will show up in the panel.
3. Creating a Joker Filter Using the Simplest Method
Finally we are actually going to create something! To start with, you just need to have your studio setup. We will use all the online tools so that everyone is in the same position.
Download the Face Assets
Face assets are a collection of 3D objects and textures that can be used when we are creating face effects. It is beneficial to use them.
After clicking on the download button, a zip file will download. Unzip it and you will see two folders inside, Mesh and Textures.
Open the Textures folder and you will see five images — faceMesh.png, faceMeshTrackers.png, FaceMeshMask.png, faceFeminine.jpg, and faceMasculine.jpg
Creating a Joker Texture
Visit Canva.com and create an account.
- Click on Create a design (top right corner).
- Click on Edit Photo.
- Toggle to the folder where all your FaceAssetstextures are, choose faceMasculine.jpg, and open it.
- Next, click on use it in a design.
- Select Custom Size from the drop-down and create a 1024*1024 panel.
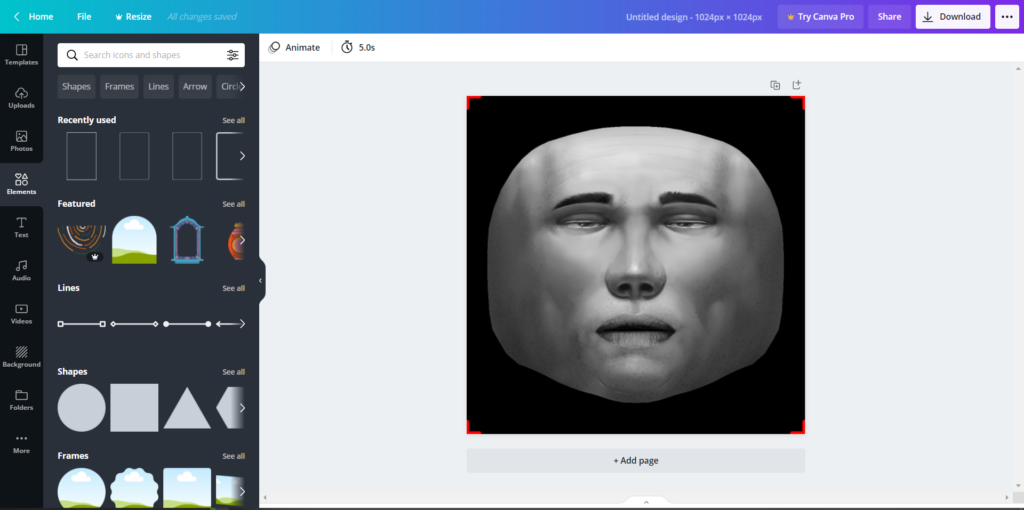
6. On the Left You will see a vertical navbar from where you can click on the elements. Search for any elements that you want to add, like a clown smile and funky googles.
7. Simply drag the elements on the top of the image and adjust according to the face.
8. When you are satisfied, click on the texture and delete it so that you only end up with the elements.
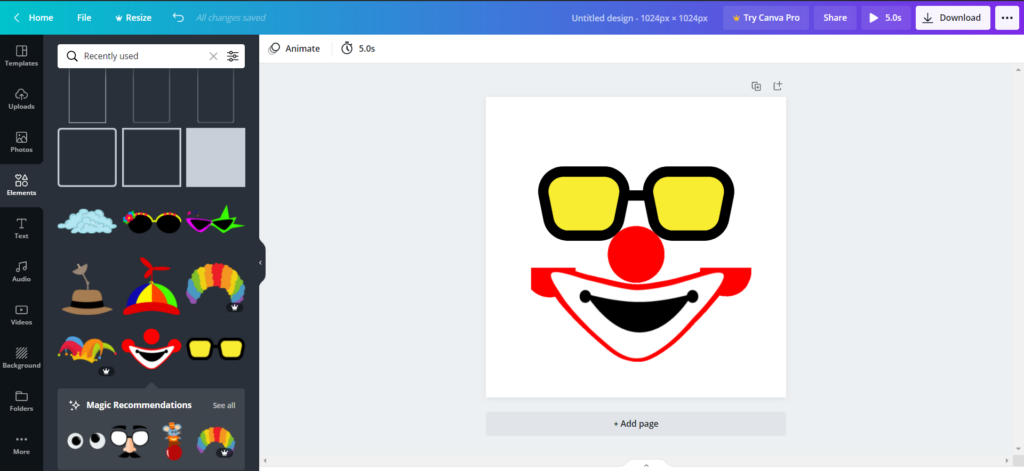
9. Now click on Download and download it as png.
10. The next step is to remove the background. You can do this in Spark AR Studio, but for this blog, we will use an external site, remove. bg. Simply drag your image to the site and then download it.
11. The downloaded image will have a transparent background. Also, you can compress it using tiny compress if the file size is big.
Applying Texture To The Face
Now open Spark AR Studio. Click on the new project and then open a blank project. Simply drag the transparent image to the assets section of the studio and let it load completely. Then, right-click on the image and click on the action and choose Use As A Face Mask.
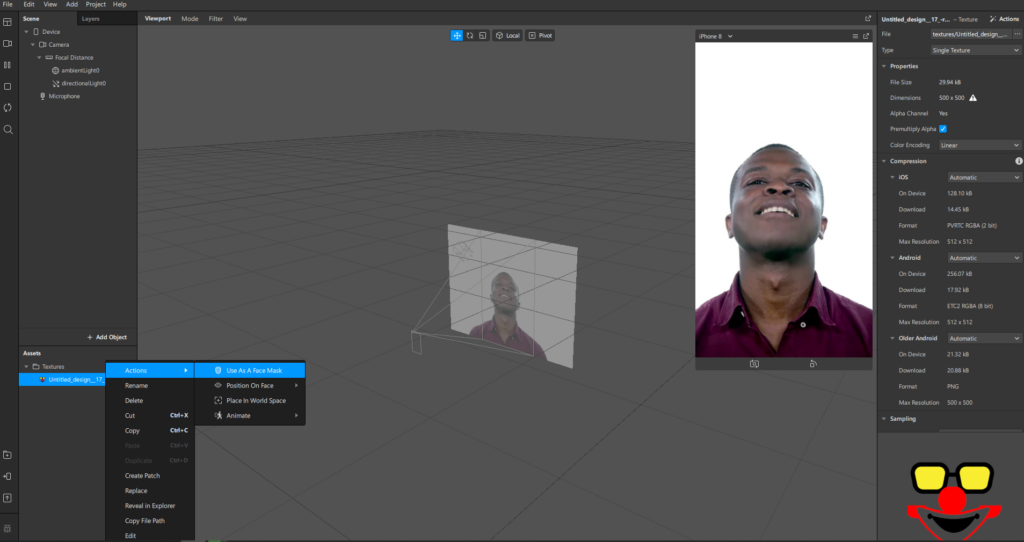
Now simply click on the video icon on the top left side and choose your webcam and you will see the clown filter applied to your face. You can even choose any demo video to test it.
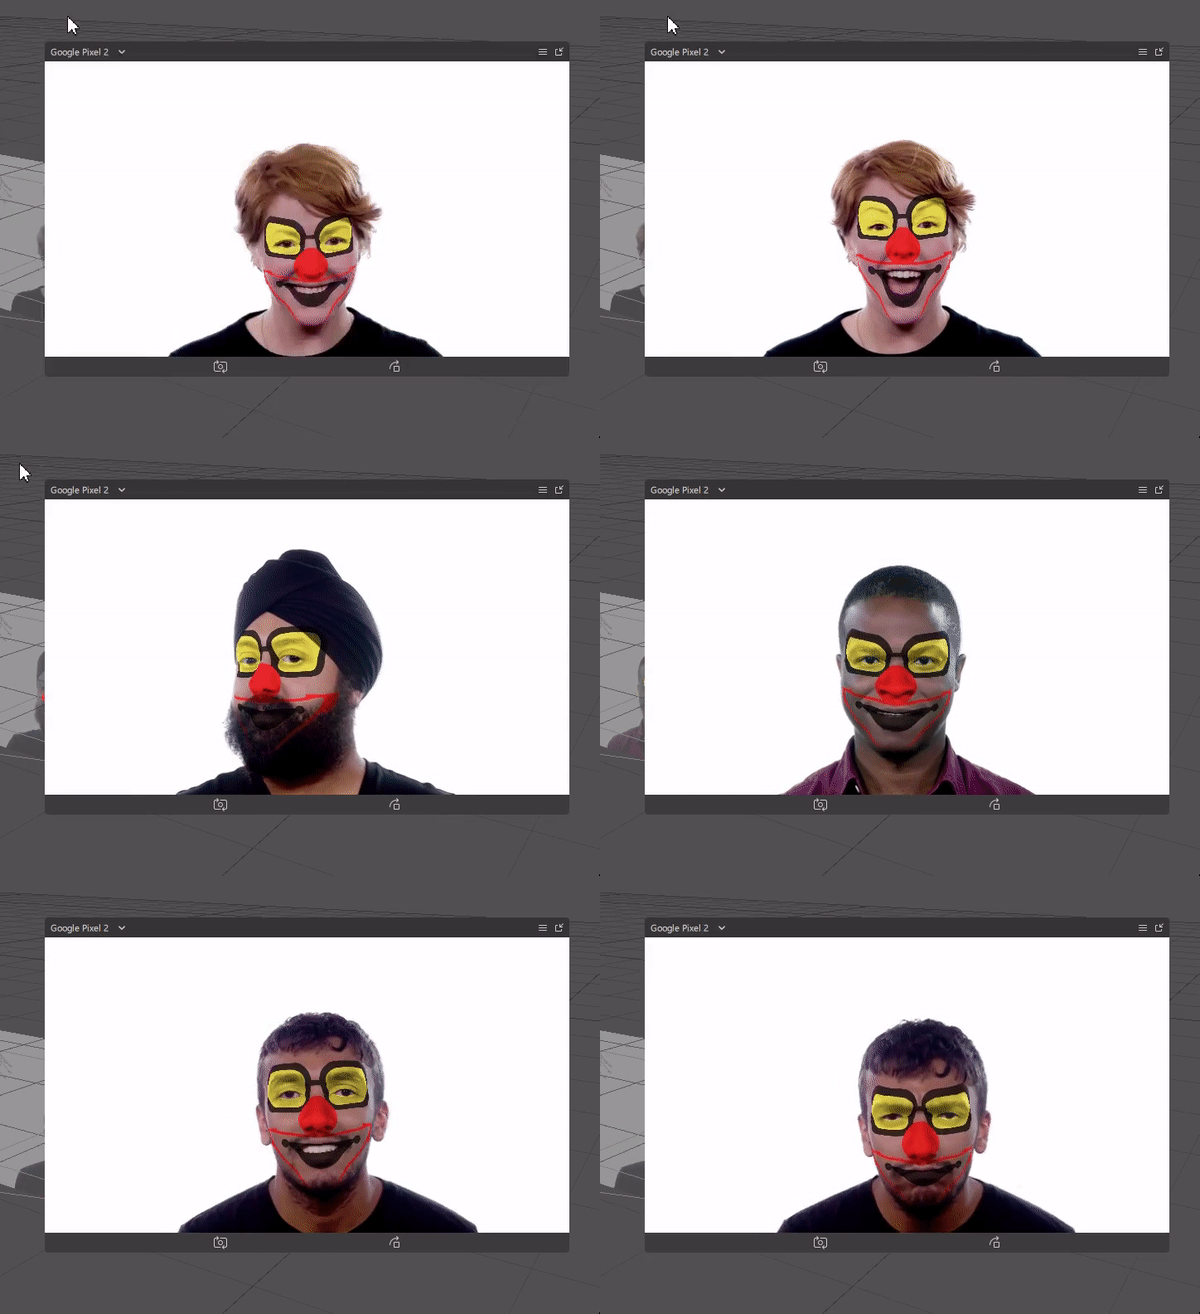
Publishing it to Instagram
The next step is to publish it on Instagram so that anyone can use it. Remember that it all depends upon the Instagram moderators whether they pass your filter or not.
- Test your filter on your device: You will see a test on the device icon on the bottom right corner, click on it and then select the platform you want to test on. Click on send a link and a notification will appear on your mobile device which will let you test your filter on your device.
- Just below the device button, there is a publish button that is used to publish the filter on Instagram. Click on it and a pop-up box will appear. If your filter meets the criteria, then you will see everything is green.
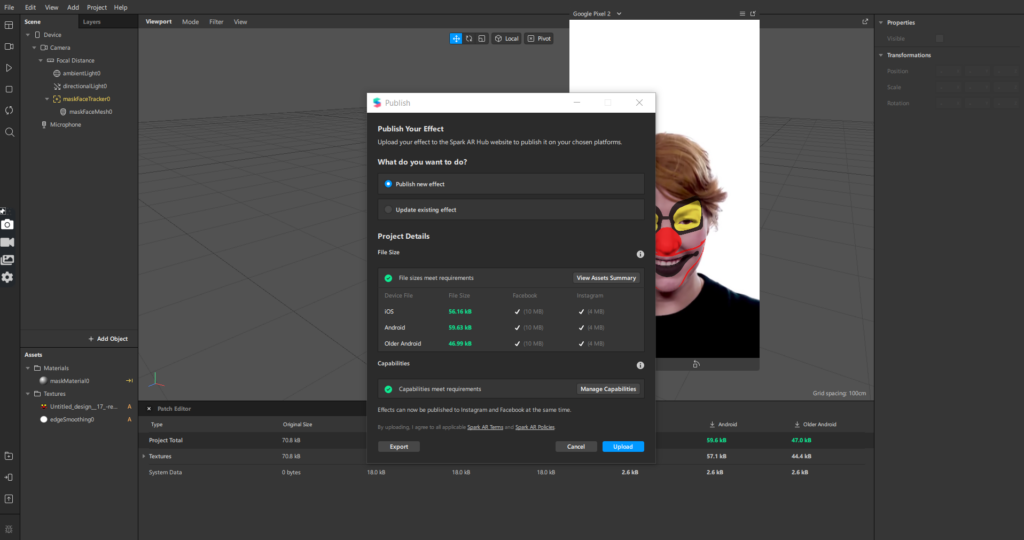
Then simply export the filter. You can also visit Spark AR Hub to publish your filter. Click on publish effect and a form will open.
Give a suitable catchy name to your filter and upload the exported filter. Choose your platform and select the categories for your filter. Make sure to also choose suitable keywords to help users search. You’ll also have to create a demo video of your filter that’s less than 15 seconds so users can get a sense of what your filter does. This video will need to be made externally to Spark AR Hub.
You’ll then need to create an icon (png. or jpg.) and, if needed, add collaborators by just mentioning their ID’s. Choose your desired publication date and submit.
Test the filter here on Instagram and Facebook.
Congrats, you have successfully created your first Instagram AR filter using Spark AR Studio!

Comments 0 Responses