
As a mobile developer looking to integrate computer vision-based machine learning in your app(s), adding camera functionality is one of the most crucial aspects of the entire process.
You not only need the library to be stable and lightweight, but that library should also support the vast array of Android devices out there, most of which have slightly different camera implementations.
For Android developers, this has always been a major pain point, as the official camera library is a bit of a mess. It includes a lot of boilerplate code just to add basic camera functionality, which is not only overwhelming but also adds a lot of code smell, making it hard to maintain. While there are tons of decent third party libraries (like CameraView) available, there’s no official package from Google.
Thankfully, the team behind Android Jetpack Components recently announced CameraX ,which while still in Alpha, is not only supposed to fix all the issues that the Camera2 API has, but it also adds features specifically aimed at developers using it with libraries like Firebase ML Kit that help developers implement machine learning features in their apps.
Table of contents:
How to Recreate Google Lens using CameraX
Let’s take a look at the inner-workings of this library and explore how we can recreate the Google Lens app using CameraX.
Step 1: Creating a new project and adding CameraX dependency
After you’ve created a new project, the next step is to add the following dependencies to your app’s build.gradle file:
def camerax_version = '1.0.0-alpha06'
implementation "androidx.camera:camera-core:${camerax_version}"
implementation "androidx.camera:camera-camera2:${camerax_version}"
Step 2: Adding Camera to the Layout xml and view previews
Add this block of code to the activity, in which you want the camera preview to be shown. CameraX uses TextureView to render the camera preview.
Step 3: Request Camera Permissions
Since using the camera is one of the dangerous permissions, we need to request and handle it accordingly. You can read how to do it in detail here :
For our use case, we need to request the following permissions from the user:
Step 4: Write code to display the preview
Next, we need to write the logic in our activity file that actually populates the preview in the TextureView that we added earlier:
class MainActivity : AppCompatActivity() {

    override fun onCreate(savedInstanceState: Bundle?) {
        super.onCreate(savedInstanceState)
        setContentView(R.layout.activity_main)
        startCamera()
    }


    //Function that creates and displays the camera preview
    private fun startCamera() {
        //Specify the configuration for the preview
        val previewConfig = PreviewConfig.Builder()
            .apply {
                //Set the resolution of the captured image
                setTargetResolution(Size(1920, 1080))
            }
            .build()

        //Generate a preview
        val preview = Preview(previewConfig)

        //Add a listener to update preview automatically
        preview.setOnPreviewOutputUpdateListener {

            val parent = cameraView.parent as ViewGroup

            //Remove thr old preview
            parent.removeView(cameraView)

            //Add the new preview
            parent.addView(cameraView, 0)
            cameraView.surfaceTexture = it.surfaceTexture
        }
        CameraX.bindToLifecycle(this, preview)
    }

}
The code above isolates all the camera logic into a startCamera() method that essentially adds a listener to the TextureView, and every time the listener is called, it does the following :
- Removes the existing Preview attached to the TextureView
- Captures a new Preview
- Adds the new Preview to the TextureView
This ensures that we always see a live preview instead of a static image containing the first preview that was captured by the camera.
Step 5: Add the image processing logic in your app
CameraX contains an interface called ImageAnalysis.Analyzer that we can implement to create a new class of our own that handles all the logic which you need to perform on the captured image.
In this article, we are using Firebase MLKit to extract labels from the captured image.
One benefit that this method has over other camera library is that this ensures that our image processing logic is separated from the app’s views which makes it easier to debug and maintain the app for adding/removing new features.
Assuming that we’re trying to recreate the Google Lens app, we’ll create a class of our own called GoogleLensAlayzer that will implement the ImageAnalysis.Analyzer interface.
class GoogleLensAnalyzer : ImageAnalysis.Analyzer {

    override fun analyze(image: ImageProxy?, rotationDegrees: Int) {

        //Handle all the ML logic here
        val mediaImage = image?.getImage()
        val image = FirebaseVisionImage.fromMediaImage(mediaImage)

        val labeler = FirebaseVision.getInstance()
            .getOnDeviceImageLabeler()

        labeler.processImage(image)
            .addOnSuccessListener {
                for (label in it) {
                    val text = label.text
                    val entityId = label.entityId
                    val confidence = label.confidence
                }
            }
            .addOnFailureListener {
               Log.e(TAG,"Failed to fetch labels")
            }
    }
}
Over here, we are getting access to the cloud labeler and detecting the labels in the provided image.
Step 6: Tying it all together
Finally, we need to let our TextureView know that we intend to use the GoogleLensAnalyzer class for processing the image.
To do that, we’ll modify our startCamera() function as follows :
  private fun startCamera() {

        val analyzerConfig = ImageAnalysisConfig.Builder().apply {
            // In our analysis, we care more about the latest image than
            // analyzing *every* image
            setImageReaderMode(
                ImageAnalysis.ImageReaderMode.ACQUIRE_LATEST_IMAGE)
        }.build()

        val googleLensAnalyzer = ImageAnalysis(analyzerConfig).apply {
            analyzer = GoogleLensAnalyzer()
        }

        ...

    }
The code above creates a new configuration that creates a new object containing our image processing logic.
To finish things up, we need to update the CameraX.bindToLifecycle() method as follows:
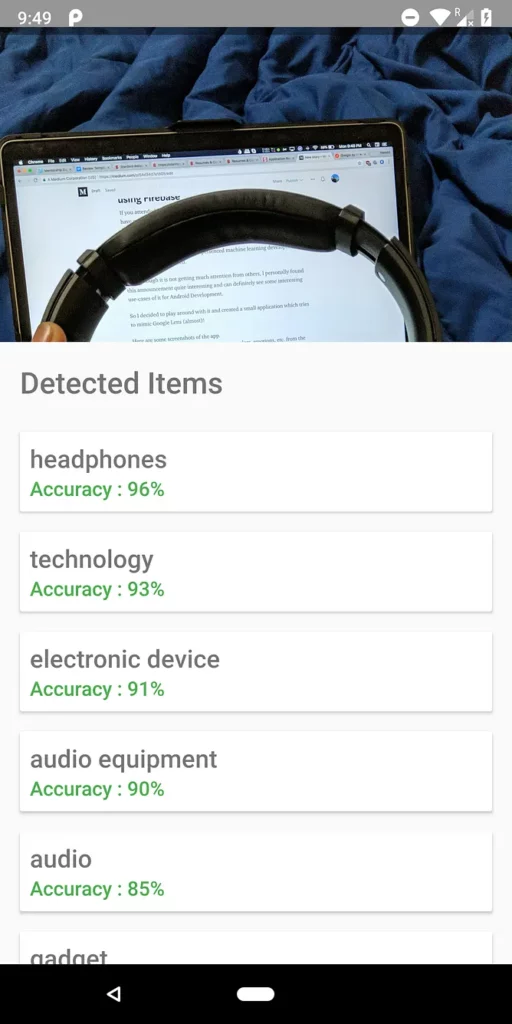
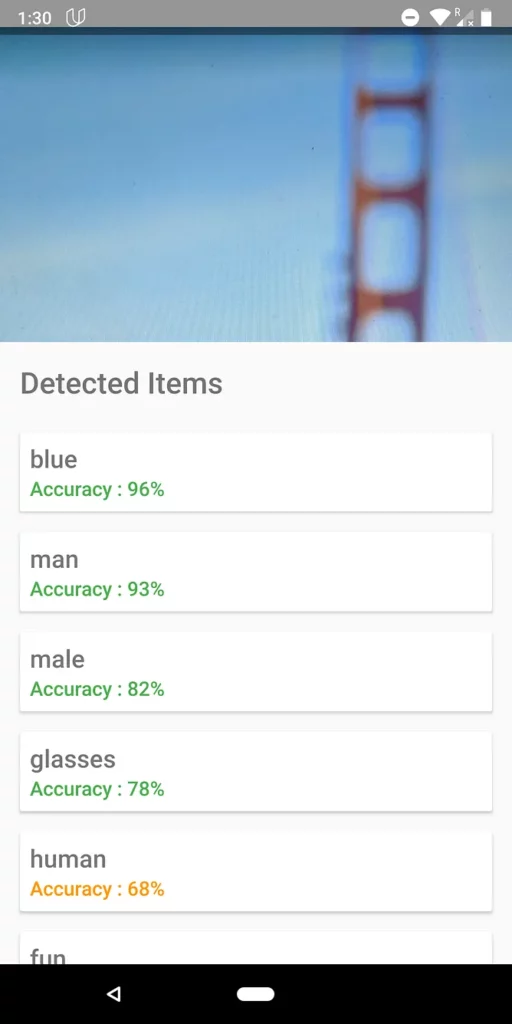
Once done, CameraX should start running the image analysis as you point it to various objects.
This is what the app should look like once you’re done with all the steps above :
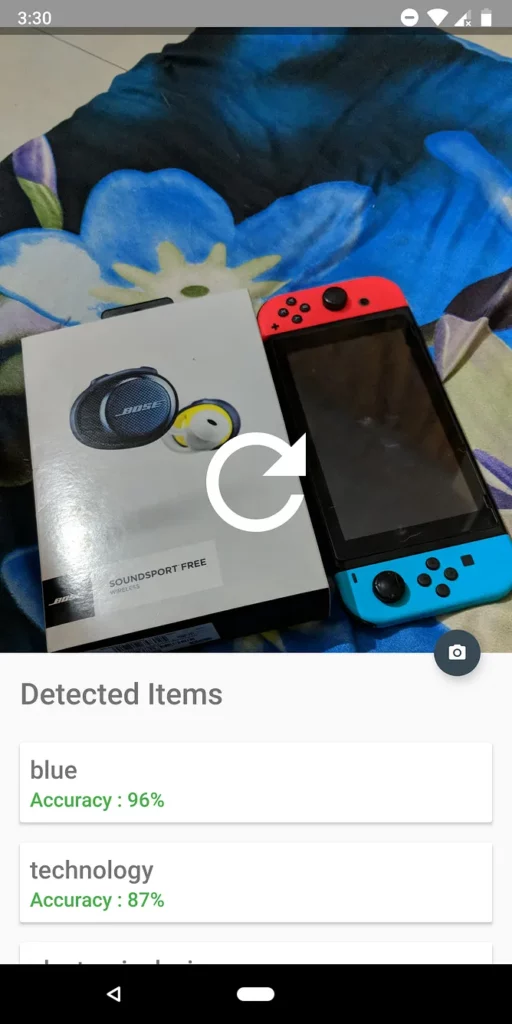
Currently it does so for every frame that’s detected, which might a bit overkill, so you can also configure it to do this only once a second or so. We’ll cover this in the next step.
Reducing the frequency at which the image analysis occurs (Optional)
Currently, image analysis happens for every frame of the preview (which might be a bit too much for a general use case).
To remedy this and to increase this time to once per second, we’ll update the analyze() method in the GoogleLensAnalyzer class as follows :
class GoogleLensAnalyzer : ImageAnalysis.Analyzer {

    private var lastAnalyzedTimestamp = 0L

    override fun analyze(image: ImageProxy?, rotationDegrees: Int) {

        //Only run the inference if 1 second has passed
        val currentTimestamp = System.currentTimeMillis()
        if (currentTimestamp - lastAnalyzedTimestamp >=
            TimeUnit.SECONDS.toMillis(1)) {
            lastAnalyzedTimestamp = currentTimestamp

            ...
        }

    }
}
As you can see, here we keep a track of the time at which the inference last happened, and the next inference happens only if the difference between that time and the current timestamp is greater than 1 second.
And that’s it!
Do note that this library is still in alpha as of now, and more features will be added as the library transitions into its stable release.
You can also refer to this codelab to get a quick starter on using CameraX for more use cases like saving a captured image into a file and only capturing an image when a button is pressed instead of doing it continuously.
Closing Notes
Despite the library not being as convenient or easy to implement as some third party alternatives CameraView, it’s a welcomed addition, especially when compared to the older Camera2 API.
The team behind CameraX is welcoming suggestions from the developers on the AOSP issue tracker to help them make the library better.
Thanks for reading! If you enjoyed this story, please click the 👏 button and share to help others find it! Feel free to leave a comment 💬 below.
Have feedback? Let’s connect on Twitter.
Comments 0 Responses