Using Google’s ML Kit one can build an application that can be consumed in more than 50 languages. For example, you can have users select the language they prefer and translate the app’s content into that language.
The translation is quite fast because it happens on the user’s device. The ML Kit translation models are built to translate to and from English.
When making translations from another language, English will be used as the intermediate language during the translation process.
This can definitely affect the quality of the translation. Let’s now look at how the ML Kit can be used for translation.
Getting Started
Start by adding the ML Kit Android dependencies to the module’s app-level build.gradle i.e app/build.gradle.
dependencies {

  implementation 'com.google.mlkit:translate:16.1.1'
}
Next, ensure that the models that will be downloaded won’t be compressed. Add the following to the same file.
 android {
 ../

 aaptOptions {
        noCompress "tflite", "lite"
    }

    }
The App Elements
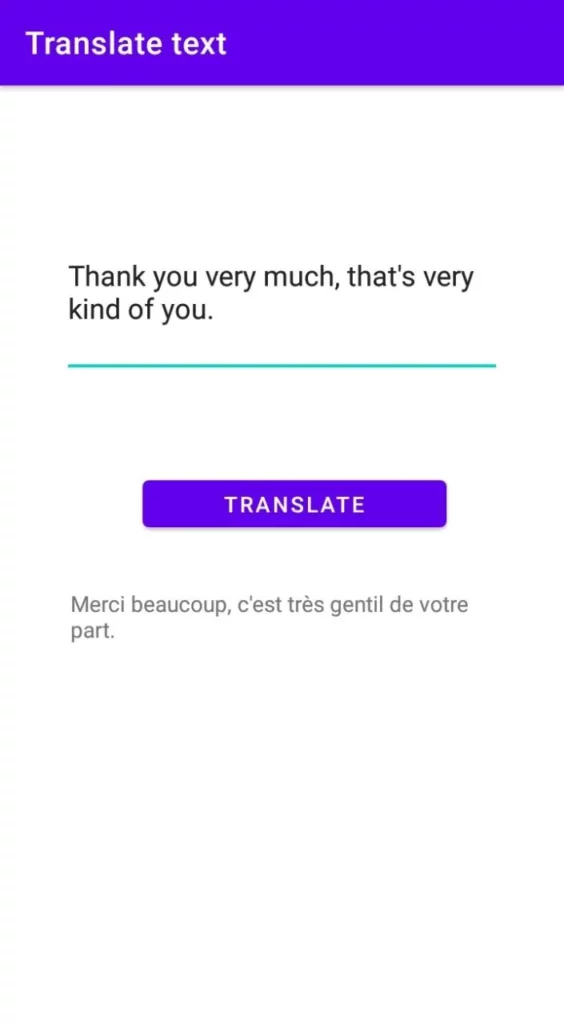
In order to illustrate the translation, the app will have three elements; a text area, a button, and a text view. The button will invoke the function that will download the models and run the translation. Thereafter, the result will be displayed in the text view.

<?xml version="1.0" encoding="utf-8"?>
<androidx.constraintlayout.widget.ConstraintLayout xmlns:android="http://schemas.android.com/apk/res/android"
    xmlns:app="http://schemas.android.com/apk/res-auto"
    xmlns:tools="http://schemas.android.com/tools"
    android:layout_width="match_parent"
    android:layout_height="match_parent"
    tools:context=".MainActivity">

    <EditText
        android:id="@+id/editText"
        android:layout_width="281dp"
        android:layout_height="110dp"
        android:layout_marginStart="100dp"
        android:layout_marginTop="149dp"
        android:layout_marginEnd="101dp"
        android:layout_marginBottom="59dp"
        android:ems="10"
        android:inputType="text|textMultiLine"
        app:layout_constraintBottom_toTopOf="@+id/button"
        app:layout_constraintEnd_toEndOf="parent"
        app:layout_constraintStart_toStartOf="parent"
        app:layout_constraintTop_toTopOf="parent" />

    <Button
        android:id="@+id/button"
        android:layout_width="194dp"
        android:layout_height="42dp"
        android:layout_marginStart="80dp"
        android:layout_marginEnd="64dp"
        android:layout_marginBottom="384dp"
        android:onClick="translateText"
        android:text="Translate"
        app:layout_constraintBottom_toBottomOf="parent"
        app:layout_constraintEnd_toEndOf="parent"
        app:layout_constraintStart_toStartOf="parent"
        app:layout_constraintTop_toBottomOf="@+id/editText" />

    <TextView
        android:id="@+id/textView"
        android:layout_width="271dp"
        android:layout_height="90dp"
        android:layout_marginStart="70dp"
        android:layout_marginTop="69dp"
        android:layout_marginEnd="70dp"
        android:layout_marginBottom="225dp"
        android:onClick="translateText"
        app:layout_constraintBottom_toBottomOf="parent"
        app:layout_constraintEnd_toEndOf="parent"
        app:layout_constraintStart_toStartOf="parent"
        app:layout_constraintTop_toBottomOf="@+id/button" />

</androidx.constraintlayout.widget.ConstraintLayout>
Create a Translator
Let’s now create an English to French translator with the default options. If you are not aware of the language of the original text, you can use ML Kit’s language identification API to determine the language.
TranslatorOptions options = new TranslatorOptions.Builder()
                        .setSourceLanguage(TranslateLanguage.ENGLISH)
                        .setTargetLanguage(TranslateLanguage.FRENCH)
                        .build();
final Translator englishFrenchTranslator = Translation.getClient(options);
Download the Model
Next, we need to ensure that the model has been downloaded before running the translate method. Obtain the text written by the user and set the model’s download conditions.
 String text = String.valueOf(editText.getText());
 DownloadConditions conditions = new DownloadConditions.Builder()
                .requireWifi()
                .build();
With that in place, the model can be downloaded using those conditions. Once the model has downloaded successfully, we use it to make the translation. We then append the translation to the text view. We also clear the previous translation once a new translation is available.
englishFrenchTranslator.downloadModelIfNeeded(conditions)
                .addOnSuccessListener(
                        (OnSuccessListener) v -> {
                            englishFrenchTranslator.translate(text)
                                    .addOnSuccessListener(
                                            (OnSuccessListener) translatedText -> {
                                                textView.setText("");
                                                textView.append((String) translatedText);

                                                Log.i("TAG", "Translation is "+(String) translatedText);
                                            })
                                    .addOnFailureListener(
                                            new OnFailureListener() {
                                                @Override
                                                public void onFailure(@NonNull Exception e) {
                                                    // Error.
                                                    Log.e("Error","Translation faliled "+e);
                                                }
                                            });
                        })
                .addOnFailureListener(
                        new OnFailureListener() {
                            @Override
                            public void onFailure(@NonNull Exception e) {
                                // Model couldn’t be downloaded or other internal error.
                                Log.e("Error","Model could n’t be downloaded "+e);

                            }
                        });
Since the language models are large, it is advised that you only download them over WIFI. The models are bundled with the application and it’s recommended that you delete any unneeded models.
Conclusion
Hopefully, this shows you how easily and quickly you can add language translation capabilities to your application.
If you know the language models you need for your app, you can also use the API to download them ahead of time. You can also use the API to manage the models that are available on the user’s device.

Comments 0 Responses