Introduction
Android’s Jetpack Compose is a modern toolkit for building native UIs. It’s simplified and is designed to accelerate UI development on Android while requiring less code
With Jetpack compose you don’t need to write an XML —calling a Jetpack Compose function will do the magic and create the element that you want.
At Google IO 2019, Google added Jetpack Compose as a part of Jetpack. If you’re completely unfamiliar and would like a primer, here’s a good presentation from I/O 2019 that covers declarative patterns in Compose:
Here’s what we’ll cover in this article:
- How to add text
- How to define composable functions.
- How to preview your composable functions.
- How to add a button
- How to add a style to text
Requirements
To use Jetpack Compose, you’ll need to download Android Studio 4.0 Canary from this link.
Step 1:
The first step is to create a new project with AppCompatActivity.
To do that, follow File -> New -> New Project
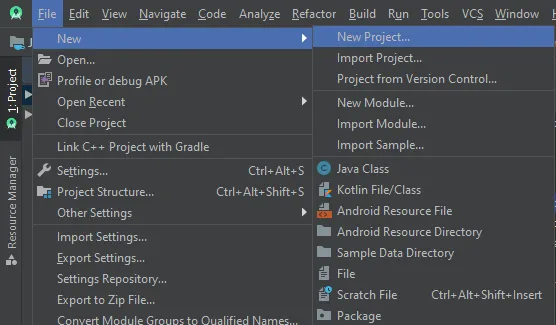
After selecting the New Project, you next need to select the Empty Compose Activity project template, as shown below:
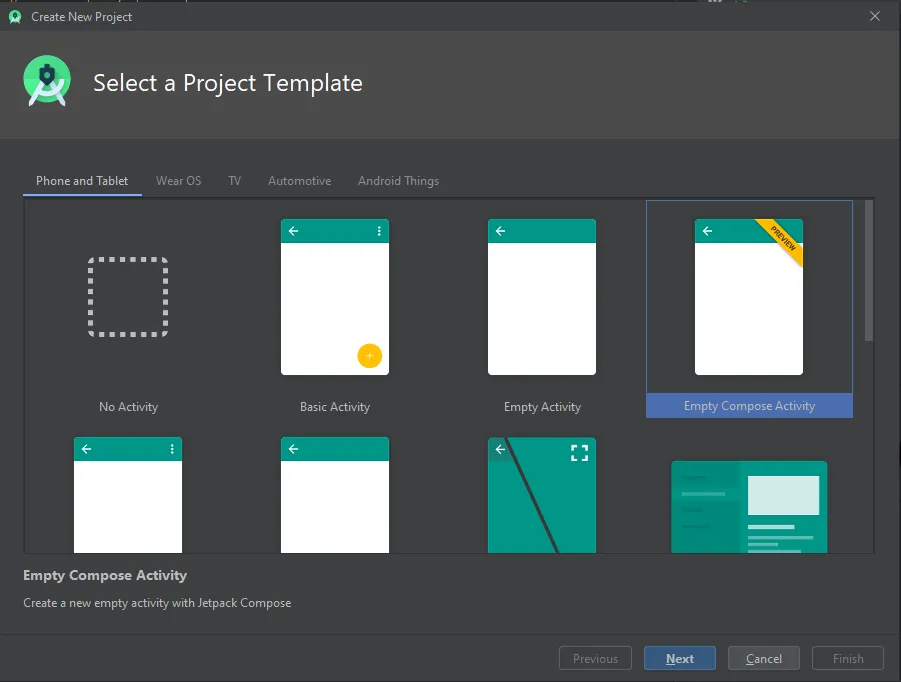
Step 2:
Add the following dependencies in your build.gralde file:
Step 3:
Then, set the compose value to true in your build.gradle file:
That’s it for project setup. You should see activity code that looks like this:
class MainActivity : AppCompatActivity() {
    override fun onCreate(savedInstanceState: Bundle?) {
        super.onCreate(savedInstanceState)
        setContent {
            Text("Hello Text")
        }
    }
}
How to define a text element in your layout file
To define a text element in your layout, you just need to call a Text() function in your setContent method and write the text within that function, as shown below:
Here, the setContent block defines the activity layout, instead of defining the layout content with an XML file.
Then just run the code, and you’ll see the result, which should look like the screenshot below:
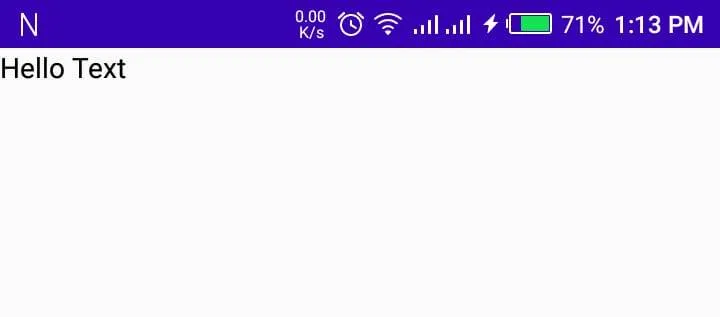
Also, you can customize your text by using a TextStyle in which you can set the color. Try it out with the below code snippet:
Result
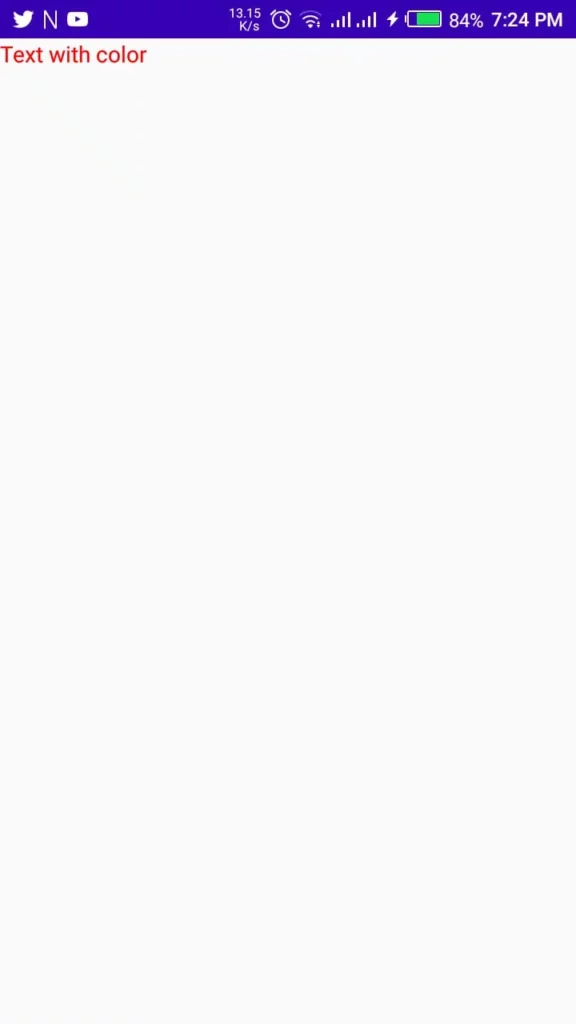
A bit later, you’ll see what else can be done to style text using Compose.
Composable Functions
A composable function will let you define your UI programmatically. Specifically, it will let you define shapes and styles. To use composable functions, we just need to add the @Composable annotation to the function name. Let’s start with a practical example.
How to Add a Composable Function
To make a composable function, you’ll need to add an @composable annotation.
Essentially, this means composable functions can call other @Composable functions within them. You can see how the ComposableFunction is marked as @Composable. This function will produce a piece of UI hierarchy displaying the given input String; Text is a composable function provided by the library.
Let’s try this out with an example:
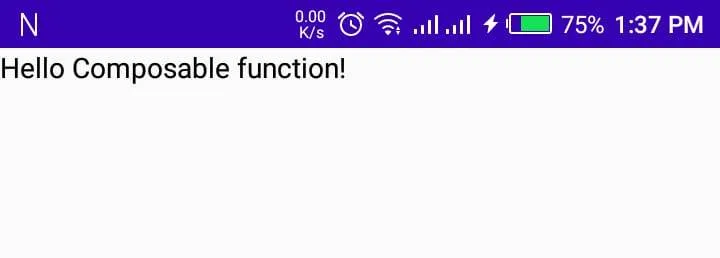
Here, I’ve created a function with the name ComposableFunction, which includes one String param called name. In that composable function, I called the function Text and set the name value inside the function. Don’t forget to add a composable annotation to that function (@composable).
Then, just call this function with the setContent method and check out the results, as shown below:
How to Preview your Composable Functions
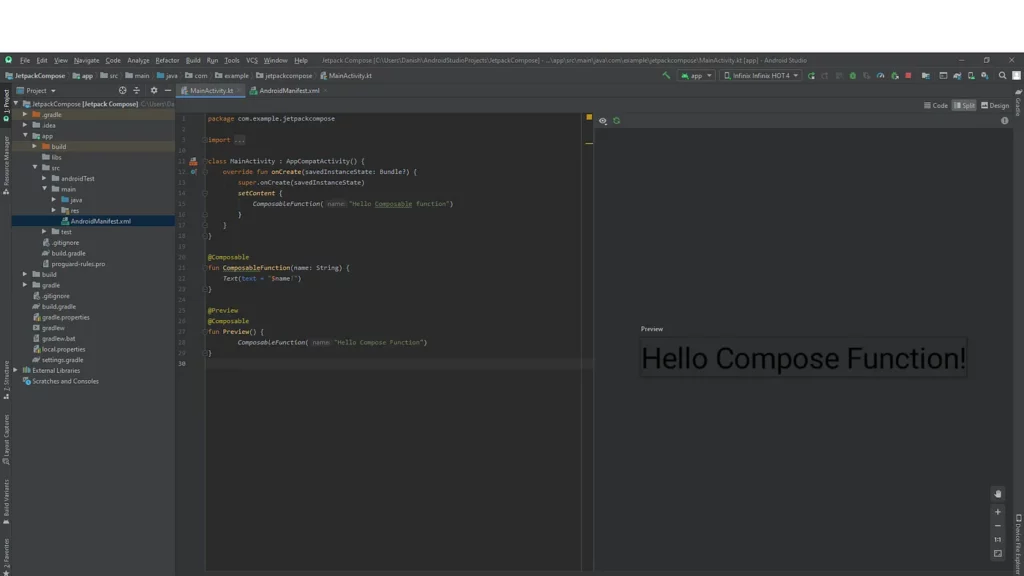
Like in Android XML layout files, when we create any layout, we can also see a preview of said layout. Previewing composable functions in Jetpack Compose is pretty easy, so let’s jump right into it—I’ll explain the steps taken shortly.
First, code snippet:
Here, I just created another function with the name Preview because I need to preview my composable function (again, this is why I used the annotation @Composable)
Also, we want to preview that function. To do this, we add another annotation (@Preview), and in that function, simply call the composable function. You’ll see the preview in the right corner of Android Studio, as shown in the below screenshot:
How to Add a Button
In Android layouts we often use buttons for any number of reasons. With Jetpack Compose we of course can also add buttons—let’s see how this works with the below code snippet:
Here, I created a composable function with the name addButton() and called the Button() function, setting the text with the property text in that Button block. Don’t forget to call this function in the setContent block, as we did previously.
Now let’s run and see the result:
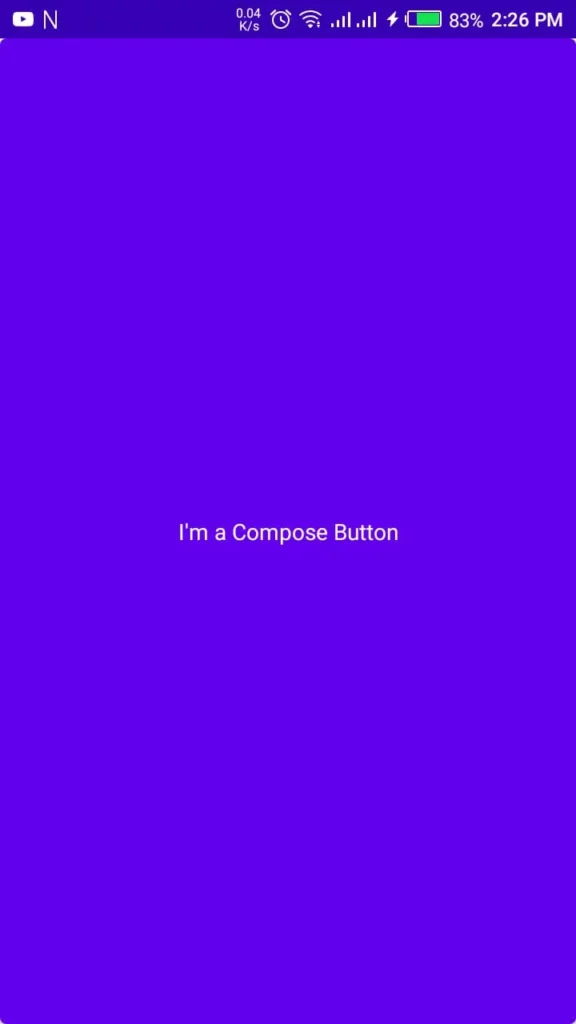
As you can see, the button currently takes up the whole screen because we haven’t yet defined its width and height. To define the width and height we need to put the Button function in the Container block. And within that container, we need to define the width and height, as shown in the code snippet below:
Result

Adding Style to Text
To add style to text, Compose makes it easy to take advantage of material design principles. To do this, we’ll apply a MaterialTheme to the components we’ve already created. Check out the snippet below:
Here, I created a function with the name styleOnText(), and in that function, I used and used MaterialTheme typography. And called in the style function.
Result:

What’s Next
You’ve learned the basics of Jetpack’s Compose for UI development in Android.
That said, there are plenty of other things you can play with in Compose, including:
- Using a Column (The Column function lets you stack elements vertically.)
- Applying shapes
- Adding images
For more on all of these additional capabilities, check out the official docs:
If you want to explore this project’s code, follow this GitHub link:
Conclusion
In this article, you’ve learned some of the basic elements of Jetpack Compose, Specifically, we explored how to add a composable function, how to play with composable functions, and how to add styled text and buttons—and also how to see previews of these UI elements.
I hope this article is helpful. If you think something is missing, have questions, or would like to give feedback, go ahead and leave a comment below. I’d appreciate the feedback.
I’ve written some other Android-related content, and if you liked what you read here, you’ll probably also enjoy this:
Sharing (knowledge) is caring 😊 Thanks for reading this article. Be sure to clap or recommend this article if you found it helpful. It means a lot to me.
If you need any help, join me on Twitter, LinkedIn, GitHub, and Subscribe to my Youtube Channel.

Comments 0 Responses