Lens Studio’s functionalities can be extended by writing your own custom code in JavaScript. For instance, you can write your own code to target various events in your Lens and trigger specific actions.
Lens Studio is already powerful without custom code, but the ability to bring your own code to the platform is just amazing. Without further ado, let’s jump straight in and see how this can be done.
Table of contents
Mouth open and mouth closed events
You can write JavaScript code to trigger the appearance of an emoji, as shown below. The emoji appears when one opens their mouth and disappears when one closes their mouth. Let’s look at how to do that.

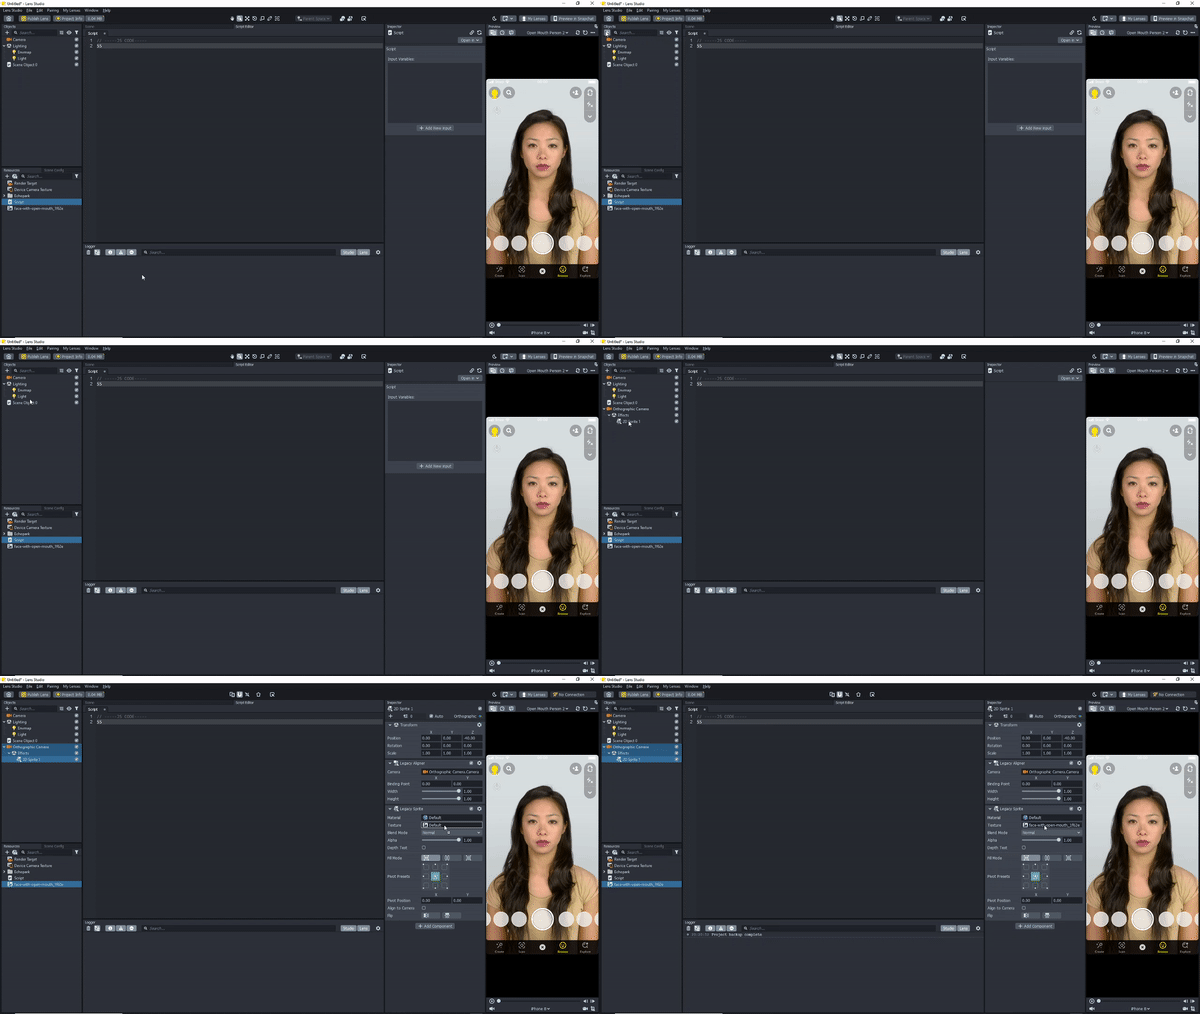
Start by creating a new project without a template. After that, create an empty object that will host the script you’ll write shortly.
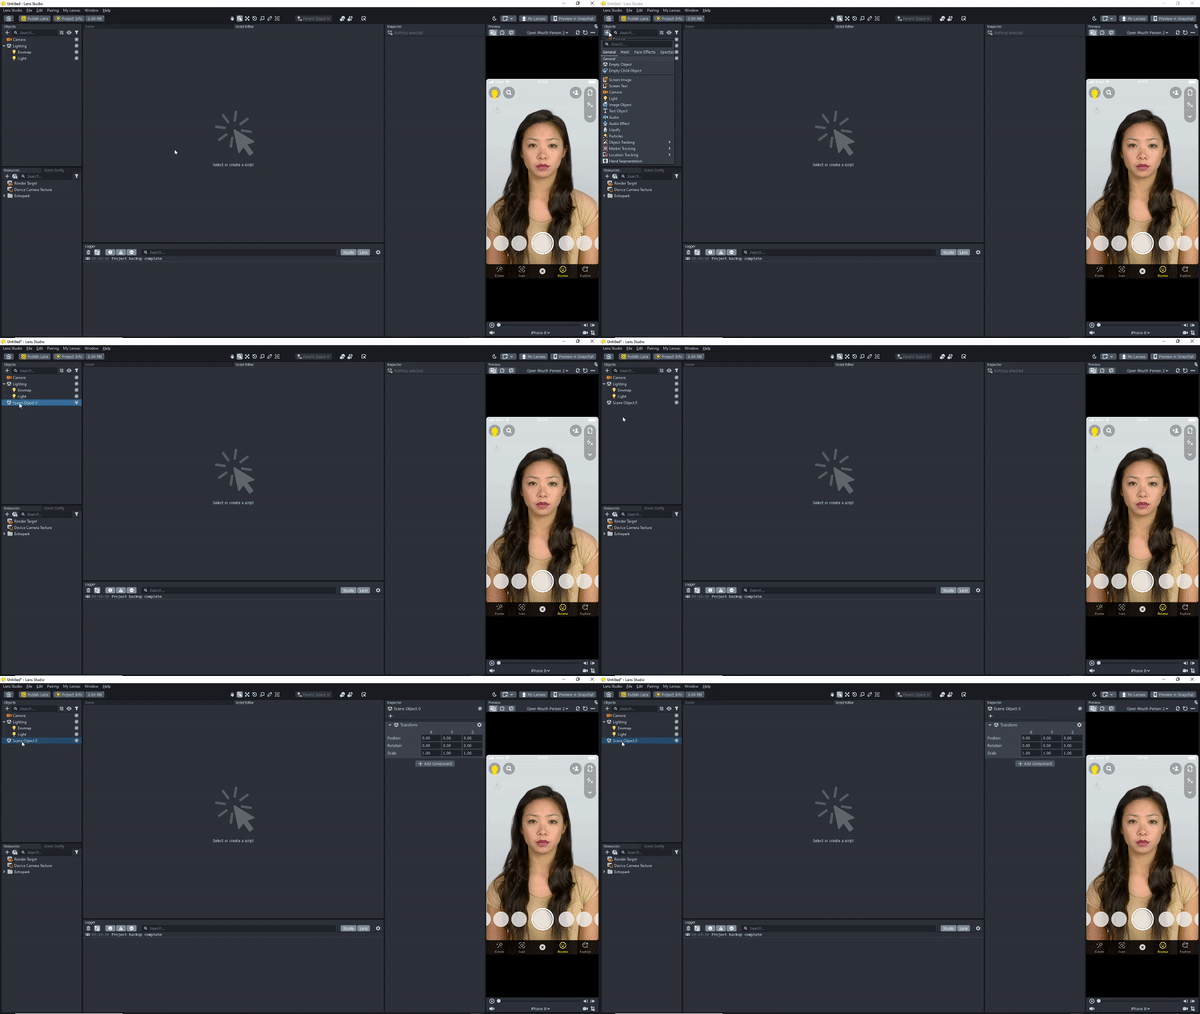
Next, create a Script from the Resources panel, as shown below.
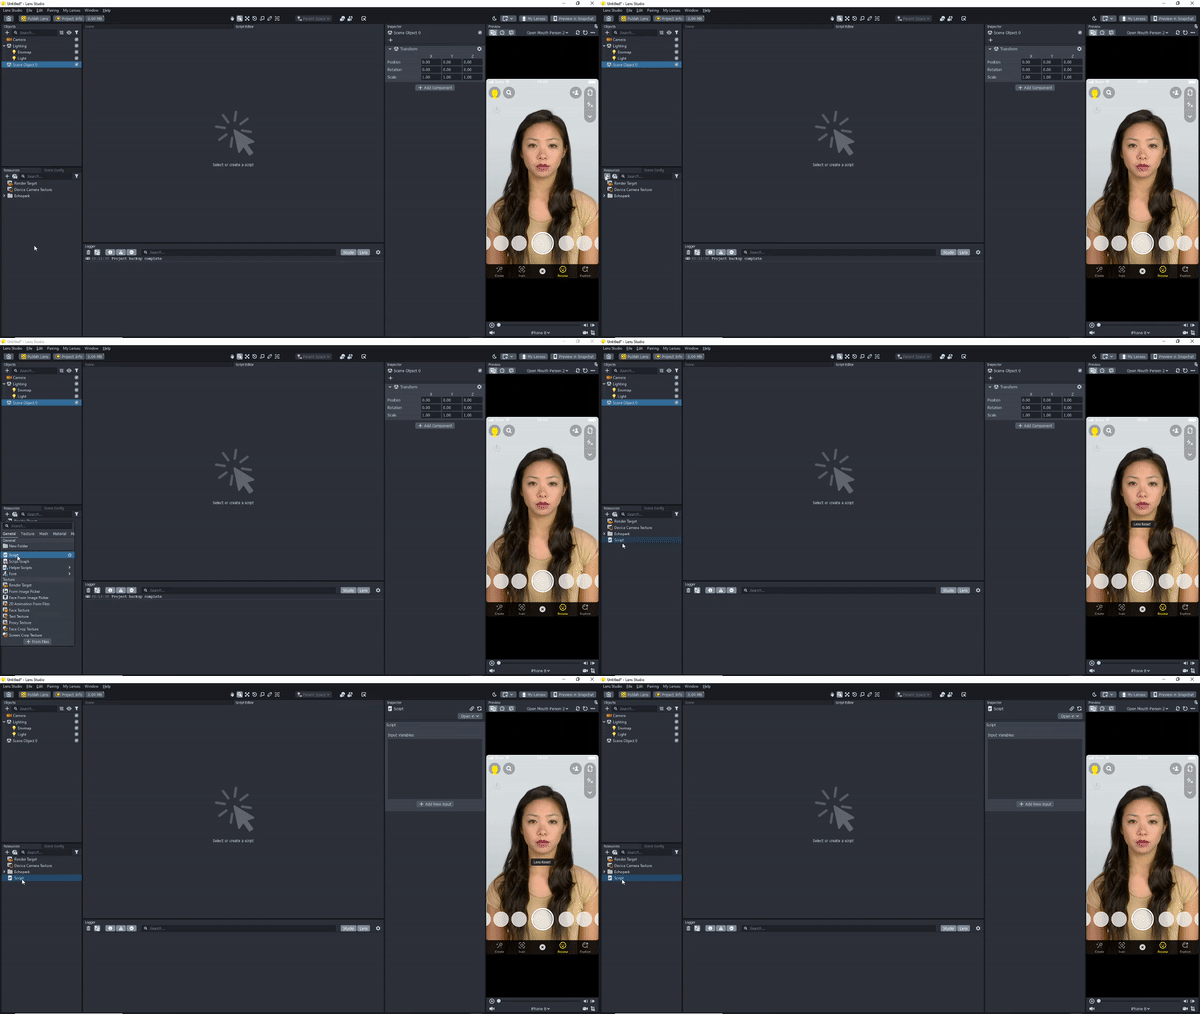
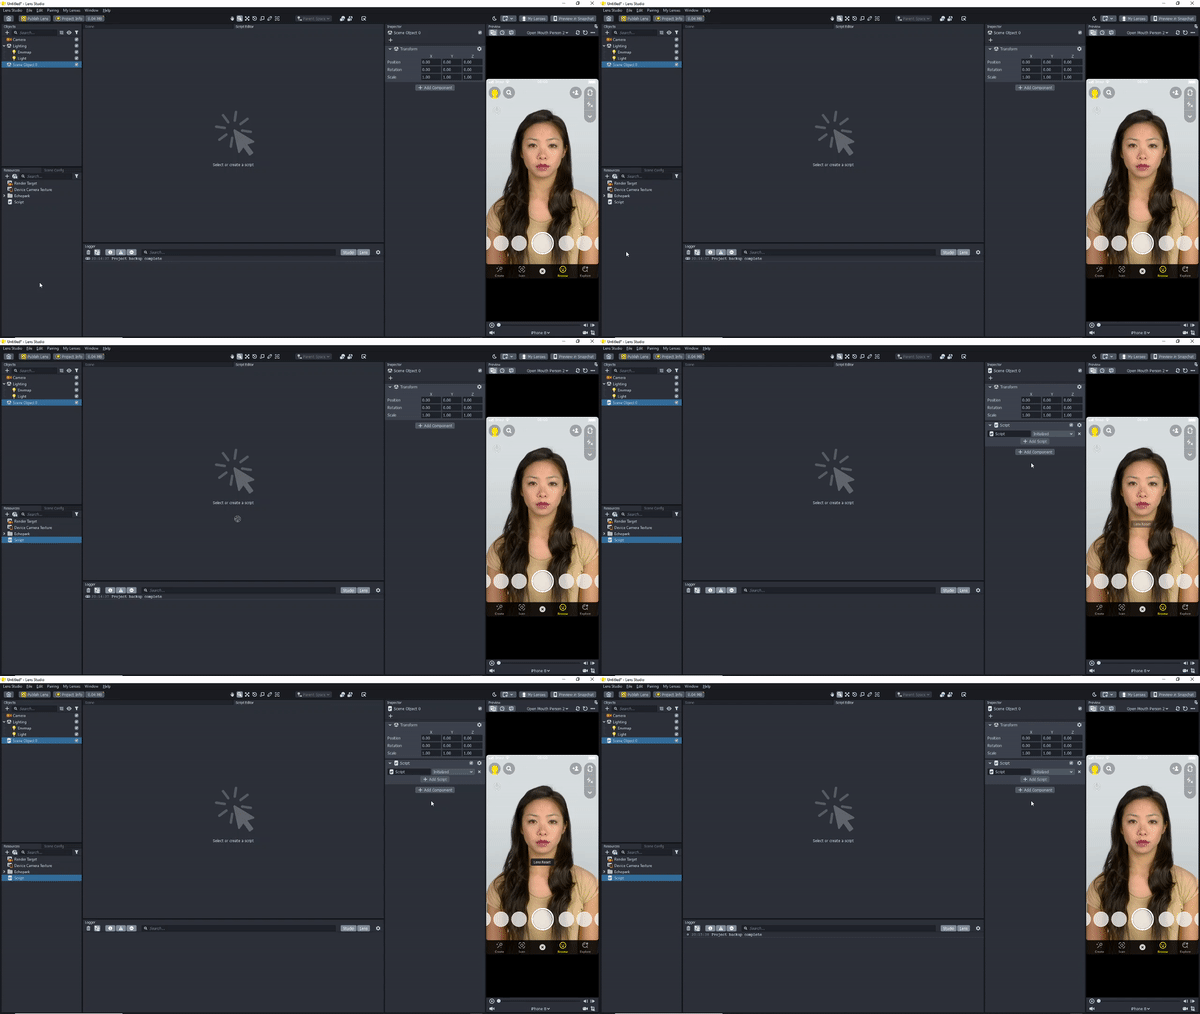
Now drag that script to the Scene Object you created. Ensure that the object has been clicked. Once you do that, it will appear in the Inspector panel on the right — you can drag the script there.
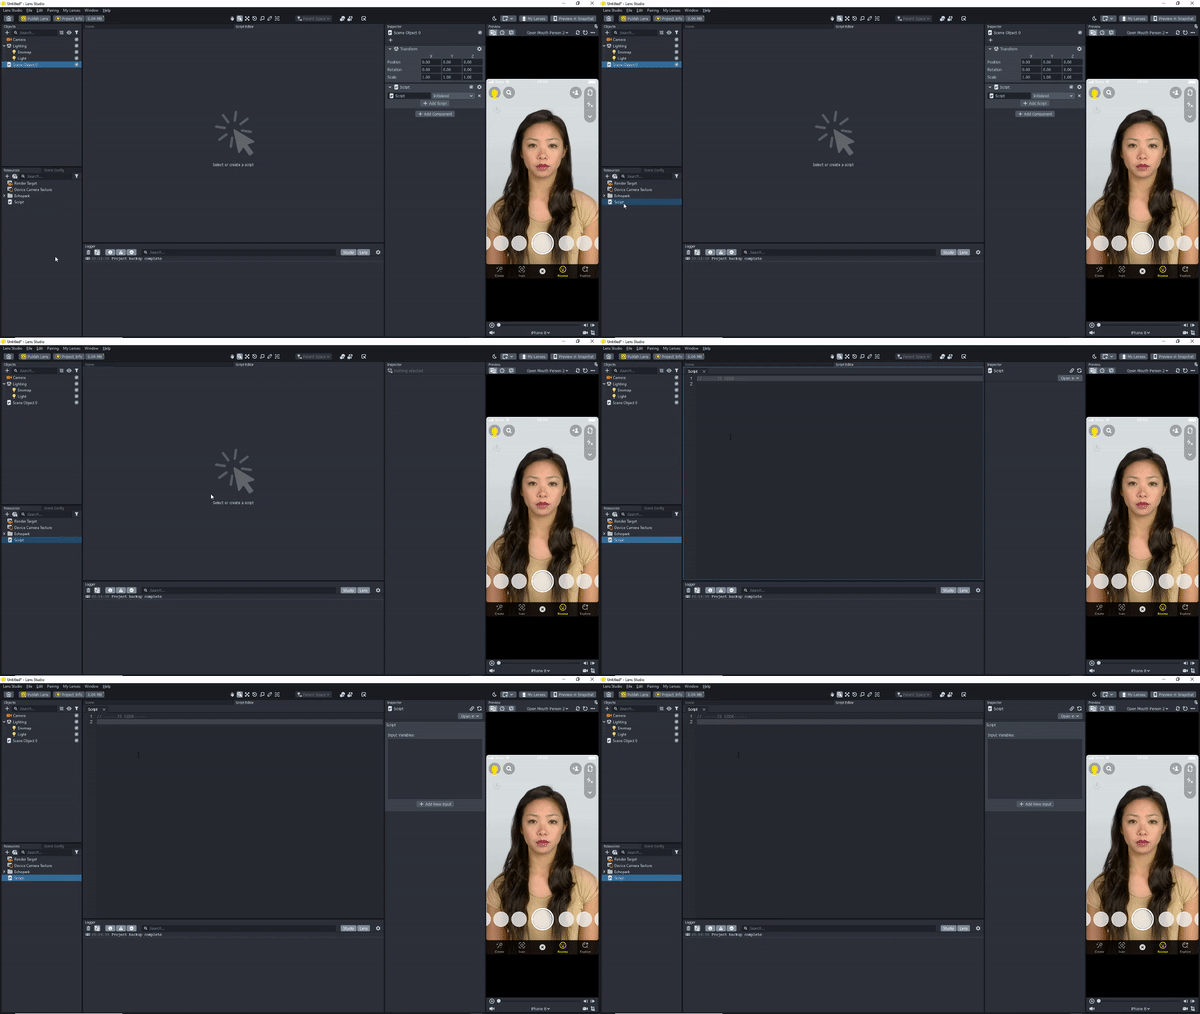
Double click on the script in order to open it for editing in Lens Studio. You can also edit the script with any other code editor of your choice.
Next, add the emoji to the project, such that it appears on top of the person’s image. You can do this using the Legacy Billboard. Any other Mesh Visual component can also be used. Once it’s in place, drag the emoji to the Resources panel of your project. Thereafter, drag that image to the Texture field of the Legacy Sprite.
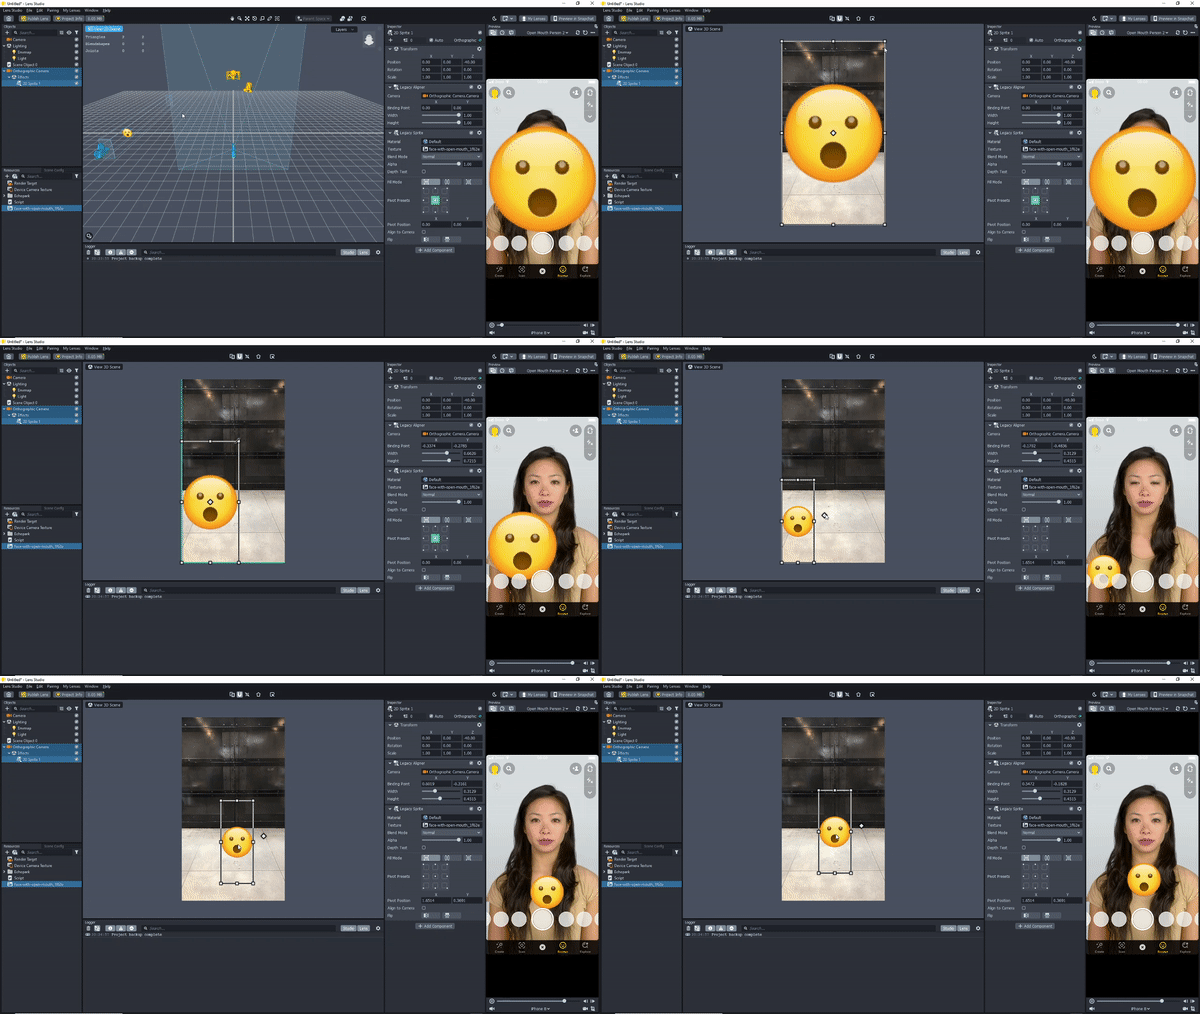
You can also use the 2D view to position the emoji to your liking, by dragging, adjusting its scale, etc.
Writing the script
First, you have to access the emoji. Since it’s a scene object the `@input` decorator can be used to access it.

Remember that you added the emoji image to the Legacy Sprite. Now you’ll need to go back to the Scene Object that you created. Notice that an input that allows you to add that Legacy Sprite has been created. Use the input to add the Legacy Sprite.
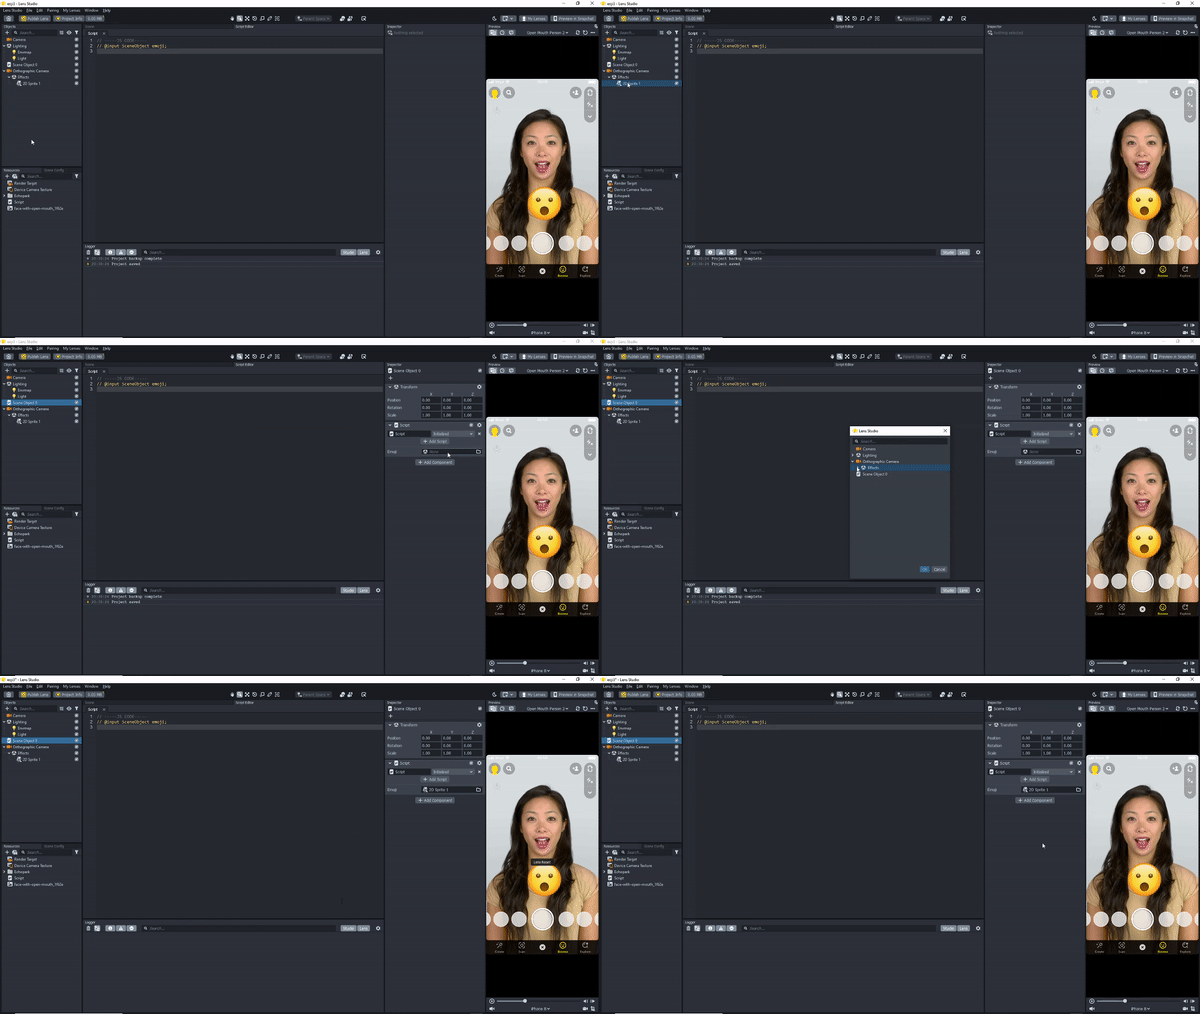
When this script is initialized, disable the visibility of the emoji. This is because the goal is to enable it when one opens their mouth.

Next, let’s write the code that will enable the emoji when one opens their mouth. This is done by accessing the mouth open event and binding a function to it. In that function, we access the emoji via script.emoji and enable it.

With the current settings, the emoji will never disappear. However, you want the emoji to vanish when the person closes their mouth. Doing this is similar to the the previous code snippet, only this time the mouth closed event is targeted.

Of course, there are many more complex kinds of JavaScript you can write for Lens interactivity, but this is a simple and clear place to get started.
Implementing tap events
Before calling it a day, let’s take a quick look at how you would implement the same behavior, but this time using tap events. The flow of events — no pun intended — will be the same with a few cosmetic changes.
The first change is that the tap event instead of the mouth event(s) is used. Finally, check to see if the emoji is enabled and disable it, and vice versa. Here’s the JS code snippet that will achieve that:
// -----JS CODE-----
// @input SceneObject emoji;


script.emoji.enabled = true;

function onTapped(eventData)
{
if(script.emoji.enabled){
        script.emoji.enabled = false;

    }
    else{
        script.emoji.enabled = true;

    }
}

var event = script.createEvent("TapEvent");
event.bind(onTapped);
Check out the link below for a complete list of all events that you can target. There are also code snippets that you can start using right away.
Conclusion
In this article, you’ve seen that you’re not just restricted to using Lens Studio templates. Specifically, you can write your own custom JavaScript code to target various events.
If you are interested in extending this example, you can try out different events from the link provided above.

Comments 0 Responses