
Privacy has always been a hot-button topic of discussion when it comes to the age-old debate of iOS vs Android.
While I’m not going to pick a side here, Android has made some radical changes in recent years concerning privacy, and the overhaul of the permission handling system is probably the biggest one of those changes.
Permissions in Android
Every app requires system-level permissions to interact with things outside the app, whether it’s communicating with the internet, accessing storage, reading messages, making phone calls, etc.
Up until Android 5.0, users had no control over these permissions whatsoever. If they were installing an app, they had to agree to all the permissions requested by the app, or else they couldn’t install the app at all. This resulted in some developers misusing this privilege and essentially stealing user data whenever users opened their apps:
Android 6.0 saw an overhaul in the permission handling system, thereby trying to mitigate this issue once and for all. All the permissions that the app could request were categorized into 2 categories: normal permissions and dangerous permissions.
You can view all the permissions and their protection levels here:
While nothing changed with normal permissions, when your app requests dangerous permissions (apart from writing that permission in the Manifest file), you have to request it from the user when the app is launched.
By default, your app is denied that particular permission. It’s only when the user chooses to grant that permission that your app is allowed to use that permission.
This eliminates the possibility of trojan apps like the malicious flashlight app that portrays one thing to users but does something entirely different in the background.
Now that we’ve covered the importance of handling permissions in Android, let’s explore how to correctly implement dangerous permissions in your app (if it’s using one).
Implementing runtime permissions in Android
While working on AfterShoot, I have to query the user’s internal storage and fetch their images from there. Looking at the documentation linked below, we can see that accessing the permission to read/write external storage is dangerous permission:
We’ll be adding runtime permissions to AfterShoot so that upon opening the app, it gives the user a choice to accept or reject the permission.
Step 1: Add the required permissions to the app’s Manifest
Regardless of whether you’re implementing runtime permissions or not, you have to register the permissions your app is going to request in the AndroidManifest.xml file.
This is how the permissions for storage can be added:
...
Step 2: Modify your Activity/Fragment to check and request runtime permission
Once the permission is added, running the app produces a SecurityException followed by a crash. This is an indication that we don’t yet have the permission and should request it from the user.
To do this, in the Activity/Fragment’s onCreate method, we’ll first check to see if the user has accepted the permissions or not. If the user has accepted the permission, proceed normally, but if he/she has denied the permission, we need to request the permissions before we proceed within the normal flow of the app.
Here’s what the code to check the permissions looks like:
class IntroActivity : AppCompatActivity() {

    // a unique integer to represent your permission request (will be used later)
    private val RQ_PERMISSION = 12345

    override fun onCreate(savedInstanceState: Bundle?) {
        super.onCreate(savedInstanceState)
        ...
        requestPermissions()
    }

    private fun requestPermissions() {
        // check if all the permissions are granted
        if (ActivityCompat.checkSelfPermission(this, Manifest.permission.READ_EXTERNAL_STORAGE) == PackageManager.PERMISSION_DENIED
                || ActivityCompat.checkSelfPermission(this, Manifest.permission.WRITE_EXTERNAL_STORAGE) == PackageManager.PERMISSION_DENIED) {
            // if even a single permission is denied, request that permission
            ActivityCompat.requestPermissions(this, arrayOf(Manifest.permission.READ_EXTERNAL_STORAGE,
                    Manifest.permission.WRITE_EXTERNAL_STORAGE), RQ_PERMISSION)
        } else{
            // we already have the permission, so query user's internal storage here
        }

    }
  ...
}
After your run the app, this is what you’re presented with as soon as the app is launched:
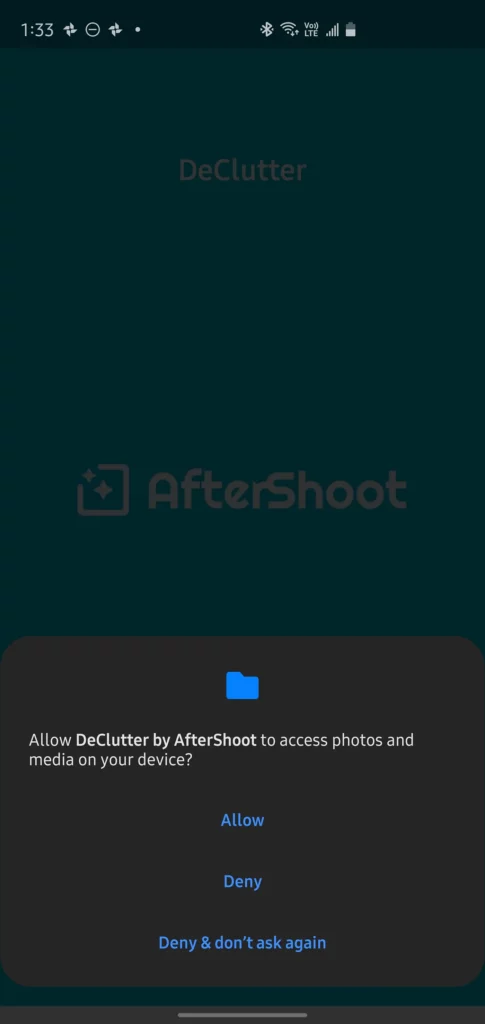
Great! So the app doesn’t crash now, but we still need to know if the user has accepted or denied permission in order to proceed further.
Step 3: Handling a user’s answer for the permission request prompt
On this screen, the user can either allow or deny the requested permission(s). We need to react differently based on their response, and that’s what we’ll be doing in this step. Before we proceed, here’s how the app’s user flow might look:
a) If the user accepts the permissions, proceed with the normal flow.
b) If the user denies the permissions, tell them why the permissions are required and request the permission again.
To perform either of these tasks, in our Activity/Fragment we need to override the onRequestPermissionsResult method and write the logic above inside that method:
class IntroActivity : AppCompatActivity() {

    private val RQ_PERMISSION = 12345

    ...

    // the permissions and the grantResults array contains the permissions we requested and the user's choice for them respectively
    override fun onRequestPermissionsResult(requestCode: Int, permissions: Array, grantResults: IntArray) {
        super.onRequestPermissionsResult(requestCode, permissions, grantResults)
        // check to see if the request code is the one we requested the permission with
        if (requestCode == RQ_PERMISSION && grantResults[0] == PackageManager.PERMISSION_GRANTED && grantResults[1] == PackageManager.PERMISSION_GRANTED) {
            // the permission is granted, so query the user storage here!
        } else {
            // the permission is denied, show a message to the user and request the permission again!
            Toast.makeText(this, "Please accept the storage permissions for the app to work!", Toast.LENGTH_SHORT).show()
            requestPermissions()
        }
    }

    ...
}
And that’s all! Running the app now, you’ll see that the app not only shows the permission prompt but also respects the user’s choice and reacts accordingly.
Step 4: Better UX for requesting user permissions
In the code above, we’re requesting the storage permission as soon as the app is launched. Any user who just downloaded our app will definitely reject the permission until they know what the app is about and why they need the said permission(s).
In our current flow, the user is asked for permission when they don’t have any context about why the permission is required, and on making a logical choice to reject the permission, they’re prompted with the permission prompt again. This results in bad user experience, and it’s quite possible that the user might uninstall your app.
To mitigate this problem, consider either:
1. Requesting permission only when it’s needed
For example, let’s say you have an app and one of its features is that it lets the user send SMS to their contacts. Instead of requesting the SMS permission as soon as the app is started, wait until the user tries to send an SMS and then request permission for the same. This will result in a lower probability that the user will reject the permission.
2. Let the user know why the permission is needed
The second approach might be to let your users know in advance that you’re about to request permission and why it’s needed, either with a dialog or an app-intro screen.
Since I need to query the user’s internal storage as soon as the app is launched, I proceeded with the second option, and this is what it looks like:
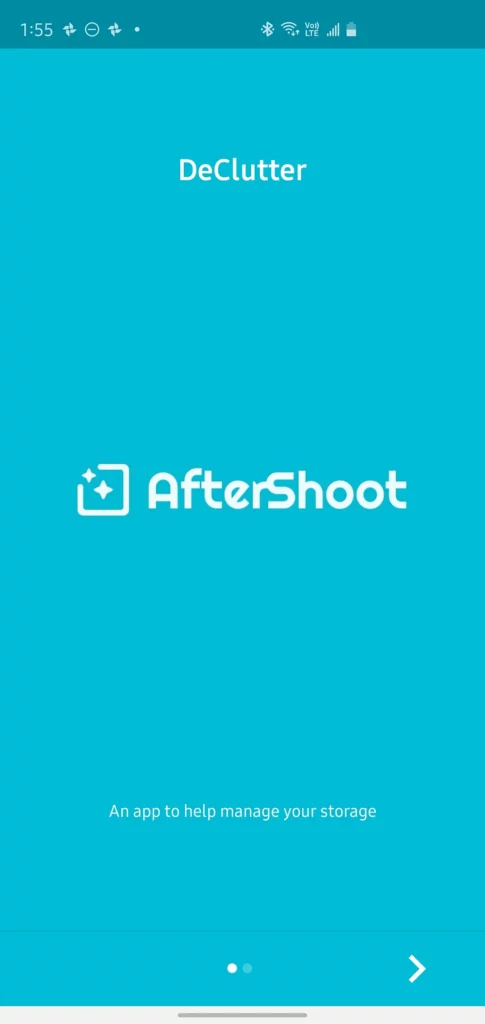
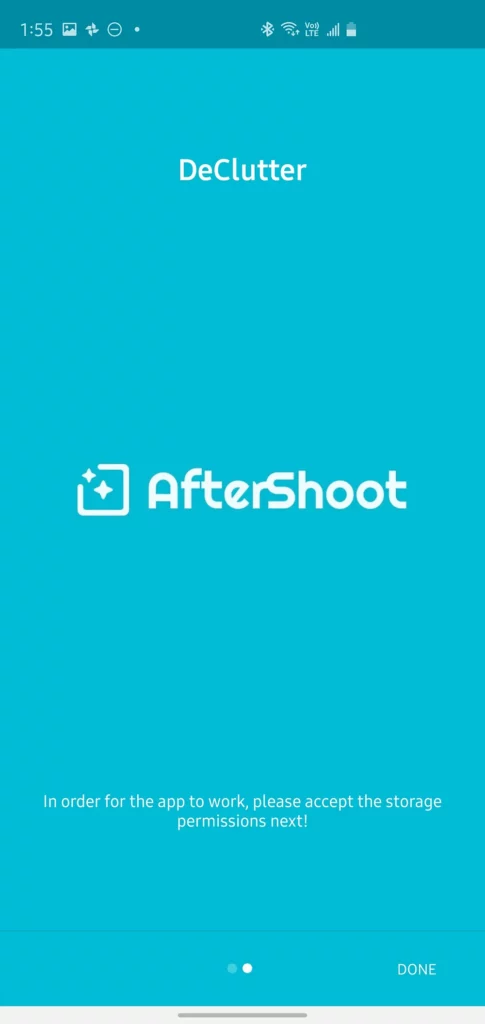
And that’s all! As you can see, the user now has some background info as to why the permission is needed, and they can react accordingly.
If you want to find the source code for the code covered in the blog post above, you can find it here:
For more info on permission handling in Android, feel free to refer to the official documentation on the same:
Thanks for reading! If you enjoyed this story, please click the 👏 button and share it to help others find it! Feel free to leave a comment 💬 below.
Have feedback? Let’s connect on Twitter.
Comments 0 Responses