In my time as an Android developer, I’ve run into issues with designing app icons for different Android devices and OS versions. Luckily, however, I found a workable solution: to create adaptive icons with Android Studio that work across devices and versions of Android.
Creating an adaptive Icon for Android using Android Studio is relatively easy—but before we jump into an implementation, let’s first take a closer look at what an adaptive icon actually is.
Adaptive launcher icons were first introduced in Android version 8.0 (Oreo) API Level 26. They’re a new icon format with different shape varieties that correspond to different device models. For example, in some devices, adaptive icons display a circular shape, a rounded shape, or a square shape. The GIF below demonstrates these differences:

Before showing you how to implement adaptive icons in your project, here’s a look at the issue that can occur when not using adaptive icons:

As you can see, the shape of the highlighted application icon isn’t proper, as all other icons are round in shape. To avoid this, we’ll create adaptive icon.
Before Android API Level 25:
Before android API Level 25 (Android 7.1), app launcher icons were sized at 48 x 48 dp by default. Now, in Android API Level 26 and above, the following guidelines should be followed:
- Both layers must be sized at 108 x 108 dp.
- The inner icon must be sized at 72 x 72 dp so the icon appears within the masked viewport.
- And the system reserves the outer 18 dp on each of the 4 sides to create interesting visual effects, such as parallax or pulsing.
If you want to learn from video then check my video below and subscribe to my channel 👇
Implementation Steps:
To create adaptive icons, we need to work through the following steps
Step 1: Project Setup
- Open the project in Android Studio
- Select the app folder
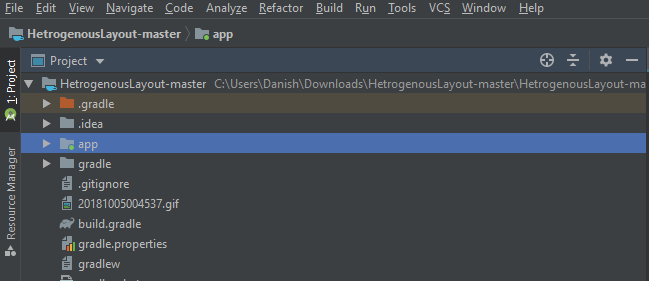
Step 2: Image Assets
Go to File → New → Image Asset
You’ll see the following screen:
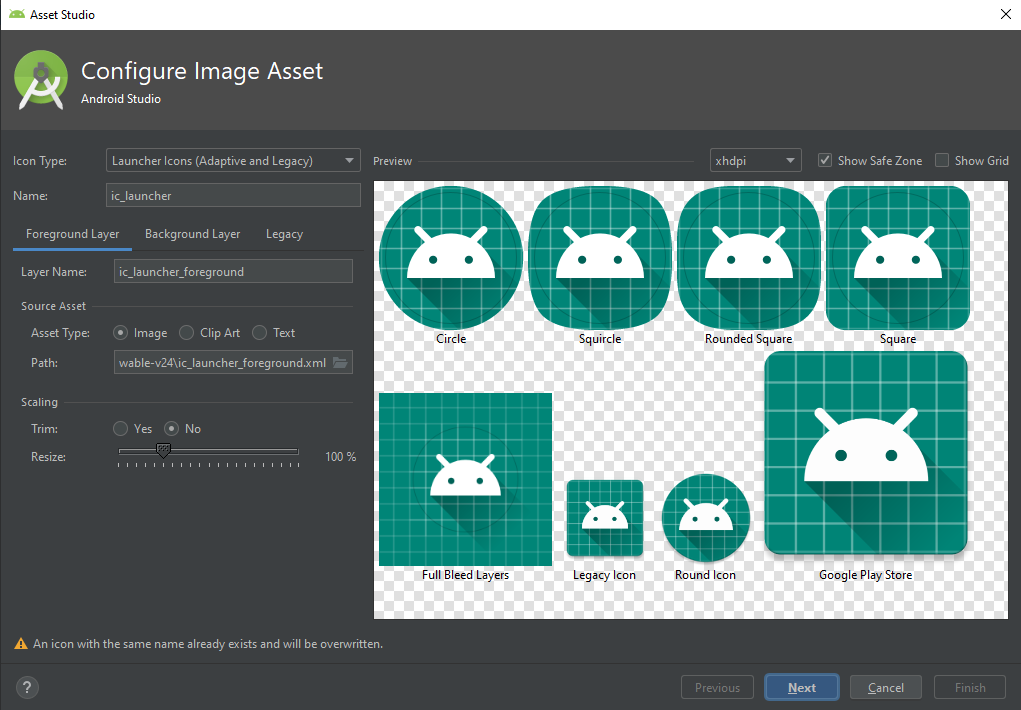
Step 3: Foreground Layer
Select the “Foreground Layer” tab and select the application icon that you want to display using its given image path, and resize in order to get the proper aspect ratio for the icon.
Step 4: Background Layer
Select “Background Layer” tab. Here, you can use the default background image, or you can use the color picker, as well. In my case, I used the color as shown in the below screenshot.
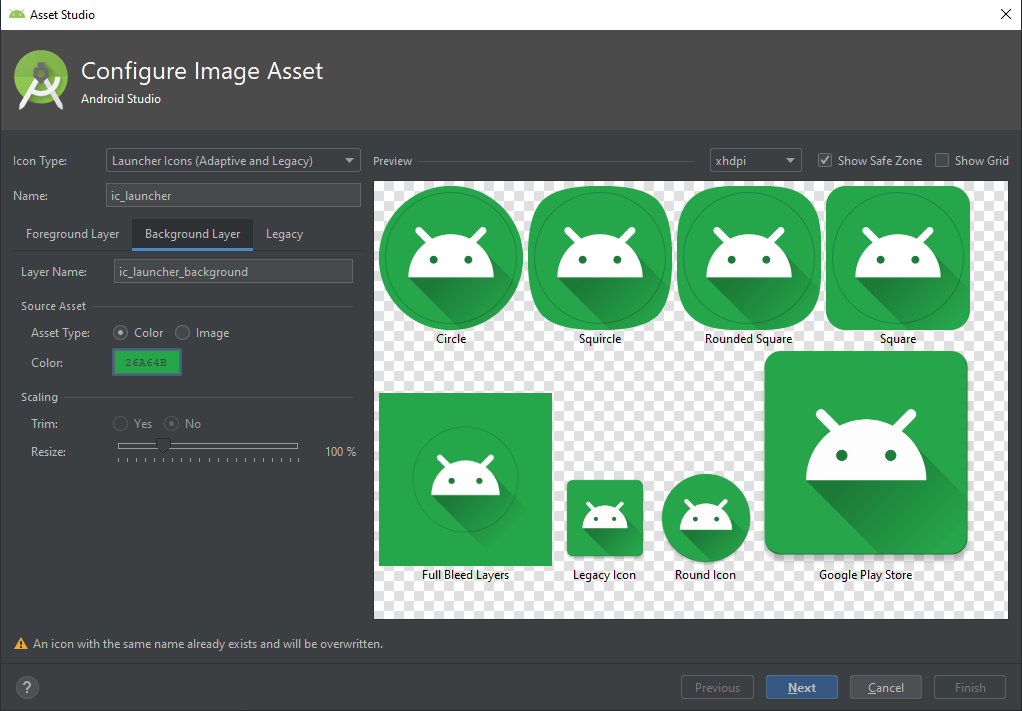
Step 5: Icon Implementation
Click on the Next button and then the Finish button; at this point, you’ll see the “Confirm Icon Path”, as shown in the screenshot below:
Confirming the icon path is essentially showing the path directory where all the application launcher icons are placed. In the screenshot below, you can see the following things in the output.
- File type: (PNG / JPEG)
- Density (nodpi, mdpi, hdpi, etc)
- Size(dp): Density pixel
- Size(px): In pixels
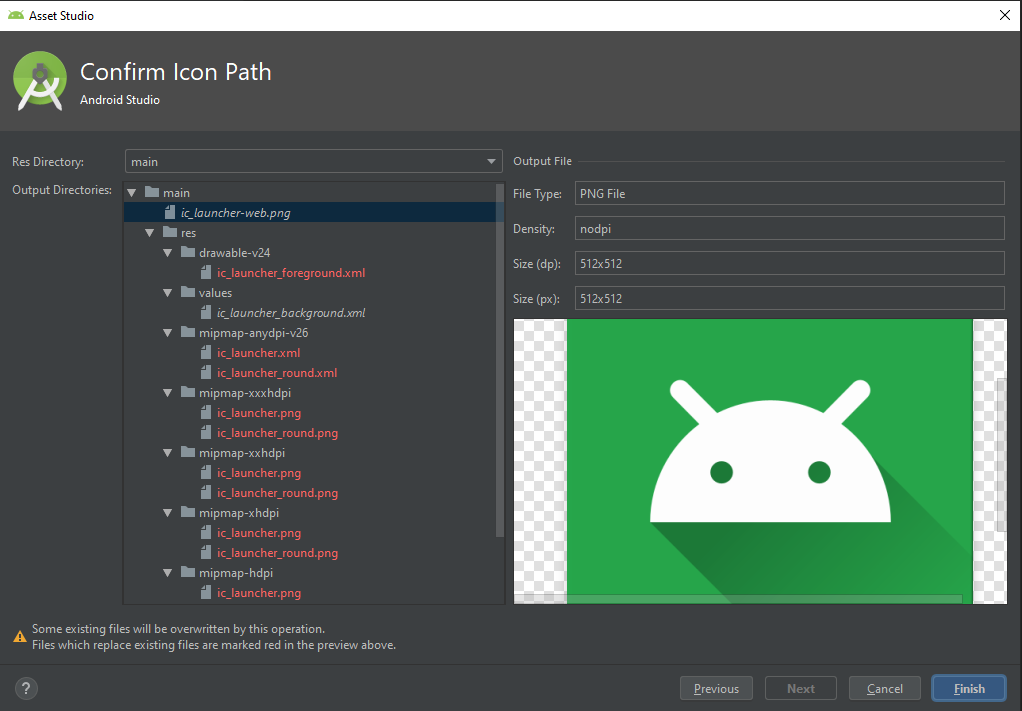
Step 6: Defining the icon in the manifest.xml file
After confirming the icon path, all the application launcher icons are created in the mipmap folder, in which you can see the XML files named ic_launcher and name ic_launcher_round.
The mipmap folders are the folders for placing your app/launcher icons (which are shown on the home screen) only.
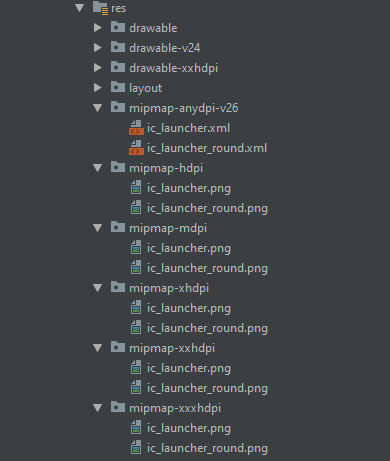
We also need to define the new rounded icon in the manifest.xml file, with the option roundIcon:
Result
Let’s run the project and see the before-and-after.
Before implementing the adaptive icon:

After implementing the adaptive icon:

Conclusion
This article taught you to easily create adaptive icons in Android using Android Studio. Specifically, I explained the steps to create a foreground layer and background layer—in the foreground layer, we looked at resizing the inner icon. And for the background layer, we learned how to set the color as well as the background icon.
I hope this article is helpful. If you think something is missing, have questions, or would like to offer any thoughts or suggestions, go ahead and leave a comment below. I’d appreciate the feedback.
I’ve written some other Android-related content, and if you liked what you read here, you’ll probably also enjoy these:
If you want to read more about, check out the official developer documentation below:
Sharing (knowledge) is caring 😊 Thanks for reading this article. Be sure to clap or recommend this article if you found it helpful. It means a lot to me.
If you need any help then Join me on Twitter, LinkedIn, GitHub, and Subscribe to my Youtube Channel.

Comments 0 Responses