Getting Started
In this article, we’ll train a model that is able to label cat and dog images. The images used for this project can be found here and here. Of course, you don’t have to use cats and dogs; the process is the same irrespective of your images. Before we get too far into this, you’ll first need to create an account at Fritz AI.
Once you are logged in, click create a project on the left panel. Then make sure you select Custom Trained in order to get the option to train your own model.
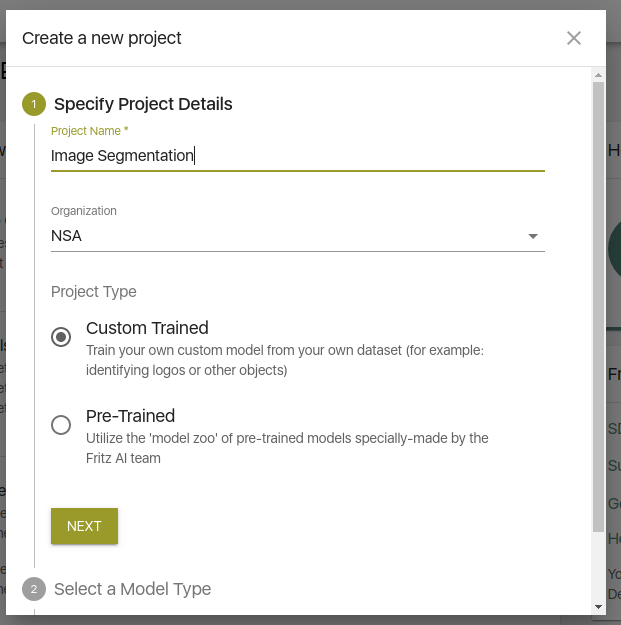
Click next and select the model type — in this case image segmentation.
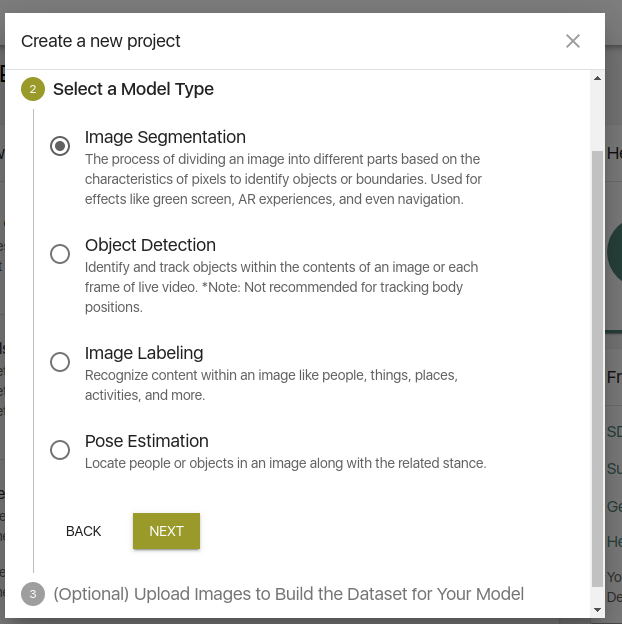
On the next page, you will get the option to upload your seed images.
More information about seed images can be found here:
Annotate the Images
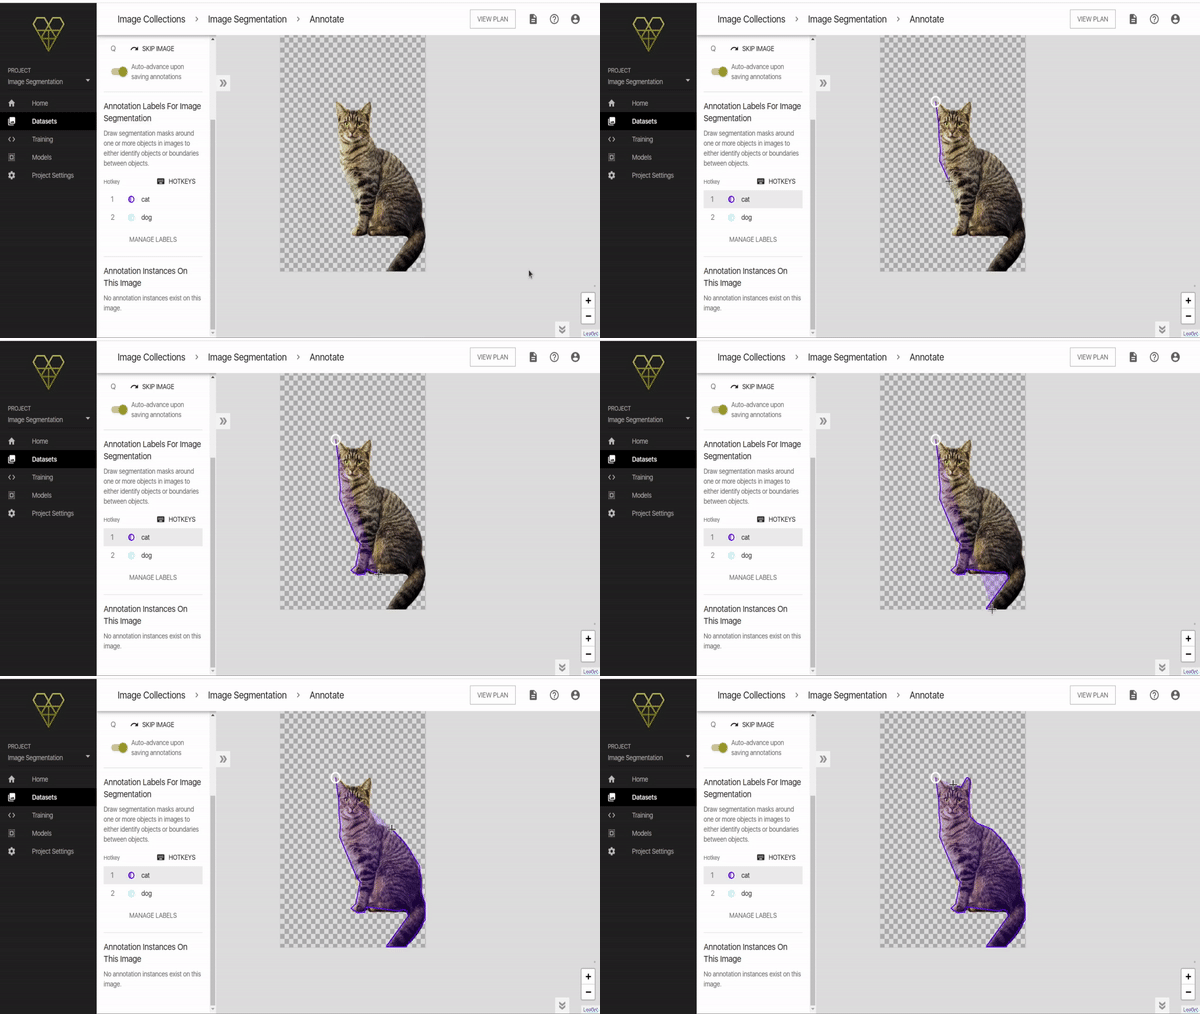
To start the annotation process, click on any of the images you just uploaded or click Annotate Images at the top of the next page.

The first thing you need to do now is to create your object labels.
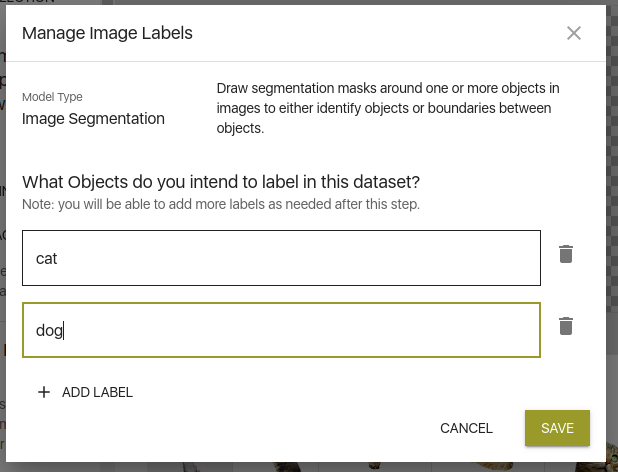
Now, click on any label to get the option to start annotating the images.
Generating the Dataset
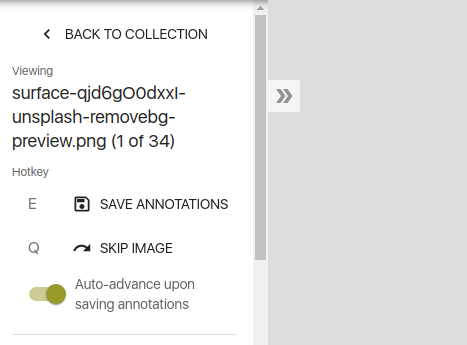
Once you have all the images annotated click Back To Collection.
This will now give you the option to create the dataset. To do that, the only thing you need to do is click Generate Snapshot.

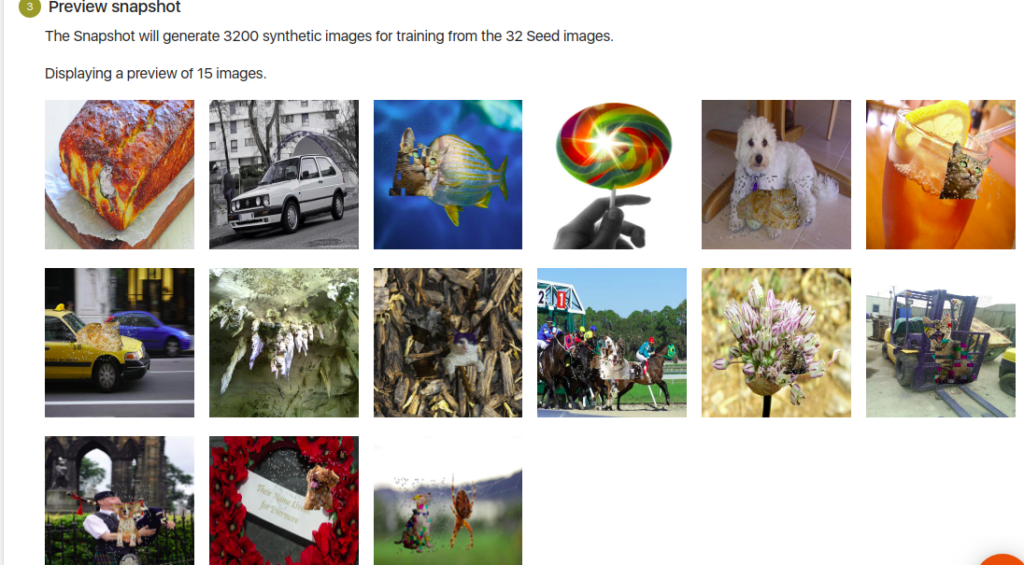
Upon clicking next, you will see a preview of the images that will be created.
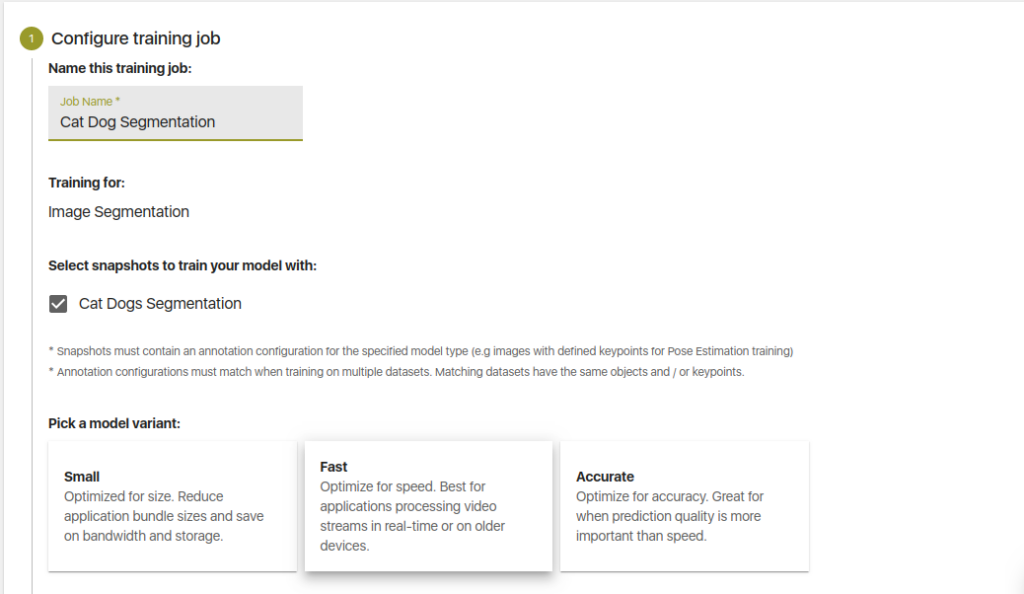
Now you can click on Create Snapshot to create the dataset. You’ll need to give this job a name. The seed images you just annotated will be selected by default. Since you’ll be using the model on-device, the Fast model variant is the best option here.
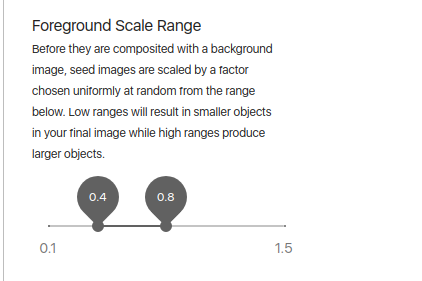
An important item to note here is the size of the object in the entire image. Ideally, the size of your object on the training and testing set should be the same. Otherwise, you will have challenges during the mask creation process. By clicking on the Advanced Options you can set the size of the foreground image. You can try different scales and check the output on the preview before confirming.
Click next to confirm details and generate the snapshot. Once your dataset is ready, you will be notified via email.

Training the Model
While still on the Datasets tab, you can click Train Model to start the training process. You can also download the dataset you just created.

You will be prompted to give this training job a name. The dataset that you just created will be selected by default.

The training time shouldn’t worry you since Fritz AI will stop training when your model is ready, even if you have chosen a longer training time.

That said, if you exceed your monthly allocation then you will have to upgrade your account.

Now, take a stroll and wait for Fritz to notify you when your model is ready.

When the training is complete you will get a Keras, Core ML, and a TensorFlow Lite model. Download the TF Lite model.

Register an Application
The next step is to register an app on the same project containing the model you just trained. That will be accessed by clicking the Project settings.

Click Register App to start the processing.
Select the platform you are working on, in this case Android. If you are using the Core Model this option will be iOS.
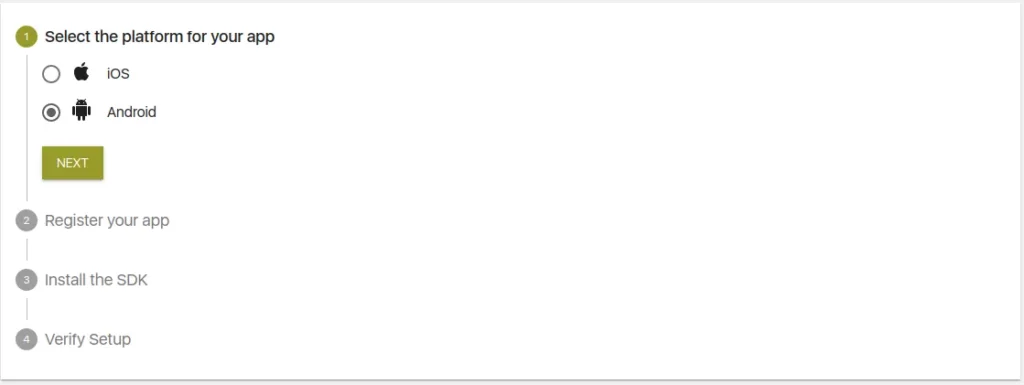
On the next step, you will give your application a name and enter its ID. You can find that in your app’s build.gradle file. Ensure that the name is the same as seen in that file, otherwise, Fritz won’t be able to communicate with your app.
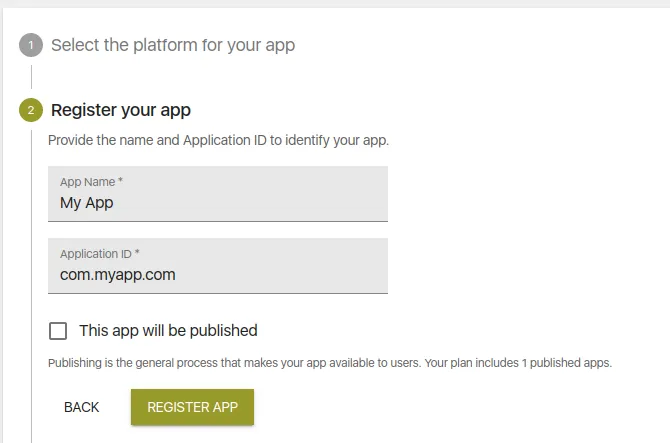
With that out of the way, you can now install the Fritz AI SDK. In your root-level Gradle file (build.gradle) include the Maven repository for Fritz.
allprojects {
    repositories {
        maven { url "https://fritz.mycloudrepo.io/public/repositories/android" }
    }
}
Now, add the dependencies for the SDK in app/build.gradle. We add the Fritz Core, Pet Segmentation, and Vision dependencies. Now that you have changed the Gradle files, ensure that you sync that with your project. That will download all the necessary dependencies.
dependencies {

    implementation 'ai.fritz:core:+'
    implementation 'ai.fritz:vision:+'
    implementation 'ai.fritz:vision-pet-segmentation-model-fast:+'

    }
Before you close that file add renderscript support to improve image processing performance. Also, specify aaptOptions to prevent compression of TFLite models.
android {
    defaultConfig {
        renderscriptTargetApi 21
        renderscriptSupportModeEnabled true
    }

    // Don't compress included TensorFlow Lite models on build.
    aaptOptions {
        noCompress "tflite"
    }
}
Now register the FritzCustomModelService in the AndroidManifest.
<manifest xmlns:android="http://schemas.android.com/apk/res/android">
    <!-- For model performance tracking & analytics -->
    <uses-permission android:name="android.permission.INTERNET" />

    <application>
        <!-- Register the custom model service for OTA model updates -->
        <service
            android:name="ai.fritz.core.FritzCustomModelService"
            android:exported="true"
            android:permission="android.permission.BIND_JOB_SERVICE" />
    </application>
</manifest>
The next step is to initialize the SDK by calling Fritz.configure() with your API Key.
public class MainActivity extends AppCompatActivity {
    @Override
    protected void onCreate(Bundle savedInstanceState) {
        // Initialize Fritz
        Fritz.configure(this, "YOUR_API_KEY");
    }
}
With that in place, click next to verify that your application is able to communicate with Fritz.

Using the Trained Model
The model we trained will create a mask on the cat or dog that has been detected. Apart from the pet segmentation, Fritz AI also allows us to do people, sky, living room, outdoor, and hair segmentation.
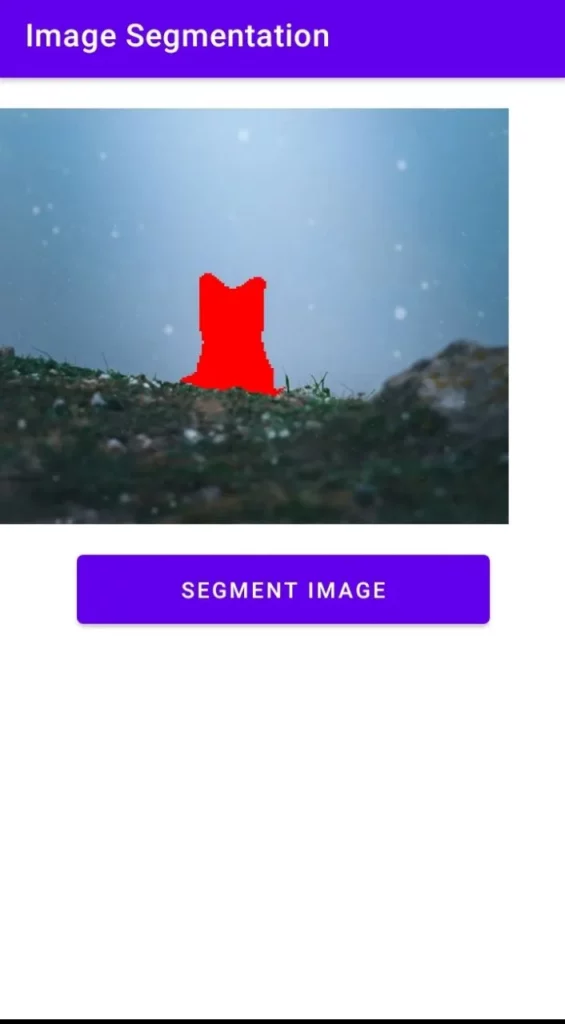
The App Elements
This application contains just two key elements:
- A Button that, when clicked, initiates the image segmentation process.
- An ImageView for displaying the image and the mask.
<?xml version="1.0" encoding="utf-8"?>
<androidx.constraintlayout.widget.ConstraintLayout xmlns:android="http://schemas.android.com/apk/res/android"
    xmlns:app="http://schemas.android.com/apk/res-auto"
    xmlns:tools="http://schemas.android.com/tools"
    android:layout_width="match_parent"
    android:layout_height="match_parent"
    tools:context=".MainActivity">

    <ImageView
        android:id="@+id/imageView"
        android:layout_width="427dp"
        android:layout_height="265dp"
        android:layout_marginBottom="305dp"
        app:layout_constraintBottom_toBottomOf="parent"
        app:layout_constraintEnd_toEndOf="parent"
        app:layout_constraintHorizontal_bias="1.0"
        app:layout_constraintStart_toStartOf="parent"
        app:layout_constraintTop_toTopOf="parent"
        app:layout_constraintVertical_bias="0.652"
        app:srcCompat="@drawable/dog" />

    <Button
        android:id="@+id/buttonClick"
        android:layout_width="263dp"
        android:layout_height="56dp"
        android:layout_marginStart="50dp"
        android:layout_marginTop="8dp"
        android:layout_marginEnd="50dp"
        android:layout_marginBottom="241dp"
        android:onClick="segmentImages"
        android:text="Segment Image"
        app:layout_constraintBottom_toBottomOf="parent"
        app:layout_constraintEnd_toEndOf="parent"
        app:layout_constraintStart_toStartOf="parent"
        app:layout_constraintTop_toBottomOf="@+id/imageView" />
</androidx.constraintlayout.widget.ConstraintLayout>
Detecting Objects and Create Masks
The process of detecting objects and creating masks occurs in several steps.
Obtain the Model
First, you’ll need to store the model you downloaded as an asset in your Android Project. Store the model in the assets folder in the main folder of your Android project. After that, you’ll need to create an on-device model as shown below. Notice that cat and dog mask classes are created as well. Therefore, if you train your model with more classes, then you have to add them to that list.
 MaskClass[] maskClasses = {
                // The first class must be "None"
                new MaskClass("None", Color.TRANSPARENT),
                new MaskClass("cat", Color.RED),
                new MaskClass("dog", Color.BLUE),
        };
SegmentationOnDeviceModel onDeviceModel = new SegmentationOnDeviceModel(
                "file:///android_asset/CatDogSegmentationFast.tflite",
                "277782d7ef70455fafa550474877b426",
                2,
                maskClasses
        );
Obtain the Image
In a previous piece, we saw how we can allow a user to select the image. However, for simplicity, we’ll just use the image as a drawable asset. We convert the image to a Bitmap because that is what is required by Fritz Vision.
Bitmap image = BitmapFactory.decodeResource(getResources(), R.drawable.cat);
Create a FritzVisionImage from an image
We now have a bitmap image. We can use it to create a FritzVisionImage:
FritzVisionImage visionImage = FritzVisionImage.fromBitmap(image);Get a Segmentation Predictor
Now that we have the model in our project we can get the predictor immediately.
FritzVisionSegmentationPredictor predictor = FritzVision.ImageSegmentation.getPredictor(onDeviceModel);
Run Prediction on the FritzVisionImage
The next step is to simply run the predictions using the predictor we just obtained.
FritzVisionSegmentationResult segmentationResult = predictor.predict(visionImage);
Displaying the Result
In order to display the result, we first build the segmentation mask. After that, we overlay that onto the image. Finally, we display the result using the imageView. Depending on the amount of seed data that you used, you might also want to reduce the confidence level, otherwise, you might not see any result. The first parameter of the buildMultiClassMask also sets the opacity so as to achieve the mask shown below.
options = new FritzVisionSegmentationPredictorOptions();
options.confidenceThreshold = 0.7f;
FritzVisionSegmentationPredictor predictor = FritzVision.ImageSegmentation.getPredictor(onDeviceModel,options);
FritzVisionSegmentationResult segmentationResult = predictor.predict(visionImage);
Bitmap petMask = segmentationResult.buildMultiClassMask(120,options.confidenceThreshold ,options.confidenceThreshold );
Bitmap imageWithMask = visionImage.overlay(petMask);
imageView.setImageBitmap(imageWithMask);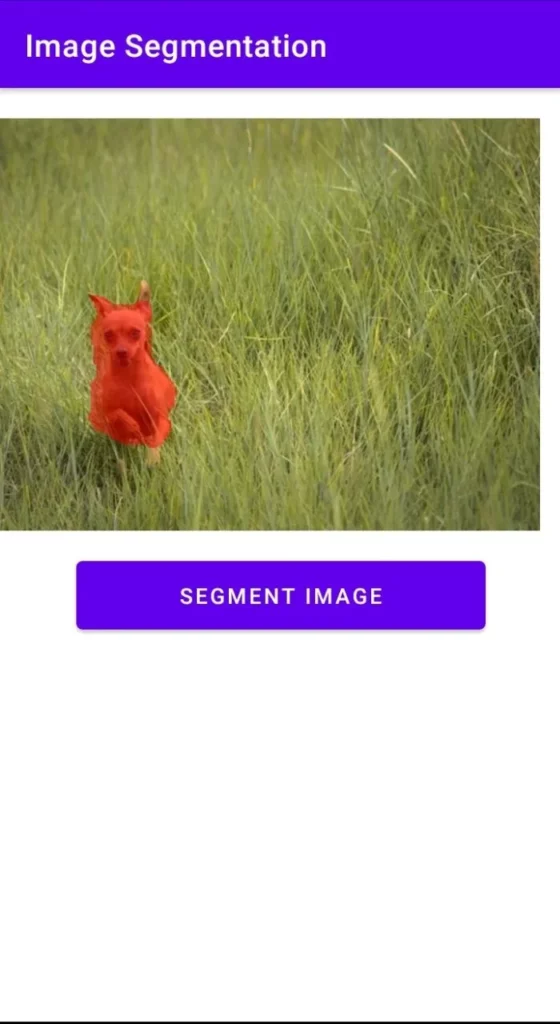
Conclusion
Hopefully, this piece has shown you how easy it is to train your own image segmentation model using Fritz AI. Check out the full source code in the repo below.

Comments 0 Responses