Nowadays, building a machine learning app isn’t considered nearly as difficult as it used to be. We have numerous cloud providers offering services that enable us to use their ML service to train and deploy models to a variety of environments and devices.
In this tutorial, we’re going to use TensorFlow.js to classify an apple as rotten or fresh using a fruit image dataset from Kaggle. We’re going to train our model using Microsoft Custom Vision from the Azure software family. Lastly, we’ll implement a simple Node.js application in order to handle the classification task directly on the browser.
So let’s get started!
Download Image Dataset from Kaggle
First, we need a dataset in order to train our model. We’ll use Kaggle as our dataset provider, as they have one that suits our exact needs. We can download the required dataset by navigating to the link below:
Keep in mind that datasets can be huge, with sizes reaching up to 2 gigabytes. We must make sure that we have enough space on our system for it.
Train model with Microsoft Custom Vision
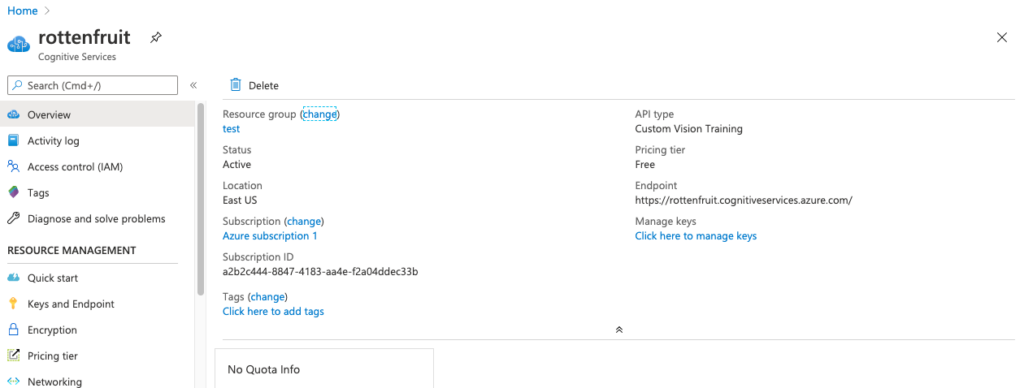
Next, we need to train a custom model. Here, we have a service that’s easy to use, called Microsoft Custom Vision. Before we actually create our custom model, we must make sure that Cognitive Service on Azure is already set up and configured, as shown in the screenshot below:
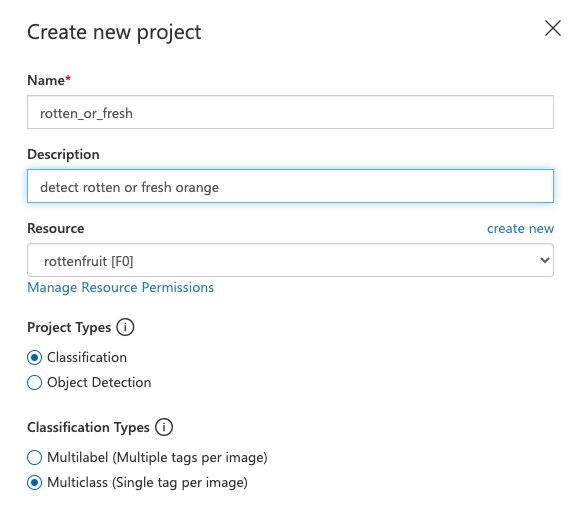
Next, we can go to the Custom Vision site and start by creating a new project, as directed in the screenshot below:
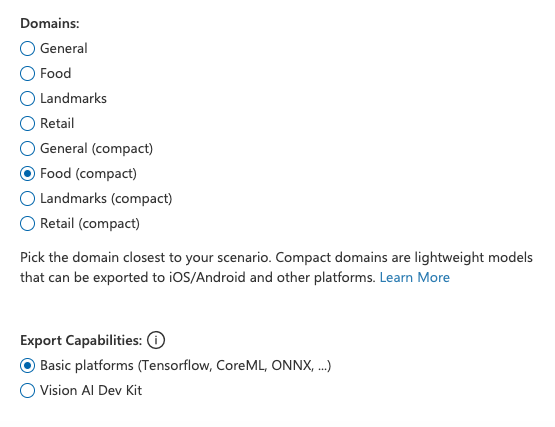
Next, we need to pick a Food (compact) model. If we do not pick ‘compact’ (i.e. lightweight and ready for edge deployment), then we won’t be able to export the model to our target platform:
The first console configured page is shown in screenshot below:
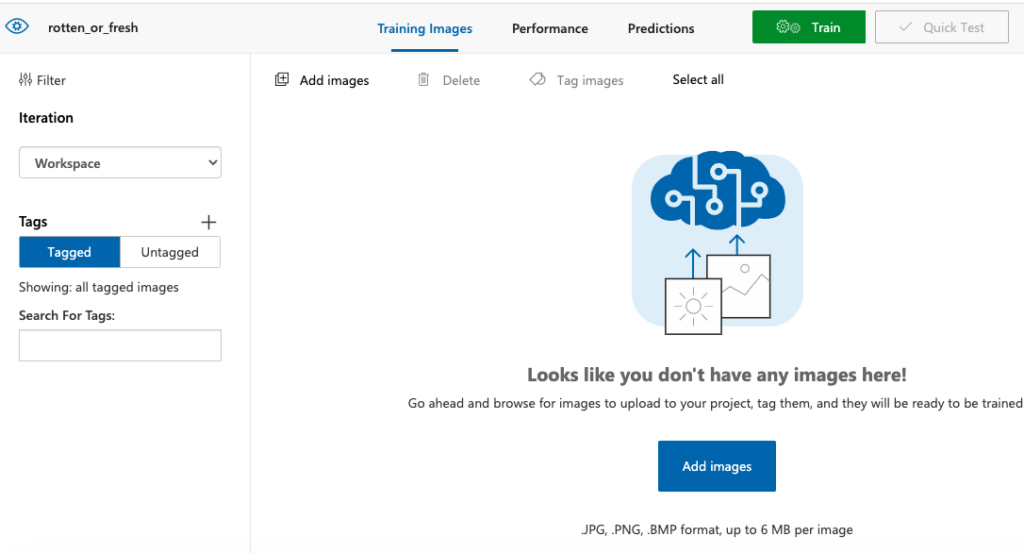
As we can see in the console, our first step is to upload images to train our model on. We need to select and import the images that we downloaded from Kaggle. Once imported, we need to add a tag to classify the images. We do this first for the ‘rotten’ samples, as directed in the screenshot below:
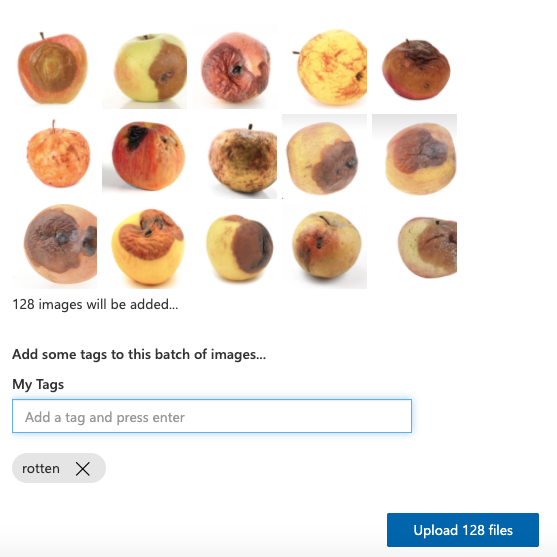
We also need to add the fresh apple images and add a tag to classify them as fresh:
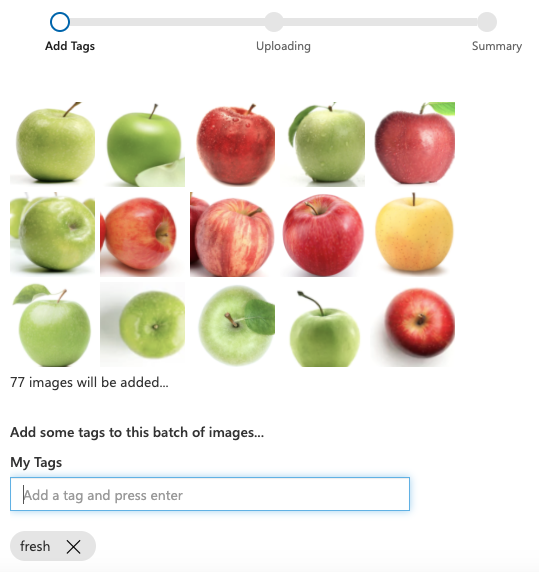
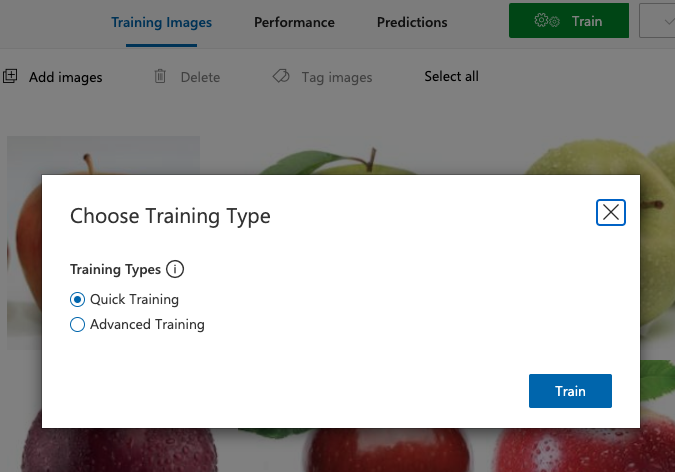
Once our classification labels are established and applied to our dataset, we can now move on and select the Training Type.
Here, we’re going to select the Quick Training option. We’re could pick the Advanced Training option, but it takes a longer period of time and more compute resources to train, and for our purposes, we don’t need anything that complex.
After a half minute (with a small dataset and simple task, this won’t take long), our training will be complete, and we’ll get the following result in the interface:
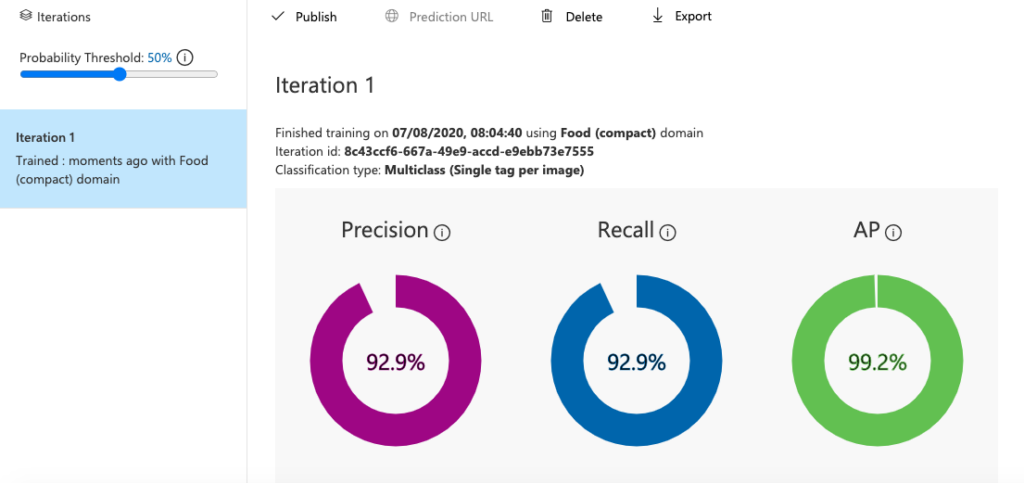
Now that we’ve trained a (pretty accurate) model, we need to export it to our desired platform. We’re going to choose TensorFlow for this tutorial.
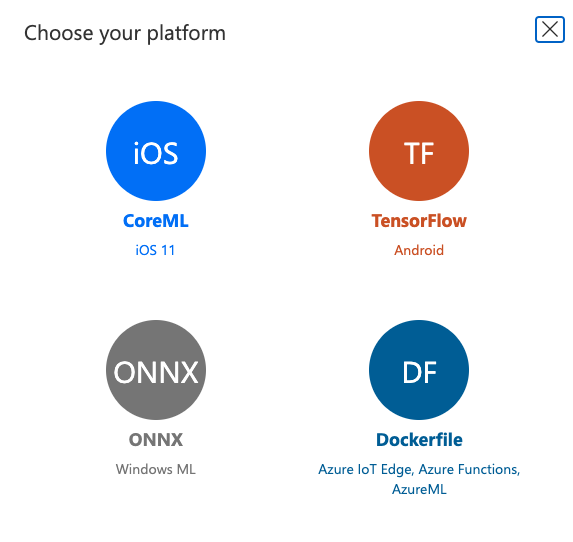
After choosing the appropriate platform, we need to choose the platform module as well. Here, we’re going to pick TensorFlow.js, which is the browser-ready, JavaScript flavor of TensorFlow:
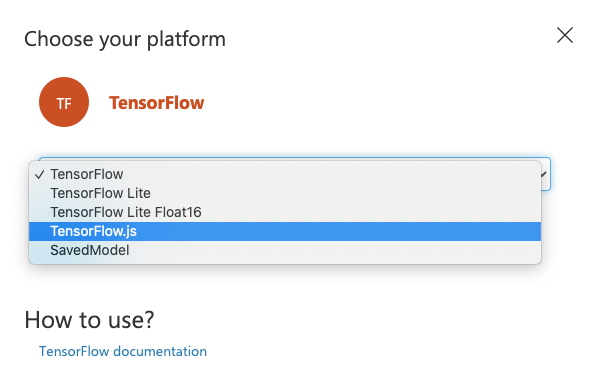
There it is! We’ve successfully created a simple model to classify and label fresh or rotten apples.
Implementing on Browser
Next, we’re going to create a simple Node.js app to serve the model on a static, simple HTTP server. First, we’re going to create a package.json file using the following command:
The folder structure for the web app is displayed below. Here, we’ve created a ./src folder. We’ve copied our ./model folder along with all the files inside it to the source folder.
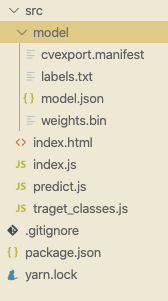
Then, we need to create an index.js file, as shown in the screenshot above. Now, let’s start to construct a page to display the classification results.
First, we add all the imports to the HTML head section, as shown in the code snippet below:
<!DOCTYPE html>
<html lang="en">

<head>
  <meta charset="utf-8" />
  <title>Fresh or Rotten</title>
  <meta name="viewport" content="width=device-width, initial-scale=1" />
  <meta name="description" content="Detect Rotten or Fresh Orange in Browser" />

  <link rel="stylesheet" href="https://stackpath.bootstrapcdn.com/bootstrap/4.3.1/css/bootstrap.min.css"
    integrity="sha384-ggOyR0iXCbsdsrttru6a34MD+dH/1fQ784/j6cY/iJTQUOhcWr7x9JvoRxT2MZw1T" crossorigin="anonymous" />
</head>
Second, we need to construct the body section. In the body section, we have a progress bar that we’re using to display model loading status. If the model load is complete, then the progress bar will disappear.
We also have a file picker and body area to display the picker image and classification result. The code to implement this provided in the code snippet below:
<body>
  <main role="main" class="container mt-5">
    <div class="row">
      <div class="col-12">
        <div class="progress progress-bar progress-bar-striped progress-bar-animated mb-2">
          Loading Model
        </div>
      </div>
    </div>
    <div class="row">
      <div class="col-6">
        <input id="image-selector" class="form-control border-0" type="file" />
      </div>
      <div class="col-6">
        <button id="predictBtn" class="btn btn-primary float-right">
          Predict
        </button>
      </div>
    </div>
    <hr />
    <div class="row">
      <div class="col-6">
        <h2 class="ml-3">Image</h2>
        <img id="selected-image" class="ml-3" width="250" alt="" />
      </div>
      <div class="col-6">
        <h2 class="ml-3">Predictions</h2>
        <ol id="prediction-list"></ol>
      </div>
    </div>
  </main>
Next, we add a script section in which we need to include JQuery, bootstrap and TensorFlow.js script links, as displayed in the code snippet below:
<script src="https://code.jquery.com/jquery-3.5.1.slim.js"
    integrity="sha256-DrT5NfxfbHvMHux34647547Y6of8TaYyK50jnxRnM=" crossorigin="anonymous"></script>
  <script src="https://cdnjs.cloudflare.com/ajax/libs/popper.js/1.14.7/umd/popper.min.js"></script>
  <script src="https://stackpath.bootstrapcdn.com/bootstrap/4.5.0/js/bootstrap.min.js"
    integrity="sha384-OgVRvuATP4563545U7Xw704+h835Lr+6QL9UvYjZE3Ipu6Tp75j7Bh/kR0JKI"
    crossorigin="anonymous"></script>
  <script src="https://cdn.jsdelivr.net/npm/@tensorflow/[email protected]/dist/tf.min.js"></script>
  <script src="predict.js"></script>
</body>

</html>
Here, we’ve got a file manager, editor, browser, and terminal on a single page.
Next, we head over to the predict.js file and start by creating a status variable named Result. We also create a function to handle the file picker and preview image, as shown in the code snippet below:
const Result = {
	0: "Fresh",
	1: "Rotten"
};
$("#image-selector").change(function () {
	let reader = new FileReader();
	reader.onload = function () {
		let dataURL = reader.result;
		$("#selected-image").attr("src", dataURL);
		$("#prediction-list").empty();
	}

	let file = $("#image-selector").prop('files')[0];
	reader.readAsDataURL(file);
});
We start by loading the model, showing the progress bar until the model successfully loads, and then we hide it. The code for this is provided below:
let model;
$(document).ready(async function () {
	$('.progress-bar').show();
	model = await tf.loadGraphModel('model/model.json');
	$('.progress-bar').hide();
});
Our last step to implement a predict button. When a user clicks on this button, we start to pre-process the input image by resizing it and converting RGB values to BGR by reverse(-1). Then, we use the model to run inference (prediction) on the image.
Lastly, we can try to clean up the result by using map, sort, and slice functions.
In order to display the result, we’re going to create a simple list. The overall coding implementation for this is provided in the snippet below:
$("#predictBtn").click(async function () {
	let image = $('#selected-image').get(0);

	let pre_image = tf.browser.fromPixels(image, 3)
		.resizeNearestNeighbor([224, 224])
		.expandDims()
		.toFloat()
		.reverse(-1);
	let predict_result = await model.predict(pre_image).data();
	console.log(predictions);
	let order = Array.from(predict_result)
		.map(function (p, i) {
			return {
				probability: p,
				className: Result[i]
			};
		}).sort(function (a, b) {
			return b.probability - a.probability;
		}).slice(0, 2);

	$("#list").empty();
	order.forEach(function (p) {
		$("#list").append(`<li>${p.className}: ${parseInt(Math.trunc(p.probability * 100))} %</li>`);
	});
});
Next, we need to go to index.js file and create a simple server command to display the index.html file, as shown below:
let express = require("express");
let app = express();
let port = 8080;

app.use(express.static("./src"));

app.listen(port, function () {
  console.log(`Listening at http://localhost:${port}`);
});
In order to start the server, we need to run the following command in the project terminal:
Hence, we should see the model load successfully:
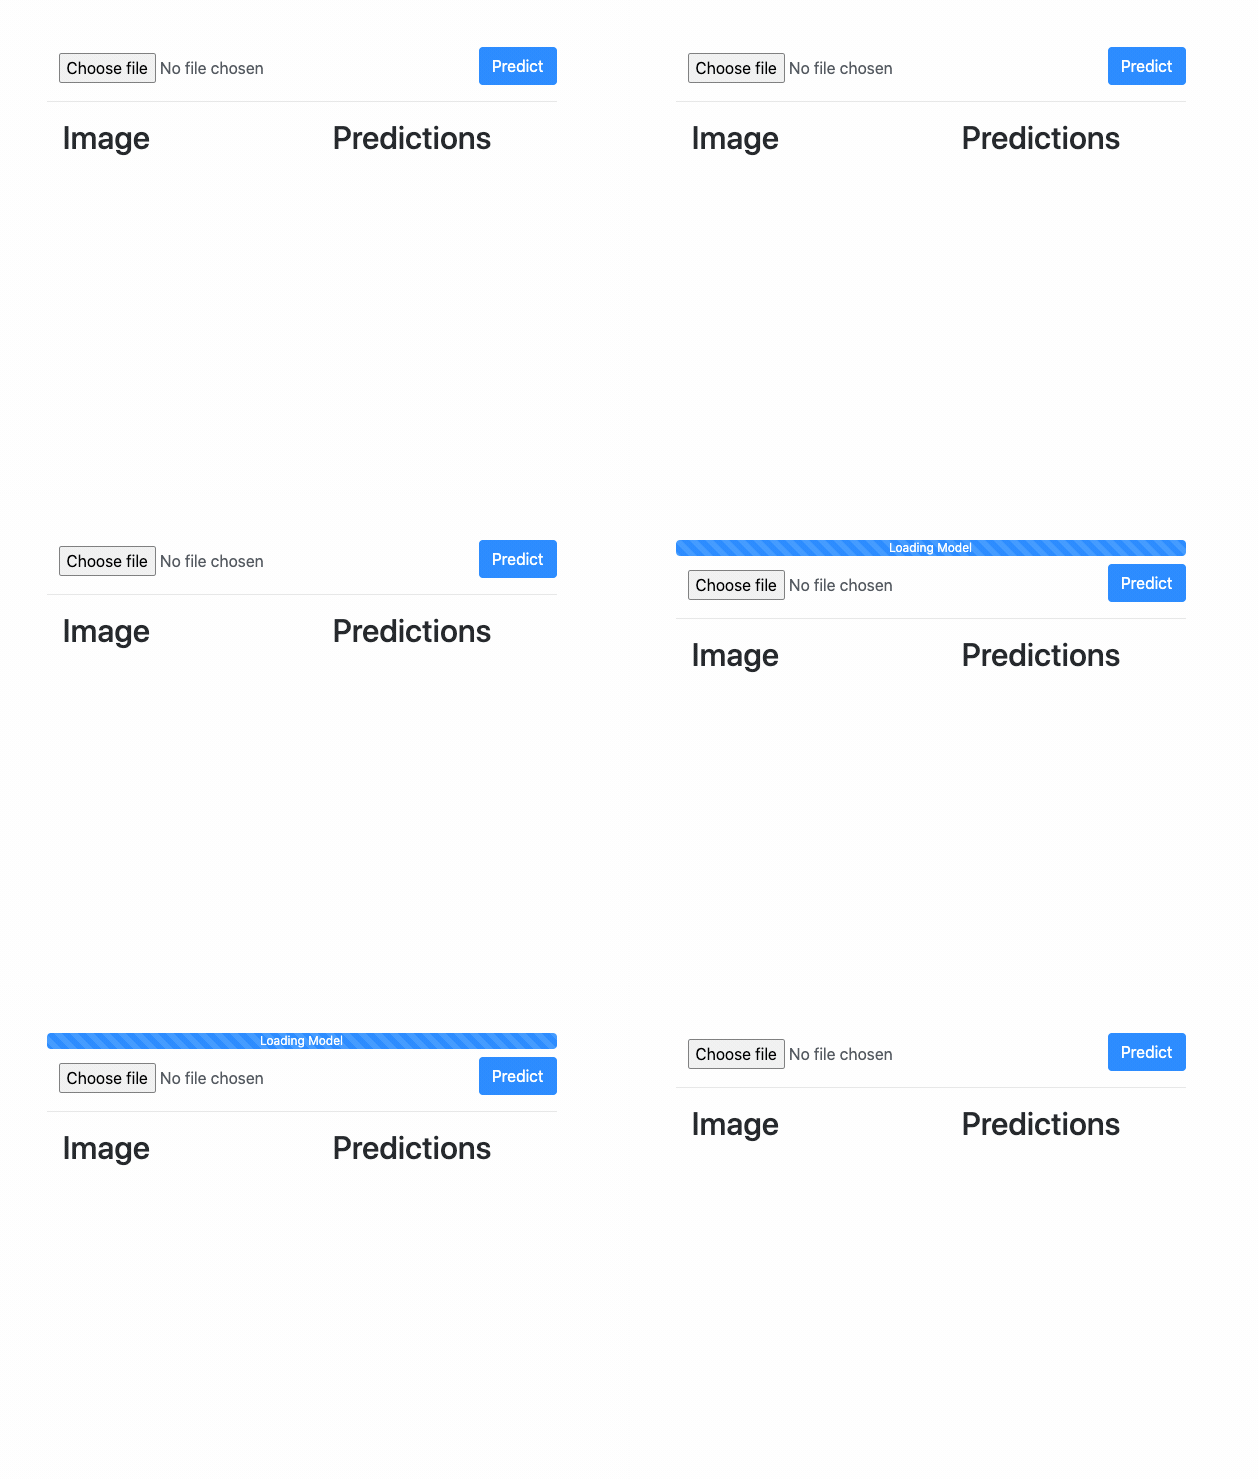
Next, we can choose a file and try to classify a fresh apple to see if the model has learned the training data:
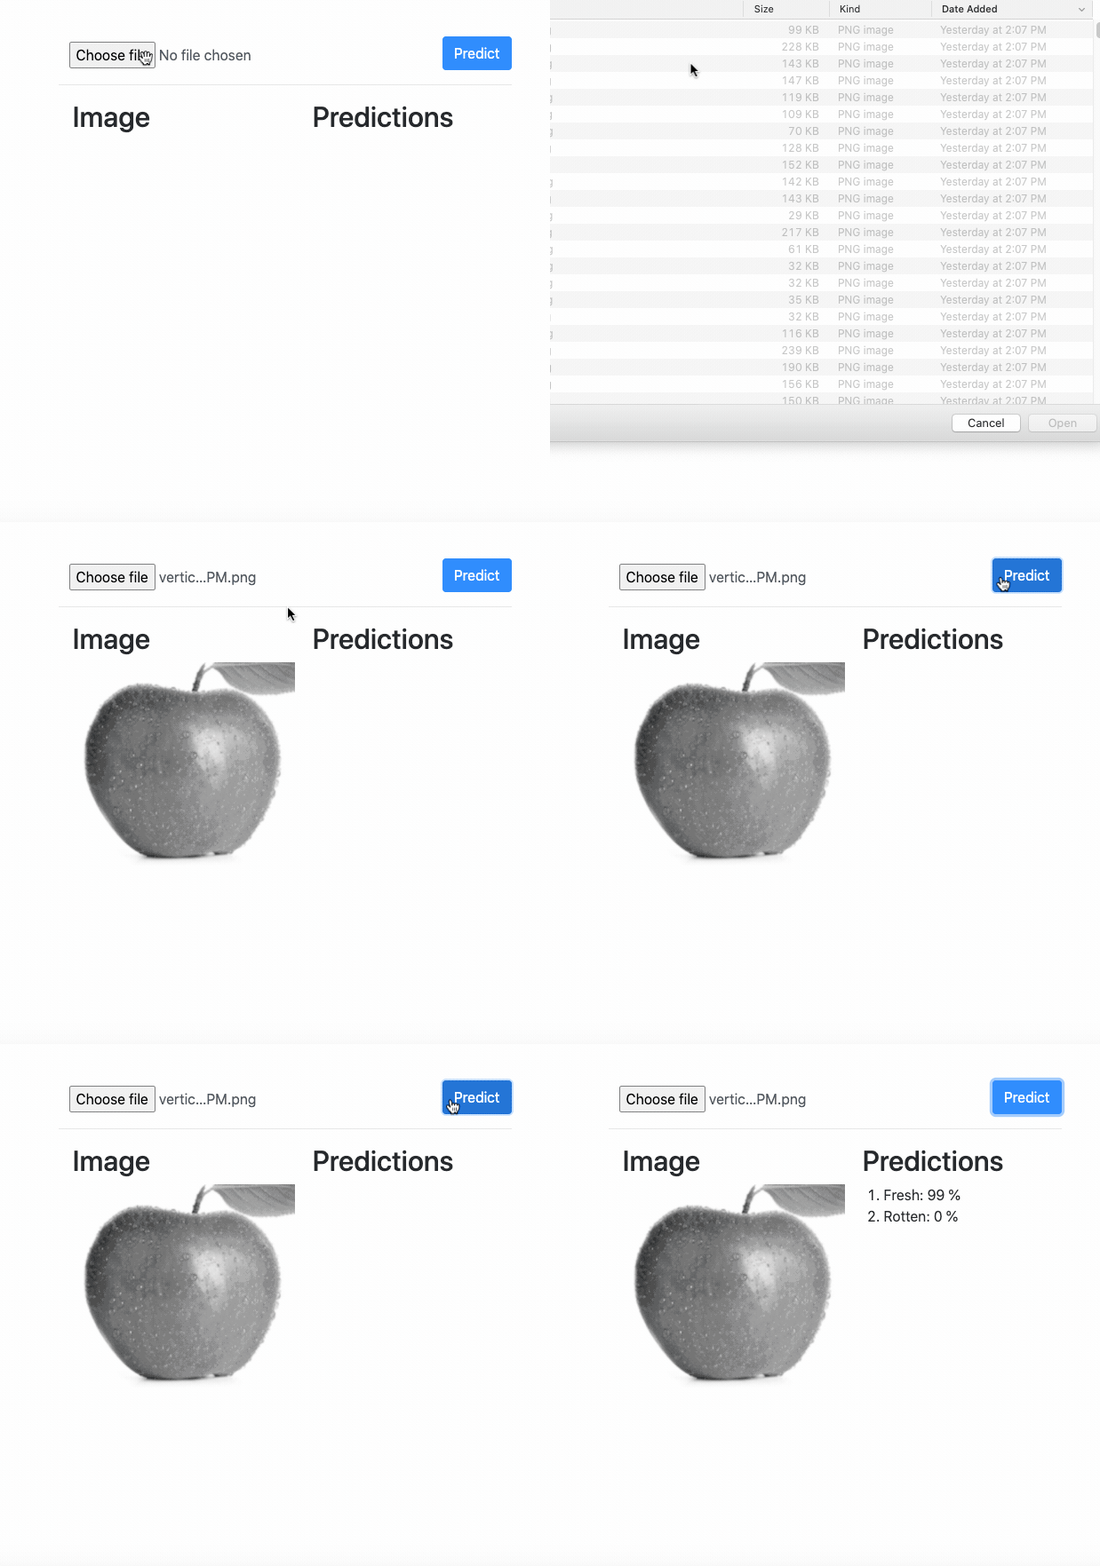
We can see that the result is 99% fresh and 0% rotten, which is the correct prediction.
We can also try the same for a rotten apple:
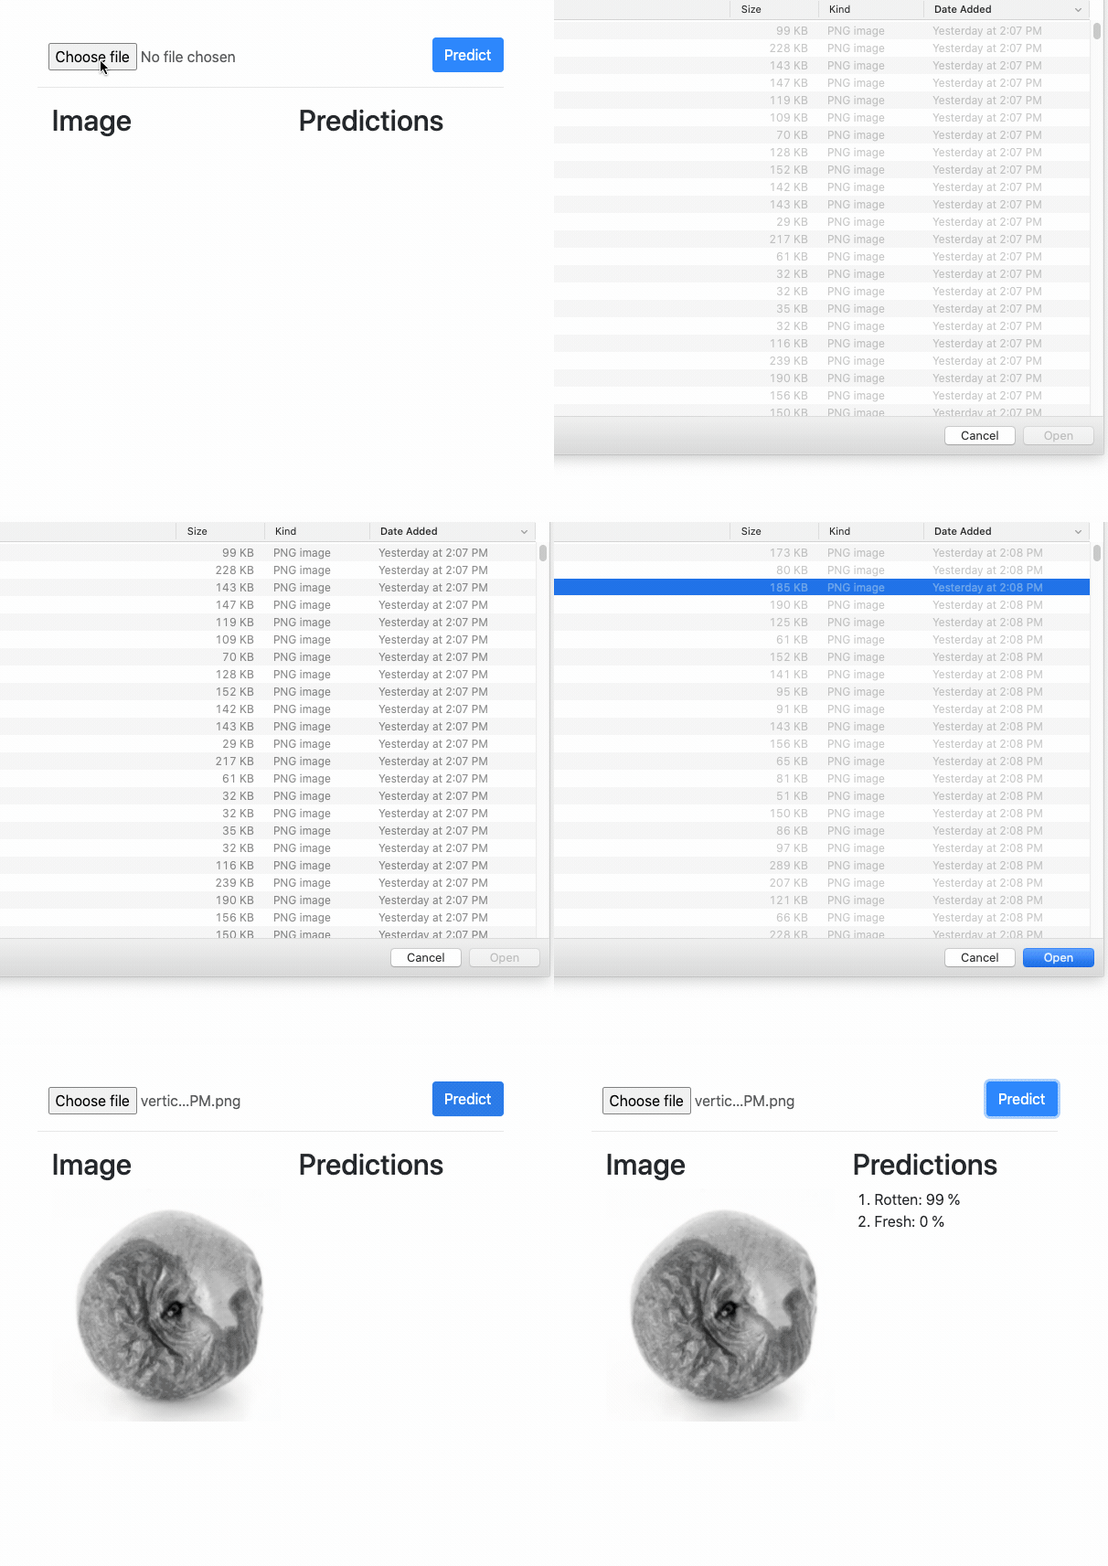
Now, we are going to perform testing using some random apple images from Unsplash. Hence, by taking a random apple image and providing it as input to our model gives the following result:
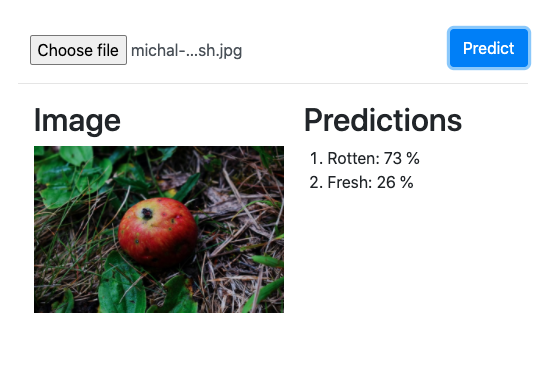
Here, we got 73% rotten and 26% fresh which seems correct if we look at the apple in the displayed image.
Now, let us try with the image which is less clear and small as well. Hence, we got the following result:
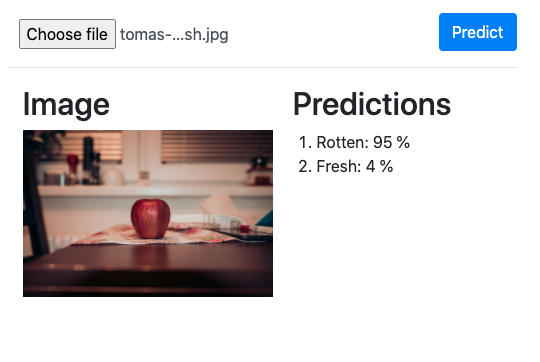
We can notice that the model gives horribly wrong predictions here. If we look at the apple in the image, it seems quite fresh. But the model predicts it like 95% rotten. This is not the model’s fault as we have trained using a compact algorithm with the images which were clearer and the apple itself took a large part of the space in the image. Thus, it could not predict the image in which the image of the apple was less clear and tiny.
Hence in order to make the model more efficient, we need to train it with images taking various dimensions into consideration as well.
This is just a quick model that was implemented in order to inspire and motivate you to learn about image classifiers on a browser using TensorFlow.js technology. You can surely improve the model as well as algorithm and predict more complex images.
Conclusion
In this tutorial, we learned how to use Microsoft Custom Vision to train and generate a simple image classification model to deploy as a browser-based application.
We used this trained model to classify between rotten and fresh apple in images. In order to classify these images, we used the TensorFlow.js module in the browser.
We can use the same configuration to train a model for different kinds of classification tasks (kinds of animals, plants, etc). The implementation of a web app using Node.js was also easy and simple to understand. No hardcore stuff here.
For the next step, you can pick other images to classify. You can make use of a normal food algorithm, select advanced training modules, gather more raw image datasets for training, etc. You can implement a model for identifying and classifying more complex target objects with more variables and offsets.
Peace out folks!

Comments 0 Responses