In this article, we’ll discuss how to increase these accuracy values, how to validate the model using a validation set, and examine overfitting and find a solution to this common machine learning problem.
Validating the model
Since we used only one dataset—i.e. the training dataset—to train the model, Create ML didn’t use all the images in the set to train, since it also requires a set of images for validation (or in other words, training on data the model hasn’t already seen).
In our example, Create ML bifurcated the training set to a 95%–5% split and used the remaining 5% for validating the model it created. Xcode playground console logs show the following:

In the upcoming sections, we’ll discuss methods to increase both training and validation accuracies.
Increase iterations
A very simple way to improve the accuracy of the model is to increase the number of iterations. Create ML has default iterations set to 10.
By increasing the number of iterations, the training time will increase, but the accuracy of the model will improve.
To try this, we need to stop the playground execution and start it again. Click on the disclosure icon and set the iterations to 30, as follows:
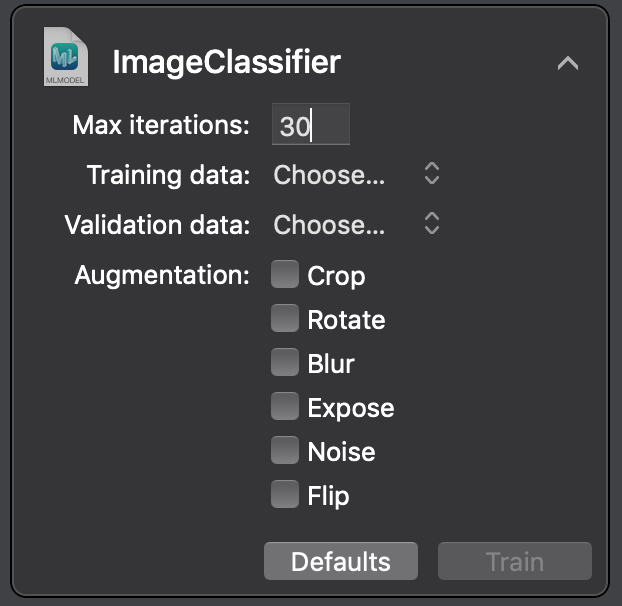
Then, drag the training dataset inside the playground to start training. You’ll notice an increase in the training time but improved accuracy, as shown in the following image:
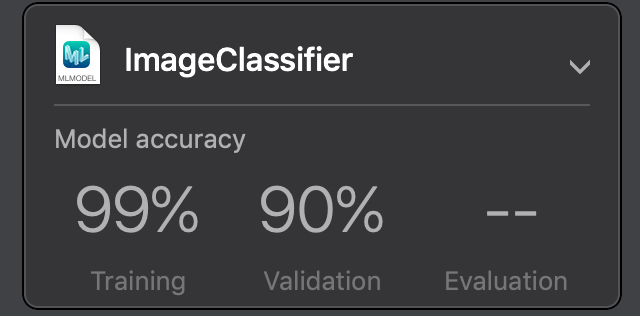
You might have noticed that with our model, the validation accuracy didn’t improve as much, but the training accuracy increased significantly. The reason for such behavior is that the 5% validation set used by Create ML might be too small to validate the model on previously unseen data.
But what is the difference between validation and training accuracy and which one should we pay more attention to?
Validation accuracy vs training accuracy
Training accuracy conveys that the model is still learning new details about the data while iterating, which makes it a useful metric, but not so useful when it comes to real world usage of our ML models.
On the other hand, validation accuracy matters more when using ML models models in an app with data that the model has never encountered. Validation accuracy determines how close an object is to what the model already knows.
When it comes to encountering new input data, overfitting isn’t the only reason for lower validation accuracy compared to training accuracy. It might also happen because of data discrepancies.
If training images are different from validation images in some fundamental way, then the model won’t achieve a good validation score. For example, if all the images in the training set were taken during the night, compared with training images taken during the day, then we should expect differences in accuracy values.
Separate validation set
In the previous section, we saw that increasing the iterations increased the training accuracy of out model considerably, but validation accuracy did not improve as much. Our speculation was to use a bigger validation set in order to increase the validation accuracy. Let’s try that now.
We need to stop the playground execution and start it again. Click on the disclosure icon and select the val folder, which contains validation images next to the validation data, as follows:
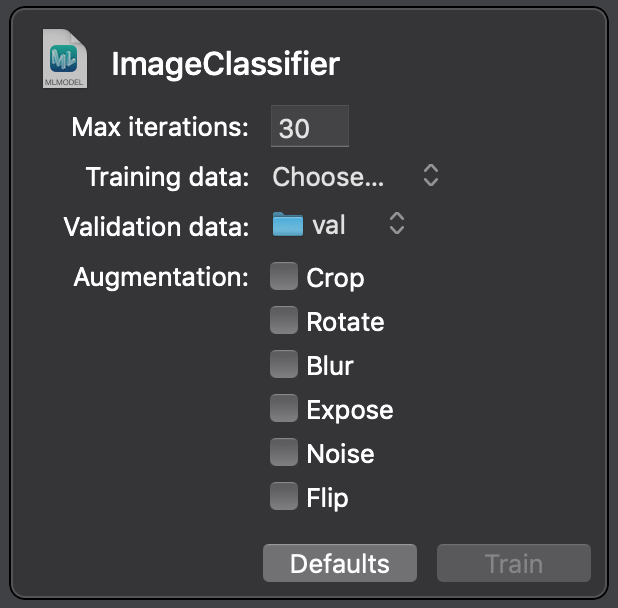
Set ‘Max iterations’ to 30 once again, and finally drop the training set inside the playground.
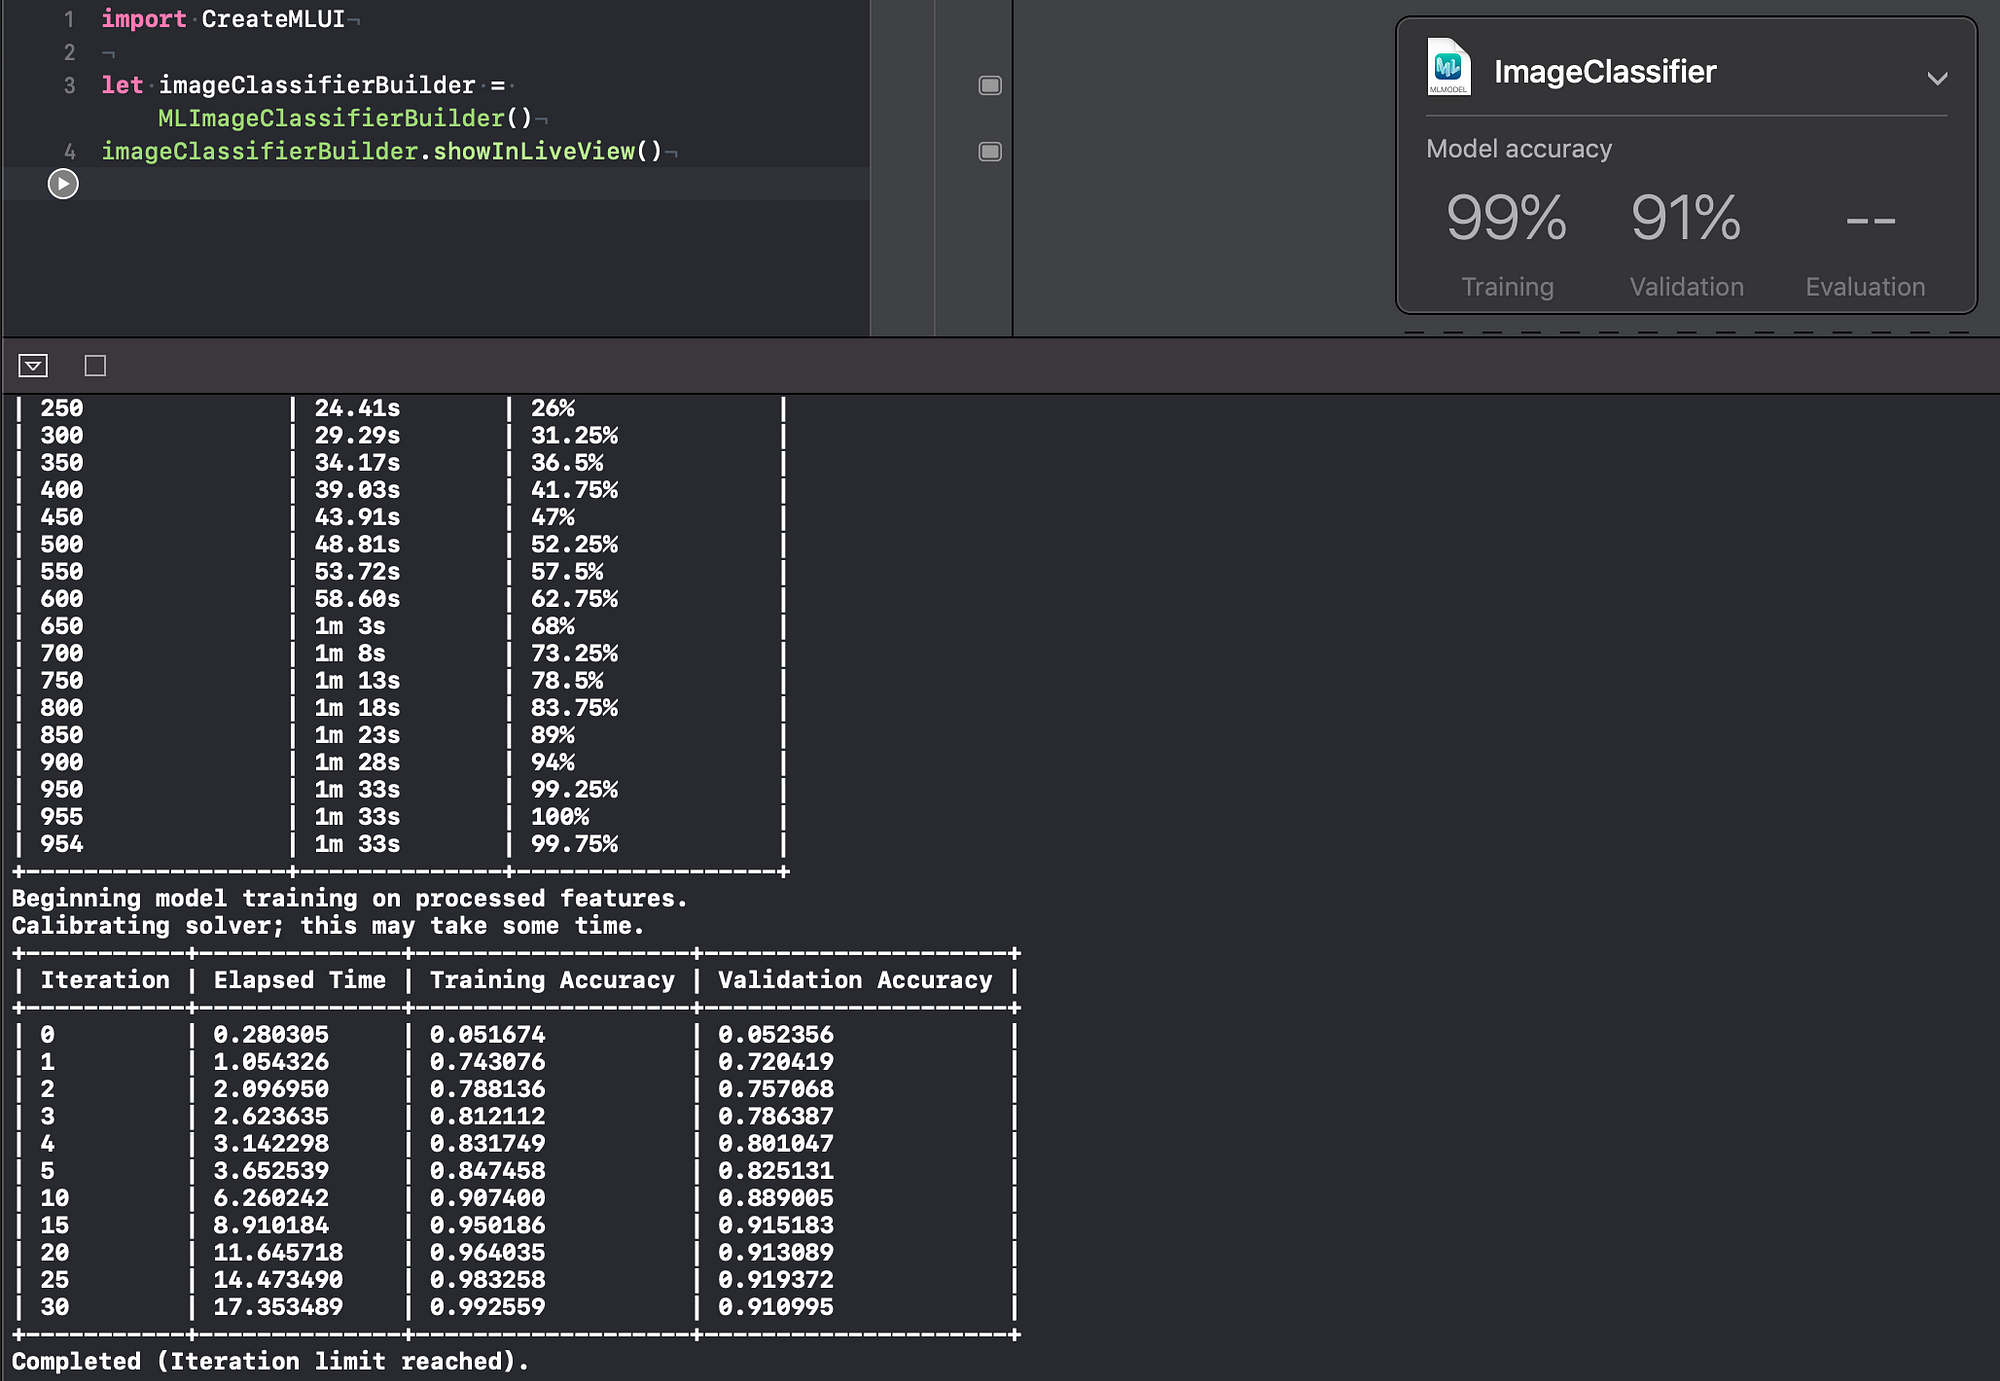
You’ll notice slightly improved values for validation accuracy, as shown in the image below:
No more 5% split for validation data
This time around, since we supplied a validation dataset, Create ML didn’t use a section of the training dataset to validate the model. It used 100% of the training dataset for just training and the newly supplied validation dataset for validating. Although to get this increased accuracy, you might have noticed a significant increase in the training time.
Even though we went through the extra effort of using a validation set, you might have noticed that validation accuracy has not improved significantly to reflect the level of training accuracy. This is an indication that the model may be overfitting.
Overfitting
In the previous section, we tried to increase the validation accuracy, but the results weren’t quite what we expected—this can be explained by the fact that the model is overfitting.
Overfitting is a very frequently used term in the world of machine learning, so let’s establish a quick definition:
Overfitting means that the model has started to remember specific training images, and because it’s hyper focused on the training data, it can’t generalize well to unseen data.
Let’s take the example of the following image for “candy”:

In the image, we see a kid wearing a black t-shirt enjoying a candy. Suppose the classifier learns a rule that says if there is a black blob in the image, then the class is a candy.
This is something we don’t want the model to learn. In general, a black blob has no correlation to a candy.
This is why the validation set of images shouldn’t also be used for training the model. Since the validation images are new to the model, it hasn’t learned anything about them. As such, we can determine how well our model generalizes to previously unseen data using a validation set.
Understanding model accuracy
The true accuracy of this particular model is 91%. That is the validation accuracy, and not the training accuracy, which is 99%. If you only look at the training accuracy, your estimate of the model’s accuracy can be too optimistic.
The problem that we’re facing right now is not to increase the validation accuracy in raw percentage points, but to minimize the difference between training and validation accuracy. Otherwise, the model might have learned too many irrelevant details from the training set.
Overfitting is one of the most prevalent issues with deep learning models, but there are several ways to deal with it.
The number one strategy to deal with overfitting is to train with more data, but since we have a very limited set of data, for the purpose of this article we are constrained on this front.
Another approach to solve overfitting is to augment the image dataset by cropping, flipping, blurring, sheering, or changing the exposure of images.
Data augmentation increases the dataset and reduces the amount of irrelevant features in the dataset. For example, take the following image of an apple”
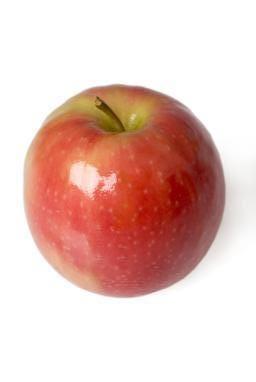
Original image of apple
We don’t want the model to learn irrelevant patterns for this image while also making sure that even if the image is upside down or turned left or right, the model still treats it as an apple, which will boost the overall performance of the model.
So in our example, we augment the image of apple shown above by rotating it and then supplying it to the model as shown in the image below:

Augmented data set
Augmenting the dataset isn’t as good as having more images, and we still need extra time to process the augmented images. But we also won’t have to keep searching for useful images. Let’s try augmenting our dataset in our Xcode playground.
Augmenting the dataset
To start augmenting, we need to stop execution of the playground and start it again. Increase the Max iteration count to 30 as earlier, choose the val folder, and in addition to this, check the augmentation options. The more augmentation options you choose, the more time model will take to train and validate. For our example, lets select the following options and then start training:
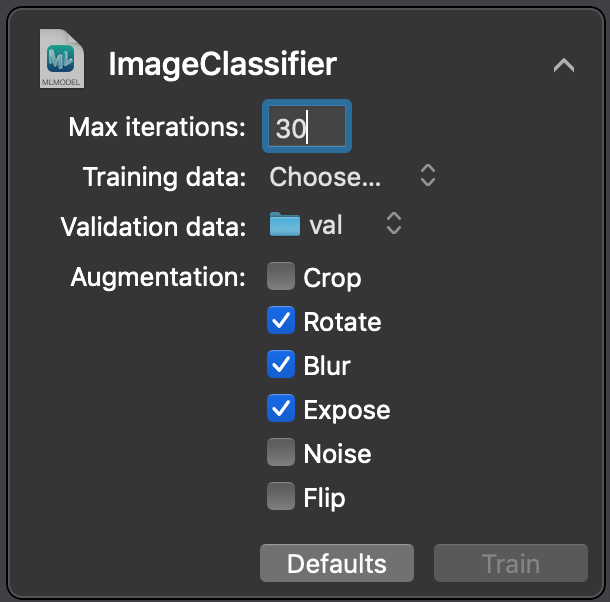
The augmentation options are listed from greatest to least effective, which means if we have more training time at our disposal, we can use crop as an augmentation option.
With that done, you’ll notice that the validation accuracy hasn’t changed much, but now the training accuracy is much closer to it, as shown in the figure below:
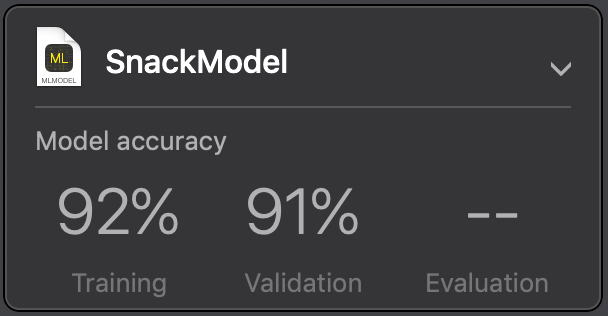
This means that we are still overfitting a bit, but not that badly.
Extracting the trained model
Once the playground has finished executing, we can go ahead and save the trained model by clicking on the disclosure options and choosing the save option, as shown in the image below:
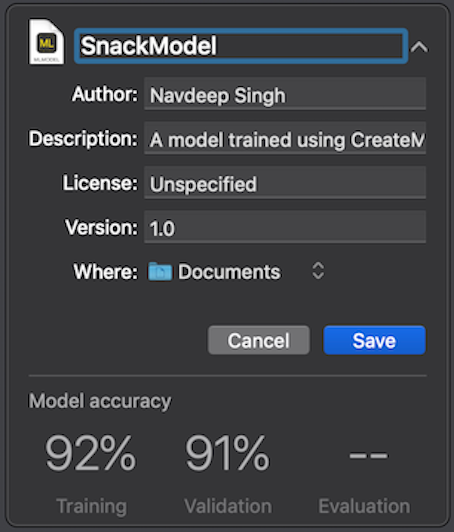
The resulting file is very small:
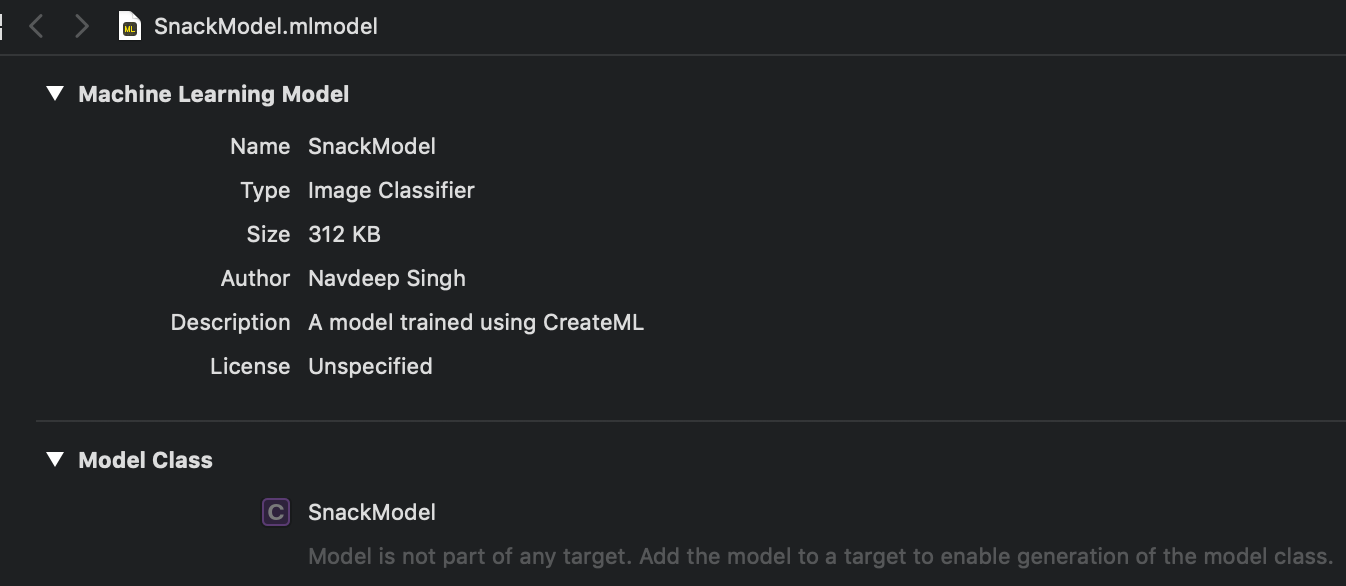
Model Size — 312KB
A generic Core ML model normally combines a feature extractor with a logistic regression classifier as different layers.
We need both the layers in our example, but we don’t need to add feature extractor as a separate layer in our model. This is because VisionFeaturePrint_Scene is already installed as part of iOS 12, 13, and probably in all the upcoming versions. So our model is left with only one layer, i.e. the logistic regression classifier, which allows the model size to be this small.
Once we have the model, we can now use this in our custom app where we’ll use it for image classification. We’ll explore these implementation details in upcoming articles.
For other updates you can follow me on Twitter on my twitter handle @NavRudraSambyal.
Thanks for reading, please share it if you found it useful 🙂

Comments 0 Responses