

In a previous article — Build iOS-ready machine learning models using Create ML—we learned how to create and train our own Core ML model using Xcode.
Then, we learned how to fine-tune these custom models to provide accurate results. For that, check out the following tutorial: Create ML — Increasing ML model accuracy.
In this tutorial, we’ll use the model that we created in the previous two tutorials and create an application that will use image classification to classify the food items according to 20 classes that were used for training the data.
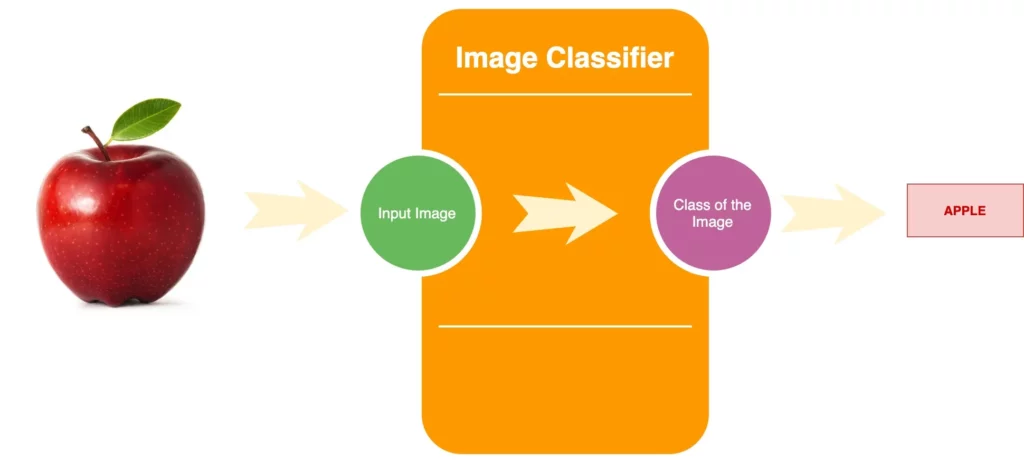
The ML model that we have created is a multi-class image classifier. We’ll feed an input image to our model, and the output will be the class to which that image belongs. For example, if we expose an apple to the model, it should correctly predict that it belongs to the class “apple”.
Since our model can classify 20 different types of food items, we’ll use it to classify similar objects in the real world with our app.
Multi class Image Classifier
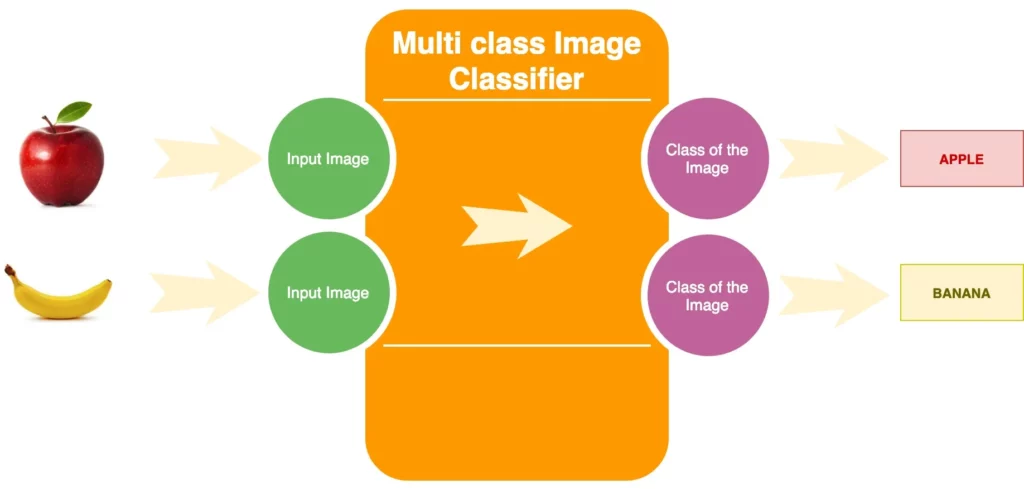
In the example shown above, our multi-class image classifier will either predict an Apple or a Banana for the given input image (or, hypothetically, any of the other 18 classes).
Images can be classified in many ways using different types of image classifiers, but deep learning provides the best results by far. The recent hype around AI and ML can very well be attributed to deep learning’s success with image classification.
Setting up the project
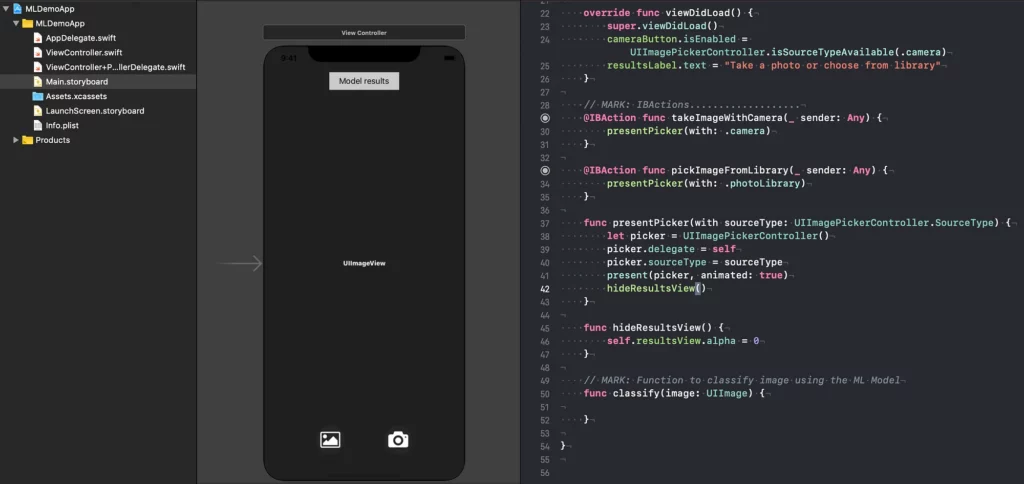
We can start by cloning the repository to get the starter project here. The demo starter project has a very standard ViewController that allows us to either pick images from the Photos library or capture from the camera (needs to run on-device).
Once you clone the code, you can open the project:
In order to start working with machine learning on an IOS device, we need to start with a trained model. Since we want our demo app to predict the class to which an image belongs, we’ll need a model that knows about the different classes. Luckily, we’ve created and saved one in the previous tutorial — Create ML — Increasing ML model accuracy—using CreateML.
The Model
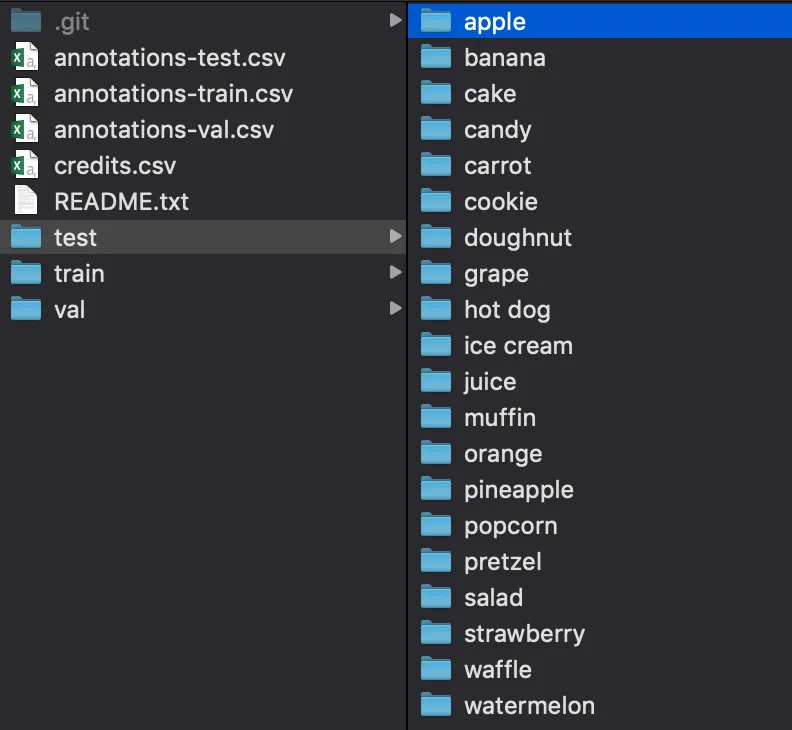
The model that we’re going to use in our demo app recognizes 20 different categories of food items, as discussed while we trained the model.
Categories used in the testing set:
Prediction process
The model that we created in the previous tutorials doesn’t predict just the labels for the food items; instead, it works on a probability distribution, where each classification is assigned a probability value.
In our case, the probability distribution is a list of 20 numbers because the model has 20 classes.
For any given image, the model will try to predict the result depending on the top two matches for the image.
Adding models to the app
It’s really easy to add models to our app using Core ML. The model is packaged in an .mlmodel file, which contains the structural definition of the model and the weights it’s learned.
We can start by dragging the model into our app, as shown below:

Since this is an image classifier, we have only one input (i.e. a colored image), and it must be 299 pixels in each dimension.
On the other hand, for the outputs, we have two. The first is the dictionary that has key value pairs with probabilities of each category, and the second gives us the category with highest probability.
Model Description
We can take a look at the model description by clicking on the .mlmodel file inside the project navigator:
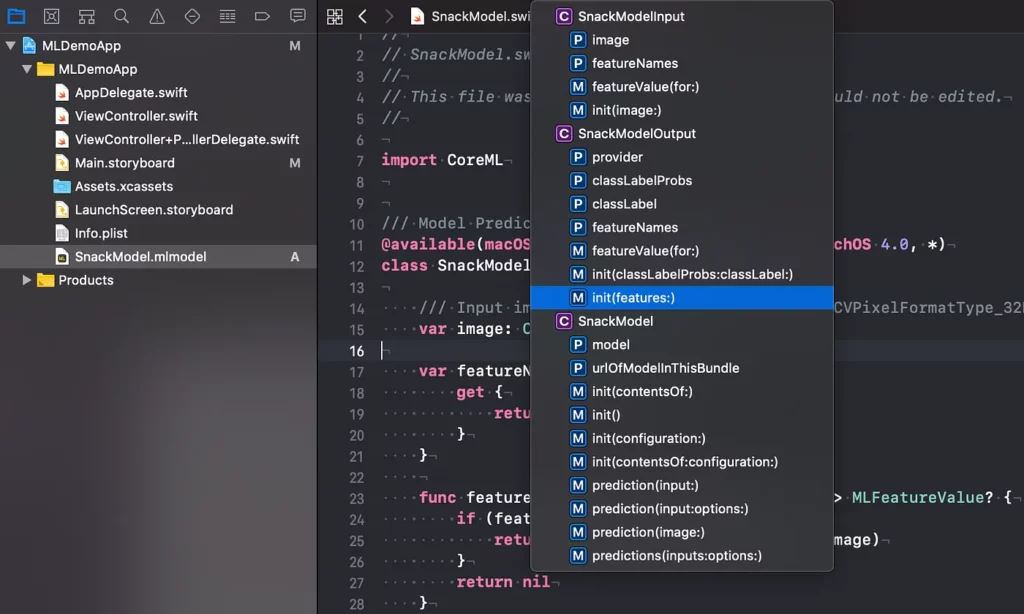
As soon as we add the model file to the project, Xcode automatically generates a bunch of Swift source code that makes it easy for us to use the functionality offered by the model in our app. As seen in the image above, generated classes include input and output classes. We also have a class named SnackModel that has the MLModel property, which has prediction methods for making classifications.
The Vision Framework
Apple introduced it’s Vision framework with Core ML in IOS 11.
Vision provides functionalities like detecting squares in images, detecting faces and moving objects, and more. It makes it easy to run Core ML models that take images as input. Combined with other vision tasks, we can then easily create an efficient image processing pipeline.
For example, in an app that detects deceases in a given plant by looking at images of that plant’s leaves, we can build a vision pipeline that first detects a leaf in the image and then runs a Core ML classifier on just that leaf to predict the type of decease or deficiency that the plant might have.
Using Vision in our app
We’ll use Vision to solve some problems that need to be addressed before our model starts predicting. In this section, we’ll identify the problems and discuss how Vision will help us solve them:
- As discussed earlier, our model requires a colored image and it must be 299×299 resolution, but images from the Photo library are usually much larger than that and are not square in size. We’ll use Vision to crop and size the images to fit the requirements of our model.
- Our model also requires the input image to be a CVPixelBuffer object, but the UIIMagePickerController that we’re using in our app gives a UIImage instead. Vision can do the conversion for us so that we don’t have to worry about types of input objects.
- Vision can also rotate the images so that they are always right-side up and match the color space of the device.
Implementing the Vision framework
Since we need Core ML and Vision, we’ll first need to import them in the file.
We’ll need a VNCoreMLRequest object that we’ll reuse for every image that we want to classify.
lazy var vnRequest: VNCoreMLRequest = {
        let vnModel = try! VNCoreMLModel(for: SnackModel().model)
        let request = VNCoreMLRequest(model: vnModel) { [unowned self] request , _ in
            self.processingResult(for: request)
        }
        request.imageCropAndScaleOption = .centerCrop
        return request
}()
VNCoreMLRequest requires a VNCoreMLModel to initialize. VNCoreMLModel bridges the gap between model representations and the two frameworks.
We’ll use the request to perform different tasks like scaling the image down to the required square size, and imageCropAndScaleOption tells the request how to do that.
It’s ideal to know the training process when writing such code since that will help us figure out the correct imageCropAndScaleOption.
With .centerCrop, Vision first scales the image so that the smallest size is the required pixel dimension, and then it crops around the centre square. Hence, it’s important that the object of interest is in the center of the image.
Let’s classify
Since we have the request object, we can write our classification code inside the classify(image: UIImage) {} method of the ViewController as follows:
// MARK: Function to classify image using the ML Model
func classify(image: UIImage) {
    DispatchQueue.global(qos: .userInitiated).async {
        let ciImage = CIImage(image: image)!
        let imageOrientation = CGImagePropertyOrientation(rawValue: UInt32(image.imageOrientation.rawValue))!
        let handler = VNImageRequestHandler(ciImage: ciImage, orientation: imageOrientation)
        try! handler.perform([self.vnRequest])
    }
}
While taking pictures with an iOS device, images are stored in landscape orientation since that’s the native orientation of the camera sensor.
Most image classification models expect to see the image in a specific orientation, and if we pass in an image that’s not what the model expects, then the model might not give accurate results. This is why we need to specify imageOrientation to Vision. Since performing the request is an expensive operation, we’re performing it on the background queue, as shown in the code below.
VNImageRequestHandler’s perform() method takes in an array of VNCoreMLRequests so that we can perform multiple requests on an image, but in our example we have created a single element array.
Next, we’ll process the results for VNRequest with the following code:
func processingResult(for request: VNRequest) {
    DispatchQueue.main.async {
        let results = (request.results! as! [VNClassificationObservation]).prefix(2)
        self.resultsLabel.text = results.map { result in
            let formatter = NumberFormatter()
            formatter.maximumFractionDigits = 1
            let percentage = formatter.string(from: result.confidence * 100 as NSNumber)!
            return "(result.identifier) (percentage)%"
        }.joined(separator: "n")
        self.showResultsView()
    }
}
Since our model tries to classify an image among 20 categories, we want to show display only the top two predicted classes in the label. Build and run the project, and if you click and select an image of a cake, the app will predict the top two matches and display in the label as shown in the image below:
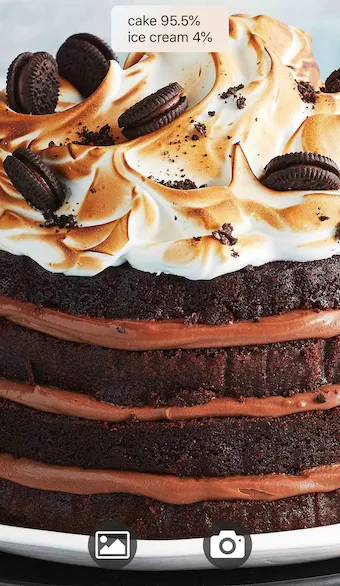
Our app now predicts that the probability of this image being a cake is 95.5% and 4% an ice cream.
Those who are aware of the probability distribution graph know that the sum total of probability is always a 100%. But here we only reach 99.5%. That’s happening because we only picked the top 2 results after classification and hid the remaining results (hence the remaining .5%).
You can find the finished project here — MLDemoFinished
For other updates you can follow me on Twitter on my twitter handle @NavRudraSambyal.
Thanks for reading, please share it if you found it useful 🙂
Comments 0 Responses