
Barcodes are everywhere. They provide a uniform interface for machines to identify real world items.
Thanks to the decimal code underneath the bars, barcodes are also interpretable by humans, which makes them wildly used virtually everywhere.
Barcodes are, perhaps surprisingly, a form of binary code. They consist of multiple lines stacked vertically. If a line is black its value is 1, where blank stands for 0.
Thicker lines are just series of sequential 1’s.
Traditionally, laser scanners are used to scan barcodes. However, with the rise of smartphones and the rapid improvements in camera resolutions, we can nowadays read the barcodes without a scanner — using a camera.
This might be useful in a supermarket where customers can scan their products themselves. Or in factories where employees can get additional information about a part using only their phone.
In this tutorial, I’m going to show you how to make a barcode reader using Swift and Apple’s awesome Vision framework.
The app will scan barcodes and when a match is found, it will display information to the user.
We start by decoding the barcode from raw camera input. After that, we check for the payload in a product catalog.
Finally, we display information about a product to the user.
Because I wanted to focus on reading and using the payload, I already created a starter app, which is available on my GitHub.
It displays the live camera view on the screen and also has an extendable product catalog—more on that later. Don’t forget to star it 😉
Table of contents
Introduction to Vision
Vision is Apple’s relatively new framework for working with computer vision. In case you’re new to the Vision framework, this image illustrates how most of Vision works:
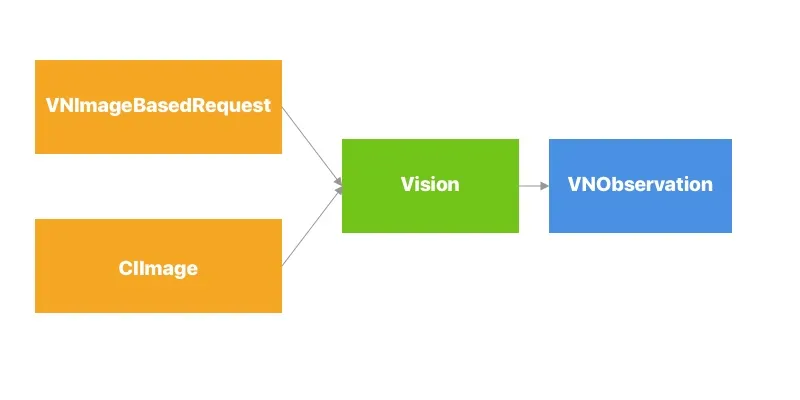
We start by defining some subclass of VNImageBasedRequest, which basically is a way to tell Vision what data we want to get out of the image. A request could be a VNClassifyImageRequest or a VNDetectBarcodesRequest, for example.
The input must be of type CIIamge (a CoreImage-image, similar to a UIImage). We give both objects to Vision and tells it to perform the request on an image.
Vision will then return some subclass of VNObservation, depending on the input.
Making a barcode request
Start by importing Vision at the top of ViewController.swift:
import VisionThen we need to define our request—in this case a VNDetectBarcodesRequest. Because we don’t want to initialize the request until we’re using it, we’re defining it as a lazy variable (you can read more about those here).
At initialization we already provided the completion handler that will be called when the request completes. In the handler, we’ll first check for any errors, and potentially display them.
Finally, when we’ve determined that there are no errors, we’re ready to update our view controller with the result.
lazy var detectBarcodeRequest: VNDetectBarcodesRequest = {
    return VNDetectBarcodesRequest(completionHandler: { (request, error) in
        guard error == nil else {
            self.showAlert(withTitle: "Barcode Error", message: error!.localizedDescription)
            return
        }

        self.processClassification(for: request)
    })
}()
Xcode probably complains that the method processClassification(for:) doesn’t exist yet, so let’s add a placeholder.
// MARK: - Vision
func processClassification(for request: VNRequest) {
    // TODO: Extract payload
}
The starter project provides us with a UIImage captured from the live video stream when the user taps the shutter button. As I mentioned earlier, Vision expects CIImages so lets convert it. Replace // TODO: Process image. with:
// Convert image to CIImage.
guard let ciImage = CIImage(image: image) else {
    fatalError("Unable to create (CIImage.self) from (image).")
}
Now that we have a CIImage-image, we can use this to make the actual request. Because the request can be quite resource-intensive to make, we perform the request on a background thread — keeping the UI snappy.
Note that performing a request might throw errors. If it does, we simply show an alert to the user.
// Perform the classification request on a background thread.
DispatchQueue.global(qos: .userInitiated).async {
    let handler = VNImageRequestHandler(ciImage: ciImage, orientation: CGImagePropertyOrientation.up, options: [:])

    do {
        try handler.perform([self.detectBarcodeRequest])
    } catch {
        self.showAlert(withTitle: "Error Decoding Barcode", message: error.localizedDescription)
    }
}
Once Vision finishes, it automatically calls the completion handler we defined earlier. Let’s implement that so we can see some results.
Extracting the payload
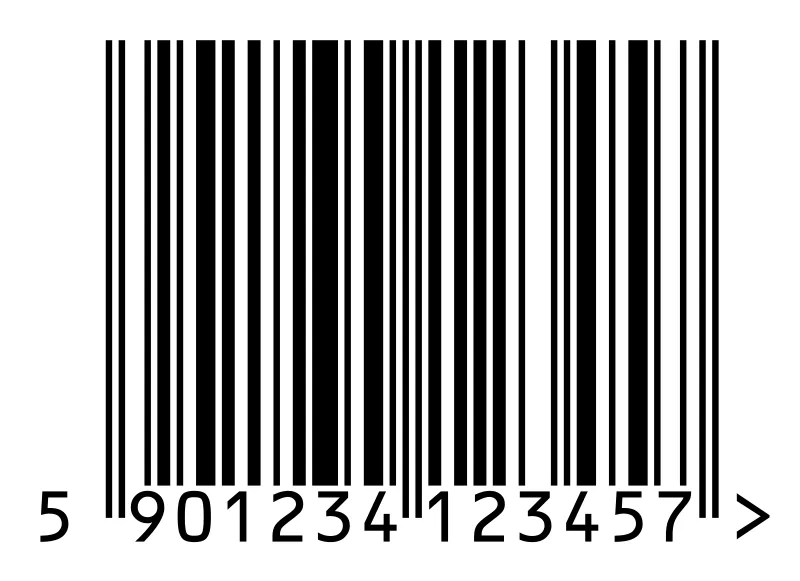
The string of numbers underneath the bars are the payload for the barcode. To make it easier for humans, they’re represented as decimal values. The bars contain the same payload but in binary form.
A VNObservation doesn’t just return a single result, but an array of them. The reason for this is that sometimes Vision isn’t sure about what the correct response is.
This is often the case in object detection applications. Luckily, the results are filtered in ascending order based on confidence score. Since we’re only interested in the best result, we can just grab the first result.
Let’s implement the processClassification(for:) method, which contains just a placeholder at the moment. We’ll also have to switch back to the main thread because we’re working with UI again.
DispatchQueue.main.async {
    if let bestResult = request.results?.first as? VNBarcodeObservation,
        let payload = bestResult.payloadStringValue {
        self.showInfo(for: payload)
    } else {
        self.showAlert(withTitle: "Unable to extract results",
                       message: "Cannot extract barcode information from data.")
    }
}
Depending on the image, there may or may not be a barcode present. If there is a barcode, Vision might fail to recognize it. Therefore, we have to carefully unwrap the results, and we show an alert to the user if we don’t get any (good) results.
The product catalog
If everything has gone well, you’ll now be able to read barcodes and do whatever you want with them.
You probably don’t want to show only the payload to the user—they can read it themselves after all—but instead some kind of information about the product attached to the barcode.
Because this tutorial is focused on Vision, I went ahead and already implemented a ProductCatalog struct, which serves as a “database” abstraction layer.
It loads the data from ProductCatalog.plist (which by the way you can add your own data to) and makes it searchable.
The Product struct contains information about the product. If you’re interested, please take a look at how those structs are implemented.
The public API of the ProductCatalog is simple:
if let product = ProductCatalog().item(forKey: payload) {
  // do something with the product
}
Let’s start by defining a product catalog at the top of the view controller:
let productCatalog = ProductCatalog()We can now use it in our view controller as follows:
private func showInfo(for payload: String) {
    if let product = productCatalog.item(forKey: payload) {
        print(payload)
        showAlert(withTitle: product.name ?? "No product name provided", message: payload)
    } else {
        showAlert(withTitle: "No item found for this payload", message: "")
    }
}
Note that we also print the payload to the console. This may be very convenient when adding new products to the catalog (you can just copy the code), and when debugging (so that you can make sure the code gets read correctly).
If you run the app on your phone, you’re able to scan barcodes. The app will check if the product catalog contains a product with this payload, and if it does, it will display an alert with details about the product.

If you don’t happen to have a 33cl can of Coke at hand, here’s an image you can use instead. You can add any product of your own to the plist file—just add the payload as a key, and a name for the value.t
Conclusion
As you’ve seen, it’s super easy to work with barcodes in Swift thanks to Apple’s Vision framework. You can find the finished project in the here on GitHub.
If you have any questions or comments, feel free to reach out on Twitter or email me directly at rick_wierenga [at] icloud [dot] com.
Comments 0 Responses