In the first part of this tutorial series, you learned how to train a recommender system that can suggest books for users based on their history/interactions with those books.
In the second part, you learned how to convert your trained model, and then embed it in a web application built in JavaScript. This allowed you to display books to users, as well as display recommended books in the browser.
In this third and final part, you’ll learn how to deploy your application to the cloud using Google Firebase, an efficient platform for building scalable applications.
Table of Content
- Introduction to Firebase
- Signing into Firebase and Creating a New Project
- Installing Firebase CLI in your Local Machine
- Setting up your Firebase Project Locally
- Testing and Deploying your Application to Firebase
Introduction to Firebase

Firebase is a mobile and web application development platform owned by Google. It has and provides numerous tools and APIs for building great apps, whether mobile (iOS, Android) or web based.
Firebase is incredibly popular, and is in use in about 1.5 million apps. Here are a few reasons why:
- Developers can build applications faster without worrying about infrastructure. This gives you time to focus on the problem and your users.
- It’s backed by Google and built on the infrastructure powering Google itself. This means that it can automatically scale to extremely large applications.
- Access to numerous services that can work individually or synchronously together. This gives developers enough tools and services to build, deploy, manage, and scale their products.
Below are some services offered by Firebase:
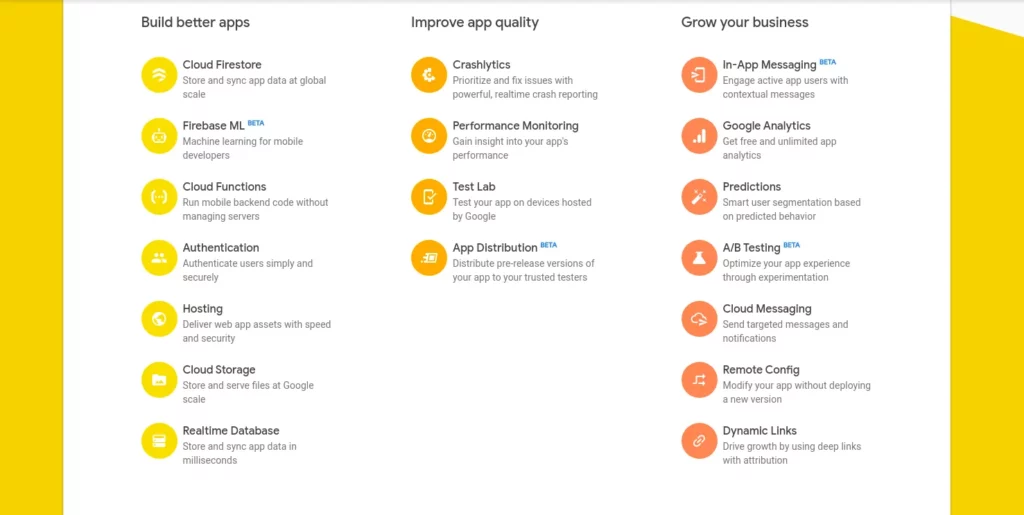
Signing into Firebase and Creating a New Project
In order to use Firebase, you must create an account. If you have a Gmail account, then you can easily signup using your email address.
- Navigate to the page ‘https://firebase.google.com/’ and click on Sign in. Once you’re signed in successfully using your Gmail account, you should see a Go to console button at the top right corner next to your account name.
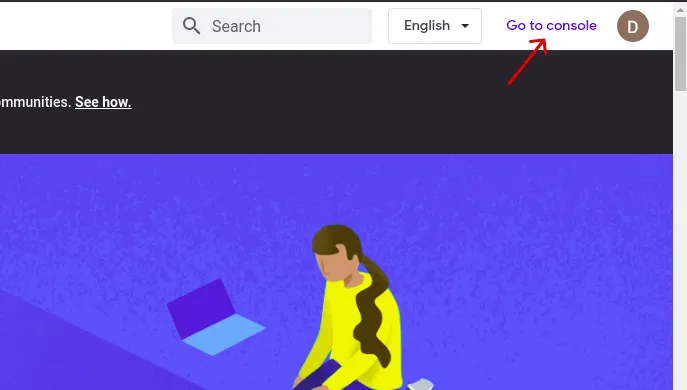
Clicking on this button will take you to your project page. Since this is your first time signing up, you should see a Welcome to Firebase text, and also a button to Create a Project.
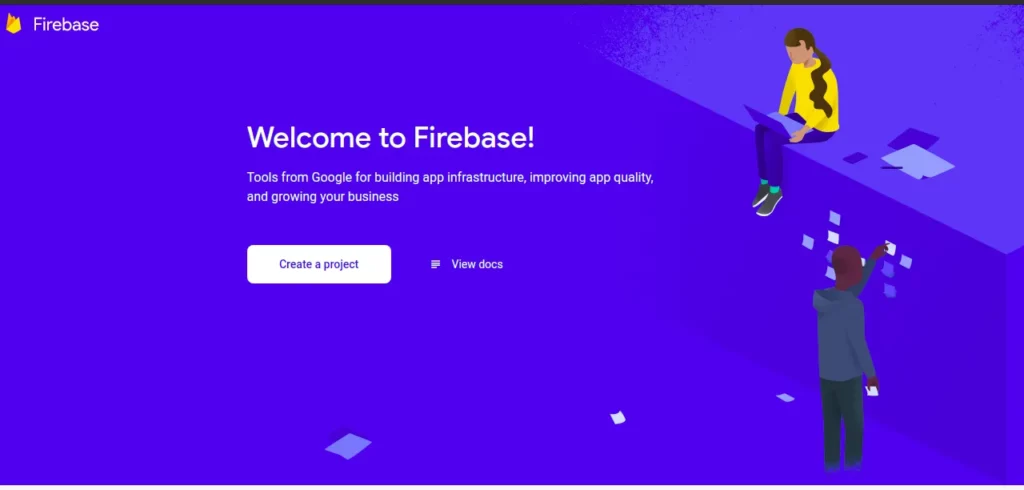
Click on that button, and then add your project name. I’ll call mine book-recommender. Notice that Firebase assigns an ID using your project name. This ID is unique to your project across Firebase and will be used to access your application after deployment.
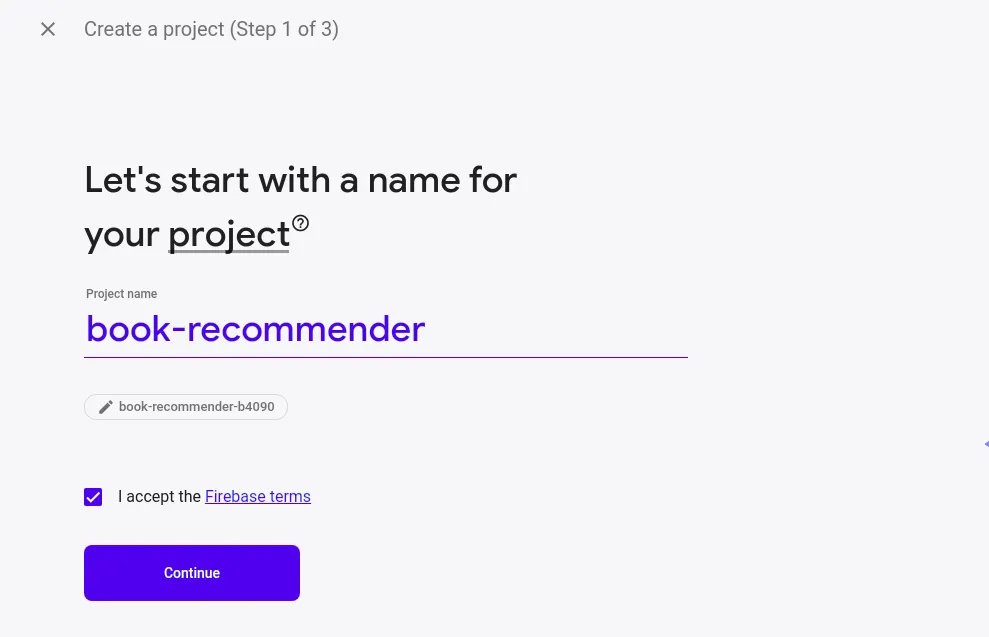
Clicking continue takes you to the next step, where you’re offered free analytics collection for the project. This is useful if you want to track logs, crashes, and reporting on your app. Accept and continue to the next page.
In the next step, you can decide to share your app analytics data with Google (or not). And lastly, accept the terms and conditions.
When you’re done, click on Create Project and wait for it to provision resources for your project. On clicking Done, it takes you to your new project page:
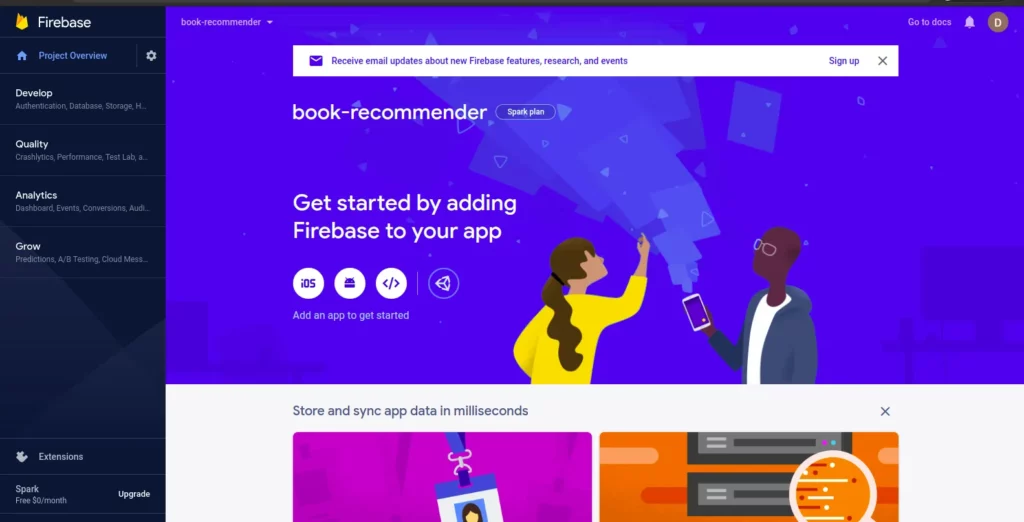
Now that you’ve created an account on Firebase and also created your project, you’ll move on the next section, where you’ll install the Firebase CLI (Command Line Interface) on your local machine.
Installing Firebase CLI in your Local Machine
The Firebase CLI is a command-line tool that can be used on your local machine to interact with Firebase. It provides a variety of tools for managing, viewing, and deploying Firebase projects.
If you have Node.js and NPM installed in your machine, then you can easily install it by opening a terminal/command prompt and running:
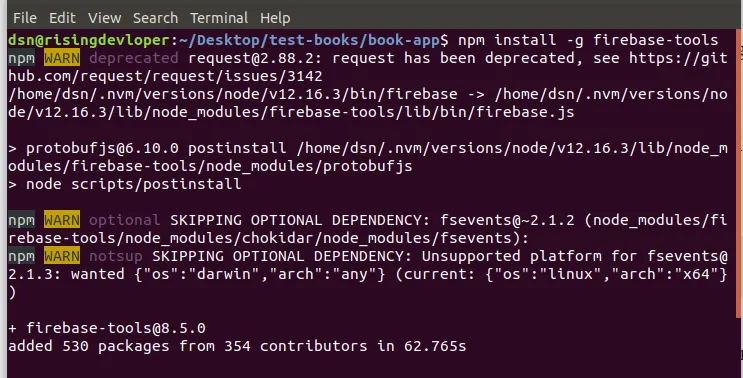
The command above installs Firebase globally. This means it can be accessed from anywhere in your machine. If you need to install it for just this specific project, then run the command above without -g.
Next, you’ll set up your recommender application to use Firebase.
Setting up your Firebase Project Locally
To set up Firebase locally, you need to first login and initialize a project. In the terminal/command prompt run:
This should open a login window in your default browser. Enter your email and password, which you used to sign up earlier, and click allow.
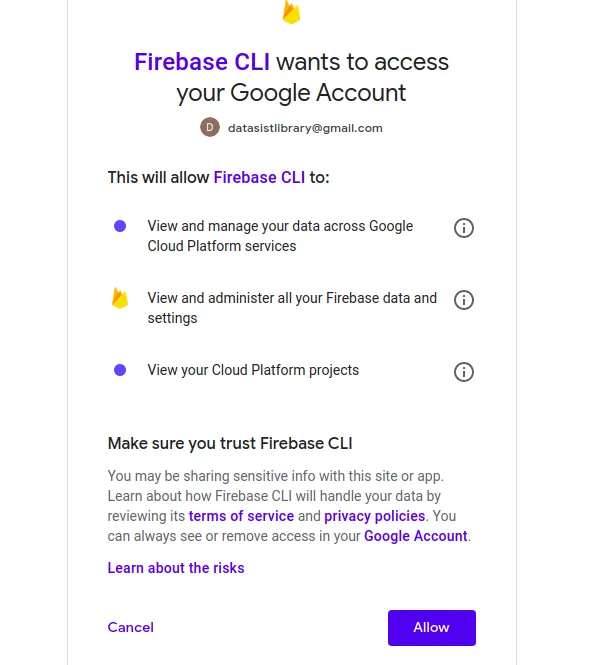
On clicking Allow, your terminal should display a success message. Now you’re all ready to start interacting with your Firebase projects.
To initialize a project locally, also in the terminal, run the command:
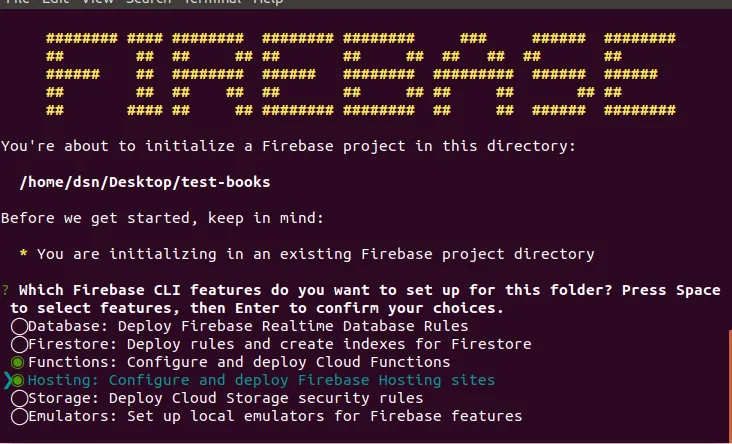
It informs you that you’re trying to initialize a new Firebase project in the current directory, and asks you to select features you want to control from the CLI in this project. We’ll be using just Functions and Hosting in this project, so use your arrow keys to select each one, and click on the space bar to highlight them before clicking Enter to accept.
Next, it asks you to associate this local project with a Firebase project. Since you already created a book-recommender project on Firebase, go ahead and select Use an existing project. Click Enter to proceed.

This command retrieves all existing projects in your Firebase account. Select the book-recommender project and click Enter.
Next, it asks for a development language for your project. Since we’re using JavaScript, select JavaScript and click Enter.
Next, it asks if you want you to configure ESLint to identify problematic patterns in the JS code. You can decide to do this or not. I opted out. Finally, it asks you if you want to install dependencies with npm. Type Y to install them.
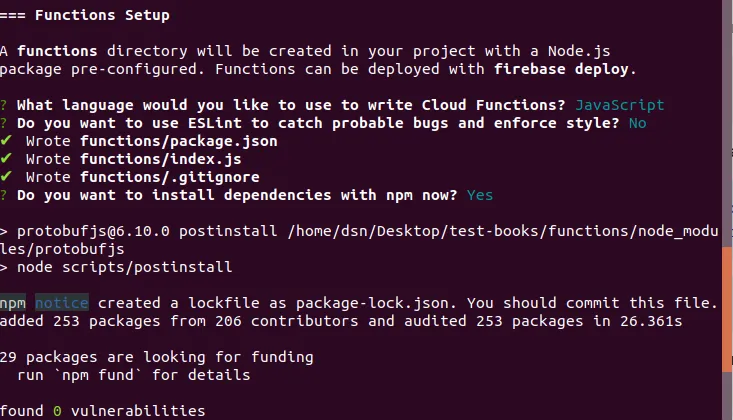
You’ll next need to name your public directory. Click Enter to leave this as default. Finally, it asks if you want to configure this app as a single-page app. Type N (No) and click enter. This means we’re not using a single-page, but instead a multi-page app with modules.
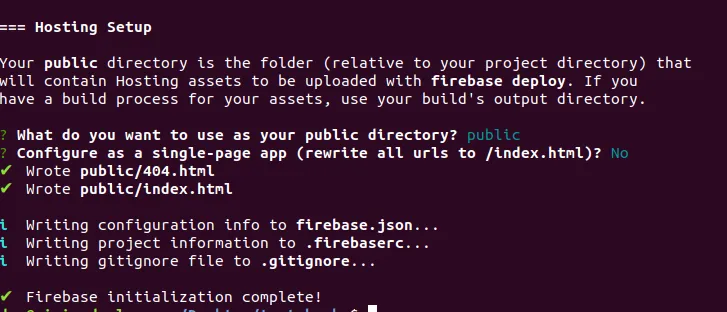
Once project initialization is complete, opening the project folder should reveal the following files:
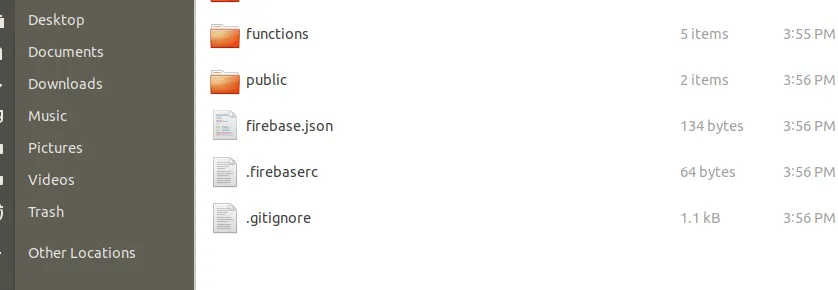
The functions folder will hold our app scripts, views, model, and book data. The public folder will hold all frontend files. We won’t be using this folder, since we’re rendering our views and not displaying static files. So the first thing you should do before you proceed is to delete the index.html file in the public folder.
Now, that the project initialization is complete, We just need to copy some files from our old app (the one you created in part 2), and then change some settings in the Firebase project. Follow the steps below to achieve this:
- Copy all code in the app script from the old book app and paste it just below the first line of code in the index.js file of your new Firebase project. Then change the last part where you exported the app module from:
to:
When you’re done, your index.js script should look like this:
const functions = require('firebase-functions');
const express = require("express");
const bodyParser = require("body-parser");
const expressHbs = require("express-handlebars");
const books = require("./data/web_book_data.json")
const model = require("./model")

const app = express();
app.set("views", "./views");
app.set("view engine", "hbs");

//Body parser middleware
app.use(
    bodyParser.urlencoded({
        extended: false
    })
);
app.use(bodyParser.json());


app.engine('.hbs', expressHbs({
    defaultLayout: 'layout',
    extname: '.hbs'
}));

app.get("/", (req, res) => {
    res.render("index", { books: books.slice(0, 12), pg_start: 0, pg_end: 12 })
});


app.get("/recommend", (req, res) => {
    let userId = req.query.userId

    if (Number(userId) > 53424 || Number(userId) < 0) {
        res.send("User Id cannot be greater than 53,424 or less than 0!")
    } else {
        recs = model.recommend(userId)
            .then((recs) => {
                res.render("index", { recommendations: recs, forUser: true })
            })
    }


})

app.get("/get-next", (req, res) => {
    let pg_start = Number(req.query.pg_end)
    let pg_end = Number(pg_start) + 12
    res.render("index", {
        books: books.slice(pg_start, pg_end),
        pg_start: pg_start,
        pg_end: pg_end
    })
});


app.get("/get-prev", (req, res) => {
    let pg_end = Number(req.query.pg_start)
    let pg_start = Number(pg_end) - 12

    if (pg_start <= 0) {
        res.render("index", { books: books.slice(0, 12), pg_start: 0, pg_end: 12 })

    } else {
        res.render("index", {
            books: books.slice(pg_start, pg_end),
            pg_start: pg_start,
            pg_end: pg_end
        })

    }
});


// module.exports = app;
exports.app = functions.https.onRequest(app);
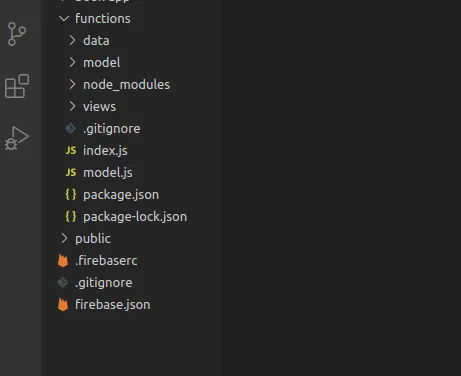
2. Copy the folders model, data, view, and the model.js file from the old app into the functions folder of your Firebase application. Your folder structure should now look like this:
3. Open the firebase.json file and add the following text in the hosting object:
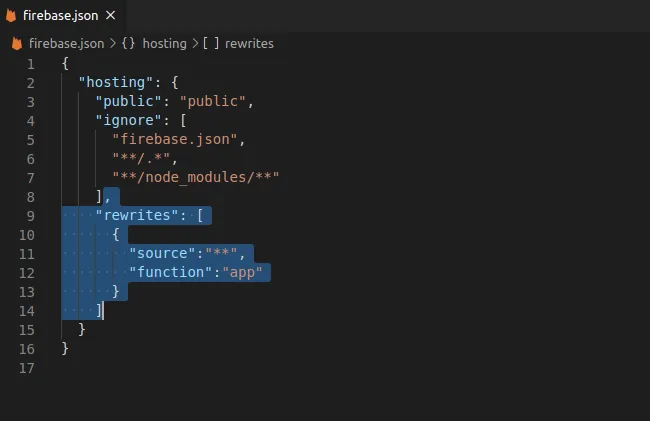
This command tells Firebase that the entry point of the application is the exported express app. So all routes are serviced by that app.
4. In the model.js file, we’ll make the model path dynamically inferred instead of hardcoded, as we did in the first application. This ensures that the model can be found when uploaded. Update the following section in the model.js file from:
console.log('Loading Model...')
model = await tf.loadLayersModel("file:///home/Projects/recommender-sys/recommender-books/model/model.json", false);
console.log('Model Loaded Successfull')
to:
console.log('Loading Model...')
home_ = process.cwd()
model_path = "file://"+ home_ + "/model/model.json"
console.log('Model Loaded Successfull')
5. Open the package.json file in the Firebase project, and add the extra dependencies from the old project:
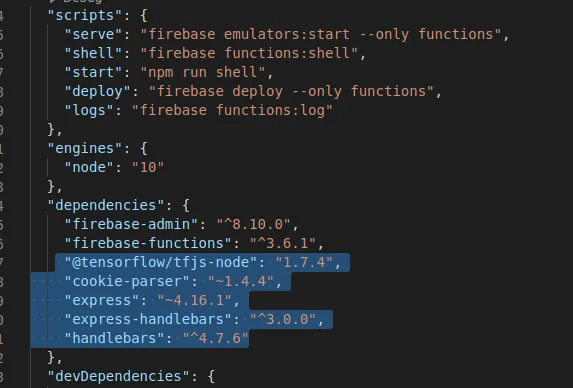
6. Run npm install to install the dependencies in this new project.
Once the installation is complete, you’re ready to test your application.
Testing and Deploying your Application to Firebase
In the terminal where you have your functions directory, run the command:
This command starts a local server for you to test your application. If you followed all the steps above, then you should see the following in your terminal:

Next, open your browser and go to:
This should open your book application, as we have seen before. Try making recommendations to ensure everything works the same.
Once you’re sure everything works fine, it’s time to deploy.
Stop your running server (CTRL C), and run the following command:
This starts the build and upload process, and once done it should display a URL to access your app. If you’re seeing the upgrade error below after running this command…

…there are two things you can do.
1. If your app is for learning purposes just like this one, then go to your package.json file and change the node runtime from 10 to 8.
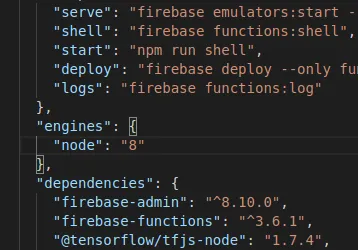
This will show a warning later that node 8 is depreciated, but for now it should work and allow you to upload your app successfully.
2. The other option is to upgrade to a pay-as-you-go plan and keep the recent node 10 runtime. You only get charged when you go over the limit of the free tier, and this is recommended for production-ready applications.
Since this is a temporary project, I’ll go with the first option. After changing the node runtime in package.json to 8, run the command firebase deploy again. This should build and upload your project as shown below:

Copy the displayed Hosting URL, and open it in your browser. Your URL will be different from mine, due to the fact that Firebase assigns a unique ID to each project.
To see my app live, go here:
And that’s it! Congratulations—your app is live. You can share the app link with your friends, employers, and to the general public to view and interact with. The free plan should be enough for all this interaction.
If you have questions, comments, or additions, don’t hesitate to use the comment section below.

Connect with me on Twitter.
Connect with me on LinkedIn.

Comments 0 Responses