Hello readers, continuing on from my previous article where I explained about how the face recognition internally works, here I will give you the code implementation and will guide you step-by-step on how to start an attendance system using face recognition.
This whole attendance system can be divided into two parts, one where we will register students and the other which will be used to infer on a video feed. I will provide a basic working pipeline which can be extended to any use case easily.
For face detection and vector generation we will be using this official repository where they have also provided the weights of the models. I have made some necessary changes to make it an attendance marking system with some additional Python scripts. All the code implementation is provided here. You need to clone this repository by executing:
git clone https://github.com/harsh2912/attendance-system.git
Download the models for RetinaFace (for face detection) and InsightFace (for vector generation) from this drive. Make a directory “models” inside Face_detection folder and extract “retinaface-R50.zip” in a folder inside “models” with name “retinaface” and extract “insightface.zip” in the “models” folder only. So now you will have two directories inside “models,” namely InsightFace and RetinaFace.
Note: In the code implementation, instead of using only additive margin loss, they combined all three different losses that I explained in my previous article for training.
Part I
This part includes the process where we will generate the vector for the faces which we want to register. As we want to store the vectors and use them during inference time, we will use a very fast NoSQL database Redis. You don’t have to know a lot about Redis if you are already familiar with Python as it is a database which works on key-value pair paradigm just like Python dictionaries. If you want to learn about basic working of Redis database with python, you can refer this great tutorial which includes the steps for setting up the Redis server also.
From here on, I will assume that you have already set up the Redis server using the steps in this article and installed the Redis package for Python to use it as an API.
After cloning the above repository, you will need to setup a Conda environment so as to run the code. If you don’t know about Conda and virtual environments, please go through this article where I have briefly explained them. You will need to run the following command to setup a Conda environment using the environment.yml file present in the repository:
conda env create -n face_recog -f environment.yml
After creating the environment you need to start a Redis server by executing:
redis-server
This will start up your Redis server which will be used to store the vectors of the faces. We will use the same server and database while inferring. I have written the script in such a way that you need to provide the path of the location where you will have different folders for all the students with their unique ID (enrollment number) as the folder name and each folder will contain the face images of respective students. These face images will be used while registering and the name of the folder will be used during inference. After preparing the dataset in the above mentioned format, you need to first activate the Conda environment using command:
conda activate face_recog
Then you need to run the register.py file in the root folder where you cloned the repository by executing:
python register.py -p path/to/folder/ -db 0
Here -p will take the path of the directory containing all the folders and -db is the database that we will be using inside Redis server. You can use any number, but it should be same while inferring. I am using ‘0’ here.
After the above script is run, you will see a printed statement ‘Registration Done.’ This means that the registration is done and the vectors are generated and stored. Now we can move to Part II where we will be inferring on a video.
Part II
This part will just require you to execute the infer.py script which takes three arguments, -in for input video path, -out for output path where the video will be stored after inference, and -db which is the same database where the vectors are stored. You need to run the following command:
python infer.py -in path/to/video -out to/save/path -db 0
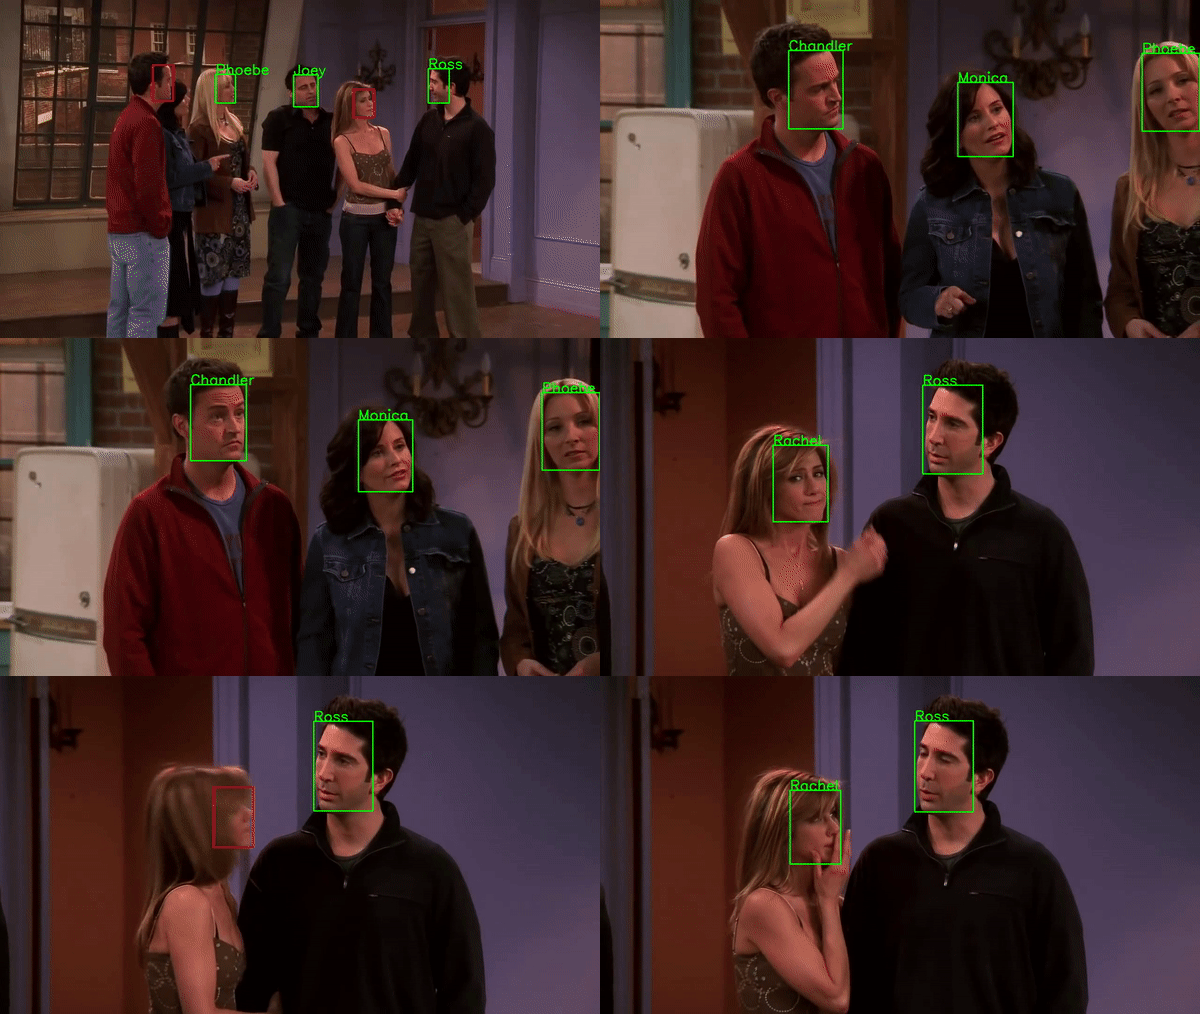
As a demo I have included a folder named demo_friends where I have put some face images of all the “Friends” characters in their respective folders and then followed the above steps for registering and inferring on a “Friends” episode. The result is also in the repository with the name friends_demo.avi.

Wrap Up
Now you have all the pieces and know how to arrange them to have a fully working attendance system. For a classroom or in any working environment, you will just need few face images of the people you want to register and put them in folders with the folder name being unique to each person. After registering them, you only have to run inference on the video feed of the classroom or the working area. You can change the code a bit and can generate the timestamps for each person identified. In this way you can have an analysis of when that student was in the classroom or when the employee left work, though it is more suitable for classroom environments as there won’t be any manual work for attendance.

Comments 0 Responses