
A notification is a message you can display to users outside of your application’s normal UI. When you tell the system to issue a notification, it first appears as an icon in the notification area.
To see the details of a notification, the user opens the notification drawer, can tap it to open the app related to it, or take an action directly from the notification. Both the notification area and the notification drawer are system-controlled areas that the user can view at any time.
1. Create an instance of NotificationManager
NotificationManager is a class used to notify users of events that happen. This is how you tell users that something has happened in the background.
2. Create a NotificationChannel and set the importance
- Notification channels provide us with the ability to put notifications that our application sends into manageable groups. Once our notifications are in these channels, we no longer have input into their functionality — so it’s up to the user to manage these channels.
- Before we can deliver the notification on Android 8.0 and higher, we must register the app’s notification channel with the system by passing an instance of NotificationChannel to createNotificationChannel(). So the following code is blocked by a condition on the SDK_INT version:
private fun createNotificationChannel() {
    // Create the NotificationChannel, but only on API 26+ because
    // the NotificationChannel class is new and not in the support library
    if (Build.VERSION.SDK_INT >= Build.VERSION_CODES.O) {
        val name = getString(R.string.channel_name) //name of the channel
        val descriptionText = getString(R.string.channel_description)
        val importance = NotificationManager.IMPORTANCE_DEFAULT  //importance of the channel
        // Create a NotificationChannel
        val channel = NotificationChannel(CHANNEL_ID, name, importance).apply {
            description = descriptionText
        }

        // Register the channel with the system, her nm is the NotificationManager object created above.
        nm.createNotificationChannel(channel)
    }
}
In the above code, to create a NotificationChannel object, three parameters have to be passed to the NotificationChannel’s constructor:
- Name: Name of the channel.
- ID: ID of the channel.
- Importance Level: This parameter determines how to interrupt the user for any notification that belongs to this channel. You can set it up using one of the many constants from the NotificationManager class. Although you must set the notification importance/priority, as shown above, the system does not guarantee the alert behavior you’ll get. In some cases, the system might change the importance level based on other factors, and the user can always redefine what the importance level is for a given channel.
Also, because you must create the notification channel before posting any notifications on Android 8.0 and higher, you should execute this code as soon as your app starts. It’s safe to call this repeatedly, because creating an existing notification channel performs no operation.
3. Create the notification
There are various types of notifications. Some of them include:
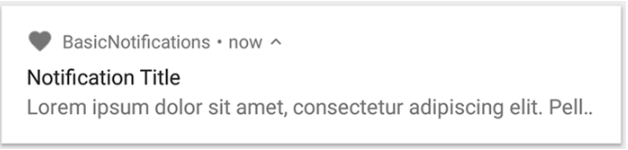
1. Simple/Basic notification
A notification in its most basic and compact form (also known as collapsed form) displays an icon, a title, and a small amount of content text. The user can click on it to launch an activity in your app.
           //Create a simple notification, first - > Channel ID
            val simpleNotification = NotificationCompat.Builder(this, "first")
                .setSmallIcon(R.drawable.ic_launcher_foreground)
                .setContentTitle("Hello There")
                .setContentText("General Master!")
                .setPriority(NotificationCompat.PRIORITY_DEFAULT).build()

            //Show the notification, nm is the NotificationManager object
            nm.notify(id, simpleNotification)
As shown above, you need to set the notification’s content and channel using a NotificationCompat.Builder object. Its constructor requires a context and a channel ID. The channel ID is required for compatibility with Android 8.0 (API level 26) and higher but is ignored by older versions. The above example shows how to create a notification with the following:
- A small icon, set by setSmallIcon(). This is the only user-visible content that’s required.
- A title, set by setContentTitle().
- The body text, set by setContentText().
- The notification priority, set by setPriority(). The priority determines how intrusive the notification should be on Android 7.1 and lower. (For Android 8.0 and higher, you must instead set the channel importance)
- setAutoCancel(): It sets the cancelable property of the notification.
Show the notification:
To make the notification appear, call NotificationManagerCompat.notify(), passing it a unique ID for the notification and the result of NotificationCompat.Builder.build(). You can pass the ID accordingly, but do remember to save the notification ID that you pass to NotificationManagerCompat.notify() because you’ll need it later if you want to update or remove the notification.
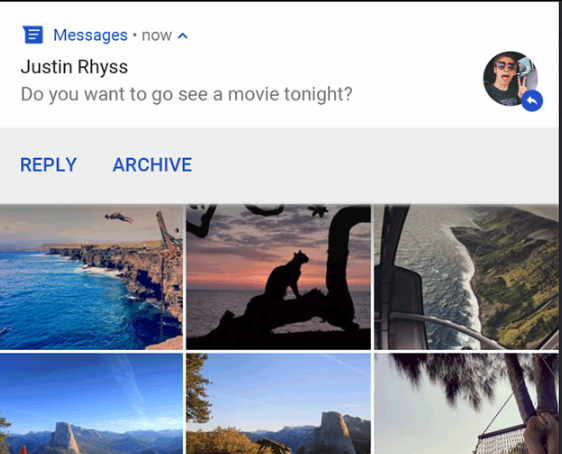
2. Expandable notification
By default, the notification’s text content is truncated to fit one line. If you want your notification to be longer, you can enable an expandable notification by adding a style template with setStyle(). For example, the following code creates a larger text area:
 val bigTextStyle = NotificationCompat.Builder(this, "first")
                .setSmallIcon(R.drawable.ic_launcher_foreground)
                .setContentTitle("Hello There")
                .setContentText("General Master!")
                .setStyle(
                    NotificationCompat.BigTextStyle()
                        .bigText(getString(R.string.big_string))
                )
                .setPriority(NotificationCompat.PRIORITY_DEFAULT).build()

//Show the notification with the help of NotificationManager, Unique ID ->3
nm.notify(3, bigTextStyle)
Here’s the expandable notification with an image:
 val icon = BitmapFactory.decodeResource(
                this.resources,
                R.drawable.ic_launcher_foreground
            )

            val not = NotificationCompat.Builder(this, "first")
                .setSmallIcon(R.drawable.ic_launcher_foreground)
                .setContentTitle("Hello There")
                .setContentText("General Kenobi!")
                .setLargeIcon(icon)
                .setStyle(
                    NotificationCompat.BigPictureStyle()
                        .bigPicture(icon)
                        .bigLargeIcon(null)
                )
                .setPriority(NotificationCompat.PRIORITY_DEFAULT).build()

nm.notify(5, not)
3. Actioned notification using intents
Every notification should respond to a tap, usually to open an activity in your app that corresponds to the notification. To do so, you must specify a content intent defined with a PendingIntent object and pass it to setContentIntent().
The following snippet shows how to create a basic intent to open the Google home page whenever the user taps/clicks on the notification:
           // Create an intent
            val i = Intent()
            i.action = Intent.ACTION_VIEW
            i.data = Uri.parse("https://www.google.com")
           // Craete a pending intent
            val pi: PendingIntent =
                PendingIntent.getActivity(this, 12345, i, PendingIntent.FLAG_UPDATE_CURRENT)

            val actionedNotification = NotificationCompat.Builder(this, "first")
                .setSmallIcon(R.drawable.ic_launcher_foreground)
                .setContentTitle("Hello There")
                .setContentText("General Master!")
            // Set the intent that will fire when the user taps the notification
                .setContentIntent(pi)
                .setAutoCancel(true)
                .setPriority(NotificationCompat.PRIORITY_DEFAULT).build()

            nm.notify(2, actionedNotification)
Notice this code calls setAutoCancel(), which automatically removes the notification when the user taps it.
4. Clickable action buttons with notifications
A notification can offer up to three action buttons that allow the user to respond quickly, such as snooze a reminder or even reply to a text message. But these action buttons should not duplicate the action performed when the user taps the notification.
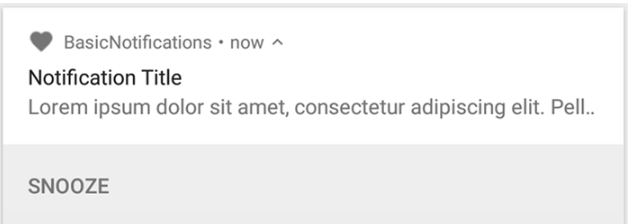
Here’s the code that shows how clickable actions can be added in the notifications. To add an action button, pass a PendingIntent to the addAction() method. This is just like setting up the notification’s default tap action, except instead of opening up the Google home page as done above, you can do a variety of other things, such as start a BroadcastReceiver that performs a job in the background so the action doesn’t interrupt the app that’s already open.
  val i = Intent()
            i.action = Intent.ACTION_VIEW
            i.data = Uri.parse("https://www.google.com")

            val pi: PendingIntent =
                PendingIntent.getActivity(this, 12345, i, PendingIntent.FLAG_UPDATE_CURRENT)

            val actionedNotification = NotificationCompat.Builder(this, "first")
                .setSmallIcon(R.drawable.ic_launcher_foreground)
                .setContentTitle("Hello There")
                .setContentText("General Master!")
                .addAction(R.mipmap.ic_launcher, "Snooze", pi)
                .setPriority(NotificationCompat.PRIORITY_DEFAULT).build()

            nm.notify(4, actionedNotification)
And with this, you’ve now learned how to use and implement notifications in your apps. Congrats! 😄
Link to the GitHub repository:
You can find the complete code here:
Thanks for reading! If you enjoyed this story, please click the 👏 button and share it to help others find it!
Have feedback? Let’s connect on Twitter.
Comments 0 Responses