
In Spark AR Studio, you use the Simulator to perceive how an effect will appear on a device while you are creating it.
The Simulator is positioned on the top right side of the Spark AR Studio interface. You will see that the Simulator previews an effect on an iPhone 8 by default.
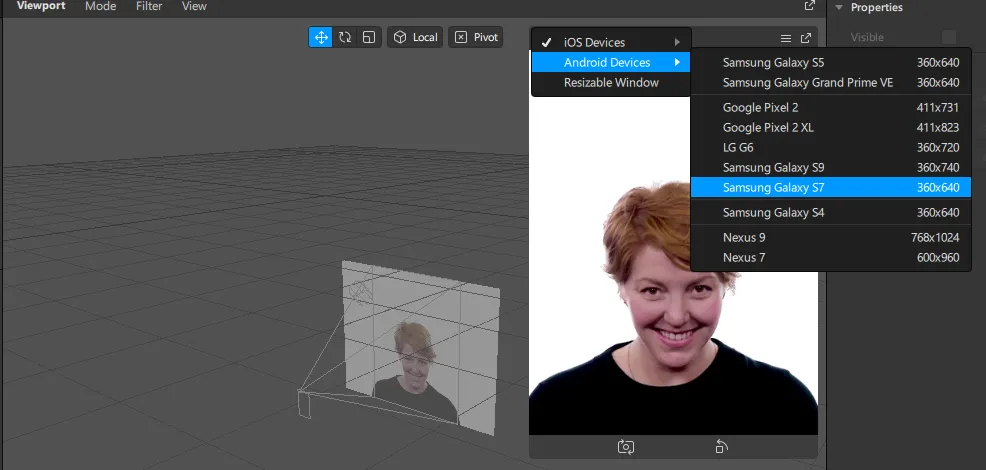
You can change this by:
- Clicking in the Simulator to show the list.
2. Then click on the pull-down next to iPhone 8.
3. Select a device from the options.
Adding a Custom Device to the List
- Go to the menu bar.
2. Select Preferences, then choose Simulator.
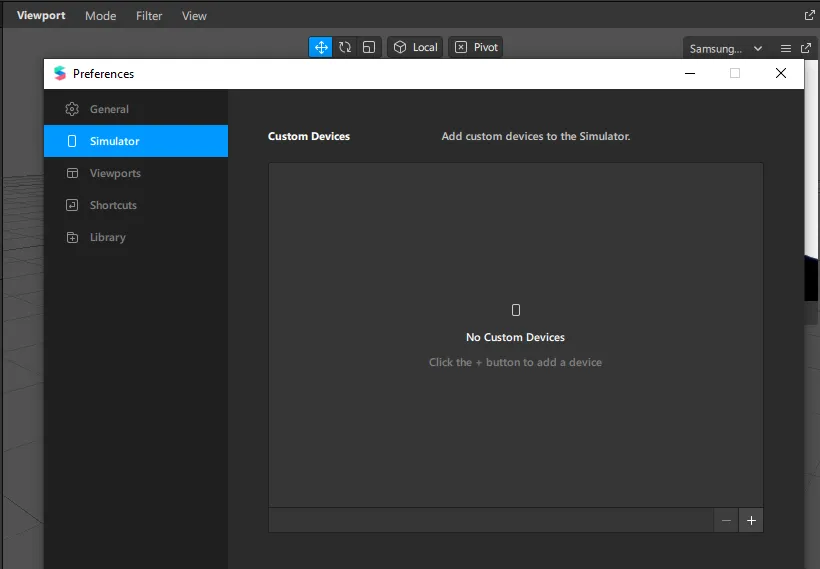
To add a device, click on the + at the bottom right. Add the details of the device then click Add.
Changing the Real-Time Video in the Simulator
Go to the toolbar and click on the video icon. Choose Real-Time Simulation then select the built-in camera of your computer to view the effect on yourself.
To change the size of the simulator, simply use the cursor on the edges of the simulator.
Changing the Simulator Position
To separate the Simulator, click on the Undock icon in the top right of the Simulator menu. To return the simulator to its original position click on the button again.
You can rotate the Simulator by clicking on the menu bar on the simulator, then selecting Rotate Device.
You can either rotate the device to 90, 180, or 270 degrees.
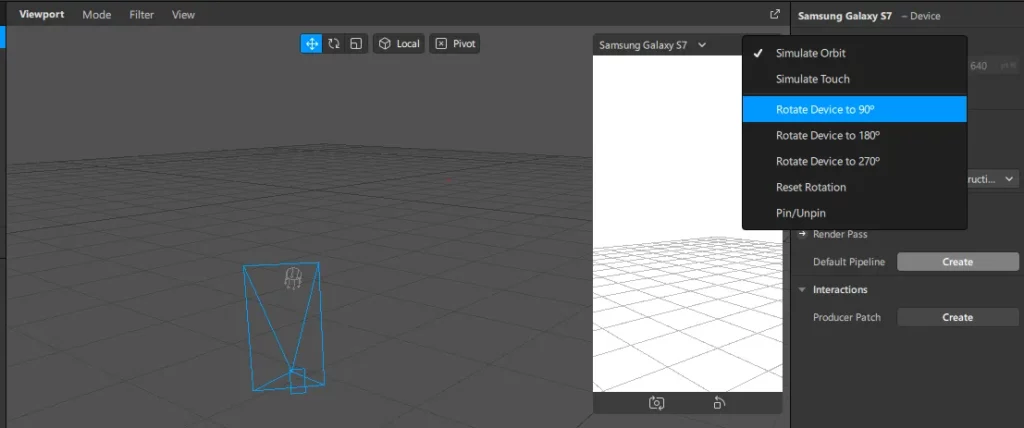
To return the Simulator to the original orientation select Reset Rotation.
How to Simulate the Movement of the Camera
To Simulate the movement, click and drag the mouse cursor in the Simulator.
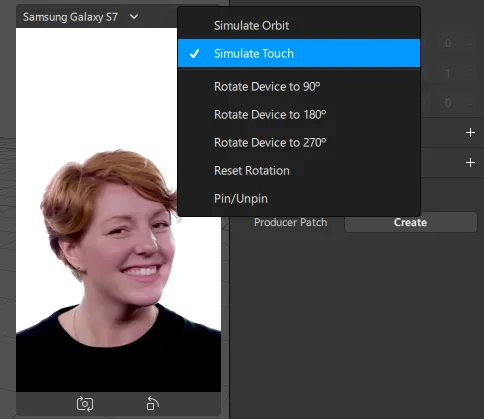
How to Simulate Touch Gestures
To experiment with an effect that responds to someone’s touch:
- Go to the menu bar in the Simulator.
2. From the list, select Simulate touch.
To simulate two fingers pinching or rotating the screen, you can:
If you are using Windows, press the Alt key then click and drag.
If you are using macOS, press Option then click and drag.
How to Simulate the Gallery Texture.
A gallery texture is a texture added to a material to create an effect with a gallery picker.
To add gallery texture:
- Go to the Assets panel.
2. Click add Asset.
3. Choose Gallery Texture from the list.
It will be listed as galleryTexture0 in the Assets panel.
When you add the gallery texture to your project, you will see a press button in the Simulator. Click the button to add a video or an image from your device to see how an effect with the gallery texture will look.
How to Simulate the Media Library
In Spark AR Studio, a media library is where effects can be added to the videos and photos on a device.
When effects are enabled for the media library, you will be able to use the Simulator to experiment with how your effect would appear on someone’s device.
Conclusion
In this article you have learned how to change the device which is represented by the simulator, change the video in the simulator, change the size and position of the simulator, and much more.
Check out the link below to learn more about the Simulator.
Comments 0 Responses