
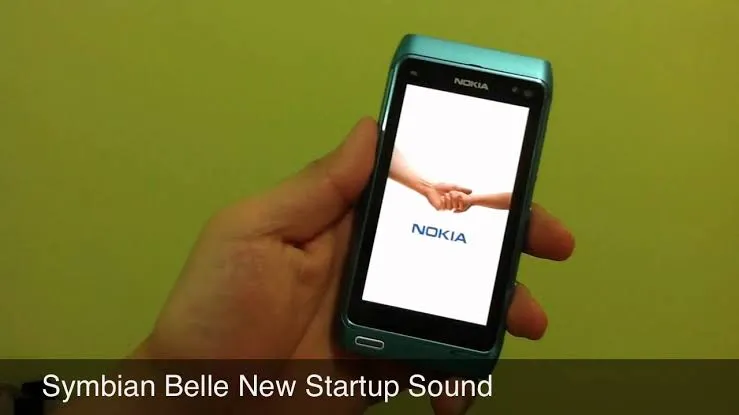
Splash screens are as old as mobile phones themselves, as you can see from this picture of an old school Nokia phone:
While they might not look visually appealing and can be repetitive after a while, they can markedly improve the overall UX of your app if used correctly. In this blog post, I’ll be covering how to do it; taking my AfterShoot app as a point of reference.
Table of contents:
The need for splash screens
Before we go ahead and implement one, it’s important to understand the need for splash screens in the first place.
If your app is doing a lot of background processing in its onCreate() method before inflating the UI (or before the setContentView() method is called), your users might see a blank screen for a while when they open your app.
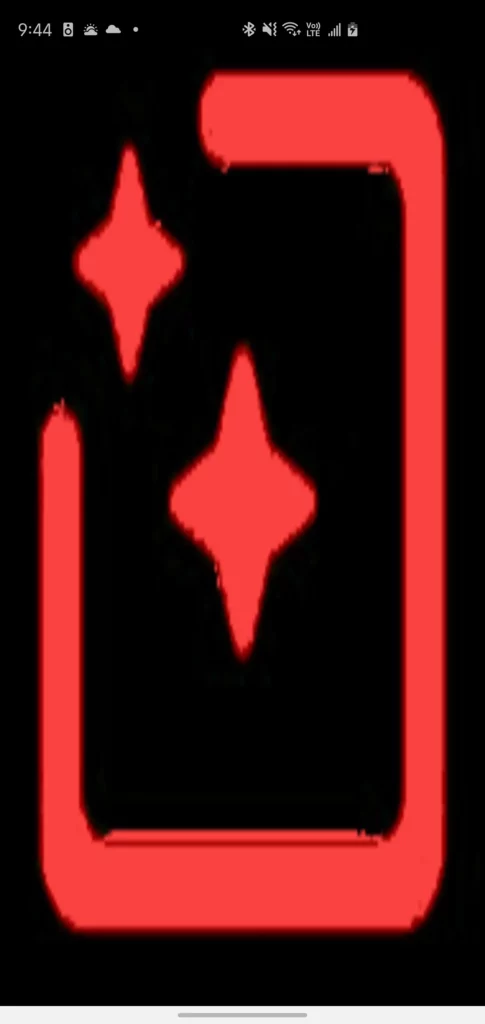
This might also happen if you’re processing some long-running task in your Application class’s onCreate() method. This is what that blank screen looks like:

As seen in the GIF above, you see the black screen for a while before the AfterShoot logo and the main app kicks in.
During that moment, the app looks like it’s not responding; prompting the user to force close your app and start it afresh, only to face the same issue again! By implementing a splash screen correctly, we aim to let the user know that the app is starting by giving them something to look at instead of this blank screen.
How *not* to implement a splash screen!
A lot of tutorials available online do something like this:
private static int SPLASH_TIME_OUT = 3000;      // Delay of 3 Seconds

@Override
protected void onCreate(Bundle savedInstanceState) {
    super.onCreate(savedInstanceState);
    setContentView(R.layout.activity_splash_screen);

        new Handler().postDelayed(new Runnable() {
            @Override
            public void run() {
                // This method will be executed once the timer is over
                Intent i = new Intent(SplashScreenActivity.this, AnotheActivity.class);
                startActivity(i);
                // close this activity
                finish();
            }
        }, SPLASH_TIME_OUT);
    }
}
The code above is not good, mainly because of two reasons:
- First, it forces the user to wait for 3 seconds (or a fixed time interval) no matter what. It’s possible that your app might take more/less time to complete the initialization process, which results in this method being of no little or no use.
- Second, if your app was recently closed and then reopened, it does something that’s called a hot start instead of a cold start, which is done when your app hasn’t been opened for a while. You can read up more on these starts here:
If your app does a hot/warm start, it takes less time to initialize those variables. Again, forcing your users to wait for a fixed time doesn’t make much sense.
So instead of doing it incorrectly, let’s see how we can implement a splash screen the right way!
The correct way to implement a splash screen
The problem with the previous approach was that the time for which the splash screen is shown is a constant and doesn’t respect the app’s launch type (hot vs cold). We need something that knows how long the blank screen is shown, and use that time to show an alternate screen instead.
One clever way of overcoming this issue is by setting a placeholder background to our Activity that performs all the heavy-work and have that placeholder shown until the activity is ready to inflate the UI.
Let’s see how we can do this:
Step 1: Deciding on a splash screen image
This will most likely be your app’s Launcher Icon or another image asset that’s relevant to your app. Although you can feel free to experiment here as well!
Step 2: Creating a new style for the splash screen and setting its background
Once you’ve decided on the drawable that’s to be shown, it’s time to go into your app’s style.xml file and create a new style—let’s call it AppThemeSplash— and have it extend from your parent app’s theme Theme.AppCompat.DayNight.NoActionBar.
Once the theme’s created, set its windowBackground as the drawable you’ve selected in Step 1. This is what it looks like for me:
The windowBackground parameter controls what’s shown instead of that blank screen. You can also set a color instead of setting a drawable. Give it a shot and see it in action
Step 3: Set the theme to your activity
Once done, you might want to set the created theme to your Main Activity’s AndroidManifest.xml file. Select the activity that’s doing the heavy lifting:
If you now start the app, this is what you see instead of the dull blank screen:
Something here doesn’t look right! The image is stretched throughout the screen and looks quite ugly. Let’s see how we can fix this.
Step 4: Fixing the distorted icon with a layer-list drawable
To do this, create a new drawable in your app’s res-drawable folder. Once done, define a
Inside this element, we’ll add 2 items: one will be our original drawable with a center gravity so that it’s confined to the center of the screen; and another element that will define the background color of the splash screen (it’s black currently, but let’s make it so that it falls in line with the background color of our app):
-
android:src="@drawable/after_splash" />
Once done, update the value of android:windowBackground in your styles.xml file with this new drawable.
And that’s it! On running the app, this is what you’ll see:

As you can see, users are now greeted with your app’s icon instead of the blank screen. You can add more customizations to this drawable, like such as text that communicates something important to your users—and much more!
Conclusion
In this post, we saw how correctly implement splash screens so that they not only fulfill their purpose but also don’t take more time or resources than needed. It always makes sense to have some sort of fallback like this in your app so that it doesn’t seem unresponsive in scenarios where either the phone’s memory is low or the app is running on a low-end device.
Thanks for reading! If you enjoyed this story, please click the 👏 button and share it to help others find it! Feel free to leave a comment 💬 below.
Have feedback? Let’s connect on Twitter.
Editor’s Note: Heartbeat is a contributor-driven online publication and community dedicated to exploring the emerging intersection of mobile app development and machine learning. We’re committed to supporting and inspiring developers and engineers from all walks of life.
Editorially independent, Heartbeat is sponsored and published by Fritz AI, the machine learning platform that helps developers teach devices to see, hear, sense, and think. We pay our contributors, and we don’t sell ads.
If you’d like to contribute, head on over to our call for contributors. You can also sign up to receive our weekly newsletters (Deep Learning Weekly and the Fritz AI Newsletter), join us on Slack, and follow Fritz AI on Twitter for all the latest in mobile machine learning.
Comments 0 Responses