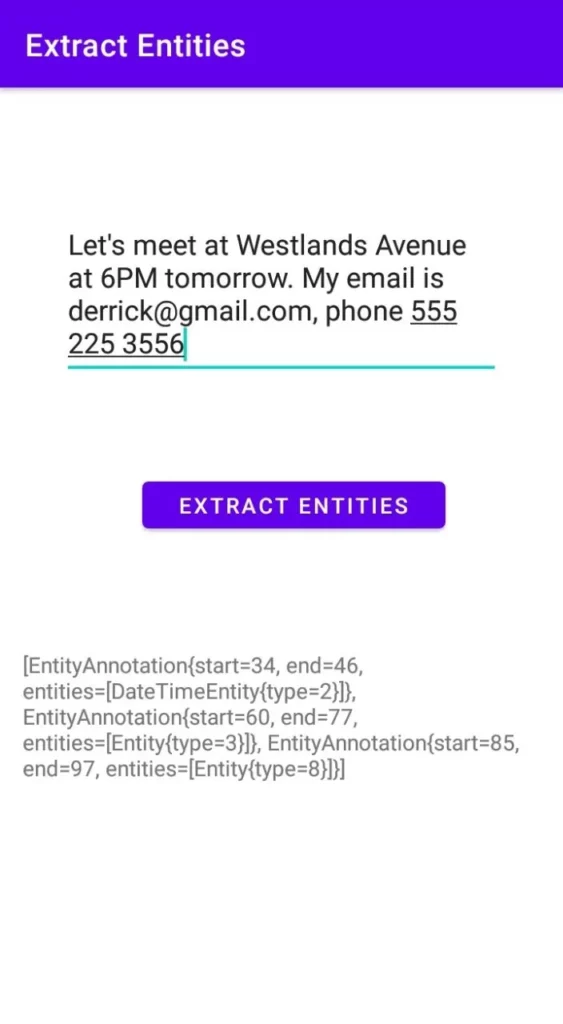
Entity extraction can be useful when you want to add interactivity to your application based on the context of the text.
For example, if it’s a phone number you can prompt the user to make a call and if it’s an email address you can prompt the user to open the email app. This is achieved by first extracting various entities in the text. In this piece, let’s look at how that can be achieved using Google’s ML Kit.
In this article:
Getting Started
Let’s start by adding the internet permission to the Android Manifest because it’s needed in order to download the model.
<uses-permission android:name="android.permission.INTERNET" />Next, ensure that the model’s compressed by adding that instruction in the app’s build.gradle file.
android {
    compileSdkVersion 30
    buildToolsVersion "30.0.2"

    aaptOptions {
        noCompress "tflite", "lite"
    }

    }
In the same file, add the extraction model’s dependency. Note that it is in beta as of this writing.
dependencies {
    implementation 'com.google.mlkit:entity-extraction:16.0.0-beta1'

}The App Elements
For the purpose of this illustration, let’s build an app with an input box and a view to display the extracted entities. The entities that can be detected by this API are:
- Address
- Email address
- Phone number
- URL
- Flight number (IATA flight codes only)
- IBAN
- Version 13 of ISBN
- Currency (Arabic numerals only)
- Credit Cards
- Standardized international formats of a tracking number
Information about supported languages can be found here.

<?xml version="1.0" encoding="utf-8"?>
<androidx.constraintlayout.widget.ConstraintLayout xmlns:android="http://schemas.android.com/apk/res/android"
    xmlns:app="http://schemas.android.com/apk/res-auto"
    xmlns:tools="http://schemas.android.com/tools"
    android:layout_width="match_parent"
    android:layout_height="match_parent"
    tools:context=".MainActivity">

    <EditText
        android:id="@+id/editText"
        android:layout_width="281dp"
        android:layout_height="110dp"
        android:layout_marginStart="100dp"
        android:layout_marginTop="149dp"
        android:layout_marginEnd="101dp"
        android:layout_marginBottom="59dp"
        android:ems="10"
        android:inputType="text|textMultiLine"
        app:layout_constraintBottom_toTopOf="@+id/button"
        app:layout_constraintEnd_toEndOf="parent"
        app:layout_constraintStart_toStartOf="parent"
        app:layout_constraintTop_toTopOf="parent" />

    <Button
        android:id="@+id/button"
        android:layout_width="194dp"
        android:layout_height="42dp"
        android:layout_marginStart="80dp"
        android:layout_marginEnd="64dp"
        android:layout_marginBottom="384dp"
        android:onClick="extractEntities"
        android:text="Extract Entities"
        app:layout_constraintBottom_toBottomOf="parent"
        app:layout_constraintEnd_toEndOf="parent"
        app:layout_constraintStart_toStartOf="parent"
        app:layout_constraintTop_toBottomOf="@+id/editText" />

    <TextView
        android:id="@+id/textView"
        android:layout_width="330dp"
        android:layout_height="210dp"
        android:layout_marginStart="70dp"
        android:layout_marginTop="104dp"
        android:layout_marginEnd="70dp"
        android:layout_marginBottom="63dp"
        android:onClick="extractEntities"
        app:layout_constraintBottom_toBottomOf="parent"
        app:layout_constraintEnd_toEndOf="parent"
        app:layout_constraintHorizontal_bias="0.508"
        app:layout_constraintStart_toStartOf="parent"
        app:layout_constraintTop_toBottomOf="@+id/button" />

</androidx.constraintlayout.widget.ConstraintLayout>Extract entities
You can start by obtaining the text from the text input.
String text = String.valueOf(editText.getText());The next step is to create an EntityExtractor object. As that is done, also set the EntityExtractorOptions. In this case, English is set as the language.
 EntityExtractor entityExtractor =
                EntityExtraction.getClient( new EntityExtractorOptions.Builder(EntityExtractorOptions.ENGLISH)
                                .build());
The next step is to download the model. Once the model is downloaded the following is done:
- Create a EntityExtractionParams object with the text.
- Pass the params to the annotate method.
- onSucess append the extracted entity to the text view.
The text view is set to empty whenever new entities are available.
entityExtractor
                .downloadModelIfNeeded()
                .addOnSuccessListener(
                        aVoid -> {
                            // Model downloading succeeded, you can call the extraction API here.
                            EntityExtractionParams params = new EntityExtractionParams
                                    .Builder(text)
                                    .build();
                            entityExtractor
                                    .annotate(params)
                                    .addOnSuccessListener(new OnSuccessListener<List<EntityAnnotation>>() {
                                        @Override
                                        public void onSuccess(List<EntityAnnotation> entityAnnotations) {
                                            // Annotation process was successful, you can parse the EntityAnnotations list here.
                                            textView.setText("");
                                            textView.append(entityAnnotations.toString());
                                        }
                                    })
                                    .addOnFailureListener(new OnFailureListener() {
                                        @Override
                                        public void onFailure(@NonNull Exception e) {
                                            // Check failure message here.
                                        }
                                    });
                        })
                .addOnFailureListener(
                        exception -> {
                            // Model downloading failed.
});Conclusion
In this article, you have seen how quick and easy it is to add text extraction to your apps using ML Kit. You can explore the entire source code below.

Comments 0 Responses