
With over 210 million daily active users, Snapchat remains one of the top applications that people use to enjoy augmented reality experiences. The app’s wide variety of AR features lets users do everything, from giving their digital selves some doggie ears to adding realistic 3D effects and transformations.
Snap has always been proactive about letting people come up with new ideas and designs, with Lens Studio allowing developers to “create, publish, and share Lenses” across the platform. To date, Snap reports over 1 million custom Lenses created.
With the Lens Studio 3.0 update, Snap has now introduced new features, such as voice command search for Lenses, using custom ML models and ML templates within Lens Studio, and gathering visual data from Snaps for 3D geographic mapping.
Machine learning has always played a big role in Snapchat Lenses, with features such as object tracking and image segmentation being used for things like hand gesture recognition, separating subjects from their backgrounds, and more.
Now, with the introduction of SnapML, developers can bring all the benefits of their custom ML models to Lenses—in addition to using some of the built-in model “templates” provided in Lens Studio that allow for various tasks such as object detection, style transfer, and segmentation.
A look behind the scenes
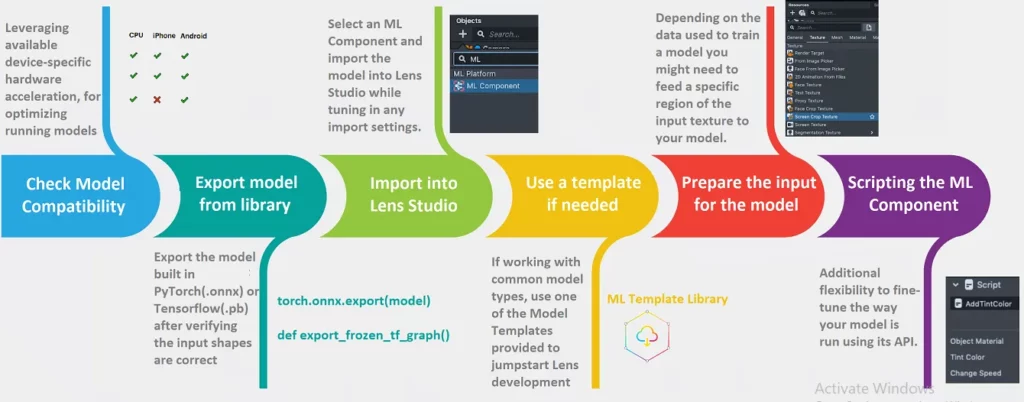
Let’s take a closer look at the process of working with SnapML inside Lens Studio.
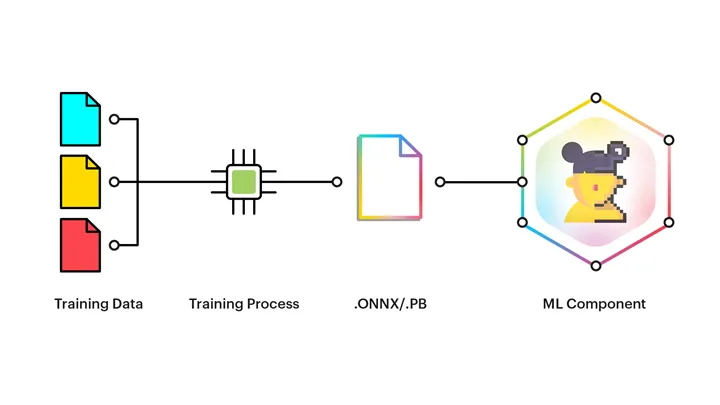
First, Lens Studio requires a model that has already been built and trained, which can then be imported—the same is true for the templates provided. Accepted inputs are models in the .ONNX or .PB format. These models reflect the functions of their corresponding Lenses.
The entire process is essentially like any other algorithm: it has an input, some well-defined set of instructions, and an output.
Here, the model is the set of instructions, the input is the camera feed, and the output is whatever ML feature the Lens is supposed to combine with AR textures, materials, etc.
And just like any algorithm, the effectiveness depends on how well-defined these instructions are. Take, for example, an image segmentation model — if the Lens has a particular feature that is only concerned with a person’s face, then SnapML has options to customize the model to this particular requirement.
The requirements here are quite different than for a use case where, for example, we use the same model to segment the sky, where the corresponding Lens colors the sky.
When a model is imported, Lens Studio has no knowledge about what inputs it needs nor what outputs it produces.
The only information it has is how to use the model and how to show the result. The way you instruct Lens Studio to use a model is via the ML Component.
The ML Components not only takes care of the data coming in and out of the model, but it also controls the way in which the model should be run. Models can also be run in parallel threads allowing your Lens to continue running in the background.
Customizing the Lens experience further
With these new updates, SnapML allows you to use machine learning models to perform certain tasks, and then apply effects based on this task.
For a meaningful use case, consider the Classification Template, where a model determines whether something of a certain class is detected or not, and a Lens is then created based on this information.
The template comes with an example binary classification model, but you can come up with your own model — a process that must be undertaken outside of Lens Studio, through the usual phases of creation, training, downloading, and importing.
When working with your own models, further customization of the overall AR experience is possible with added scripts.
Adding scripts effectively adds more effects that can be triggered when using the Lens. Here’s an example of using the Classification template to determine whether a person is wearing glasses or not, and then showing AR effects when the state changes.
Scripting provides further options to trigger specific effects for the Lens. Check out this video by Snap for details on how to implement them in practice.
The Inspector panel provides a Scripts With Callbacks parameter, which is a list of scripts with specific API functions. For example, this template provides a helper script ClassificationBehaviorHelper named Glasses When No Glasses.
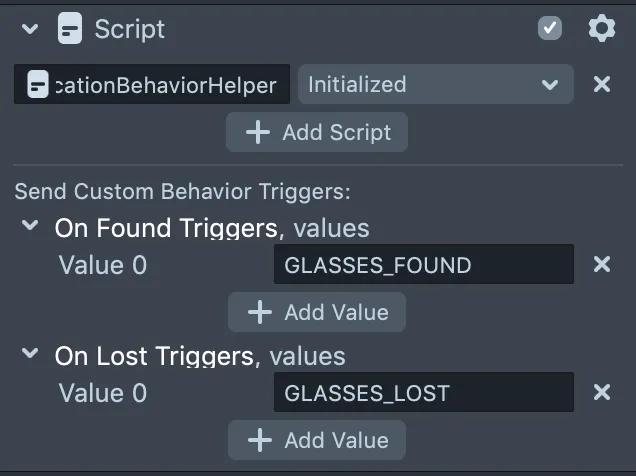
The script sends custom Triggers when a class is found or lost, such as head Binding sceneObject (which contains a glasses 3D model) when the GLASSES_FOUND custom trigger is called.

More on Scripting
Lens Studio provides this option to add your own custom scripts to make the most out of your AR experience.
By adding scripts, Lenses can now respond to touch input, play animation and audio, modify Scene Objects, and much more.
What’s more, Lens Studio also has a variety of inbuilt scripts—just like it has ML model templates—that you can use to add new features, without having to come up with your own code. Some of these “helper” scripts available are:
Behavior
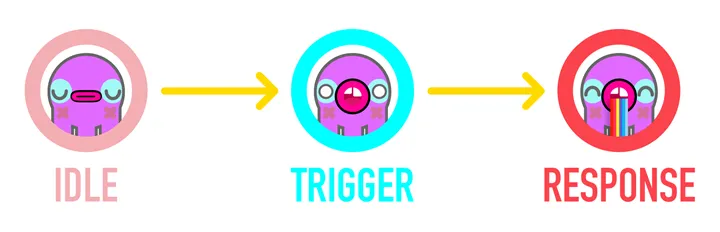
The Behavior helper script allows you to create simple interactions. It allows you to configure a trigger that defines when something should happen. It also allows you to configure what should happen as a response to a trigger.
The selectable responses include a number of commonly-used interactions like playing an animation, playing a sound, enabling an object, and more.
An example is the Lens that makes you puke a rainbow when you open your mouth: in this case, the former being the response and the latter a trigger.
Tween Manager:
Tween.js is a JavaScript engine great for creating simple animations. The purpose of the Tween Manager script is to allow you to add tweens and animations to objects in your scene.
Tween.js can be conveniently integrated into your Lens Studio project by either importing a built-in object or by including a special wrapper called TweenManager and a number of Lens Studio specific TweenType scripts.
UI
You can also build custom interactive user interfaces to overlay on your Lenses. The UI script contains tons of pre-built UI widgets that can be used in your Lens.
These widgets come with a number of settings and tuning filters, such as colors, visual states, and callbacks, which can be modified as desired.
For a complete guide on building a cool UI to go with your custom Lens, check out this guide from the Snap team:
Here’s a simple example of a script for creating a bouncing object in Lens Studio, and the result. The complete step-by-step process is detailed over here.
Scripts can be added to a Lens as Script components, which are attached to Scene Objects. Scripts are just text files that contain the code you write for a Lens.
They can either be created internally in Lens Studio or imported into your project. The Script Component integrates Scripts into a Lens by running custom code when Lens events are triggered.
Let’s make some noise
To complete the AR sensory experience, Lenses offer lots of support for integrating audio, too. Sounds can be added by using an Audio component added to an object. Scripts come in handy when determining when sounds are to be played.
You can assign an AudioTrackAsset to play through a script or through the Audio Component’s inspector in Lens Studio. See the Playing Audio guide for more information.
Lenses can also have multiple sounds playing simultaneously (e.g. looping background ambience paired with event-based sound effects).
To add sound to a Lens, you have two options—integrating an imported sound with the Audio Component, or having a script play sound.
Importing audio
To import your sound into Lens Studio, drag and drop the appropriate audio files into the Resources panel.
You also need an object with an Audio component. Select an existing object from the Objects panel or create an Empty Object and add an Audio component in the Inspector panel.
To embed the imported sound, click on the Choose Audio Track field and select it. To loop the audio—such as for looping music or background noise— check the Autoplay Loop checkbox.
Using a Script
Another method for integrating audio is to create a script that will play the sound. In the Resources panel, select + -> Script. With the newly-added script selected, head to the Inspector panel to replace the text in your script resource with the following code:
Next, we need to connect this script with the Audio component. Select the recipient object and add a Script component in the Inspector panel.
Select + Add Component -> Script. Click the + Add Script field and select the script resource we just created. Set the script to run on the Lens Turned On event. This will bind the audio to the Audio component.
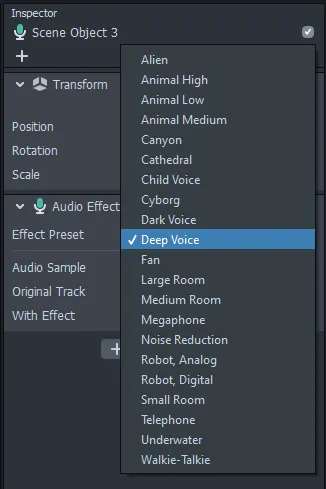
It’s also possible to add special Audio Effects to your Lens. Audio Effects are only applied after the user records a Snap, and is only applied to the audio that the microphone recorded.
You can use Audio Effects to, for example, shift the pitch of a user’s voice up so that they sound like a cute animal.
You can add a new audio effect in the Objects panel or alternatively by introducing an Audio Effect component to any Scene Object.
Lens Studio includes a number of built-in Audio Effects you can apply to your Lens.
Wrapping Up
To summarize, with this latest update, Snap Inc. has brought many new features to Lens Studio that push the boundaries of augmented reality functionality.
SnapML makes a fine addition that expands the frontier for ML developers and enthusiasts, allowing them to more quickly access a wider audience, while at the same time allowing users a greater variety of experiences.
Now anyone can create their own Lenses with neural networks that they’ve trained, expanding the possibilities for new and improved Lenses.
In addition, Lens Studio 3.0 also offers improved facial tracking features, new hand gesture templates, and an updated user interface to simplify navigation.
Comments 0 Responses