Introduction:
In Android application development, we often need to pass data between fragments—i.e. from a listing fragment to a detailed fragment—to update values.
Passing data between fragments in Android is very common, and to do this task, we’ve traditionally used Interface.
But with the introduction of Android Jetpack, there’s a different way to move data between fragments. In this tutorial, we’ll take a closer look at ViewModel and see how it compares to Interface.
ViewModel explained
ViewModel is a part of Android Jetpack. It’s designed to manage the UI-related data in the lifecycle of activities and fragments. What differentiates the ViewModel class is that it allows data to survive configuration changes, such as screen rotations.
Passing Data between fragments in Android using Interface
First, let’s take a look at how we used Interface before ViewModel to pass data between fragments. Here, I’m just going to show you a quick overview of using Interface.
Let’s go through the steps to set up Interface.
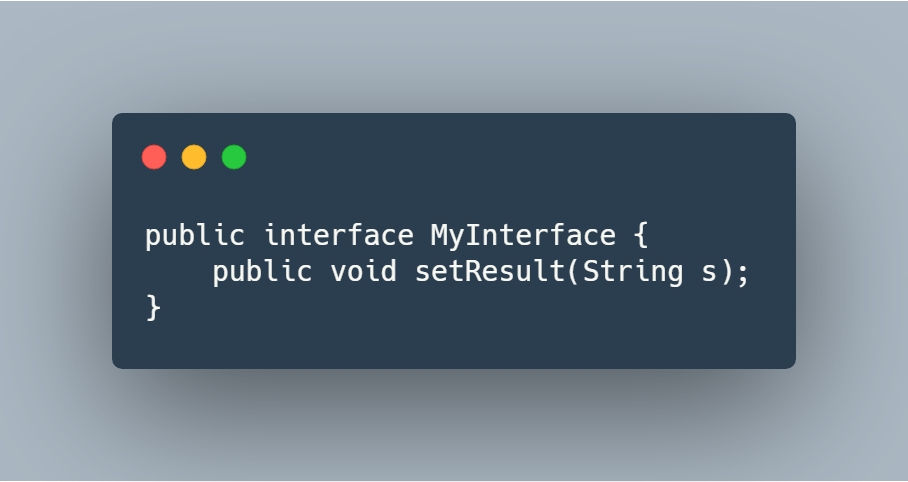
Step 1: Create Interface
The First step is to create an Interface and make a function like below snippet.

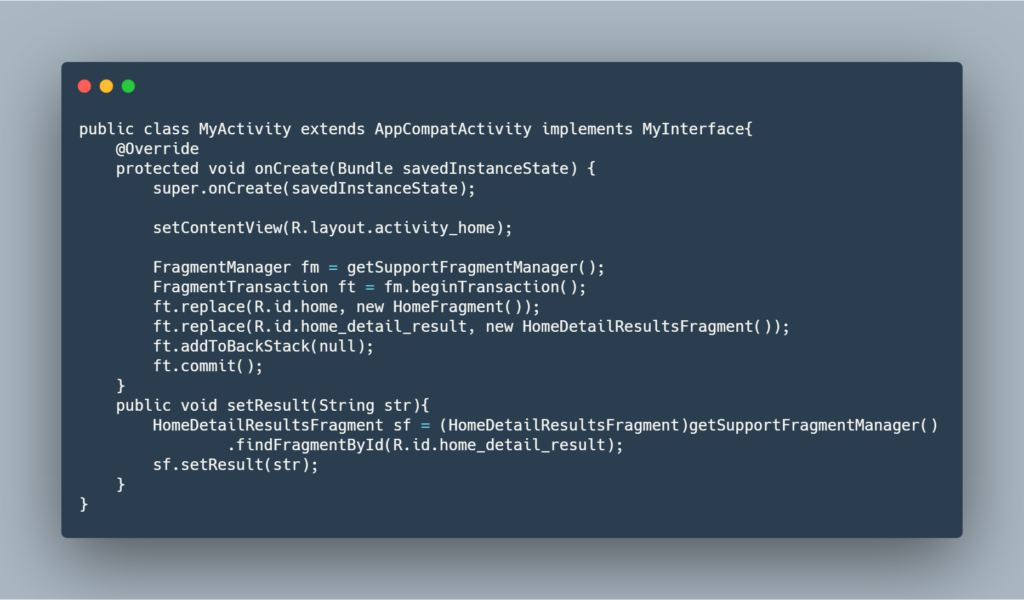
Step 2: Implement Interface in MyActivity
Here, I’ve implemented Interface and override the method with the name setResult(String str), and in that function, I set the value with my detail fragment object, as you can see from the below snippet.

Step 3: Set Value in Interface
After that, you can set the value in your Interface. Here, I defined when I clicked on my submit button, as you can see from the below snippet.

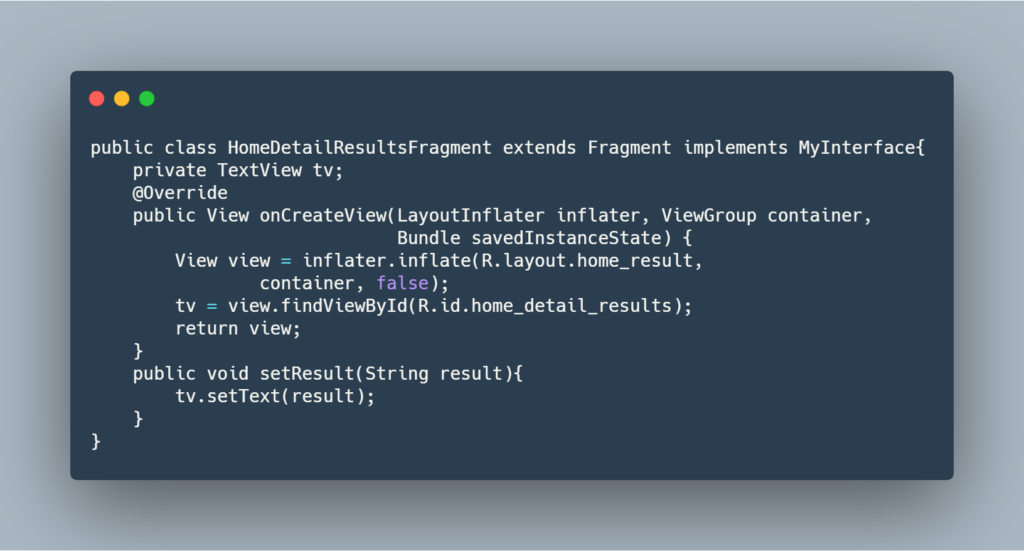
Step 4: Get Value in Detail List Fragment by Implementing Interface
Everything is set up, and now we need to get the value. So for that, we need to implement the Interface. In our override method, we set the value in our view, like below.

That’s how we used Interface to pass data between fragments.
Passing Data between fragments in Android using ViewModel:
Using ViewModel and LiveData to pass data between fragments has a number of advantages, such as separation of controllers from data handling and avoiding repeated data fetching due to configuration changes like screen rotation. This is because ViewModel is tied to the activity lifecycle.
To actually pass the data between fragments, we need to create a ViewModel object with an activity scope of both the fragments, initialize the ViewModel, and set the value of the LiveData object.
After that, another fragment observes the LiveData object (which is defined in ViewModel) and then gets the value from the data and sets the value and display to the UI.
Example:
In the following bottom navigation example, I’ll show you how to implement communication between fragments using ViewModel and LiveData.
Setup
1). Add live data and view model dependencies to the build.gradle file.
dependencies { configurations ->
    implementation "android.arch.lifecycle:extensions:1.1.1"
    annotationProcessor "android.arch.lifecycle:compiler:1.1.1"
}2). Create a MyObseravble class that extends with ViewModel and creates a MutableLiveData variable with the data type String. You can change your data type as per your requirements.
open class MyObseravble : ViewModel()
{
    val data = MutableLiveData<String>()

    fun data(item: String) {
        data.value = item
    }
}3). Now create a MyObseravble class object in your first fragment like this:
And then initialize it with an onViewCreated override method:
Now just set the value like this:
4). Our value is set to the ViewModel LiveData object.
A ViewModel instance can be created by using the ViewModelProviders factory method. You can now use the ViewModel instance to bind the UI elements to it.
Finally, we just need to observe the data like this.
And that’s it! You’ll get the updated value in your observer and will be able to display that value in the UI.
Conclusion:
This article described how you can pass data between fragments using ViewModel to more effectively manage UI-related data.
It’s easier and more efficient to separate out view data ownership from UI controller logic.
Why is it more efficient? Because it won’t lose the data when we change the screen orientation and will handle it by itself.
I hope this article is helpful. If you think something is missing, have questions, or would like to give feedback, go ahead and leave a comment below. I’d appreciate the feedback.
I’ve written some other Android-related content, and if you liked what you read here, you’ll probably also enjoy this:
Sharing (knowledge) is caring 😊 Thanks for reading this article. Be sure to clap or recommend this article if you found it helpful. It means a lot to me.
If you need any help then Join me on Twitter, LinkedIn, GitHub, and Subscribe to my Youtube Channel.

Comments 0 Responses