This will be a practical, end-to-end guide on how to build a mobile application using TensorFlow Lite that classifies images from a dataset for your projects.
This application uses live camera and classifies objects instantly. The TFLite application will be smaller, faster, and more accurate than an application made using TensorFlow Mobile, because TFLite is made specifically to run neural nets on mobile platforms.
We’ll be using the MobileNet model to train our network, which will keep the app smaller.
Getting Started
Requirements…
- Python 3 .5 or higher— python3 -V
- Tensorflow 1.9 or higher — pip3 install — upgrade tensorflow
Also, open the terminal and type:
Now, python3 will open with the python command. This will make it easier to implement the code just by copy-pasting without having to worry about 3 after typing Python.
The TFLite tutorial contains the following steps:
Step 1: Download the Code Files
Let’s start by downloading the code from the tensorflow-for-poets GitHub. Open the command prompt where you want to download the folder and type:
git clone https://github.com/googlecodelabs/tensorflow-for-poets-2This will download the files and make a new folder called tensorflow-for-poets in your current directory.
Output

FYI: You can change the name of the folder to your project name after downloading.
Step 2: Download the Dataset
Let’s download a 200MB publicly available dataset with 5 different flowers to classify from. Then extract the flower_photos.tgz inside the tf_files folder which will look something like this:
Step 3: Retrain the model
Open the command prompt inside the “tensorflow-for-poets-2” folder and type:
python scripts/retrain.py
--output_graph=tf_files/retrained_graph.pb
--output_labels=tf_files/retrained_labels.txt
--image_dir=tf_files/flower_photos
--architecture=mobilenet_1.0_224
--summaries_dir tf_files/training_summaries/mobilenet_1.0_244
Output
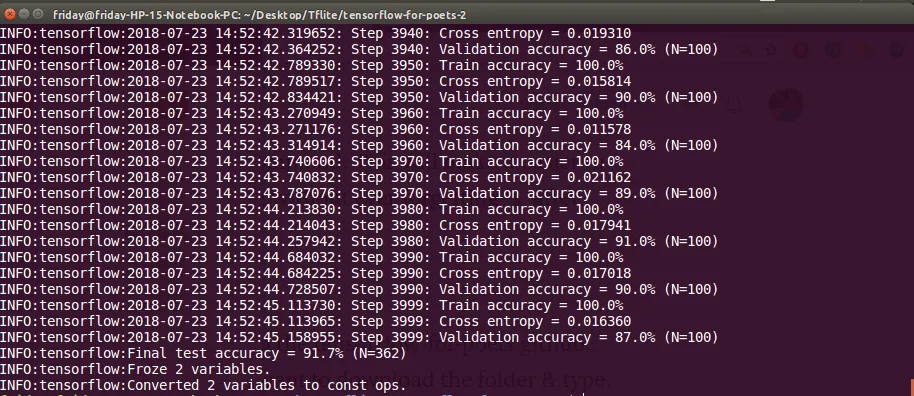
This will download the pre-trained frozen graph mobilenet_1.0_244

and create retrained_graph.pb and retrained_labels.txt files in the tf_files folder.
Open TensorBoard
Open another command prompt in the current directory and point TensorBoard to the summaries_dir:
tensorboard --logdir=tf_files/training_summaries/mobilenet_1.0_244Output

Now you can open the 6006 port in your browser to see the results.
Visualization
🔴 Training & 🔵 Validation
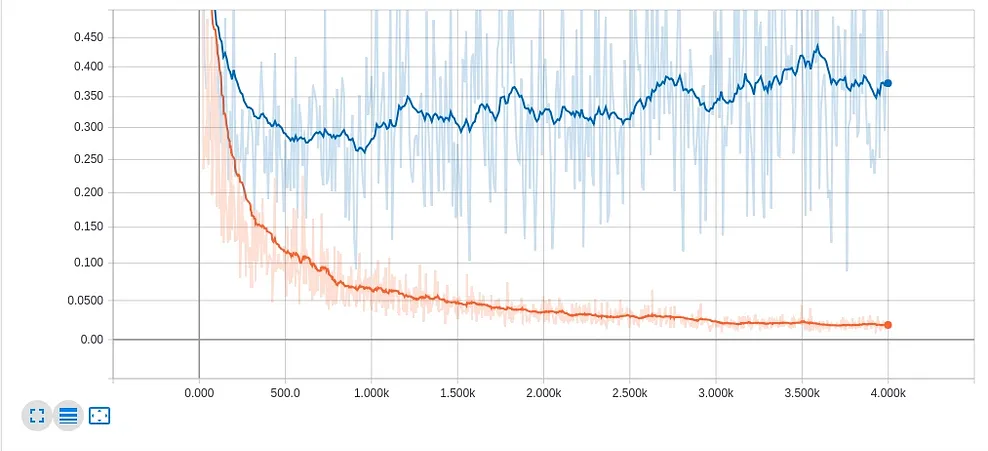
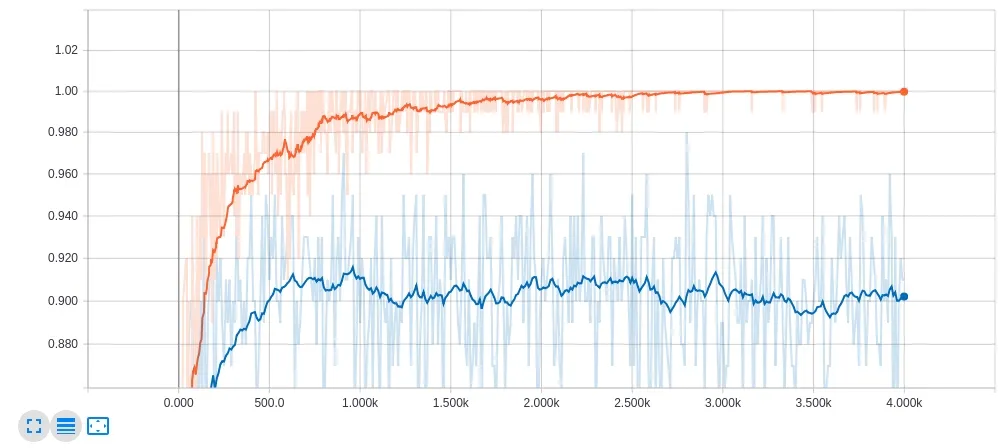
Accuracy is above 0.90 and loss is below 0.4 for validation.
Verify ✔️
I downloaded a random rose image from the Internet in the current folder and used the following command to run the label_image.py script to detect the –image using the –graph file.
python scripts/label_image
  --graph=tf_files/retrained_graph.pb
  --image=new_rose.jpg
Output
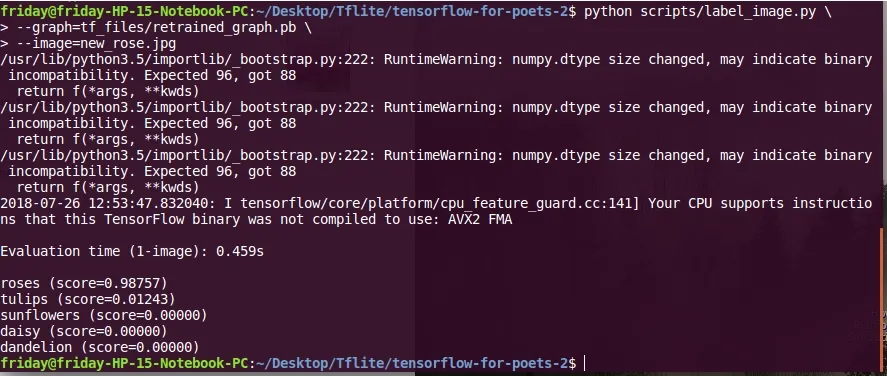

The result gives 99% accuracy for the new_rose image.
Step 4: Convert the Model to TFLite Format
TOCO (TensorFlow Lite Converter) is used to convert the file to .lite format. For more detail on TOCO arguments, use toco –help
IMAGE_SIZE=224
toco
  --graph_def_file=tf_files/retrained_graph.pb
  --output_file=tf_files/optimized_graph.lite
  --output_format=TFLITE
  --input_shape=1,${IMAGE_SIZE},${IMAGE_SIZE},3
  --input_array=input
  --output_array=final_result
  --inference_type=FLOAT
  --inference_input_type=FLOAT
This will create an optimized_graph.lite file in your tf_files directory.
🍎 iOS 📱
Step 5: Setup Xcode Studio and Test Run
Download Xcode
Install Xcode
xcode-select --installInstall Cocoapods
sudo gem install cocoapodsInstall TFLite Cocoapod
pod install --project-directory=ios/tflite/Open the project with Xcode
open ios/tflite/tflite_camera_example.xcworkspaceTest Run 🏃
Press ▶️ to initiate the simulator in Xcode.
Step 6: Run your Application
First move the trained files into the assets folder of the application.
Replace the graph.lite file.
cp tf_files/optimized_graph.lite ios/tflite/data/graph.liteAnd then thelabels.txt file.
cp tf_files/retrained_labels.txt ios/tflite/data/labels.txtNow just click the ▶️ to open the simulator and drop images to see the results.
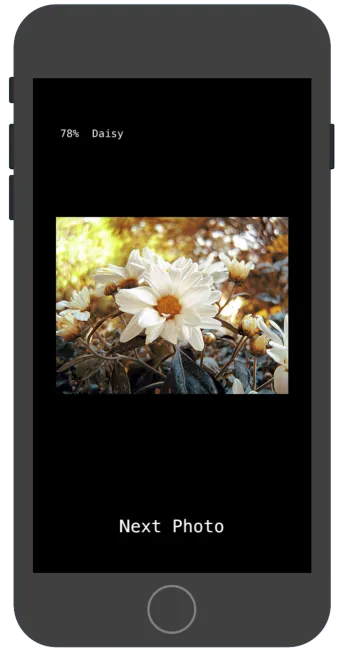
👏 👏 👏 Congratulations! Now you can apply the same method in your next gazillion dollar app, enable doctors work to faster and better without expensive equipment in the rural parts of the world, or just have fun. 👏👏 👏
🍭 🍦 Android 🍞🐝 🍩
Step 5: Setup Android Studio and Test Run
There are two ways to do this: Android Studio and Bazel. I’ll be using AS since more people are familiar with it.
If you don’t have it installed already, go here and install it:
Test Run 🏃
To make sure everything is working correctly in Android Studio, let’s do a test run.
🔸 Open Android Studio and select “📁Open an existing Android Studio project”.
🔸 Go to android/tfmobile directory.
🔸 If everything works perfectly, click the BUILD>BUILD APK button.
Open the folder containing app-debug.apk file by clicking locate.
Step 6: Run your Application
First move the trained files into the assets folder of the application.
Replace the graph.lite file.
cp tf_files/optimized_graph.lite android/tflite/app/src/main/assets/graph.liteand then labels.txt file.
cp tf_files/retrained_labels.txt android/tflite/app/src/main/assets/labels.txtNow click Tools>> Build .apk file.
Install Application
Install the .apk file onyour phone and see the re-trained neural network detecting the objects.
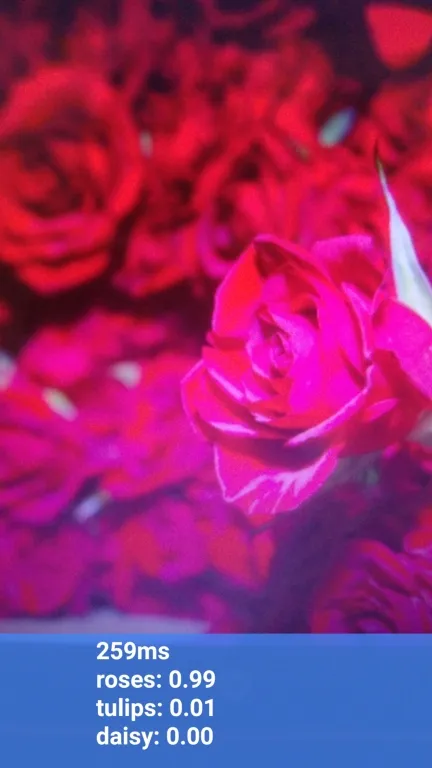
👏 👏 👏 Congratulations! Now you can apply the same method in your next gazillion dollar app, enable doctors to work faster and better without expensive equipment in rural parts of the world, or just have fun. 👏👏 👏
If you hit a wall while implementing this post, reach out in the comments.
For further tutorials on how to use TensorFlow in mobile apps follow me on Medium and Twitter to see similar posts.
Clap it! Share it! Follow Me!


Happy to be helpful. kudos…
Discuss this post on Hacker News and Reddit.

Comments 0 Responses