
Chatbots are a thing. Yes, they may seem gimmicky on the surface. But a lot has changed since the days of SmarterChild. Dig a little deeper and you’ll find there’s more to them than meets the eye.
First, chatbots are, essentially, gateways to voice apps. Whether you use Alexa, Siri, Google Assistant, or Cortana, building apps with a conversational interface is a new norm. Second, chatbots can provide a first line of support that users can feel comfortable interacting with.
They’re more personable than an FAQ page, yet more accessible than waiting for a person on the phone. Lastly, they enhance your brand by representing your willingness to adopt the latest tech, especially for the benefit of users/clients.
Streamlining Chatbots with QnA Maker
There are a number of different solutions, services, and levels of complexity when it comes to chatbots. There’s no singular correct answer for all scenarios, as every use case has some unique aspect to it. However, when it comes to building a simple support bot with a friendly personality to interact with your clients, Microsoft Azure’s QnA Maker is a fantastic solution.
Today, with the exclusion of setting up an Azure account (a free account takes minutes to setup), we’ll go through how you can create and run a basic Chatbot trained by a FAQ webpage (I’ll be using the Fritz AI FAQ, but you can use any that you’d like) in under 10 minutes.
In addition, we’ll also briefly go over how you can then customize and add to your bot’s knowledge base. Lastly, we’ll take a look at how you can take your bot to your clients through various channels (e.g. Teams, Cortana, and Slack) in a matter of clicks!
Creating a QnA Chatbot
If you haven’t already, setup an Azure account, you can easily set up a free account just to try it out if you’d like. Once that’s done, head over to QnA Maker and hit Create a knowledge base on the top.
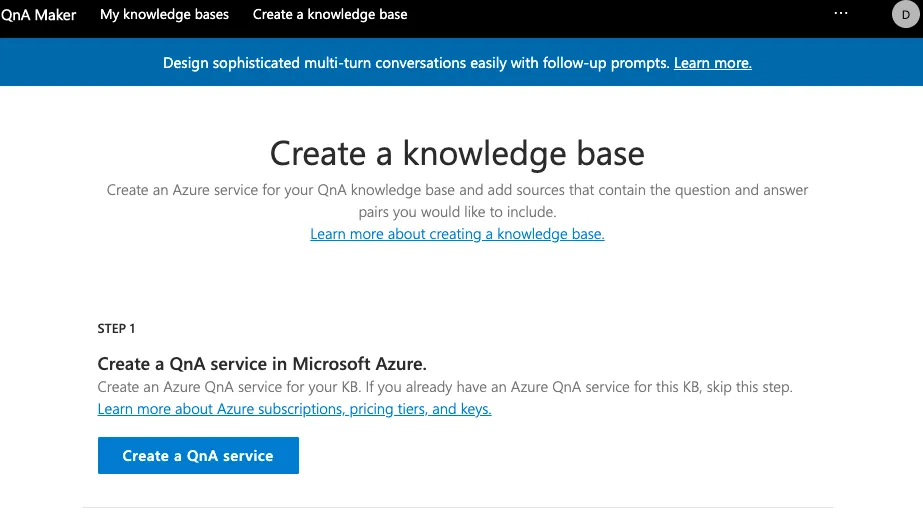
The first thing we need to make is a QnA Service. Click the Create a QnA Service button and fill out the info there. Make sure to set your service to the free tier if that’s what you’re hoping to run with. Once you hit create, wait for Azure to deploy your service.
Next, we head to Step 2. Set the Directory ID, Subscription Name, the Service we just created, and the default language. Note: If your service doesn’t show up in the drop-down, but you know it’s deployed, hit the refresh button below Step 2’s description.
For Step 3, simply give the Knowledge Base a name (e.g. I named mine Fritz AI KB).
Filling the Knowledge Base
Now we are at Step 4, which allows us to point to our FAQ. What’s cool about this section is that it can take web URL’s as well as documents with Question and Answer pairs (including exported KB’s). It then scrapes those sources and creates a data table of the pairings, which we’ll get to see and refine in a little bit.
The other option we get here is choosing a personality type for our bot. This will also load our Knowledge Base with a set of conversation Questions and Answers so our bot seems a little more interactive than just a straight-shooting bot. Our options are Professional, Friendly, Witty, Caring, and Enthusiastic.
After we set up our Knowledge Base, we finally reach Step 5 and can hit Create Your KB!
Checking Out Our KB
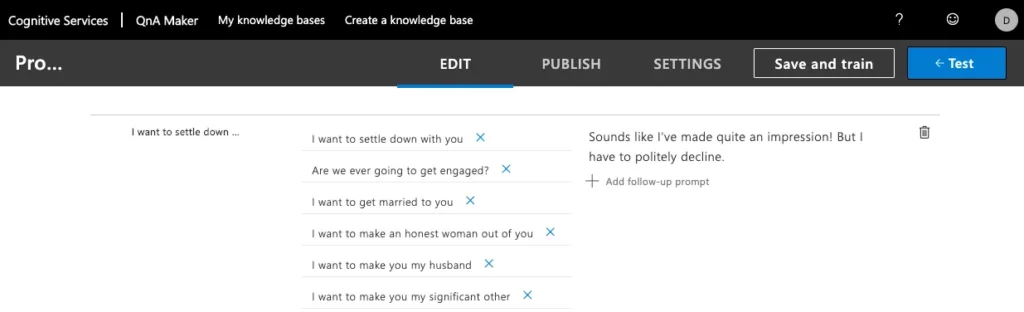
When our KB is finally set up, we then get to explore the results of the scraping. This is an important step to ensure that the service did a great job discerning questions and answers, but that it also grabbed everything we hoped it would. It also gives us the opportunity to refine answers or offer variations on questions.
An example could be that, on a FAQ page, a lengthy answer could be justified. But in a chat, perhaps shorter, more precise answers are expected with follow-up questions provided if more information is requested. We may also have various ways of asking a similar root question, but with the same answer for all of them. We can categorize those questions and point them to a common answer.
Scenarios could be different based on your target audience and your marketing strategy. It’s good to know, then, that our KB is customizable at this level. If you do make any changes, be sure to hit Save and Train before moving on.
In Settings, we can set up more sources for our KB to reference, as well as Export our KB as TSV or Excel documents. There’s also a link on how to share KBs across your Azure Portal, which could be useful for sharing core KBs across chatbots for different LOBs in your company.
Publishing Our KB
Lastly, we can hit Publish, which will make our KB consumable by a bot service. Once you do that, you’ll be given a few options.
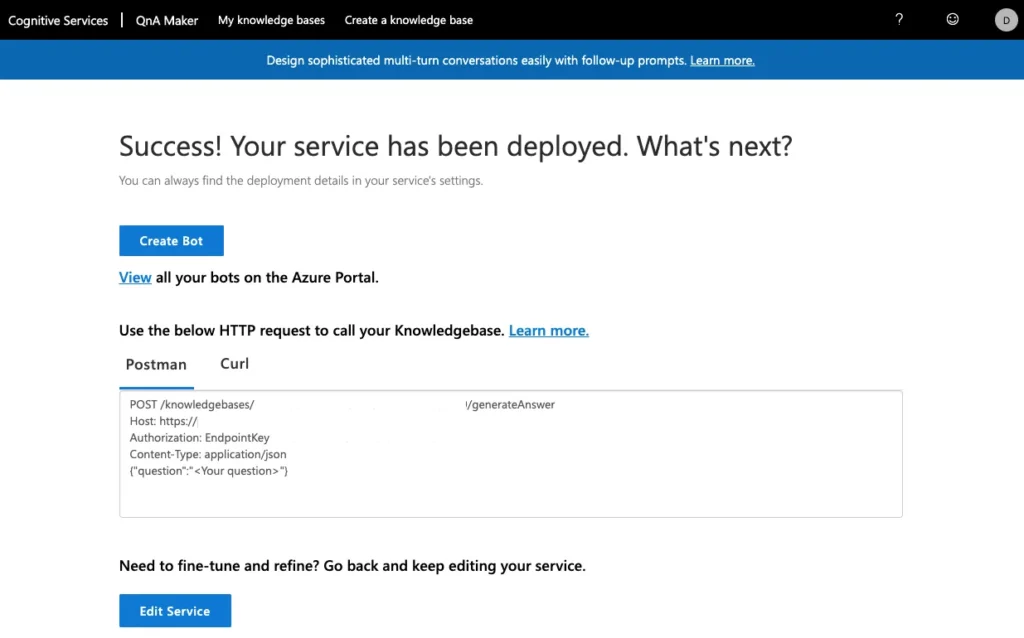
You can test your KB by copy and pasting either a Postman call or Curl call and running them locally with your questions. You can also go back and edit your service (button on the bottom). But what we want to do now is actually make our bot, so hit Create Bot!
You’ll be sent to a form that’s very similar to the we created for our QnA Service. Again, be sure to set it to the free tier if that’s what you’re looking for. Don’t edit the endpoints, as they’ve been preset for you and are needed to connect our KB to our bot.
You also have the choice of which language your bot will be implemented in (C# or Node.JS). This will be useful if you plan on editing the bot or want to essentially export the bot code to run locally (I’ll point out where to do this down below). This is totally up to your preference.
Hit Create and, again, wait for our bot to be deployed.
Running Our Bot
After our bot is deployed, we can finally use and share it! Click on the bot to go to the Bot Service portal page.
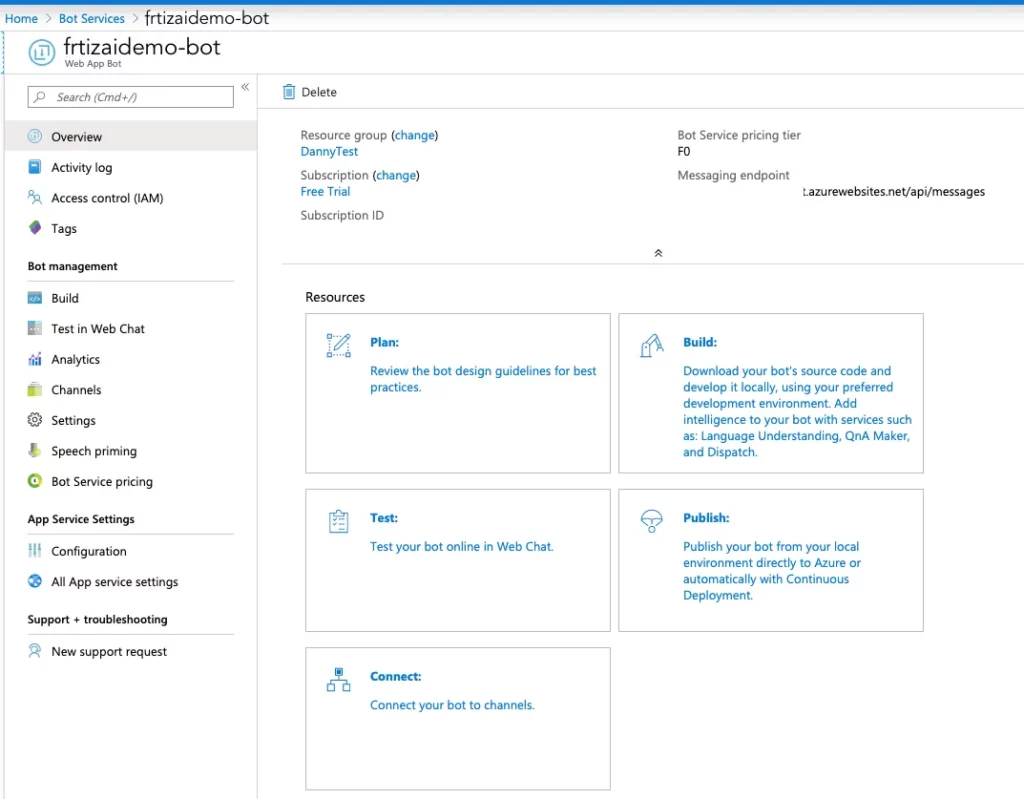
From here, we can go directly to Test in Web Chat, where a simple messaging web app will pull up, and we can chat with our bot live.

Now let’s say you wanted to run this bot in an embedded chat window on your site. We can do this in the Channels section. There, you’ll see the Web Chat channel is already online. We can click on Get bot embed codes, which will give us the embeddable Web Chat iframe as well as the secret keys we’ll need to connect to our bot.
Tuning into Other Channels
From Channels, you’ll see that we can also connect our bot to a few other services quite seamlessly (e.g. Slack, Skype, Cortana, etc). Let’s say you want to chat with your bot through Microsoft Teams. Simply click on the Teams icon, agree to run on Teams, and when you return to the Channels page, you’ll see that it has been enabled next to Web Chat.
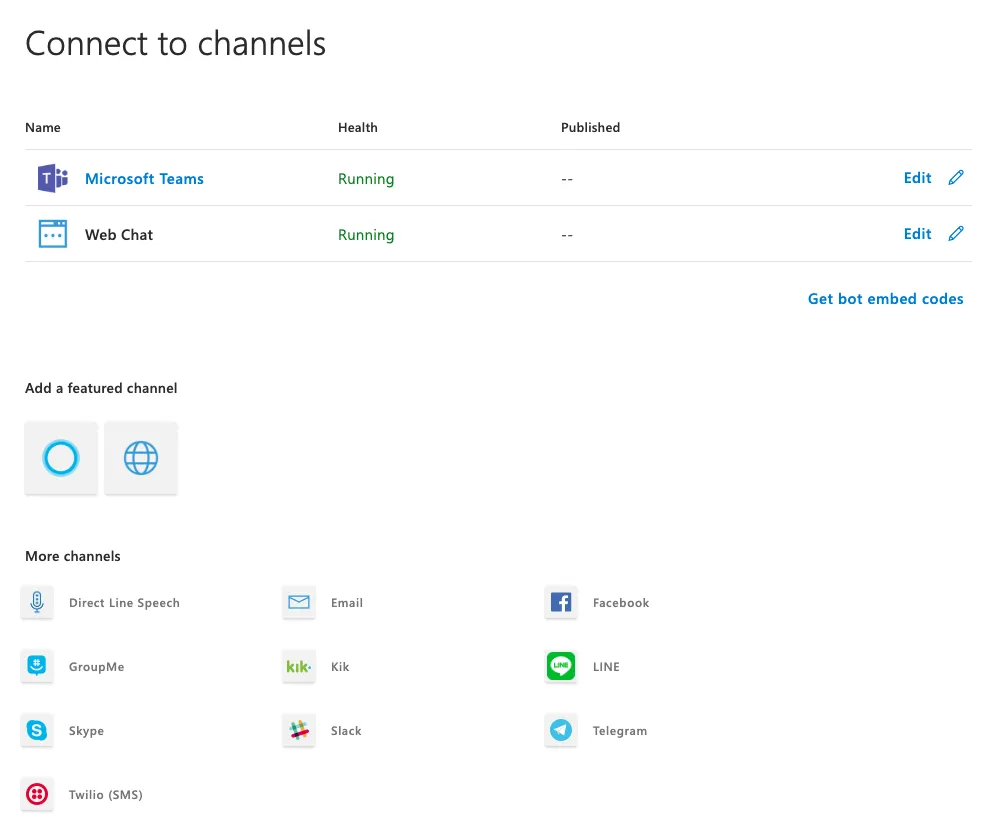
If we click on Get bot embed codes now, you’ll see a tab for Teams which gives you an embeddable icon to open a chat with your bot in Teams. You can just copy and past that URL into your browser, open Teams, and get chatting!
Building a Better Bot
From here, you can begin to explore how you can improve your bot for your target audience. One way, of course, is by refining you bot’s KB, which you can do in QnA Maker or through resource files that you can load into your KB.
The other way is to take your bot’s code and tweak it yourself. As mentioned earlier, when we set up our bot service, we got to choose between C# or Node.JS versions. From the bot service portal, we can go to Build.
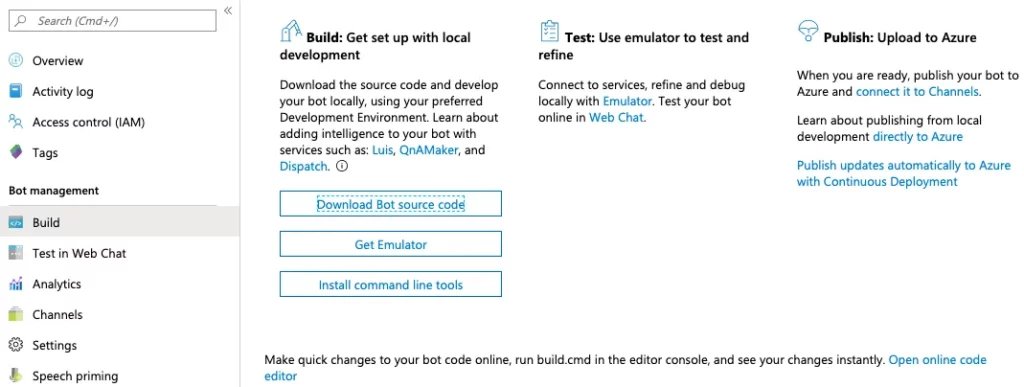
Here we see a number of different options and tools for how we can edit, test, run, and publish our bot code. I won’t get into detail with this, today, but know that it’s here and could open up a number of possibilities for you chatbot.
Comments 0 Responses