
At WWDC18, Apple announced an exciting new addition to their machine learning frameworks, Create ML. Create ML gives developers an easy way to create custom, lightweight machine learning models within Xcode.
When combined with existing frameworks such as Core ML and Vision, iOS developers (even those without prior knowledge of machine learning) can create apps that use custom models they built themselves.
This project will be split into three major parts:
- Pokémon model creation using Create ML
- Building the base iOS Application
- Using to model to classify images and display the results
Creating the Model
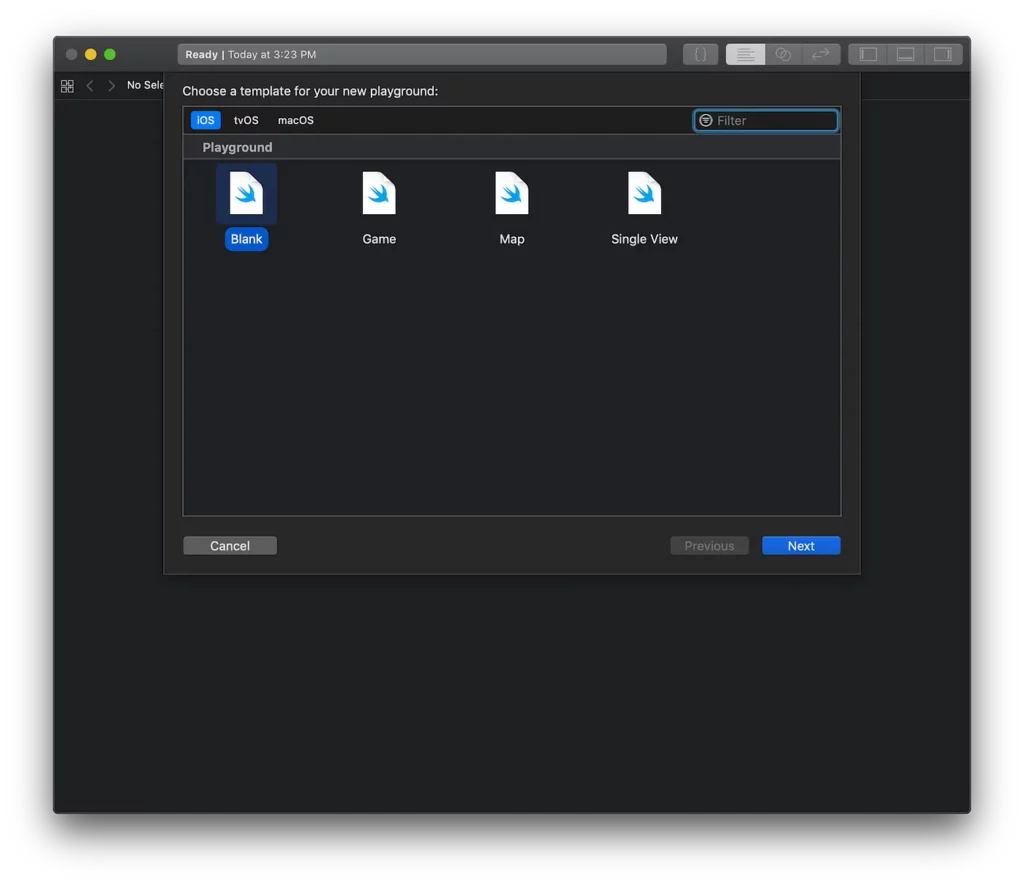
First, let’s begin by creating a new blank playground in the latest Xcode 10 Beta running on macOS Mojave.
Next, we’ll import from the new CreateMLUI framework, and write the two following lines of code and run the playground. (Make sure that your assistant editor is open so you can see the CreateML UI on the right hand side):
import CreateMLUI

let builder = MLImageClassifierBuilder()
builder.showInLiveView()
Now, rename the model to anything you’d like. In this project I am using the name “PokemonModel”.
Using the training set provided in the GitHub repository, click and drag the folder into the designated area.
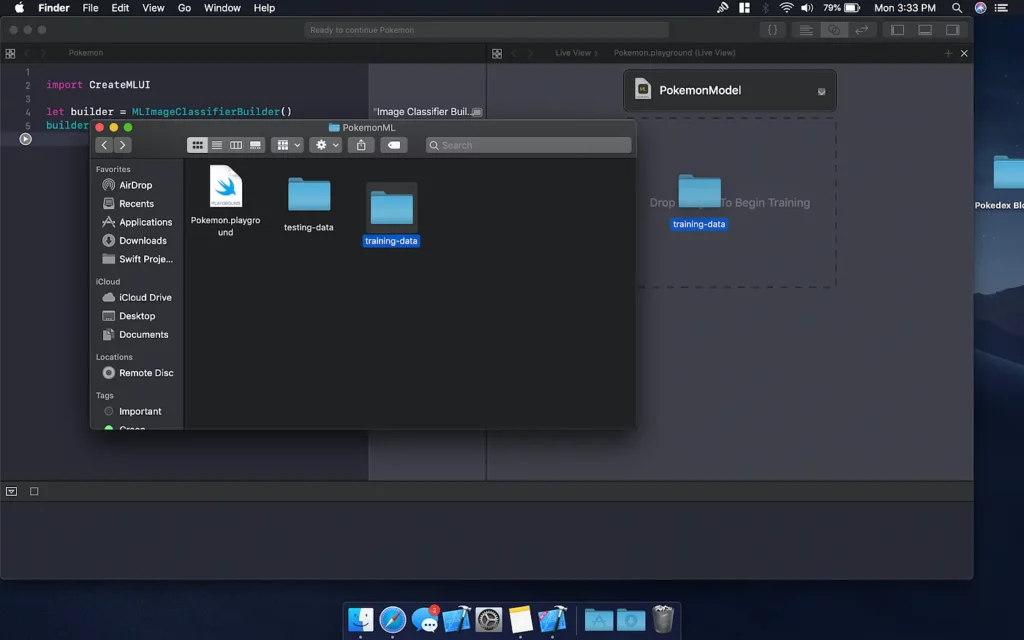
The playground will now iterate through the training data and build the model. The training data is simply a folder containing folders of each classification and their training data.
Once the model has finished training, click and drag the testing data folder into the designated area. This will have the playground run through images not found in the training data and evaluate its own accuracy. You should be presented with a score similar to this.
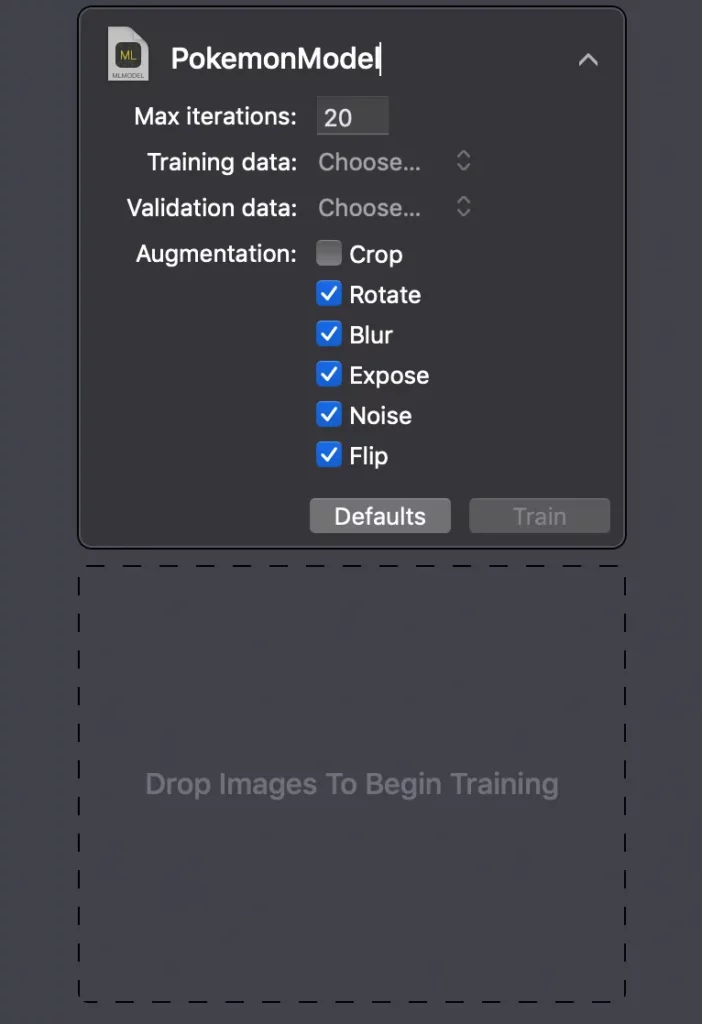
It should be noted that the training data can be enhanced by increasing the number of iterations and using the data augmentation options shown below to diversify the data. Doing so, however, will substantially increase the training time, so for the purposes of this project, I used the default settings.
After the evaluation is complete, save the model into a safe place. Now we’re ready to start building the “Pokédex” App!
Building the App
Let’s start by creating a new Xcode Project using a Single View App template:
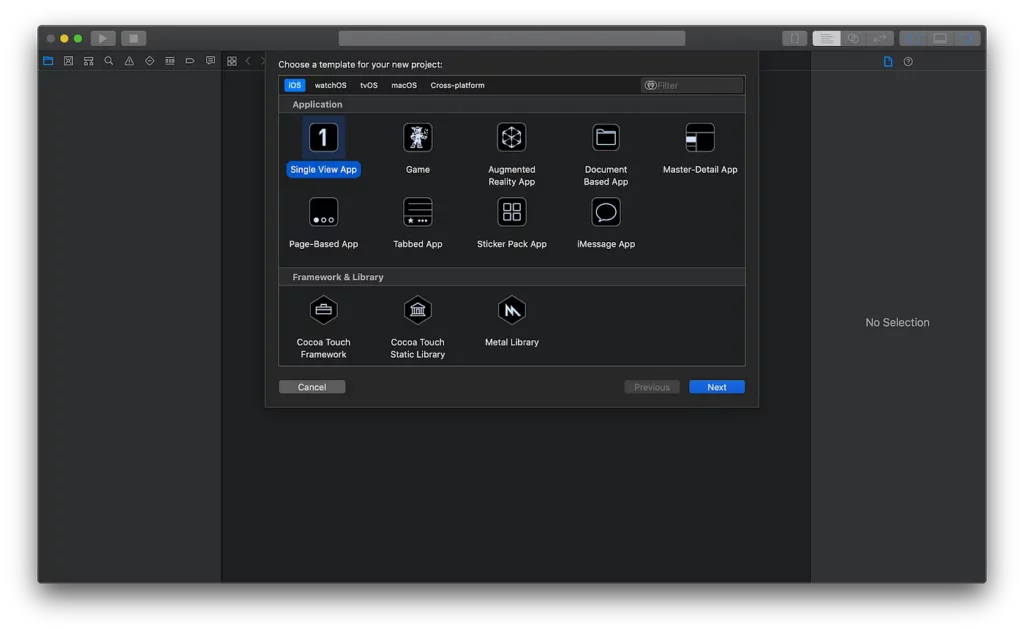
You can name it whatever your heart desires, I will be using “PokedexML” as the product name.
(In my project, I renamed my ViewController.swift file to MainVC.swift, so I will refer to it as such)
First, we need to set up a way to add child view controllers to our MainVC (and other UIViewControllers) by creating an extension below the last curly brace in the file.
extension UIViewController {
    func add(_ child: UIViewController) {
        addChild(child)
        view.addSubview(child.view)
        child.didMove(toParent: self)
    }

    func remove() {
        guard parent != nil else {
            return
        }
        willMove(toParent: nil)
        removeFromParent()
        view.removeFromSuperview()
    }
}
Next, we’ll be setting up some functions to fill later on in the project. For now, create empty functions called addCamera() and updateImage().
Now let’s create a rectangle in the lower left-hand corner of the screen that we will use to display the currently evaluated image.
Add a function called addImagePreview(), and populate it as follows:
private func addImagePreview() {
        imageView = UIImageView(frame: CGRect(x: 0, y: 0, width: 20, height: 50))
        imageView.backgroundColor = .gray
        imageView.layer.opacity = 1.0
        self.view.addSubview(imageView)
        imageView.translatesAutoresizingMaskIntoConstraints = false

        NSLayoutConstraint.activate([
            imageView.leftAnchor.constraint(equalTo: self.view.leftAnchor, constant: 16),
            imageView.bottomAnchor.constraint(equalTo: self.view.bottomAnchor, constant: -16),
            imageView.widthAnchor.constraint(equalToConstant: 72),
            imageView.heightAnchor.constraint(equalToConstant: 128)])
    }
Add two more functions called addClassificationBox() and addClassificationLabel(). These will be responsible for creating the area where we’ll display the classification of each Pokémon.
Populate these functions as follows:
private func addClassificationBox() {
        classificationBox = UIView(frame: CGRect(x: 0, y: 0, width: 50, height: 128))
        classificationBox.backgroundColor = .gray
        self.view.addSubview(classificationBox)
        classificationBox.translatesAutoresizingMaskIntoConstraints = false

        NSLayoutConstraint.activate([
            classificationBox.leftAnchor.constraint(equalTo: self.imageView.rightAnchor, constant: 0),
            classificationBox.bottomAnchor.constraint(equalTo: self.imageView.bottomAnchor, constant: 0),
            classificationBox.rightAnchor.constraint(equalTo: self.view.rightAnchor, constant: -16),
            classificationBox.heightAnchor.constraint(equalToConstant: 128)])
        addClassificationLabel()
    }

private func addClassificationLabel() {
        classificationLabel = UILabel()
        classificationLabel.text = "Tap to take a picture of a Pokemon!"
        classificationBox.addSubview(classificationLabel)
        classificationLabel.translatesAutoresizingMaskIntoConstraints = false
        classificationLabel.textAlignment = .center
        NSLayoutConstraint.activate([
            classificationLabel.leftAnchor.constraint(equalTo: classificationBox.leftAnchor),
            classificationLabel.topAnchor.constraint(equalTo: classificationBox.topAnchor),
            classificationLabel.bottomAnchor.constraint(equalTo: classificationBox.bottomAnchor),
            classificationLabel.rightAnchor.constraint(equalTo: classificationBox.rightAnchor),
            ])
    }
Next we’ll create the Camera View Controller, which will be used to show a live camera screen on top of our MainVC and enable us to take pictures of our targeted Pokémon.
Right click on the main file folder and select “New File”. Then create a new UIViewController named CameraVC.
In order to separate the camera logic and the view itself, we’ll create another swift file called CameraView. (Following the same steps as before except selecting UIView this time.)
import UIKit
import AVFoundation

class CameraView: UIView {

    // Set the layer class of view to be of type AVCaptureVideoPreviewLayer
    override class var layerClass: AnyClass {
        return AVCaptureVideoPreviewLayer.self
    }

    // Variable to access the preview layer
    var videoPreviewLayer: AVCaptureVideoPreviewLayer {
        return layer as! AVCaptureVideoPreviewLayer
    }

}
Make sure you import from UIKit and AVFoundation, and add the code above. The view will be very simple and add the videoPreviewLayer as an accessible variable.
Now we can go back into the CameraVC class that we created and begin working on accessing the camera.
First, at the top of the file, import from AVFoundation and UIKit. Then, add two constants “captureSession” and “previewView” as AVCaptureSession() and CameraView() respectively.
Since we will be using this view controller as a child of MainVC, we will override the didMove(toParent) function.
In the following steps we will be creating two functions to put inside didMove(toParent), one to configure the camera, and one to link it to our CameraView.
configureCamera:
    func configureCamera() {
        // Open Capture Session Configuration
        captureSession.beginConfiguration()

        // Setup Camera Devices
        let videoDevice = AVCaptureDevice.default(AVCaptureDevice.DeviceType.builtInWideAngleCamera, for: .video, position: .unspecified)

        // Check that the video device input is usable by the capture session
        guard let videoDeviceInput = try? AVCaptureDeviceInput(device: videoDevice!), captureSession.canAddInput(videoDeviceInput) else { return }
        captureSession.addInput(videoDeviceInput)

        // Photo Output Setup
        let photoOutput = AVCapturePhotoOutput()
        guard captureSession.canAddOutput(photoOutput) else { return }

        // Set output to handle wide angle output
        captureSession.sessionPreset = .hd1920x1080
        captureSession.addOutput(photoOutput)

        // Close Capture Session Configuration
        captureSession.commitConfiguration()

        // Set Preview
        previewView.videoPreviewLayer.session = self.captureSession
        captureSession.startRunning()
    }
setupCameraView:
private func setupCameraView() {
        // Sets up the CameraView to fill entire screen
        previewView.frame = self.view.frame
        self.view.addSubview(previewView)
        setupTapGesture()
    }
Now that those two functions are finished, we can create a way to capture photos!
We will start by creating an extension of the CameraVC at the bottom of the file and conforming to the AVCapturePhotoCaptureDelegate protocol. The extension should look like the following.
extension CameraVC: AVCapturePhotoCaptureDelegate {
    func photoOutput(_ output: AVCapturePhotoOutput, didFinishProcessingPhoto photo: AVCapturePhoto, error: Error?) {
        if let data = photo.fileDataRepresentation() {
            let capturedImage = UIImage(data: data)!
            if let parent = self.parent as? MainVC {
                parent.updateImage(image: capturedImage)
            }
        }
    }
}
This function allows us to utilize the AVCapturePhotoCaptureDelegate protocol, and create a UIImage from the data captured by the camera. We then send this UIImage back to the MainVC to be displayed in the image preview and ready to be classified.
Now in the main code section, we will conform to the UIGestureRecognizerDelegate in order to add our tap gesture to capture the photos.
Let’s create a function called setupTapGesture() as shown below:
private func setupTapGesture() {
        let tap = UITapGestureRecognizer(target: self, action: #selector(capturePhoto))
        tap.delegate = self
        previewView.addGestureRecognizer(tap)
    }
You’ll notice that we have an unknown function called capturePhoto(), so let’s declare that as well.
@objc func capturePhoto() {
        if let output = captureSession.outputs.first as? AVCapturePhotoOutput {
            let settings = AVCapturePhotoSettings()
            settings.flashMode = .off
            output.capturePhoto(with: settings, delegate: self)
        }
    }
Here we have the @objc tag in front because we are using the #selector method to call it.
Let’s head back to MainVC to fill in our empty functions.
addCamera:
private func addCamera() {
        // Instantiate cameraController
        cameraController = CameraVC()
        self.addChild(cameraController)
        cameraController.view.frame = CGRect(x: 0, y: 0, width: self.view.frame.width, height: self.view.frame.height)
        self.view.addSubview(cameraController.view)
        cameraController.didMove(toParent: self)
    }
updateImage:
func updateImage(image: UIImage) {
        self.imageView.image = image
    }
Before you’re able to build and run, we need to add some permissions in the info.plist file.
In the info.plist file, add the Privacy — Camera Usage Description and set a value for the string. This will be the description when asking the user for permission to use the camera.
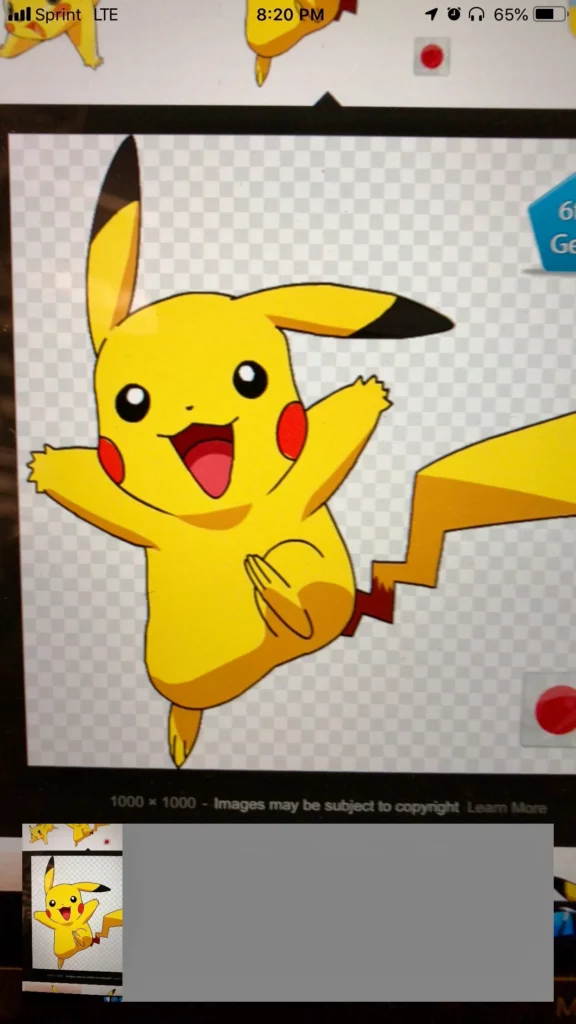
If you build and run the project now, you should see that a live camera is displayed, and tapping the screen will update the image in the lower left corner.
Now all there’s left to do is send this image to the model that we created, and we’ll have our completed “Pokédex!”
Adding the brains
Now that we have the base of the app built, we can get to the brains of our “Pokédex.”
Let’s begin by opening the place where you saved the PokémonModel from the first section. Click and drag it into the Xcode project.
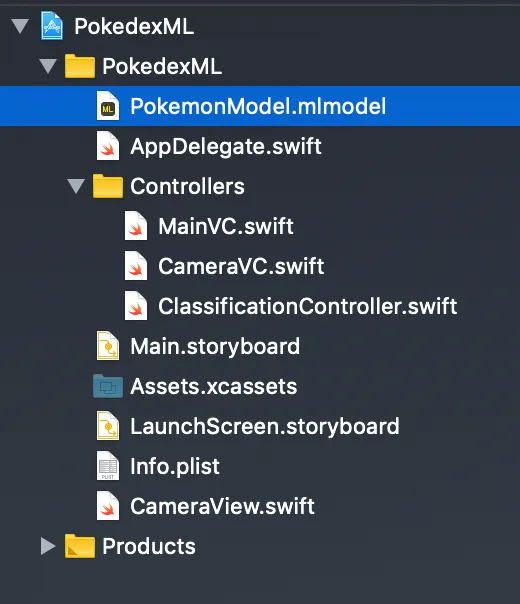
The great thing about Core ML is that it creates a Swift model class for your custom .mlmodel file! This means that Xcode handles all of the heavy lifting to convert the model into a Swift compatible class.
Making the ClassificationController
Create a new blank Swift file called ClassificationController. This is going to handle all of the logic of interfacing with the PokemonModel.
This class is going to be using UIKit, Core ML, Vision, and ImageIO, so be sure to import them at the top of the file.
First, let’s create a new protocol underneath the class declaration called ClassificationControllerDelegate, with a function called didFinishClassification. The function should take a tuple in the form (String, Float). This will help us to send the classification back to our MainVC later on.
protocol ClassificationControllerDelegate {
    func didFinishClassification(_ classification: (String, Float))
}
Inside the ClassificationController class, declare a constant for the delegate. Now we need an initializer that takes a ClassificationControllerDelegate as an argument.
class ClassificationController {

    let delegate: ClassificationControllerDelegate!

    init(delegate: ClassificationControllerDelegate) {
        self.delegate = delegate
    }

}
Next, create a function called processClassifications. This function will take a request of type VNRequest, and an optional error.
func processClassifications(for request: VNRequest, error: Error?) {

        DispatchQueue.main.async {
            guard let results = request.results else {
                print("UNABLE TO CLASSIFY IMAGE n (error!.localizedDescription)")
                return
            }

            let classifications = results as! [VNClassificationObservation]

            if classifications.isEmpty {
                print("NOTHING RECOGNIZED")
            } else {
                let topClassifications = classifications.prefix(2)
                let descriptions = topClassifications.map { classification in
                    return String(format: "  (%.2f) %@", classification.confidence, classification.identifier)
                }
                let description = (classifications.first!.identifier, classifications.first!.confidence)
                print("Classification: (descriptions.joined(separator: "n"))")
                self.delegate.didFinishClassification(description)
            }
        }
    }
This function will return the classification of the request that is made to the model, and use the delegate method didFinishClassification to return a tuple containing the string of the classified pokemon and the confidence.
The last two components are the classificationRequest lazy variable and updateClassifications function.
classificationRequest:
lazy var classificationRequest: VNCoreMLRequest = {
        do {
            // Use the generated swift file from CoreML of Pokemon Classifier
            let model = try VNCoreMLModel(for: PokemonModel().model)

            let request = VNCoreMLRequest(model: model, completionHandler: { [weak self] request, error in
                self?.processClassifications(for: request, error: error)
            })
            request.imageCropAndScaleOption = .centerCrop
            return request
        } catch {
            fatalError("Failed to Load Pokemon ML Model: (error)")
        }
    }()
The classification request accesses the PokemonModel’s automatically generated model class and sets the image crop setting to a center crop.
updateClassifications:
func updateClassifications(for image: UIImage) {
        let orientation = CGImagePropertyOrientation(rawValue: UInt32(image.imageOrientation.rawValue))
        guard let ciImage = CIImage(image: image) else { fatalError("Unable to create (CIImage.self) from (image).") }

        DispatchQueue.global(qos: .userInitiated).async {
            let handler = VNImageRequestHandler(ciImage: ciImage, orientation: orientation!)
            do {
                try handler.perform([self.classificationRequest])
            } catch {
                print("Failed to perform classification.n(error.localizedDescription)")
            }
        }
    }
This function is what we’ll use to pass a UIImage from MainVC into the ClassificationController. This sets up the orientation that the UIImage will be sent as to the request, and transforms it into a CIImage. Then, we use an asynchronous DispatchQueue to perform the classificationRequest that has been created.
It’s now time to go back into the MainVC and add a ClassificationController instance.
First, let’s create another extension of MainVC to conform to the ClassificationControllerDelegate. Inside, create the required didFinishClassification function and display the classification with the classificationLabel that we declared earlier.
extension MainVC: ClassificationControllerDelegate {
    func didFinishClassification(_ classification: (String, Float)) {
        if classification.1 > 0.60{
        print("Finished Classification (classification.0) (classification.1)")
        classificationLabel.text = "(classification.0.capitalized) - Confidence: (classification.1 * 100)%"
        } else {
            classificationLabel.text = "Could not recognize pokemon, try again."
        }
    }
}
Since the Float portion of the classification tuple is the confidence level of the classification (from 0 to 1), we will use that to check if the classification is at least 60% confidence before displaying a Pokémon name. If it is below 60%, we will display an error message with the classificationLabel.
Now we can add a variable called classifier of type ClassificationController and a private function to instantiate it with MainVC as the delegate. This function will be called inside of the viewDidLoad function.
private func addClassifier() {
        classifier = ClassificationController(delegate: self)
    }
Create a new function called evaluateImage that takes a UIImage, and call the classifier’s updateClassification function. Call this function inside of the existing updateImage function.
func updateImage(image: UIImage) {
self.imageView.image = image
evaluateImage(image) // Add this line to the existing function
}
private func evaluateImage(_ image: UIImage) {
// Uses model to classify image
classifier.updateClassifications(for: image)
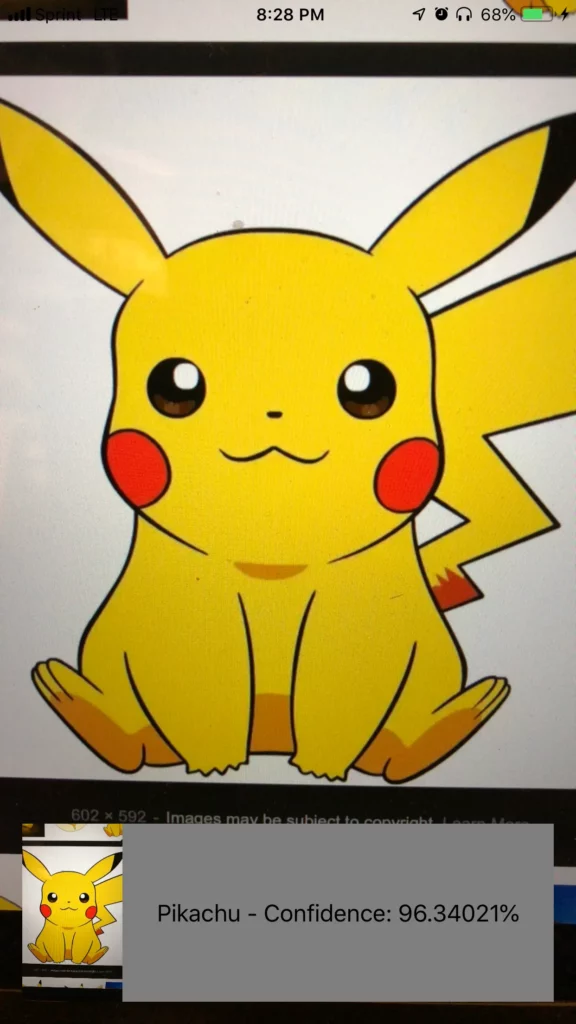
}With this last edition, you should be able to build and run the project and try it out on any of the starter Pokémon from the first three generations, and of course, the all important Pikachu!
Now we’re all done! To check out my full project with API calls and fancy graphics/animations, please check out my original GitHub repository.
Comments 0 Responses