Computer Vision — iOS
Depth estimation is a major problem in computer vision, particularly for applications related to augmented reality, robotics, and even autonomous cars.
Traditional 3D sensors typically use stereoscopic vision, movement, or projection of structured light. However, these sensors depend on the environment (sun, texture) or require several peripherals (camera, projector), which leads to very bulky systems.
Many efforts have been made to build compact systems — perhaps the most remarkable are the light field cameras that use a matrix of microlenses in front of the sensor.
Recently, several depth estimation approaches based on deep learning have been proposed. These methods use a single point of view (a single image) and generally optimize a regression on the reference depth map.
The first challenge concerns the network architecture, which usually follows the advances proposed each year in the field of deep learning: VGG16, residual networks (ResNet), and so on.
The second challenge is defining an appropriate loss function for deep regression. Thus, the relationship between networks and objective functions is complex, and their respective influences are difficult to distinguish.
Previous methods exploit the geometric aspects of the scene to deduce the depth. Another known index for depth estimation is defocus blur.
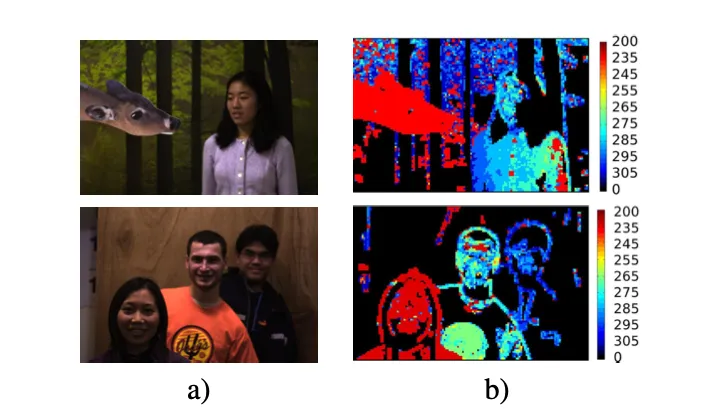
However, depth estimation using focus blurring (Depth from Defocus, DFD) with a conventional camera and a single image suffers from ambiguity relative to the plane of focus and the blind zone related to the depth of field of the camera, where no blurring can be measured. Furthermore, to estimate the depth of an unknown fuzzy scene, DFD requires a scene model and a fuzzy calibration to relate it to a depth value.
Why mobile?
Since the advent of augmented reality, which consists of inserting computer-generated images over real-world scenes using a mobile phone camera or special glasses (i.e Hololens).
Small cameras located in the middle and outside of each lens send continuous video images to two small screens on the inside of the glasses.
Once connected to a computer, the data is combined with live/filmed reality, creating a unique stereoscopic field of view on the LCD screen, where the computer-generated images are superimposed with those of the real world.
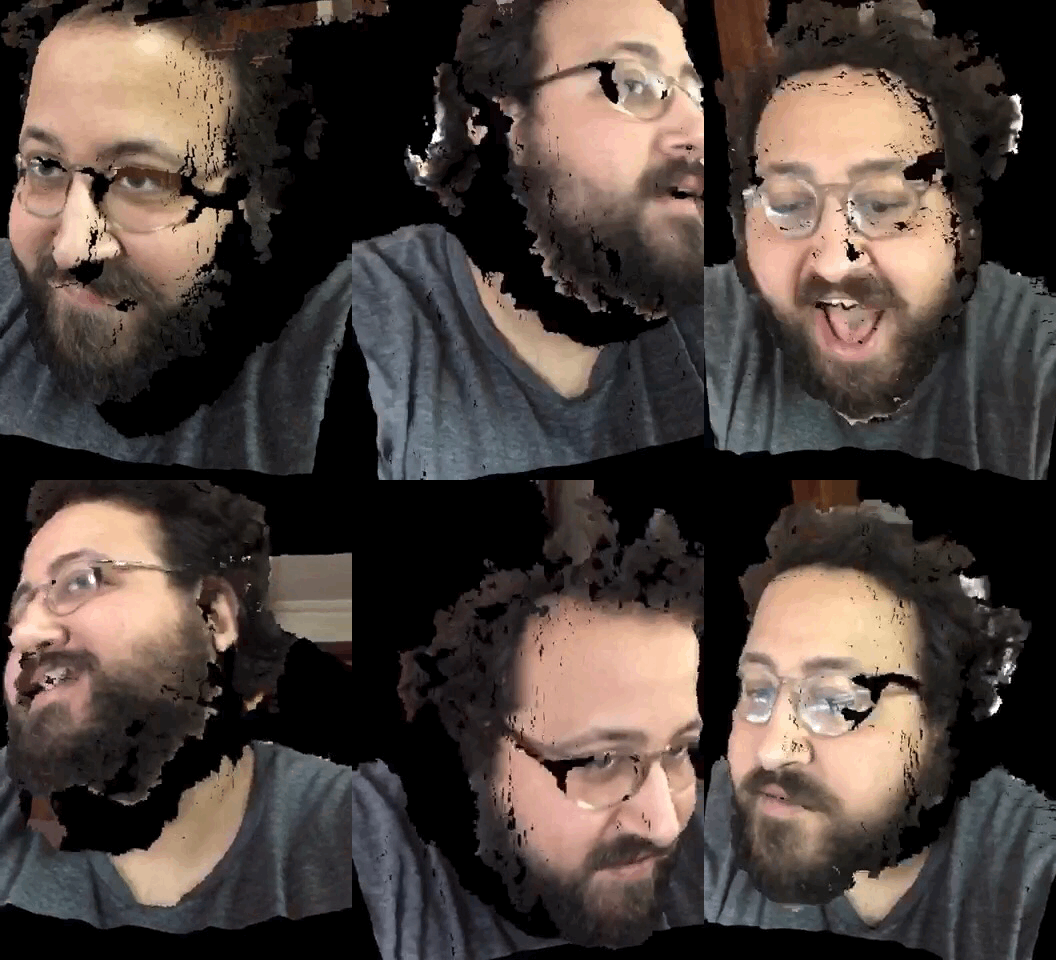
In 2017, Apple had this genius idea to put a depth sensor in the front-facing iPhone camera, mainly to improve security and accuracy for FaceID. Alongside this, they also released the first version of ARKit.
But unfortunately, the back cameras lacked that feature. Many developers were eager to have the same depth data on the back cameras in order to understand, and even reconstruct, the 3D representation of the world in order to insert digital objects in more immersive and realistic ways.
For now, the only way we have to get depth data is to try to predict the depth level of a scene using neural networks, and the input can only be a single image.
FCRN
FCRN, short for Fully Convolutional Residual Networks, is one of the most-used models on iOS for depth prediction. The model is based on a CNN (ResNet-50) to predict the depth level of a scene using a single image, and ot leverages the residual network with a pre-trained model.
Traditional methods (depth from stereo images) work by taking two or more images and estimating a 3D model of the scene. This is done by finding matching pixels in the images and converting their 2D positions into 3D depths. But this traditional method requires special lenses with expensive equipment.
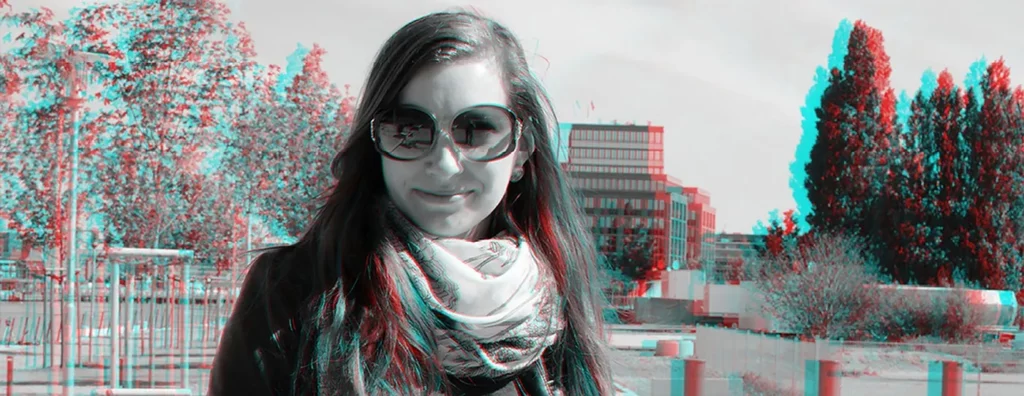
The stereoscopy process is modeled on human perception, thanks to the two flat images that we perceive from each eye. To put it simply, if two images of the same scene are acquired from different angles, then the depth of the scene creates a geometric disparity between them.
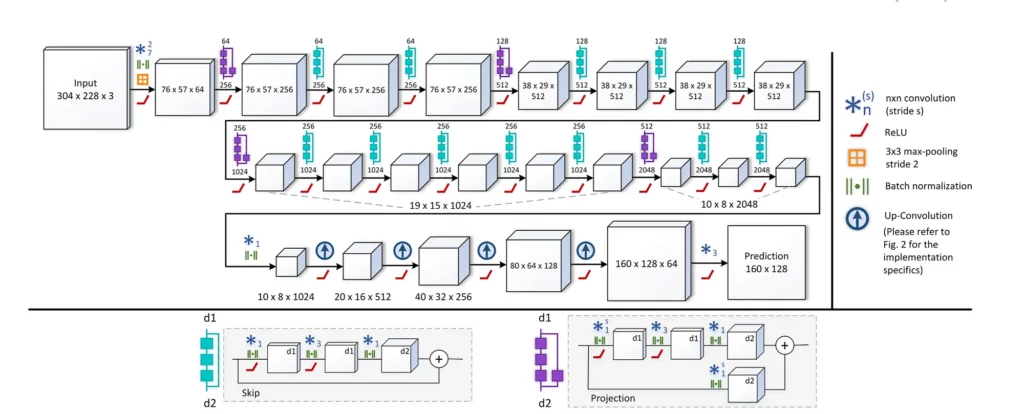
Deep learning approaches are quite different. Broadly speaking, we take a single image and predict the depth level for every pixel. The FCRN model is trained on the NYU Depth Dataset V2, which consists of 464 scenes, captured with a Microsoft Kinect, with the official split consisting of 249 training and 215 test scenes.
No need for me to go into details about the network architecture—I think the original research article is pretty straightforward and easy to understand:
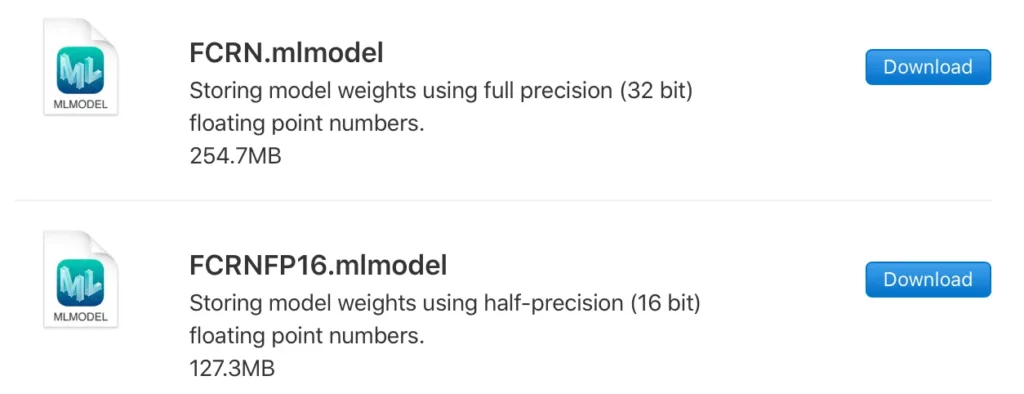
Apple offers a Core ML version on its official website. Actually, there are two versions—the first one stores the full weights of the model using 32-bit precision, and the other is half-precision (16-bit).
I chose the first one because I noticed that it’s the most consistent, but you can use them both, depending on the phone you’re running inference. This will help you optimize inference speed depending on the iPhone’s computing units.
Build the iOS Application

Now we have our project ready to go. I don’t like using storyboards myself, so the app in this tutorial is built programmatically, which means no buttons or switches to toggle — just pure code 🤗.
To follow this method, you’ll have to delete the main.storyboard file and set your SceneDelegate.swift file (Xcode 11 only).
With Xcode 11, you’ll have to change the Info.plist file like so:
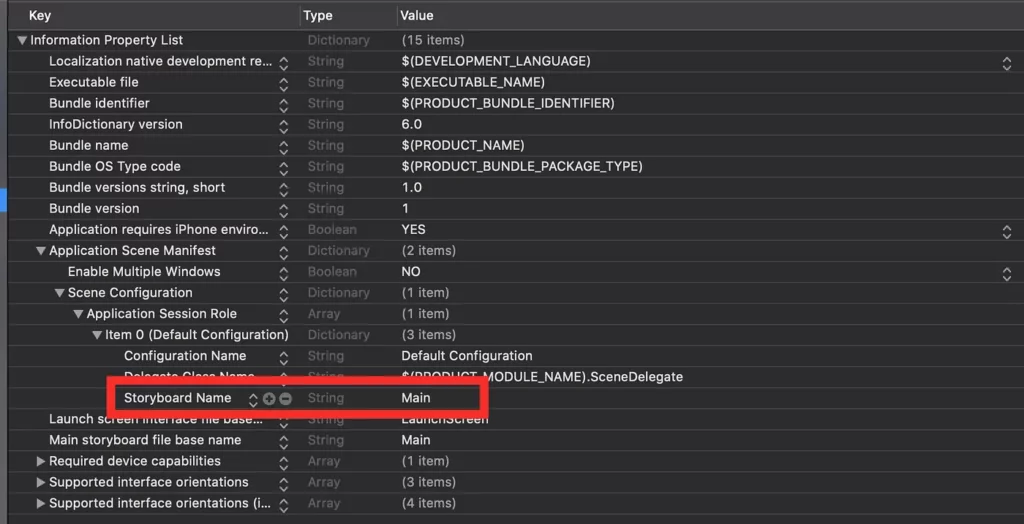
You need to delete the “Storyboard Name” in the file, and that’s about it.
1. Setup the camera session
// MARK: - Setup the Capture Session
fileprivate func setupCamera() {
    let captureSession = AVCaptureSession()
    captureSession.sessionPreset = .vga640x480

    guard let captureDevice = AVCaptureDevice.default(.builtInDualCamera, for: .video, position: .back) else { return }

    guard let input = try? AVCaptureDeviceInput(device: captureDevice) else { return }
    captureSession.addInput(input)

    captureSession.startRunning()

    captureDevice.configureDesiredFrameRate(50)

    let previewLayer = AVCaptureVideoPreviewLayer(session: captureSession)
    previewLayer.videoGravity = AVLayerVideoGravity.resizeAspect
    previewLayer.connection?.videoOrientation = .portrait
    view.layer.addSublayer(previewLayer)
    previewLayer.frame = view.frame

    let dataOutput = AVCaptureVideoDataOutput()
    dataOutput.setSampleBufferDelegate(self, queue: DispatchQueue(label: "videoQueue"))
    captureSession.addOutput(dataOutput)
}
Let break down the code:
- Instantiate an AVCaptureSession().
- Set the video quality. I chose the lowest possible (640 x 480) because the model doesn’t need a big image—takes a 304 x 228 image.
- Set up which camera to use. In my case, I have an iPhone X, so I chose the builtInDualCamera on the back and set it for video.
- Add the preview layer to the sublayer of our main view.
- Set up the capture video delegate and add the output to the capture session.
2. Predict
// MARK: - Setup Capture Session Delegate
func captureOutput(_ output: AVCaptureOutput, didOutput sampleBuffer: CMSampleBuffer, from connection: AVCaptureConnection) {

    guard let pixelBuffer: CVPixelBuffer = CMSampleBufferGetImageBuffer(sampleBuffer) else { return }

    let config = MLModelConfiguration()
    config.computeUnits = .all

    guard let myModel = try? MLModel(contentsOf: FCRN.urlOfModelInThisBundle, configuration: config) else {
        fatalError("Unable to load model")
    }

    guard let model = try? VNCoreMLModel(for: myModel) else {
                fatalError("Unable to load model")
            }

    let request = VNCoreMLRequest(model: model) { (request, error) in
        if let results = request.results as? [VNCoreMLFeatureValueObservation],
            let heatmap = results.first?.featureValue.multiArrayValue {

            let start = CFAbsoluteTimeGetCurrent()
            let (convertedHeatmap, convertedHeatmapInt) = self.convertTo2DArray(from: heatmap)
            let diff = CFAbsoluteTimeGetCurrent() - start

             print("Convertion to 2D Took (diff) seconds")
            DispatchQueue.main.async { [weak self] in
                self?.drawingView.heatmap = convertedHeatmap
                let start = CFAbsoluteTimeGetCurrent()
                let average = Float32(convertedHeatmapInt.joined().reduce(0, +))/Float32(20480)
                let diff = CFAbsoluteTimeGetCurrent() - start
                print("Average Took (diff) seconds")

                print(average)
                if average > 0.35 {
                    self?.haptic()
                }
            }
        } else {
            fatalError("Model failed to process image")
        }
    }

    request.imageCropAndScaleOption = .scaleFill

    let handler = VNImageRequestHandler(cvPixelBuffer: pixelBuffer, options: [:])
    DispatchQueue.global().async {
        do {
            try handler.perform([request])
        } catch {
            print(error)
        }
    }
}
A lot of things are happening here, so let’s break it down:
- All of the predictions are happening inside the capture session delegate. Thus, you need to implement the AVCaptureVideoDataOutputSampelBufferDelegate protocol.
- Create an instance of CVPixelBuffer from the sample buffer. This will be the image we will feed the model.
- Create an MLModelConfiguration() method to instruct the model to use all the compute units (CPU, GPU, and ANE). This step will not guarantee the phone will allow it. (Matthijs Hollemans has a repository that explains this in more detail).
- Instantiate the model and set the configuration.
- Create an instance of VNCoreMLModel to feed it to our Core ML request.
- Then create the Core ML request using the model—the request returns the result and the error.
- The model returns a multiArrayValue, which is a multi-dimensional array with the depth values (the higher the values, the closer the object to the camera).
- To create an image, we need to convert it into a 2D array (see part 3 below).
- We use the converted array to draw a view with gray pixels.
- Then we flatten the matrix and calculate an average of the black and white pixels. This will give us a number that we’ll use to estimate the level of darkness in the image. The darker the image, the closer the objects are to the camera. I choose 0.35 as a threshold, but that’s highly debatable, depending on the lighting conditions and also the type of device you’re using.
- And finally, the Core ML image request handler will take our image in the form of a CVPixelBuffer and perform the request with our instance of VNCoreMLRequest
- Voila!
3. Convert output to a 2D matrix
Since the model returns a multi-array object, we need to transform it into a plane and return a 2D matrix, with every element being a value between 0 and 1, representing the gray intensity of each pixel:
extension ViewController {
    func convertTo2DArray(from heatmaps: MLMultiArray) -> (Array<Array<Double>>, Array<Array<Int>>) {
        guard heatmaps.shape.count >= 3 else {
            print("heatmap's shape is invalid. (heatmaps.shape)")
            return ([], [])
        }
        let _/*keypoint_number*/ = heatmaps.shape[0].intValue
        let heatmap_w = heatmaps.shape[1].intValue
        let heatmap_h = heatmaps.shape[2].intValue

        var convertedHeatmap: Array<Array<Double>> = Array(repeating: Array(repeating: 0.0, count: heatmap_w), count: heatmap_h)

        var minimumValue: Double = Double.greatestFiniteMagnitude
        var maximumValue: Double = -Double.greatestFiniteMagnitude

        for i in 0..<heatmap_w {
            for j in 0..<heatmap_h {
                let index = i*(heatmap_h) + j
                let confidence = heatmaps[index].doubleValue
                guard confidence > 0 else { continue }
                convertedHeatmap[j][i] = confidence

                if minimumValue > confidence {
                    minimumValue = confidence
                }
                if maximumValue < confidence {
                    maximumValue = confidence
                }
            }
        }

        let minmaxGap = maximumValue - minimumValue

        for i in 0..<heatmap_w {
            for j in 0..<heatmap_h {
                convertedHeatmap[j][i] = (convertedHeatmap[j][i] - minimumValue) / minmaxGap
            }
        }

        var convertedHeatmapInt: Array<Array<Int>> = Array(repeating: Array(repeating: 0, count: heatmap_w), count: heatmap_h)
        for i in 0..<heatmap_w {
            for j in 0..<heatmap_h {
                if convertedHeatmap[j][i] >= 0.5 {
                    convertedHeatmapInt[j][i] = Int(1)
                } else {
                    convertedHeatmapInt[j][i] = Int(0)
                }
            }
        }

        return (convertedHeatmap,  convertedHeatmapInt)
    }
}
I also did something to optimize calculating our average. The method returns two arrays:
- convertedHeatmap: 128 x 160 matrix of grayscale values (double values)
- convertedHeatmapInt: 128 x 160 matrix of black and white (binary threshold) values (integers)
4. Draw the depth view
// MARK: - Drawing View
var drawingView: DrawingView = {
   let map = DrawingView()
    map.contentMode = .scaleToFill
    map.backgroundColor = .lightGray
    map.autoresizesSubviews = true
    map.clearsContextBeforeDrawing = true
    map.isOpaque = true
    map.translatesAutoresizingMaskIntoConstraints = false
    return map
}()
Pretty straightforward:
- Create a UIView class and instantiate a 2D array of double values
- Draw the scene using the converted array (convertedHeatmap) and assign to each pixel a grayscale value using UIColor() white values and an alpha channel of 1.
- Then draw the geometry of each pixel using CGRect and UIBezierPath().
- Set the color and fill the pixel.
5. Add haptic feedback
When the average reaches above 0.35, the phone will vibrate to give feedback to the user.
// MARK: - Set and activate the haptic feedback
fileprivate func haptic() {
    let impactFeedbackgenerator = UIImpactFeedbackGenerator(style: .heavy)
    impactFeedbackgenerator.prepare()
    impactFeedbackgenerator.impactOccurred()
}
You can use any feedback you want—I chose to set the UIImpactFeedbackGenerator() to heavy, but you can custom build your own.
Conclusion
The application is just a proof-of-concept—my iPhone X takes way too long to process the images (around 630 ms). That’s far too much time, considering I have to convert the output and draw the view, perform all the binary threshold calculation, and then get the average to decide whether or not an object is close to the phone or not.
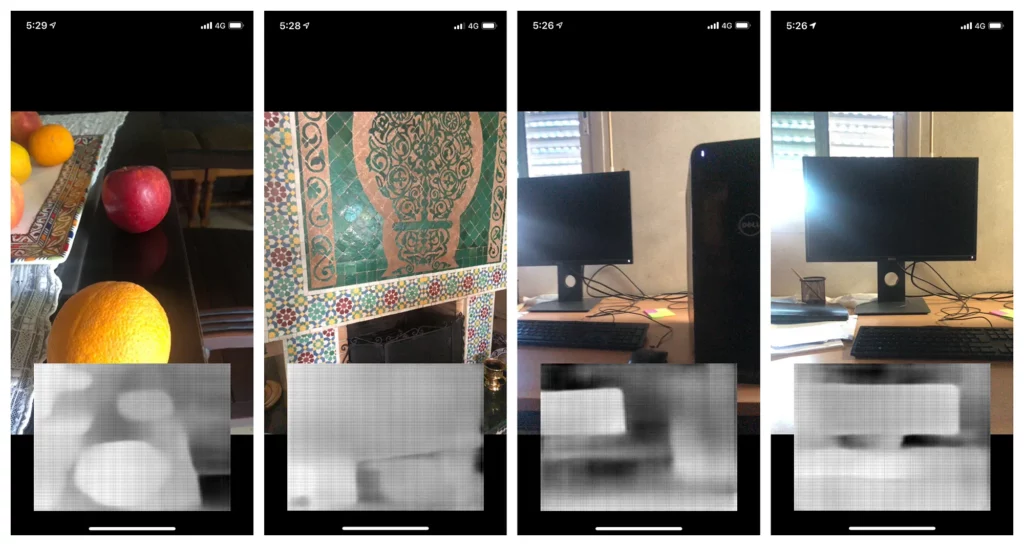
But, if you have the following phones (iPhone XR, iPhone XS, iPhone XS Max, iPhone 11, iPhone 11 pro …) you might get a better result. I estimated that the iPhone 11 Pro Max takes less than 150 ms, which is around 4 times better than the iPhone X.
There’s probably more room for improvement, especially when handling matrices—there are ways to optimize the calculations with smart algorithms. But that’s probably for another article.
If Apple keeps improving the internal components of the iPhone, and with the help of new optimizations on the model side, I can picture this implementation as a way to help people with visual impairments, especially if Apple decides to put the same depth camera used for FaceID on the back of the iPhone. That would be a big step forward for computer vision on the iOS ecosystem.
Thank you for reading this article. If you have any questions, don’t hesitate to send me an email at [email protected].

Comments 0 Responses