In this tutorial you will learn how to work with hair segmentation effects by creating texture and adding interactivity to your filters using Spark AR Studio.
Getting Started
Ensure that you have downloaded Spark AR Studio on your device. Then download this sample content that you will use to follow along in this tutorial.
Achieving Hair Segmentation
Camera Texture
A live video is captured when you are using the AR effect in the camera, and this video can be played back as a texture in the scene.
You can use the pixels in the camera texture to make changes to the image when you combine camera texture and a material because combining the segmentation texture and the camera texture lets you change the hair color. Hair segmentation texture will detach someone’s hair from the scene.
How to Add the Camera Texture
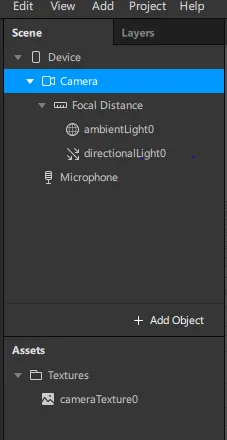
Open Spark AR Studio, then click on New Project. Select Camera in the scene panel. Then click on + next to the Texture extraction in the Inspector.
You will see a texture listed as cameraTexture0 in the Assets.
How to Add Hair Segmentation Texture
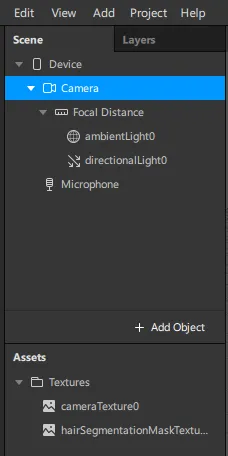
Select Camera in the Scene panel. Go to the Inspector and click+ next to Segmentation, then select Hair.
On the Assets, you will see a texture named hairSegmentationMaskTexture0.
How to Add a Rectangle
This will provide textures and materials by creating 2D effects in the scene.
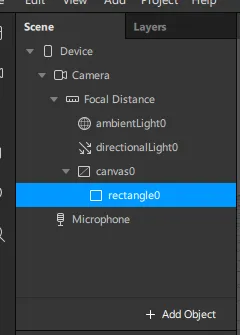
Add a rectangle by clicking on Add Object then choose Rectangle.
It will be added as rectangle0 on the Scene as the child of the canvas.
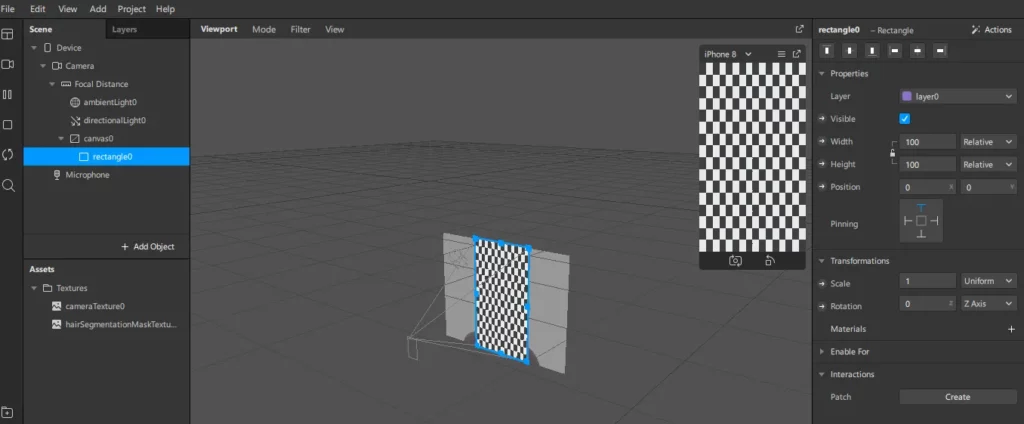
Let us now make the rectangle to fill the screen of the machine.
In the Inspector, select the box for Width and click Fill Width, then click the box for Height and click Fill Height.
How to Create a Material
On the scene panel choose rectangle0. Go to the Inspector then on Materials click +.
You will see a material that has been added on the Assets panel named material0. To help you keep track while creating your effect, rename the material, in this case, let’s choose ratty hair.
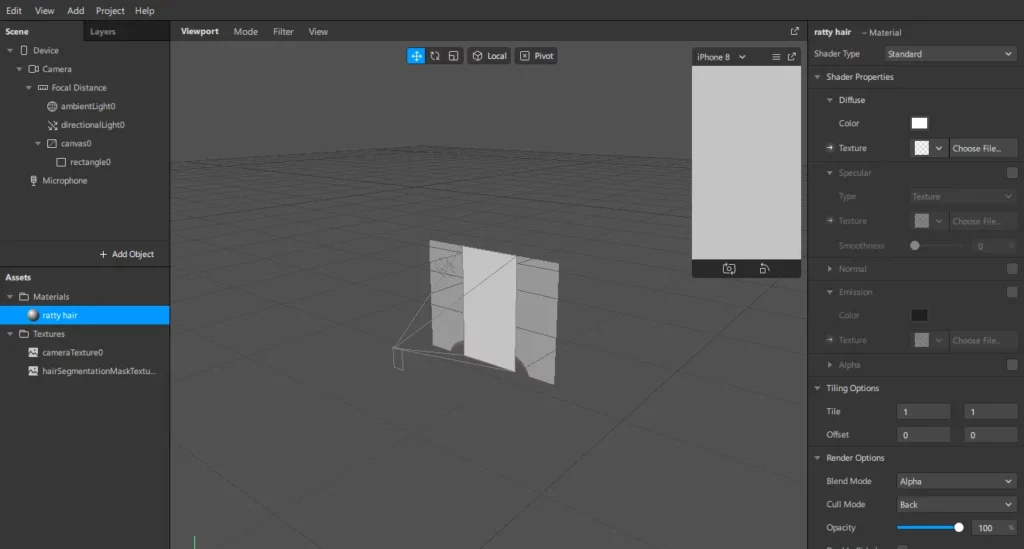
How to Edit the Material
In the inspector, below Diffuse, click on the pull-down menu next to Texture and select cameraTexture0. Click in the box next to Alpha. Then, next to texture, click on the pull-down menu and choose hairSegmentationMaskTexture0.
A video of the camera texture will be playing on the Simulator.
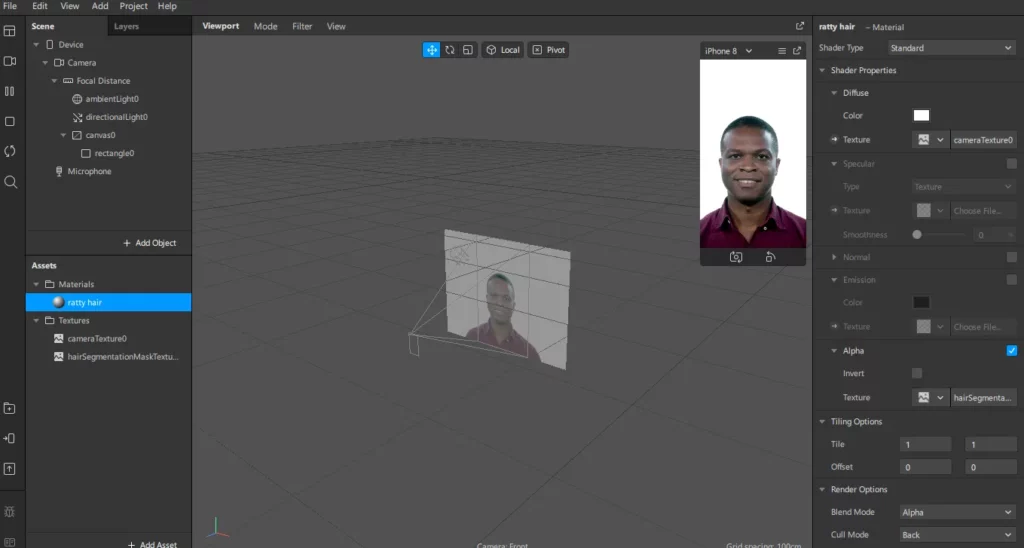
Let’s now learn to change the hair color. First, go to the Asset panel and select ratty hair. Then., in the Inspector, go to Diffuse. Click on the rectangle next to color and pick a color.
How to Add a Light
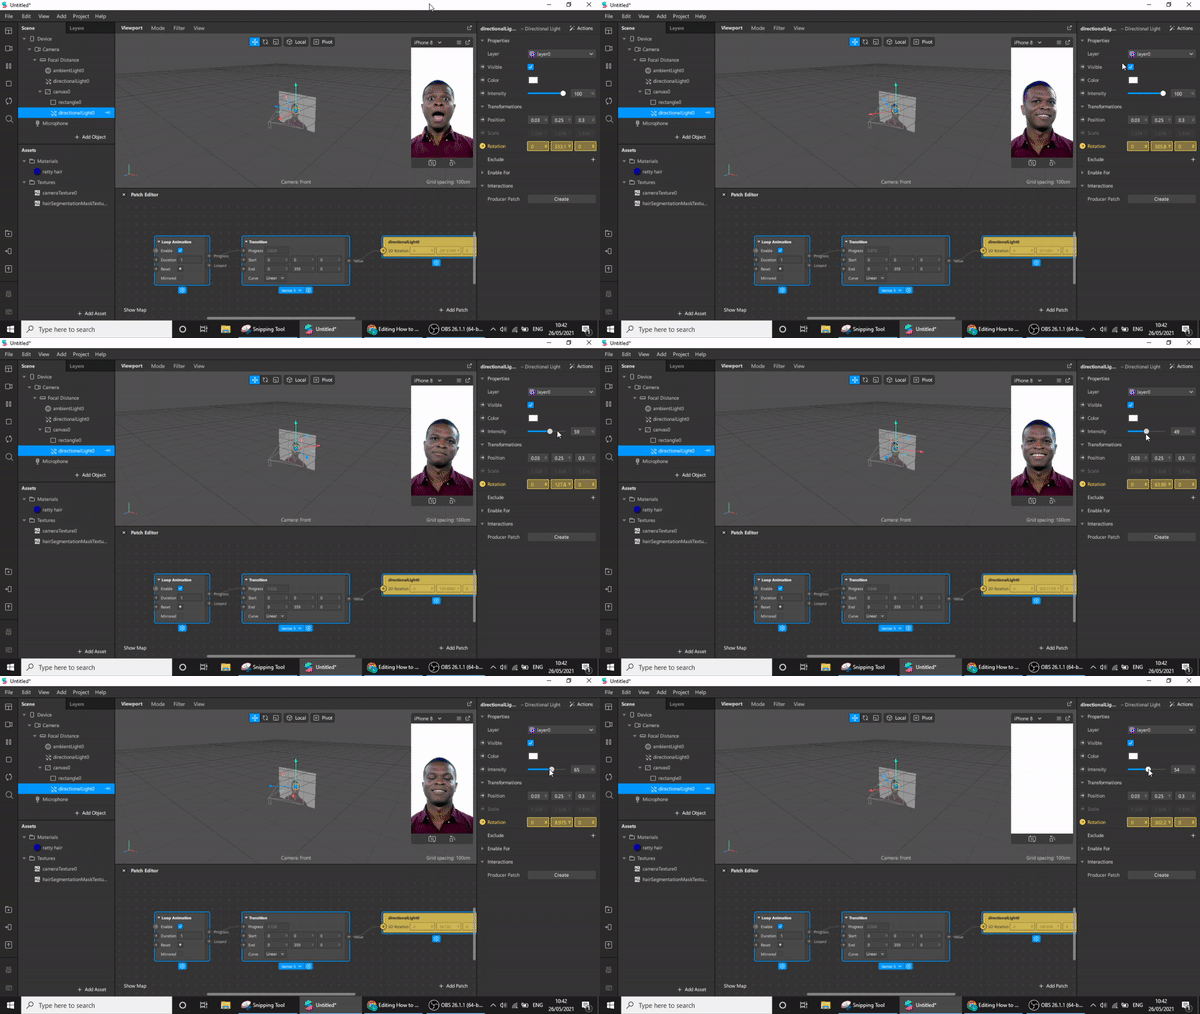
Go to the scene panel and right-click canvas0. Click Add and choose Directional Light.
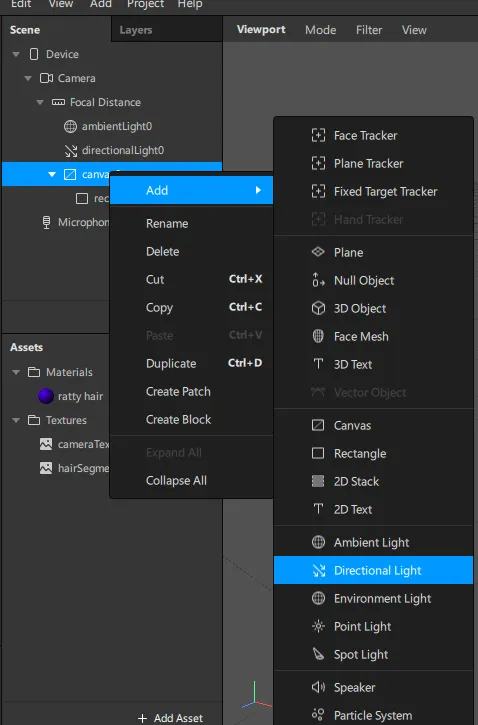
The hair will appear brighter because the light is radiating on the scene and will be listed as directionalLight0 on the scene.
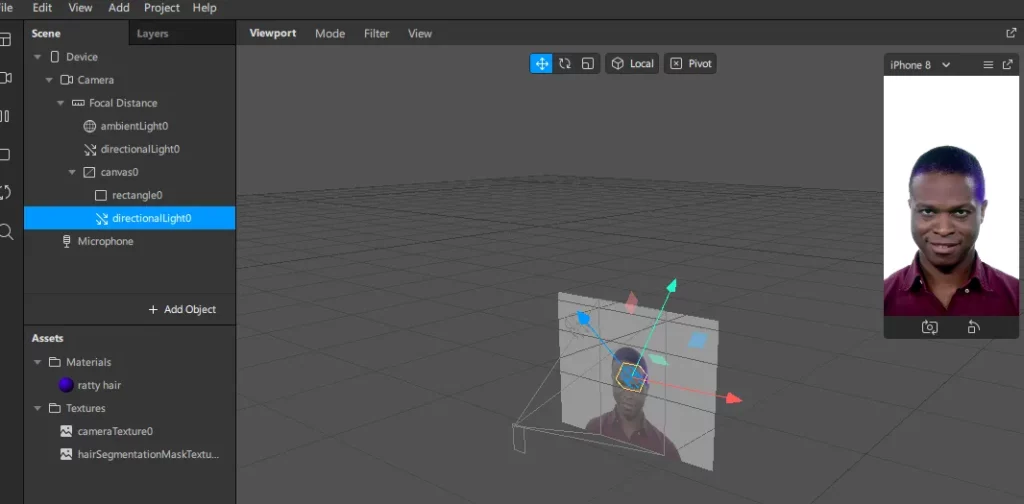
You can rotate the light by going to the inspector. On the top right side click on Actions. Select Animate, then click Spin.
You can adjust the light by going to the Inspector, then next to Intensity edit the slider.
How to Add Interactivity
To change the hair color every time you tap the screen, you will use the following patches:
Counter patch: You will use this to count pulses. Every time time a screen tap is detected the color of the object changes.
Option picker patch: You will use this to set values for the object, for example, setting different hair colors.
Screen Tap patch: This detects tapping on the screen.
Diffuse property of the material shows the color in scene.
How to Create Patches.
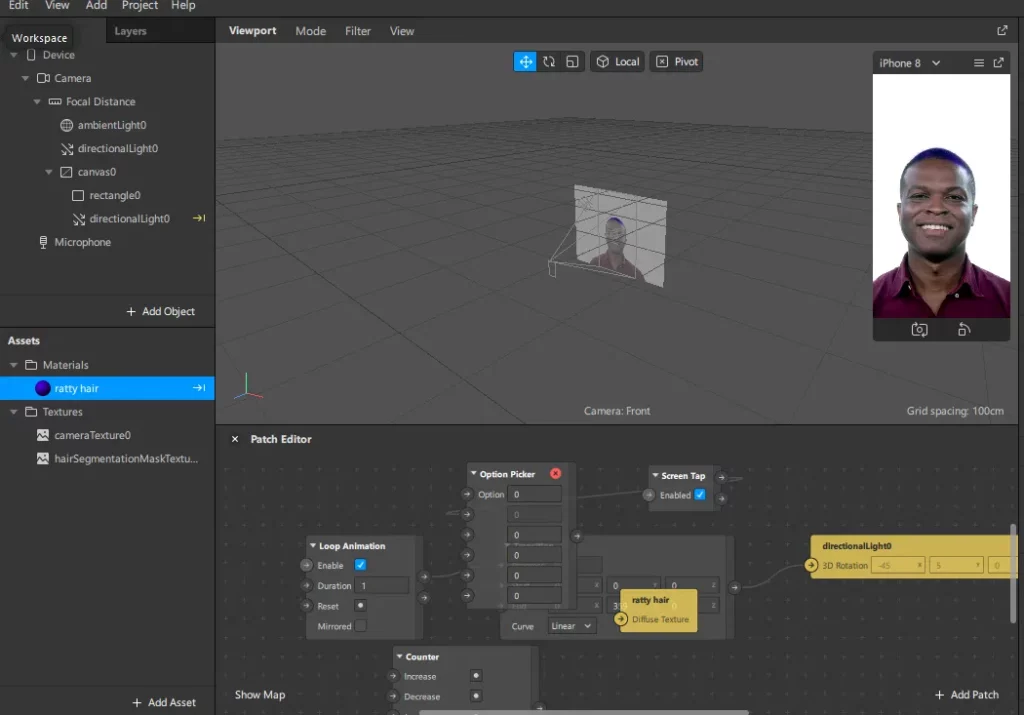
Go the patch editor and right click. The menu will open, then look for add the Screen Tap, Option picker, and the Counter patch.
Go to the Assets panel and choose ratty hair. Then, in the inspector, go to Diffuse and click on the arrow in the left of the Texture.
How to Edit the Option Picker
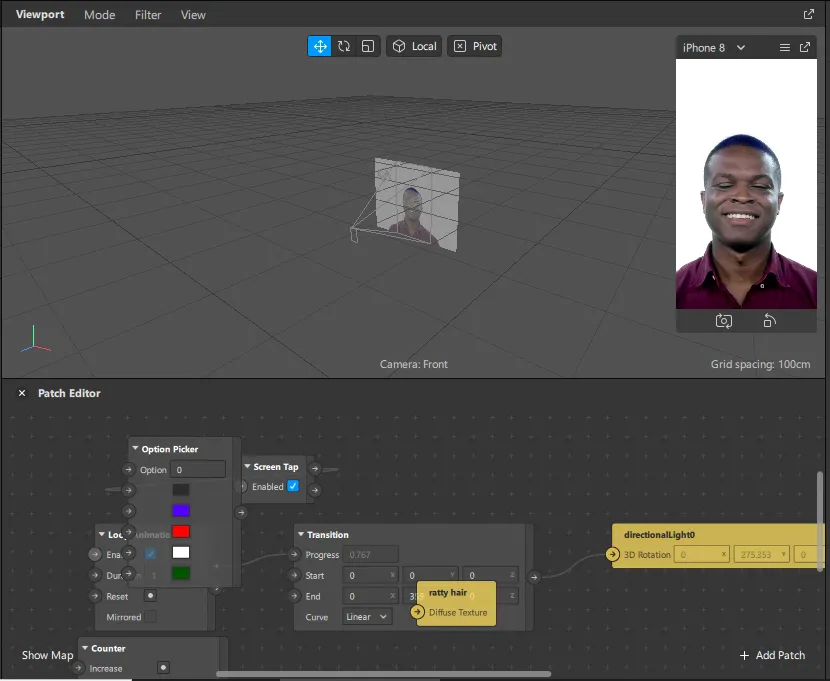
Click on the Option picker patch. Go to the bottom of the patch and click on the blue pop down menu. Pick color from the menu. Click on the rectangles that are on the patch to add colors to the Option picker.
How to Connect Patches
To increase the port in the counter patch, tap the tap port of the screen tap patch. Connect the output of the Counter patch to the Option input in the Option picker patch. Connect the output of the Option picker to the Diffuse Texture input in the material patch.
Conclusion
In this article, you have learned how to create texture by adding a rectangle, creating a material, and adding interactivity using Facebook’s Spark AR Studio.
To learn more about creating hair segmentation effect check out this link.

Comments 0 Responses