Last year, at I/O 2018, Google announced a brand new SDK available for developers: ML Kit. It’s no surprise that Google’s advances in machine learning are miles ahead of what any other company is aiming for. Through this SDK, Google was hoping to help mobile developers bring machine learning to their apps with simple, concise code. As part of the Firebase ecosystem, ML Kit allows developers to implement ML functionality with just a few lines of code; everything from vision to natural language to custom models.
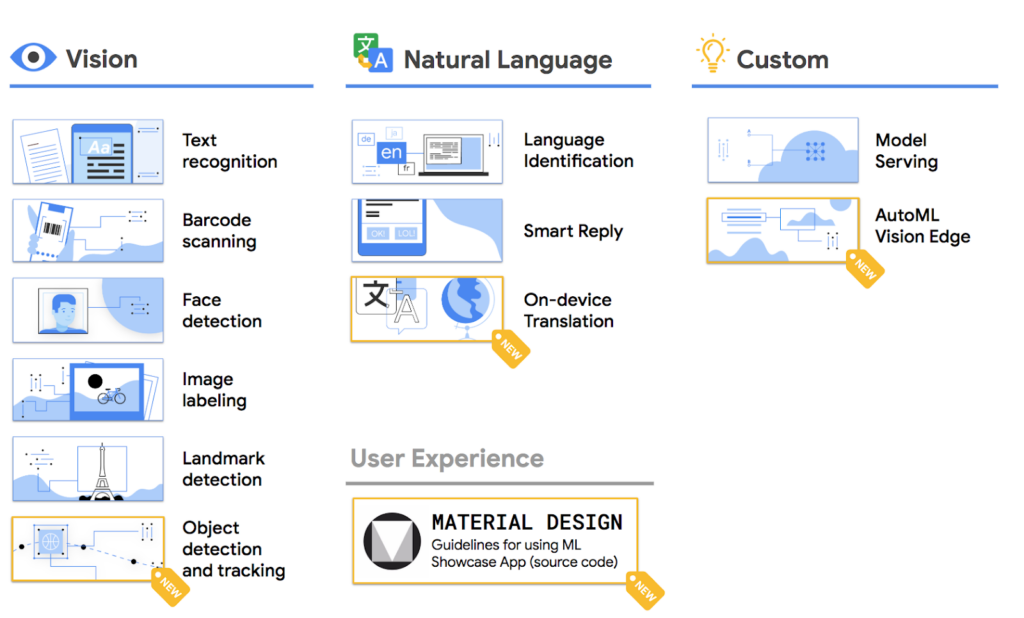
This year, at I/O 2019, Google’s ML Kit team had 3 new features in store for us. These APIs add on to ML Kit’s already-impressive library of machine learning frameworks. In this tutorial, we’ll take a look at how to incorporate these new ML Kit features in our Swift apps. Let’s get started! Download the starter project here.
Opening the project, you can see that we have a list of the three new ML Kit features ready to go. Clicking on these directs you to the view controller where you can either upload an image or type in some text and translate it into French. Currently, nothing happens because we haven’t added the machine learning code yet. Let’s do this by creating a Firebase project.
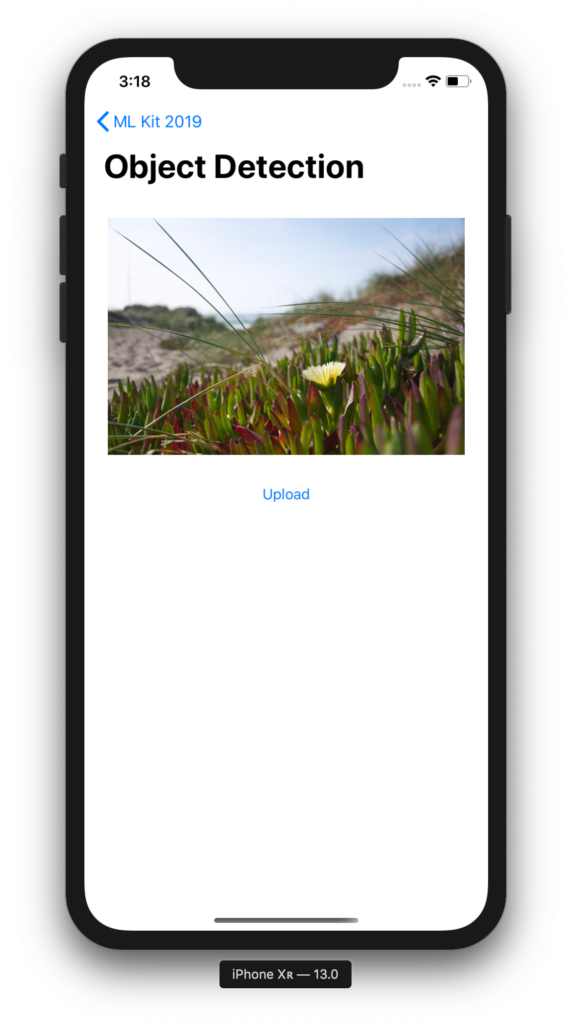
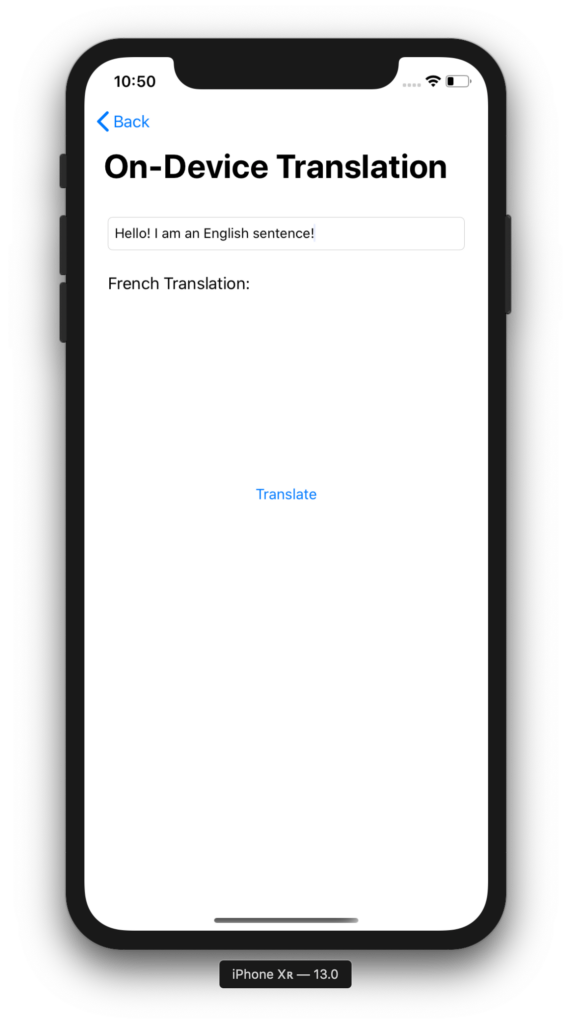
Creating the Firebase Project
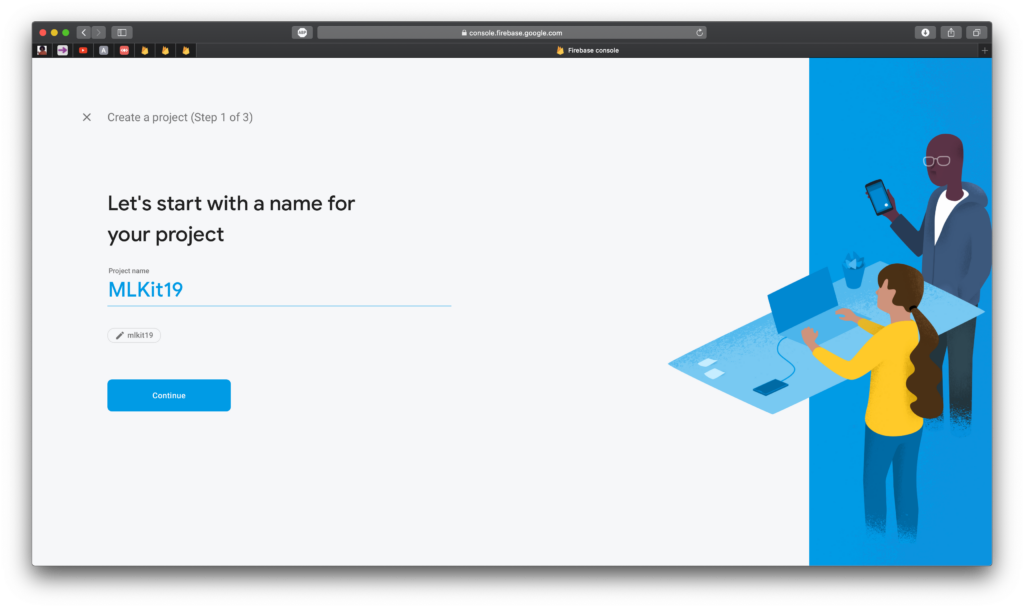
Head over to console.firebase.google.com to create a new Firebase project. Click on New Project and you’ll be prompted with a 3-step process to create a new project.
1. Name your project. Quite simply, I’m naming this MLKit19
2. Set up Google Analytics. You can turn this off.
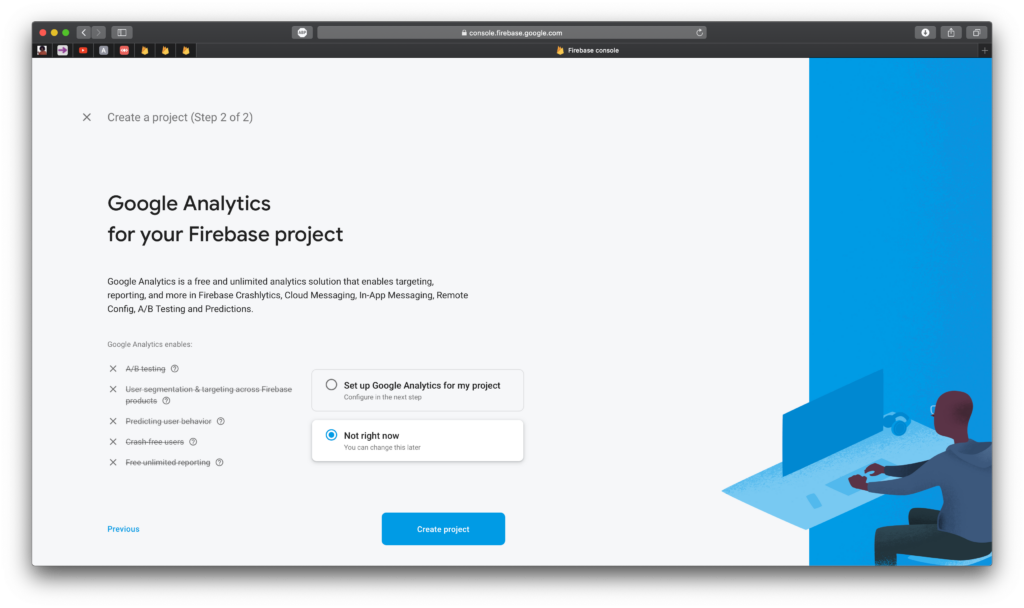
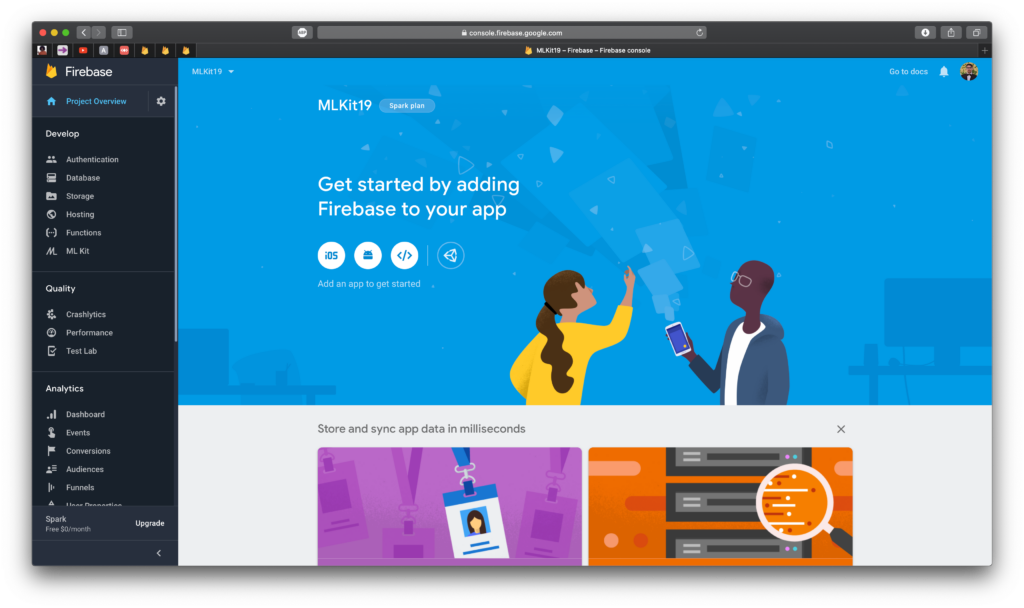
If you don’t add Google Analytics, then that’s all! Wait for a couple seconds as your project gets created. When it’s all done, you should see a page that looks like this:
Adding the Firebase APIs
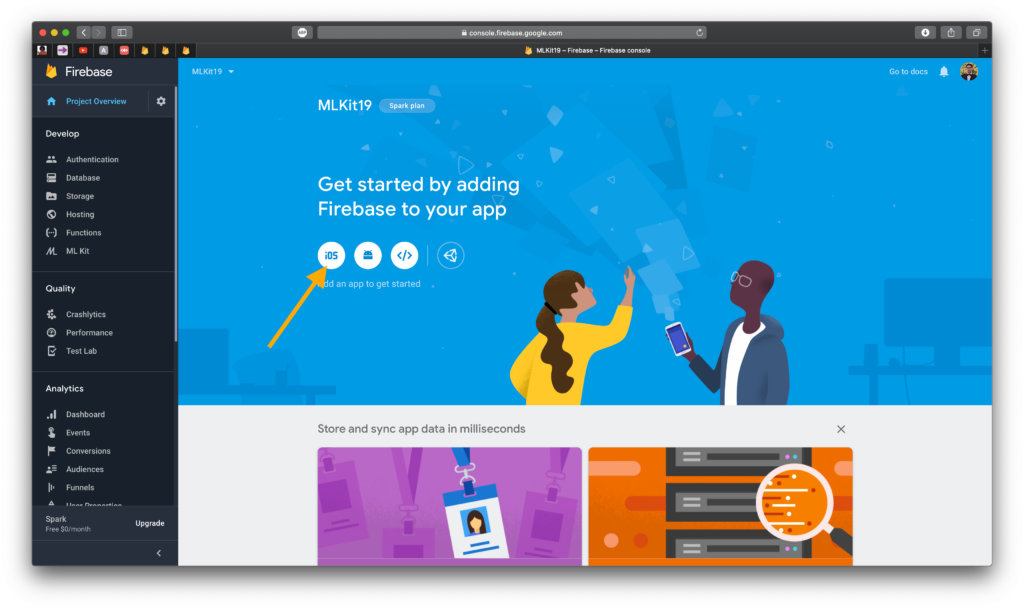
Click on the iOS button shown below. This begins the process of adding the Firebase frameworks to the Xcode project.
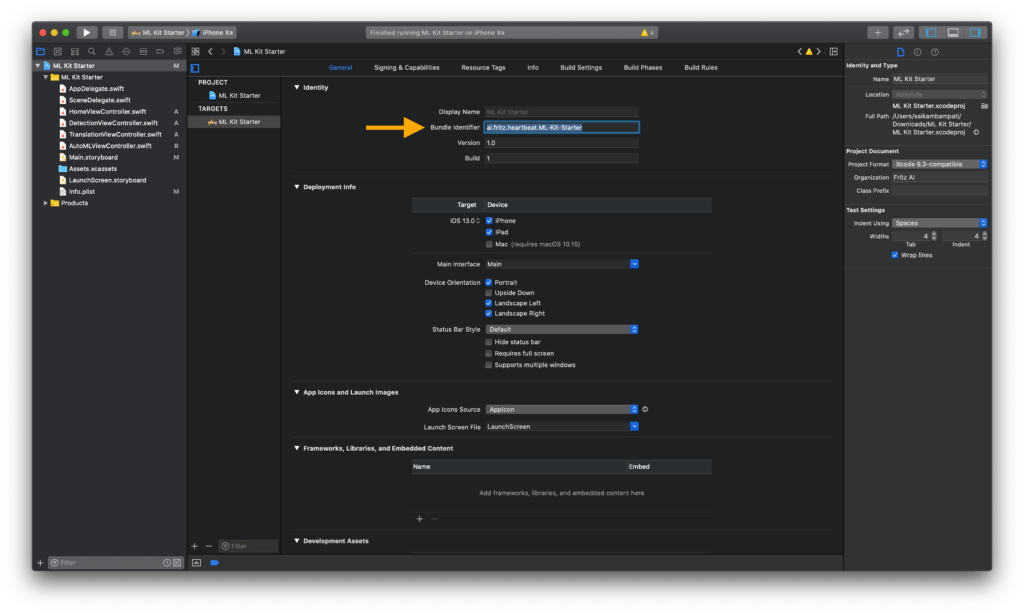
1. Fill out the iOS bundle ID. This is found by going to the project settings. It was also the ID that was created when first making the Xcode project
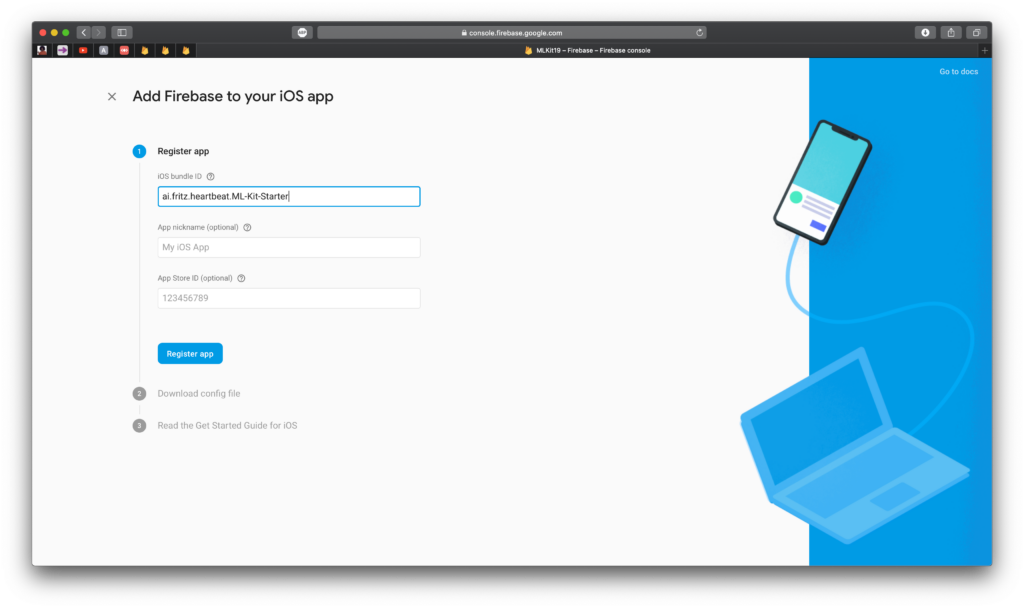
2. Download the configuration file. This is important for Firebase to communicate with the right app.
3. Move the .plist file to Xcode and make sure that “Copy items if needed” is selected.
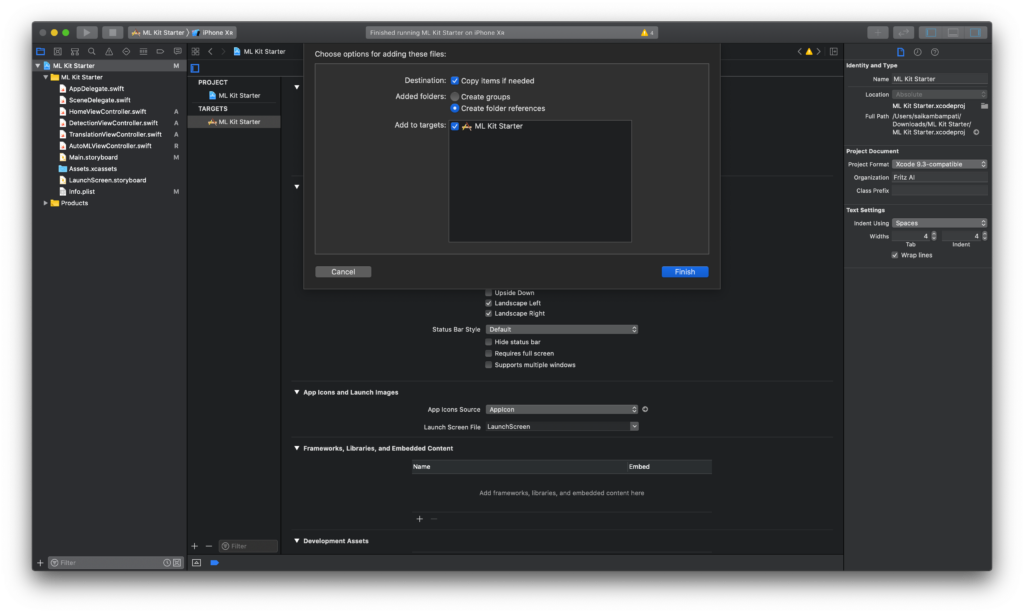
Now that our Firebase console is all set up, we need to install the respective CocoaPods to our app. Close Xcode completely and open Terminal. Here’s how you install CocoaPods to an Xcode project:
- Type cd /PATH/TO/FOLDER/MLKIT.xcodeproj
- Enter pod init
- Paste open -a Xcode-beta podfile
Xcode will open a new file called Podfile. This is where you can enter the pods you want installed in your project. Make your Podfile look like this:
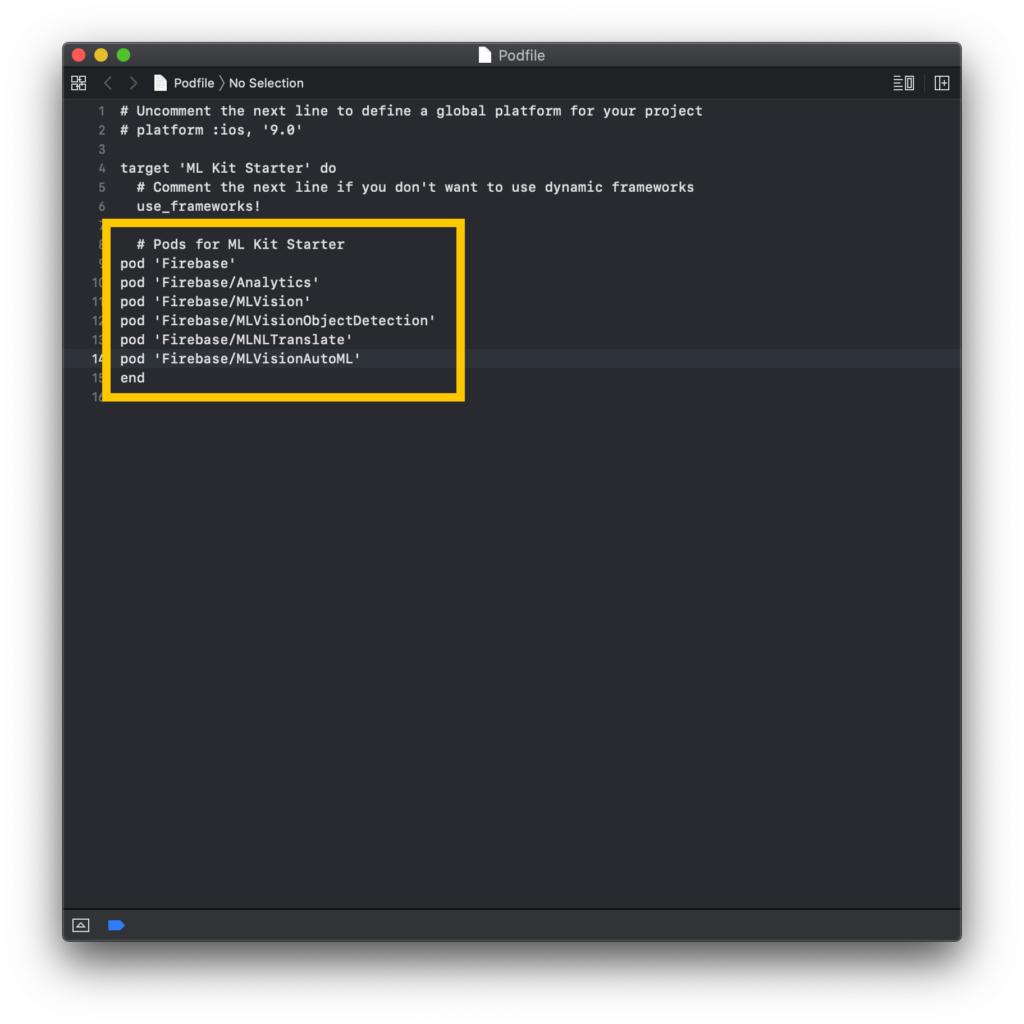
Head back over to Terminal and type the command: pod install
This may take some time depending on your wifi speed, so feel free to take a quick break. Basically what the computer is doing is going through all the pods you entered and is downloading them. A pod can consist of a framework, or sometimes, multiple frameworks. We’re installing the Firebase framework and all its subsequent ML Kit APIs
BE CAREFUL! This next part is very crucial to making CocoaPods. When your pods are added, a .xcworkspace is created consisting of both the Pods project and your current Xcode project. From now on, make sure you ONLY OPEN the .xcworkspace and NOT the .xcodeproj. All edits and changes must happen through the workspace. Otherwise, the changes won’t be synchronized and this can lead to disastrous, unfixable errors.
Object Detection API
Open the workspace. Everything is the same, but now we have access to ML Kit API’s. Let’s start with detecting objects. Head over to DetectionViewController.swift. All the code we’ll be typing will be entered in our function detectObject().
First, start by importing the Firebase framework. This will allow us to access all the Firebase APIs. Underneath the line import UIKit, type the following:
Now, change the detectObject() function to look like this:
- The first step is to define some variables. We define a constant selectedImage to be the image in our UIImageView. We also define options to configure the settings for our object detector.
- Next, we create an instance of ML Kit’s Object Detector titled objectDetector using the options we defined earlier. We run the process API to return any errors or detected objects in the image. If there are no errors and the detectedObjects array is not empty, we go to the next step. Otherwise, we end the function.
- For every object in the detectedObjects array, we print the bounds of the object to the console.
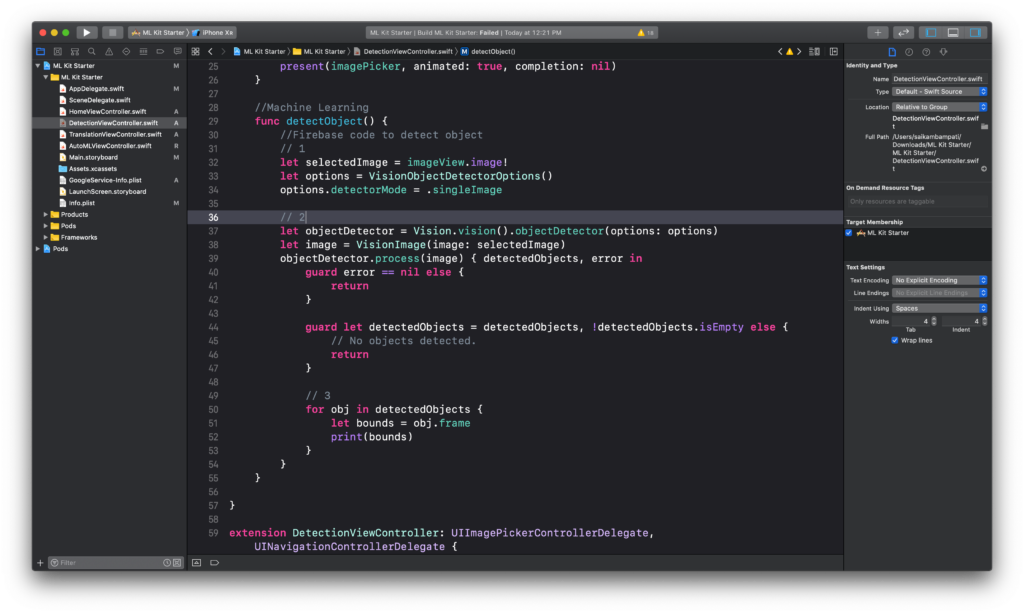
Build and run the project. If you’ve followed the instructions above, then everything should run with no errors, and if an object is detected, the bounds will be printed to the console.
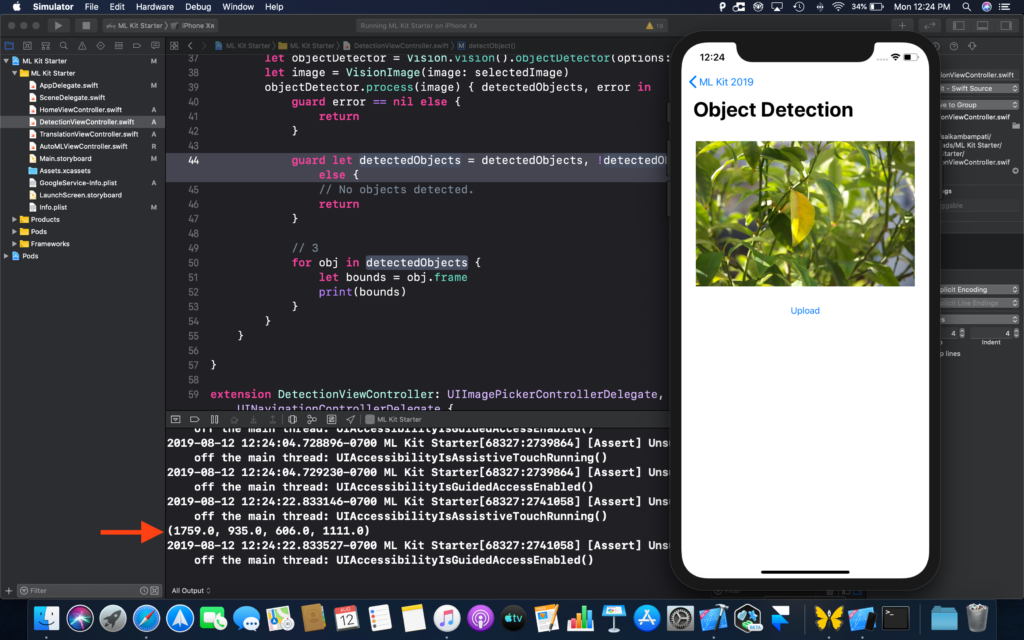
Let’s enhance this experience a little more. Instead of printing the bounds to the console, let’s draw a box around it so users can see exactly which object is being detected. Change the following code in your function:
What have we changed? Simply, we created a new UIView named box. We set the frame to a down-scaled version of bounds since the coordinates are for a larger size, not the size or image that’s showing. Then, we configure the box to have a border and no background. Finally, we insert the box on top of the imageView.
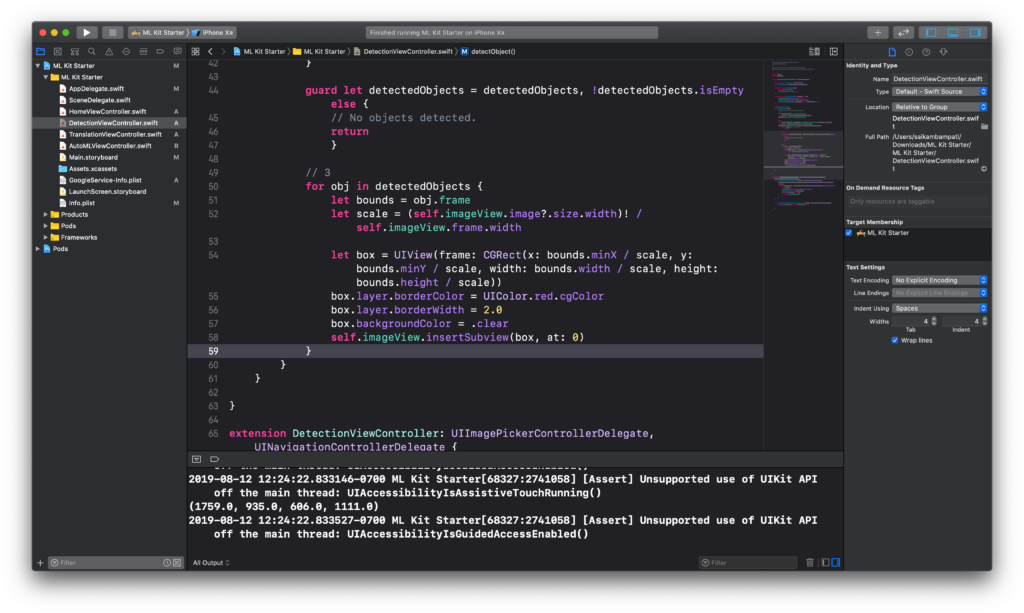
Build and run the project. This time when you upload an image, a box should be drawn around objects it recognizes.
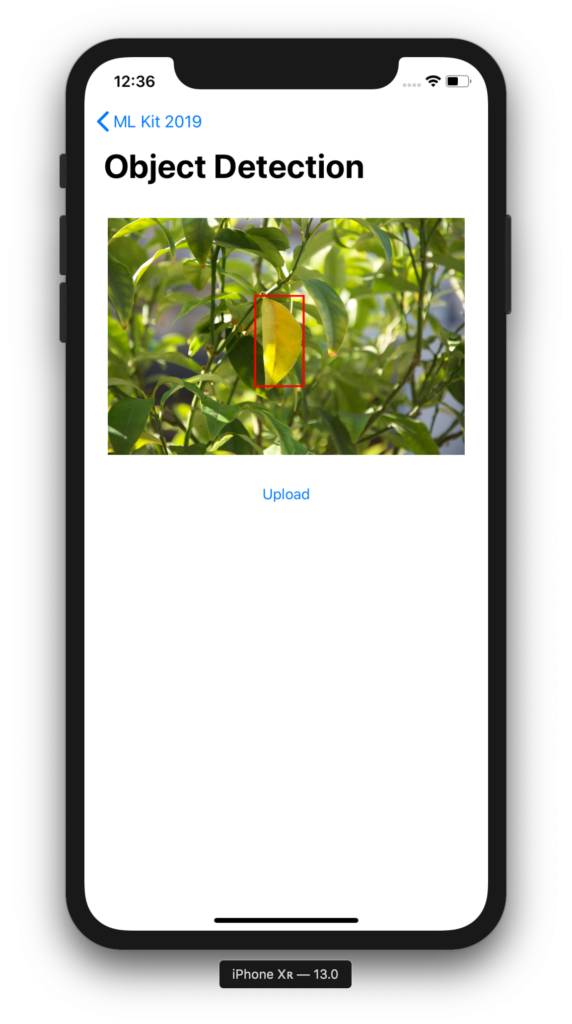
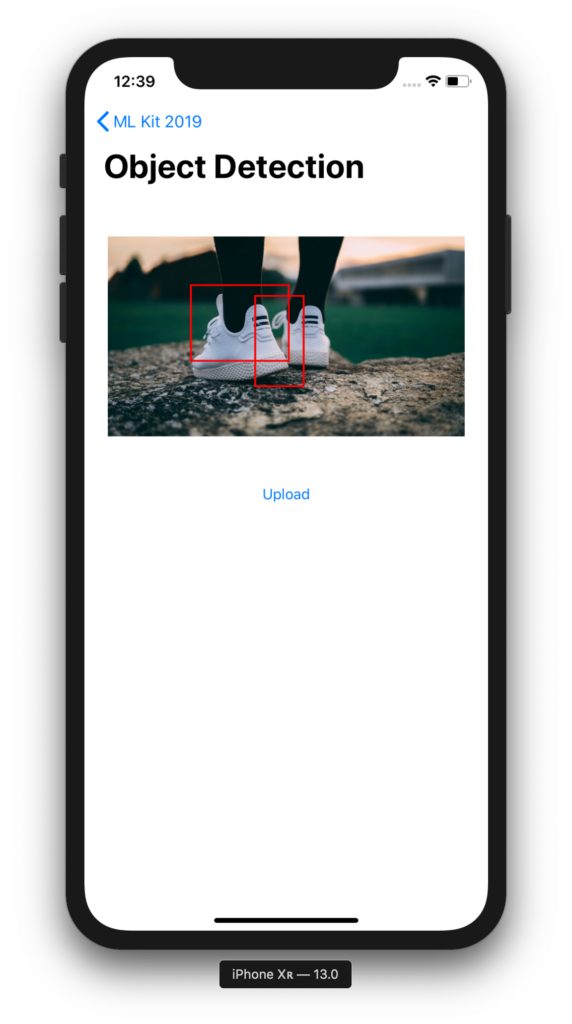
Wasn’t that easy? This is exactly what ML Kit wants to accomplish with its APIs. Next, let’s take a look at on-device translation.
On-Device Translation API
For years, we’ve had to rely on translators that would require an internet connection to translate words and sentences. No more! With the on-device Translation API, you can easily use machine learning to make offline translations for your users. This can help keep data private and open up the possibility for translators in hard-to-reach places with connectivity issues. Let’s get coding!
Head over to TranslationViewController.swift to begin coding. As always, type import Firebase underneath the import UIKit line of code. Next, let’s modify the function translate().
This is even easier than the object detector code. Here’s what we’re doing.
- First, we create a translator called englishFrenchTranslator with its options set to translating from English to French.
- Now you might think we can translate immediately, but this isn’t the case. Even though we created the translator, there is no ML model for the translator to use. That’s why we ask ML Kit to download the model if it isn’t already stored on the device. Once it’s downloaded and there are no errors, we go to the next step.
- With the model downloaded, we can translate the text entered in the textField. Once it’s been translated, we return translatedText and an error. If there’s no error, we can set the text of the translationLabel to the translatedText that was returned.
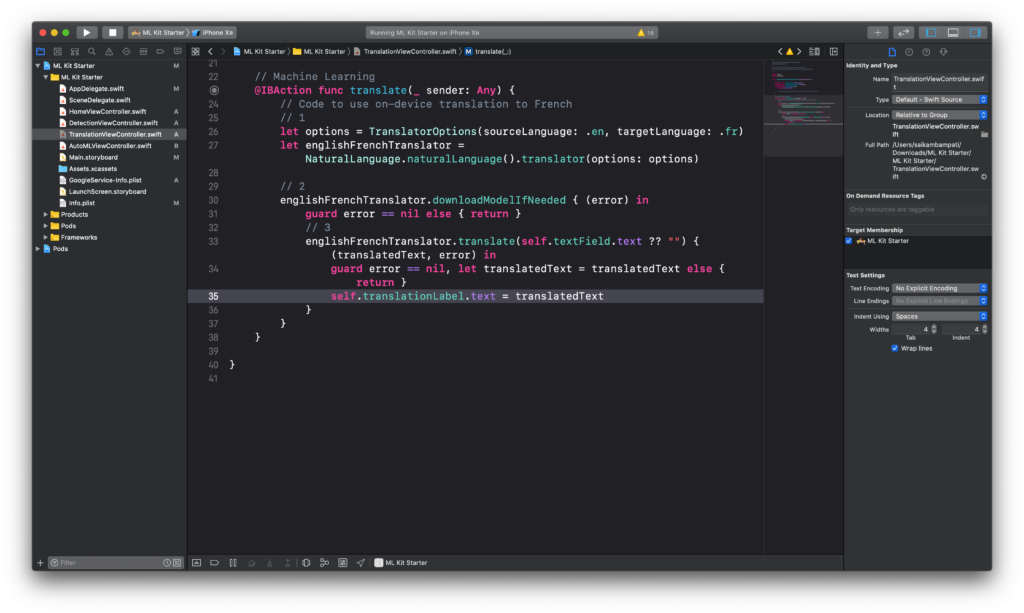
If your code looks like the above image, then you’re all done! Build and run the project to see if it’s working. It may take a little longer the first time running because of the time it takes to download the model. However, once the model is downloaded, you should be able to translate sentences from English to French offline.
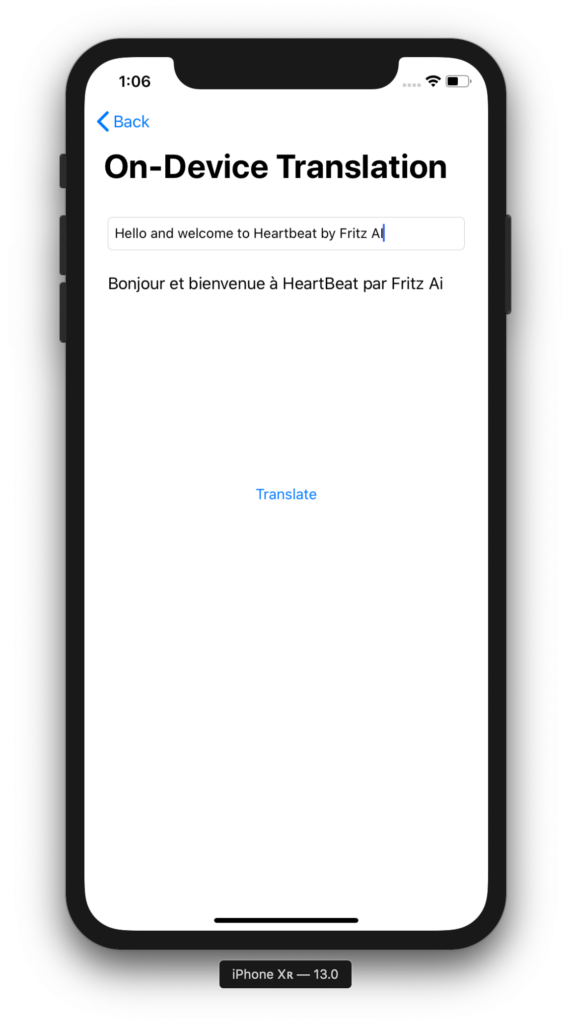
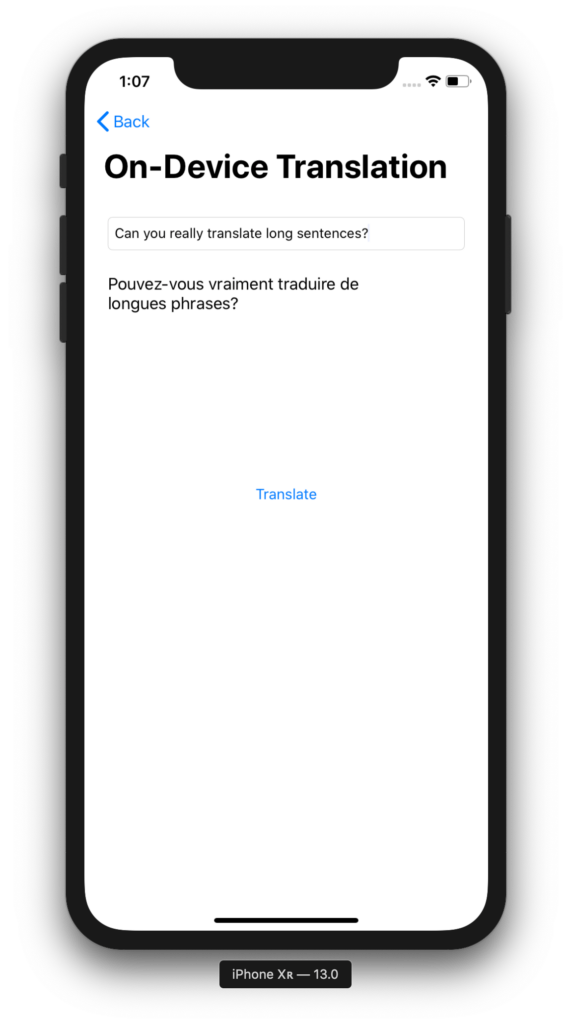
That was even easier than the previous section. I highly encourage you to experiment with other languages and see how it performs. We’re almost done, with the exception of one last section: AutoML Vision API.
AutoML Vision API
This is going to be slightly different than the previous sections. AutoML is a way for you to train high-quality custom machine learning models with minimum effort and machine learning expertise. Currently, you can train an image labeling model by providing AutoML Vision Edge with a set of images and corresponding labels. AutoML Vision Edge then uses this dataset to train a new model in the cloud, which you can use for on-device image labeling in your app.
To really test the capacity of Google’s AI, we’re going to pass three categories of images: apples, pears, and cherries. These fruits all look alike so it will be interesting to see how Google handles them.
To get started, head over to the Firebase console of the project you made at the beginning of the tutorial. Click on ML Kit on the sidebar and then go to AutoML.
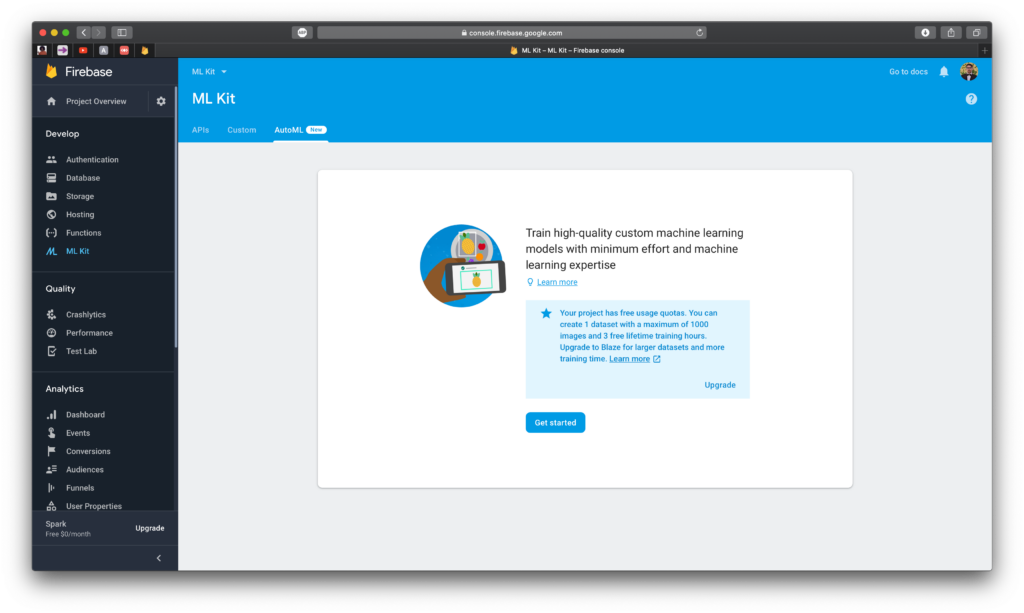
Tap on Get Started and wait for a few minutes while Firebase sets up the project. Meanwhile, you can download the dataset here. By the time you download the images, Firebase should complete setting up the AutoML project.
Click on Add dataset and fill out the information. Name your dataset Fruits and make sure that Single-label classification is the model objective. Click on Create when you’re done, and you should see something like this:
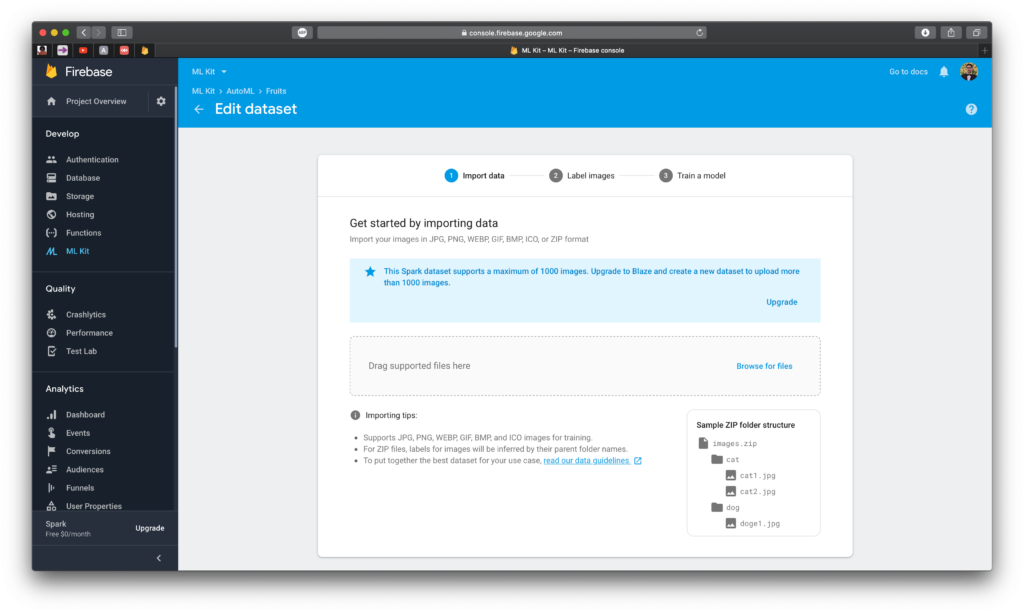
Kaggle will download a .zip file of the dataset. All you should do is drag that file into the area where it says Drag supported files here. It’ll take time to upload, validate, and then import. This can take a while, and you’ll be notified by email when it completes.
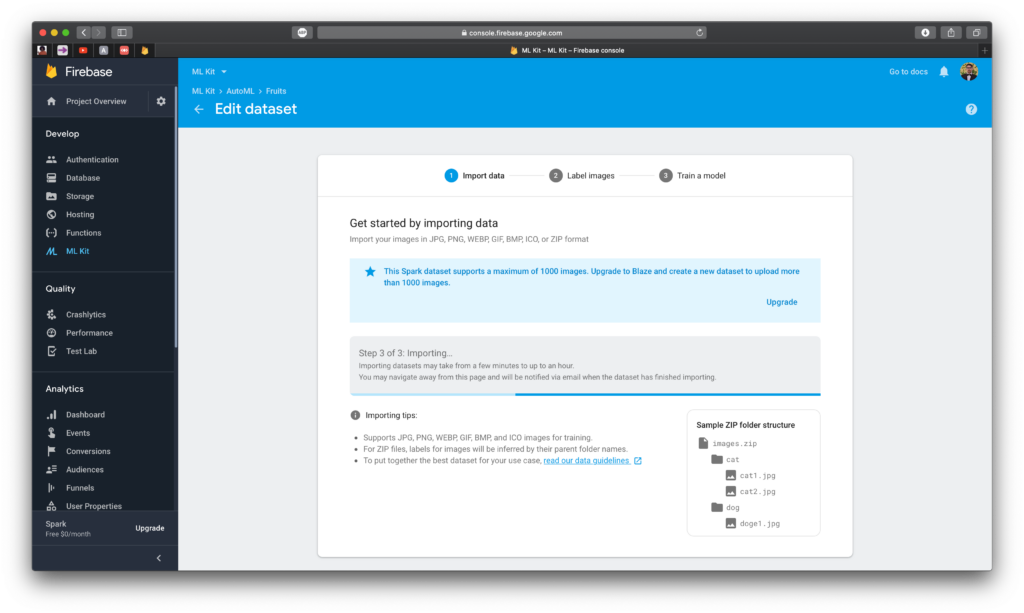
Once all the images are in place, just press the Train Model button to begin the process. You’ll be taken to a page to configure the training settings:
- Model name: I simply chose to name the model Apple_Similarity
- Latency and package size: Since we’re trying to establish the difference between apples, pears, and cherries, let’s choose the Higher accuracy option.
- Training time: We’re on Firebase’s Spark Plan, which is a free plan designed to help you kickstart your projects. As such, we can only compute for an hour under this plan.
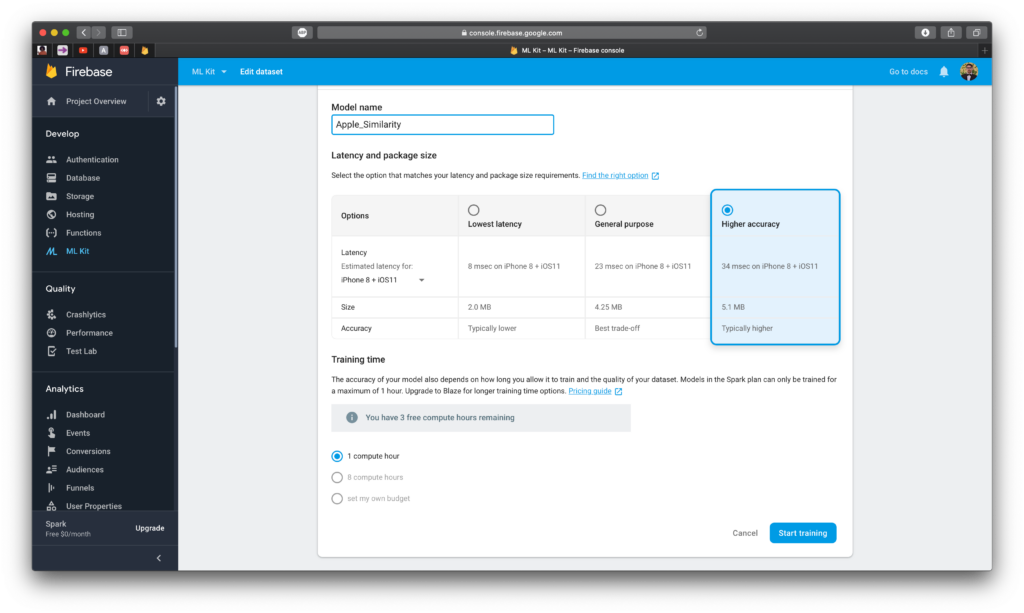
Click on Start Training. Prepare to wait a long time because it’ll take some time to train the model. For me, it took roughly 45 minutes to train the entire model.
Once training has finished, you’ll receive an email notifying you of its completion. When you open the Firebase Console and head over to the model page, you can inspect the training process on a page that’ll look like the one below.
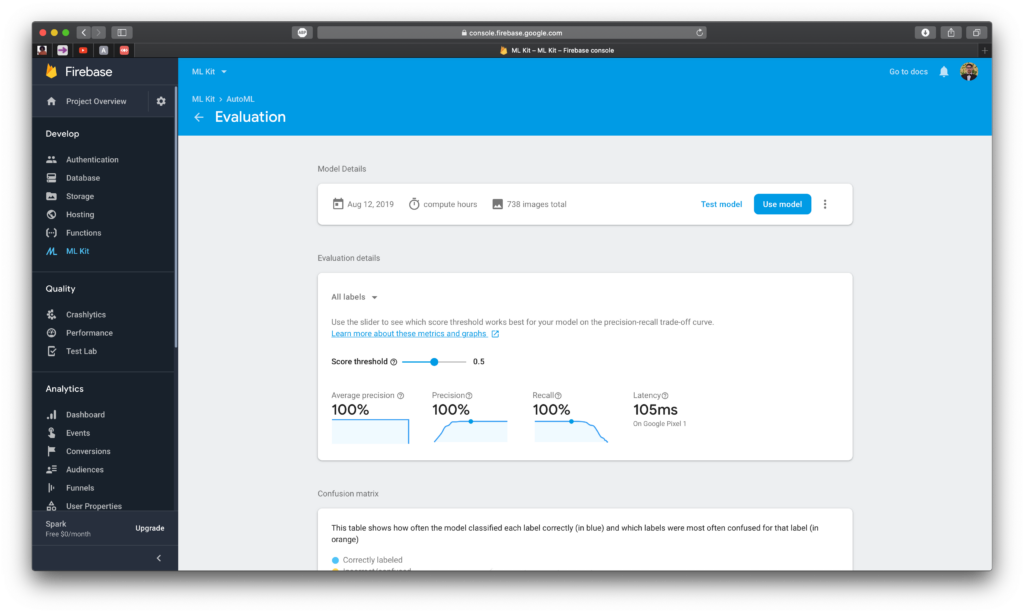
Click on Use model to present the two options on how we’re going to use it. Click on Download to download the model and Publish to publish the model.
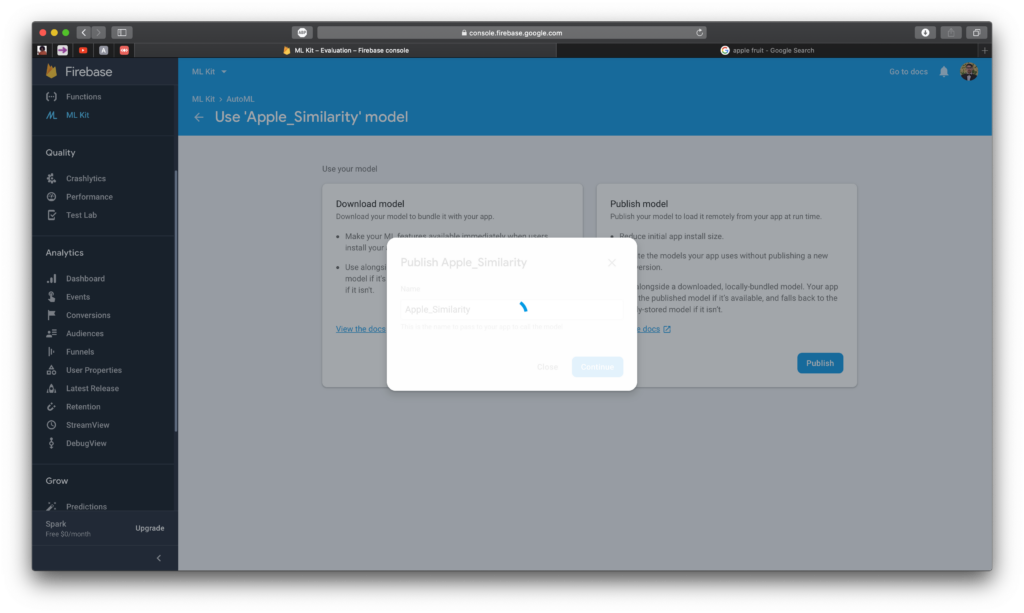
Open Downloads and rename the downloaded folder to ml_model. Now, drag it into the sidebar in the Xcode workspace underneath Assets.xcassets.
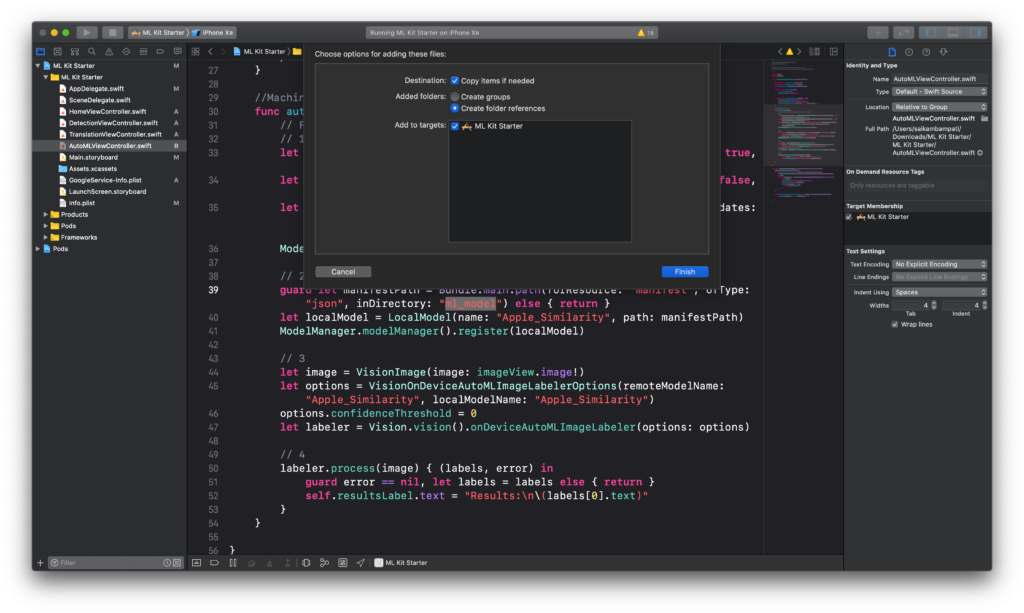
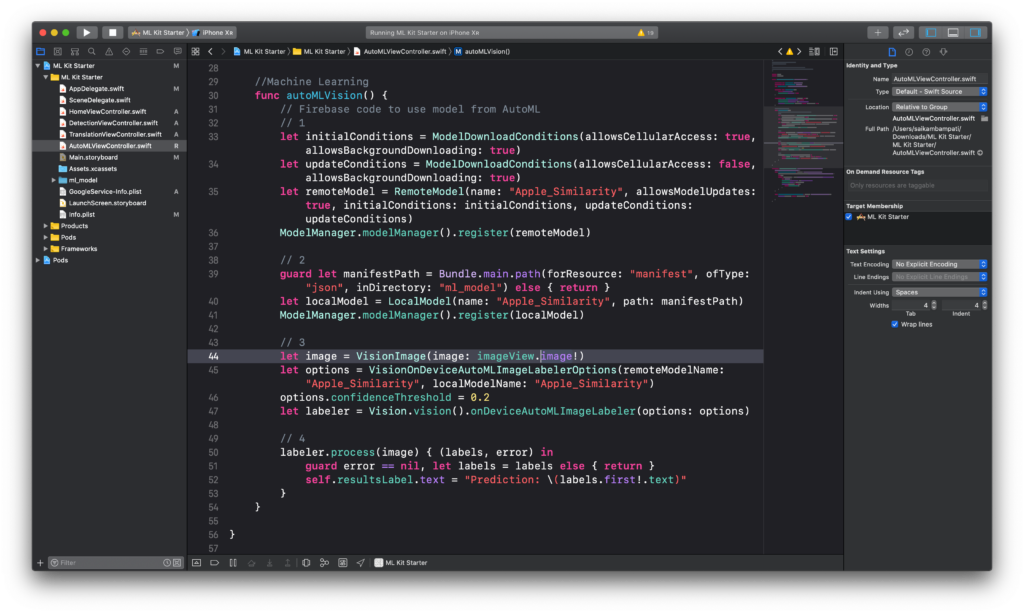
Head over to AutoMLViewController.swift to begin integrating AutoML with our app. Type import Firebase underneath the import UIKit line of code. Next, let’s modify the function autoMLVision().
This is a lot of code so I broke it down into smaller parts for comprehension.
- First, we define a remoteModel to load the model that we published. We define the name of the model, allow it to be updatable, and set some options to define when and when not to download/update the model. Finally, we register the model to our ModelManager.
- To make the model accessible for offline users, we also define a localModel using the folder we downloaded. We ask this model to look at the Manifest.json file to understand how to read the .tflite file downloaded.
- This part of the code should seem familiar. We define a labeler to label our image in the imageView. We configure this labeler to read from both the remote model and the local model.
- Finally, we ask the labeler to process the image and return labels and error. If there is no error and some labels, we set the text of resultsLabel to the first label returned.
Build and run the project. Try the model out on some images of apples, cherries, and pears. How does the model fare?
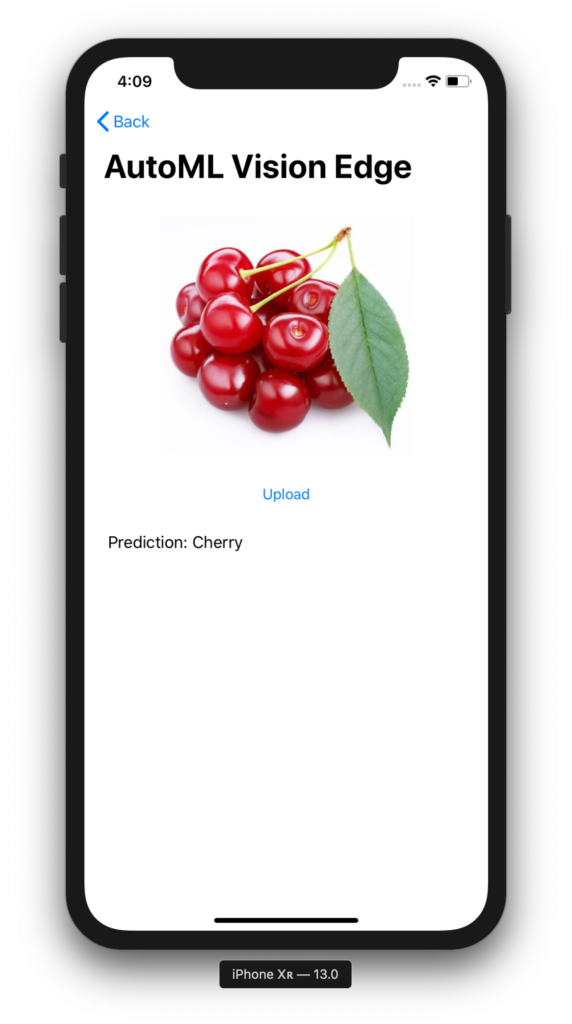
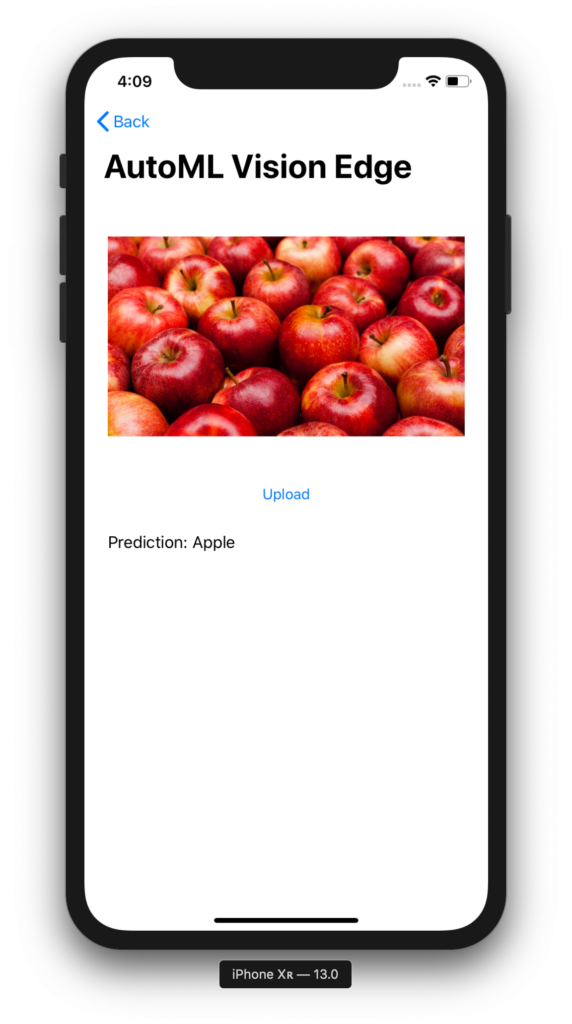
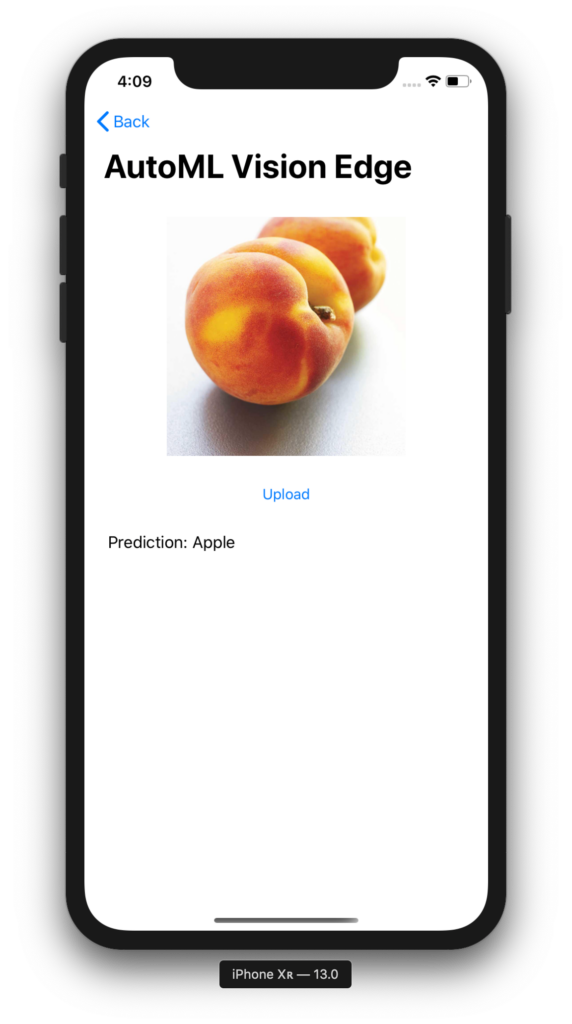
It looks like it works well for some images, and not that well for others. Of course, this can be improved with more training images and longer training time.
Conclusion
As shown, ML Kit made some impressive, easy-to-use additions to their SDK this year. You saw how easy it was to use the object detection and translation API’s. With AutoML Vision Edge, you can easily train your image dataset and quickly port the model to your device. The goal of ML Kit is to help developers easily incorporate high quality machine learning features into their apps with concise, minimal lines of code. As shown, Google is continuing to push this mission every year.
You can download the full project here. I’d love to hear what you’re building with ML Kit. Feel free to leave a message or ask a question in the comments below!

Comments 0 Responses