Among the new capabilities in Lens Studio 3.4, one that might have flown a bit under the radar—especially with the really impressive 3D Body Tracking, Full-Body Segmentation, and enhanced Finger Tracking taking a lot of the spotlight—is the new Asset Library.
Put simply, it’s a new collection of ready-to-use assets, provided by the Snap team and by a few select Official Lens Creators. If you want to get started with a range of different capabilities inside Lens Studio, but don’t want to go elsewhere to build 3D objects, ML models, materials, and more, this new library is where you should start.
In the first version of the library, the Lens Studio team has included 2D and 3D objects, scripts, materials, audio files, VFX, and—our favorite—a variety of ready-to-use SnapML models.
And again—these are all ready-to-use right out of the box. That means 3D assets are compressed and optimized, ML models are trained and configured, etc.
To take a closer look at this Asset Library, I’ll walk you through building a simple Lens that includes the following asset types:
- A SnapML Model, from the team at Fritz AI
- And Audio Component
- A 3D Object
- And 2 Behavior Helper Scripts
The Goal
Put simply, I want to show you just how easy it is to import a few assets and put them to work inside a Lens.
For inspiration, I need to look no further than my cat Spek, who I’ve been away from for the better part of a month now, while traveling across the country to escape the Cambridge winter—don’t worry, my brother and roommate are taking great care of her.
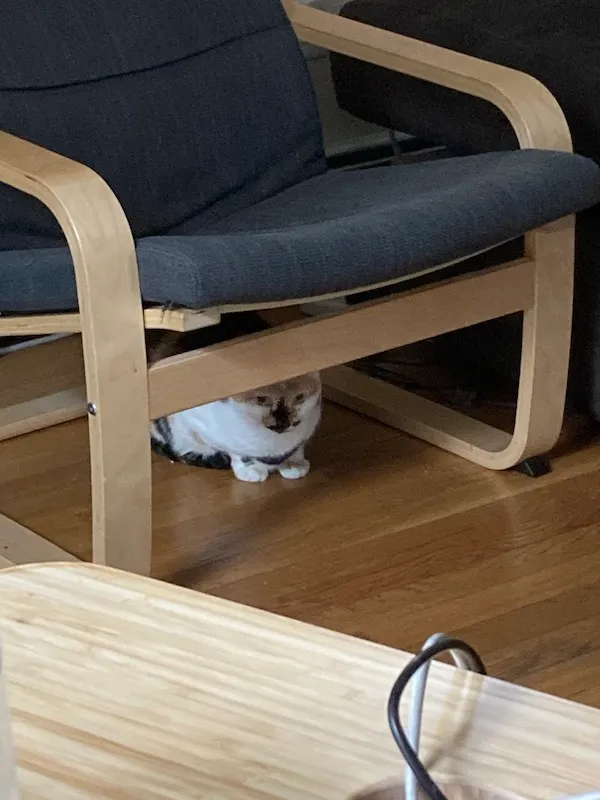
When it comes to Lens Studio (or really most things technical), my ambition often outpaces my skills. In light of that, I want to keep things as simple as possible.
Specifically, this demo Lens will leverage the Asset Library to:
- Add a SnapML model that can locate and count pet faces (cats and dogs)
- Add a “meow” audio clip that greets users shortly after opening the Lens
- Add a 3D cat that appears upon a user tapping the screen
Again, not an incredibly complicated use case—I initially wanted to tie some of this behavior more closely to the model predictions themselves, but then I realized that would take some more advanced scripting.
Step 1: Finding and Importing Assets in the Library
One of my favorite things about the Asset Library is how clean and quick it is to use.
Once I knew what I wanted, it was really easy to navigate the Library and one-click import the prefabs I wanted, along with all the related resources. I ended up working with:
- SnapML: Pet Face Detection, by Fritz AI
- Audio: Cat SFX, by Snap
- 3D: Kitty, by Snap
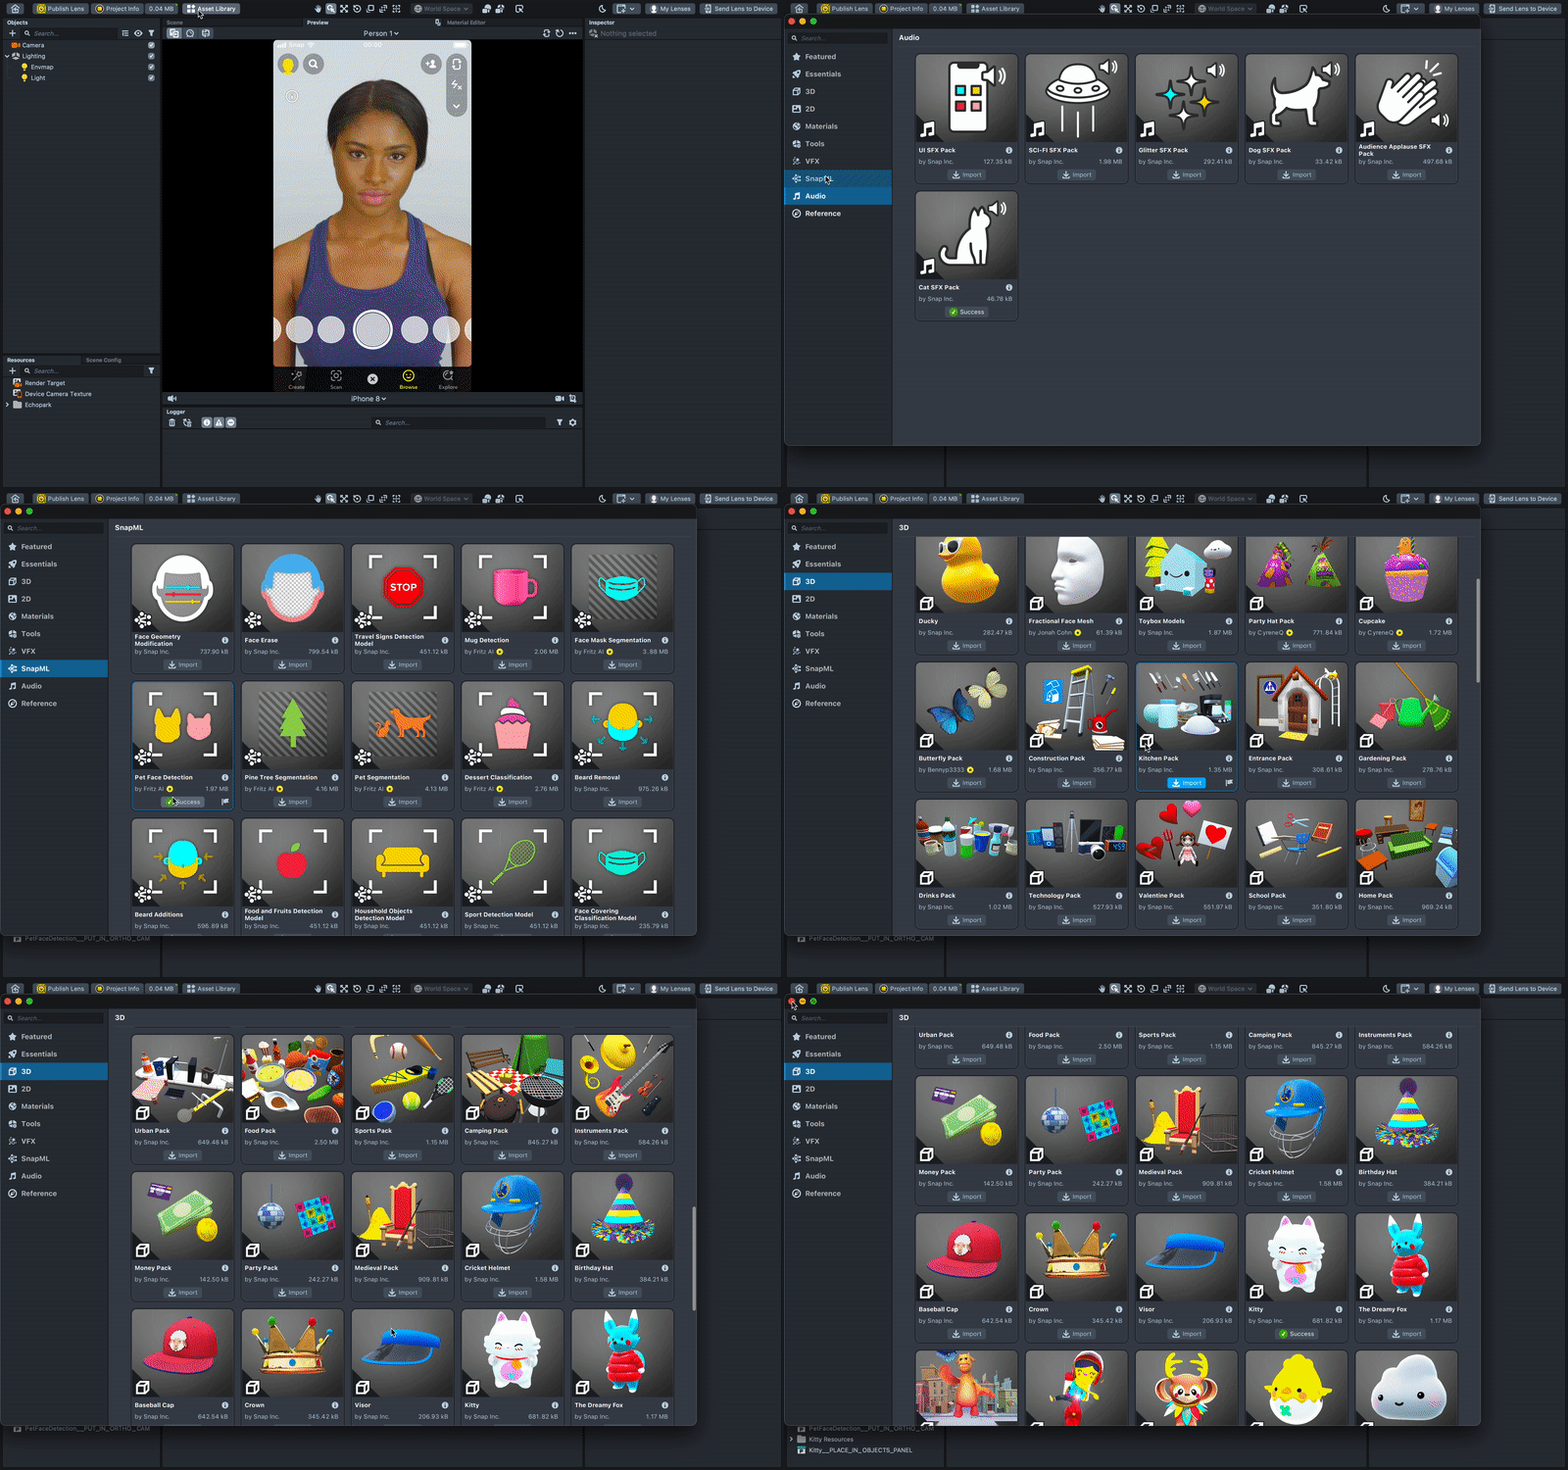
Step 2: Asset Configuration
Next, I needed to get these assets from my resources into my project. Luckily for me, each asset also comes with a hint concerning where it should go in the objects panel. The audio and 3D assets were simple enough — just drag into the Objects panel (don’t have to nest them anywhere), and poof! There they are, ready to work with.
However, the SnapML model took a bit more wrangling. Specifically, the Pet Face Detection asset needs to be placed in an Orthographic camera, which isn’t the default camera type in a new project. Here are the steps I tried:
- At first, I tried switching the main camera to an Orthographic one—nothing.
- And then I added a new camera and changed its type to Orthographic—still no dice when I added the SnapML prefab to it.
- Instead, I had to find a way to generate a new Orthographic camera layer, as my previous attempts weren’t actually generating that needed layer.
- The simplest way I found to do this was to create a new Screen Image Object, which auto-generated an Ortho camera and layer.
- From there, I simply disabled the Screen Image Object, keeping the new Orthographic camera+layer. I then added the SnapML prefab to that new camera, and there it was!
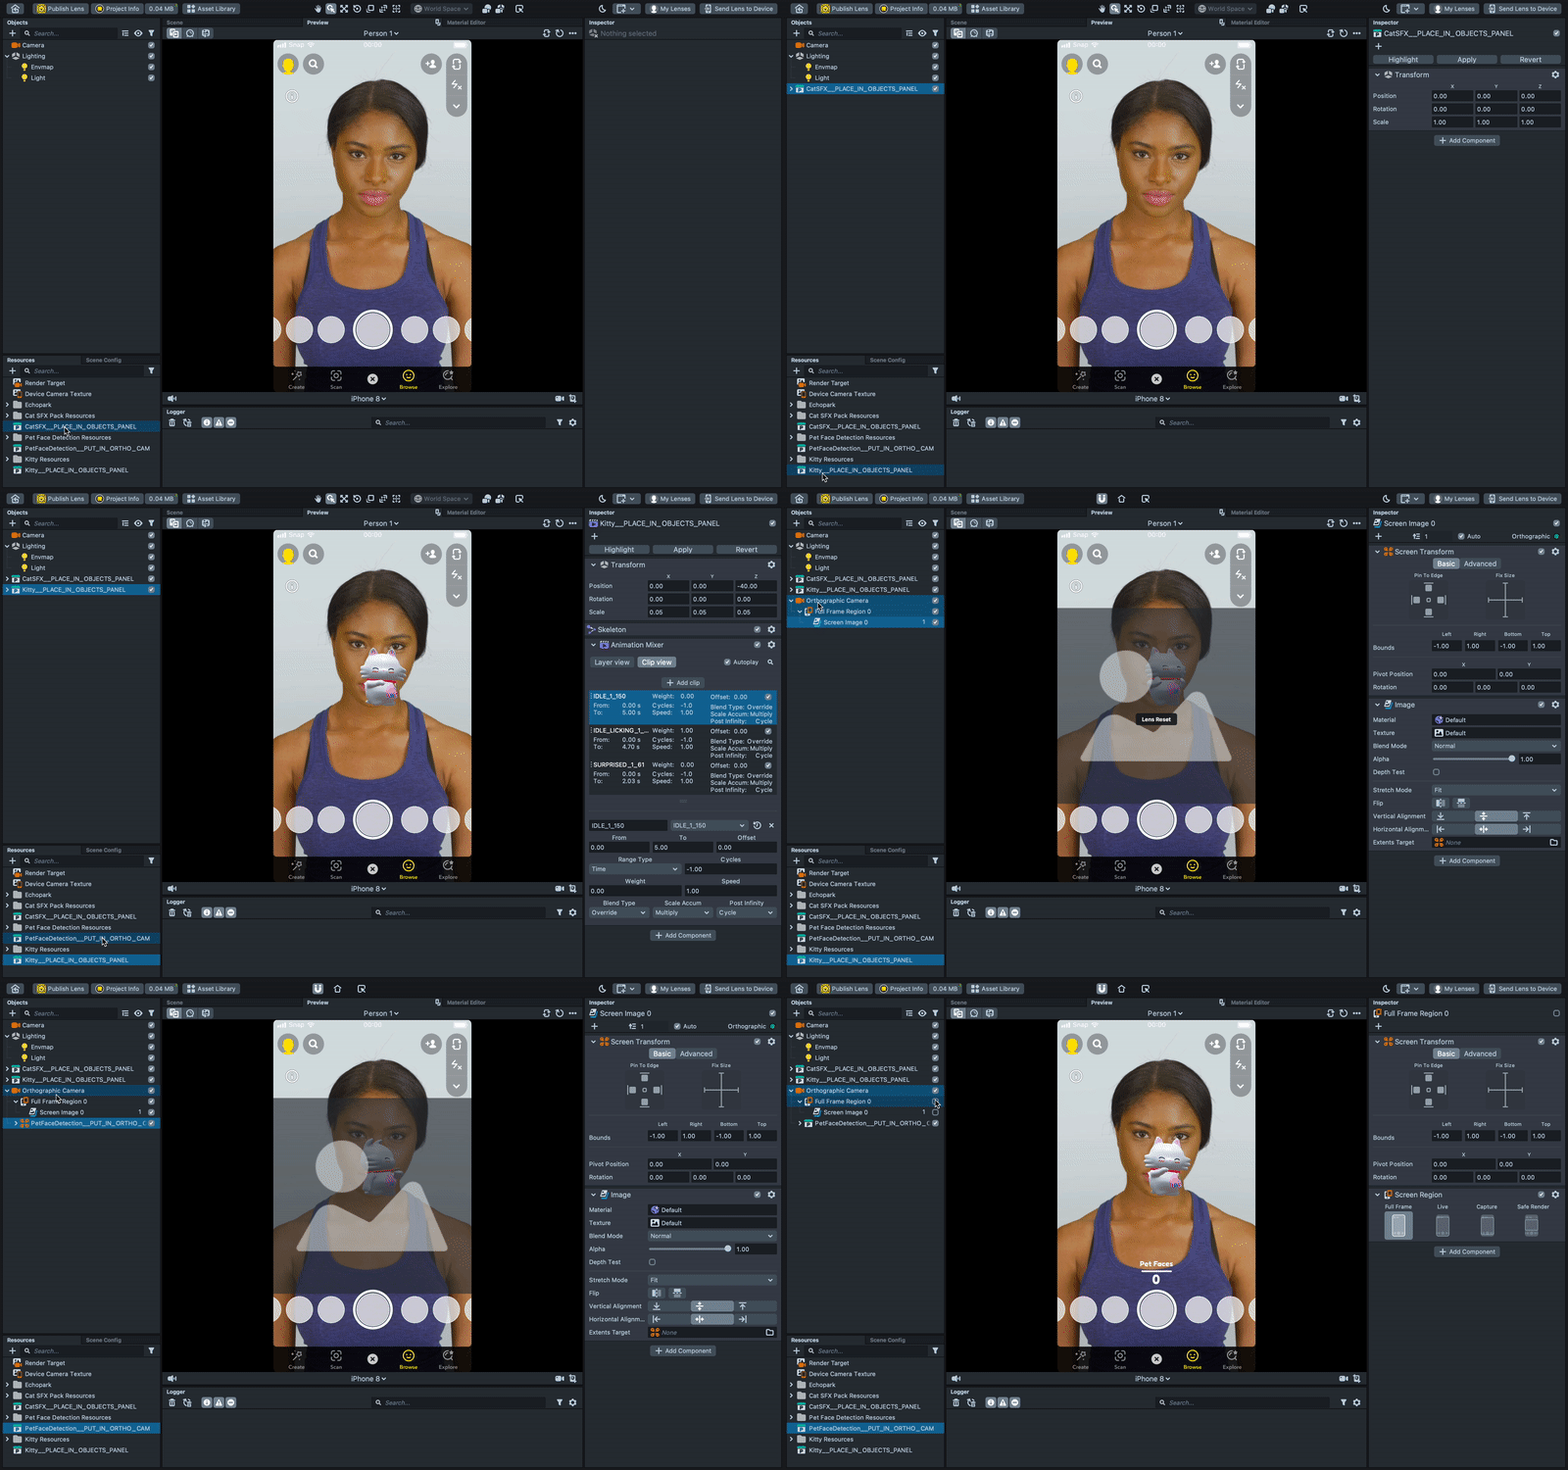
As you can see in the gif above, once I added the SnapML prefab to the new Ortho cam/layer, the Pet Faces counter appeared directly above the capture button on the UI, which signaled to me that the prefab was working correctly.
This was also easy to test—I just changed the preview image to Person + Cat, and sure enough, the model predicted and drew a box around the cat.
Also not above that the 3D Kitty asset is just plopped right in the middle of the screen upon adding it to the Objects panel. However, I only want the dancing Kitty to appear when the user taps the screen.
Additionally, I want to let users know without a shadow of a doubt that this is a cat Lens—so I want the Cat SFX prefab to be configured so that it plays upon launching the Lens, after just a slight delay.
This is where the behavior scripts come into play
Step 3: Behavior Scripting
I decided to start with the 3D Kitty. In order to hide the asset until a certain behavior triggered it (i.e. a tap), I needed to do a couple things.
First—disable the prefab in the object panel. I did this so that the object wouldn’t just appear by default, and instead would be initially hidden.
Next, I added a simple Behavior Helper script to the Objects Panel, and configured it like this:
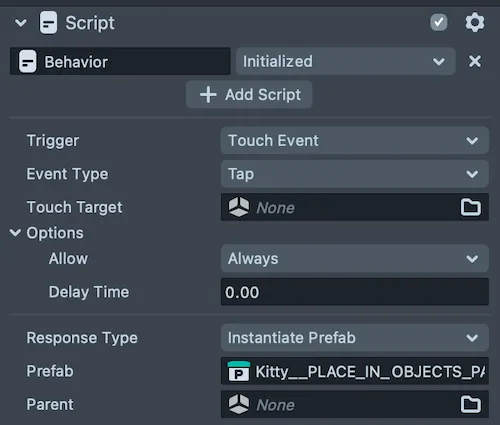
The trigger is a tap touch event, and the response type, in this case, is to instantiate the 3D object—i.e., the Prefab. So the Response Type in this case needs to be “Instantiate Prefab”. This should allow the user to tap the screen and generate the 3D Kitty in the camera scene.
The second Behavior Helper script I needed was for the Cat SFX audio. This one was pretty straightforward — I initially wanted to tie this to the model prediction (which I think would be a fun experience), but that would likely take some more advanced scripting.
So instead, I settled with a simple Helper script, which looks like this:
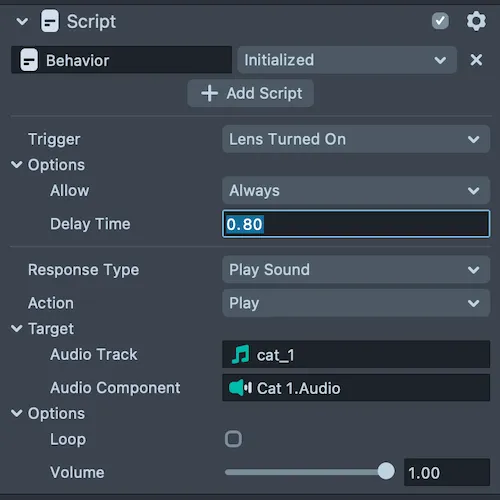
I played around a bit with the delay time to achieve a sound effect that felt right—didn’t want it to play the second the user opened the Lens, but also…again, I want the people to feel how much I miss my cat.
This is a quick look at the final project structure, with a preview of the cat + person, just to show you that the ML model is running correctly.
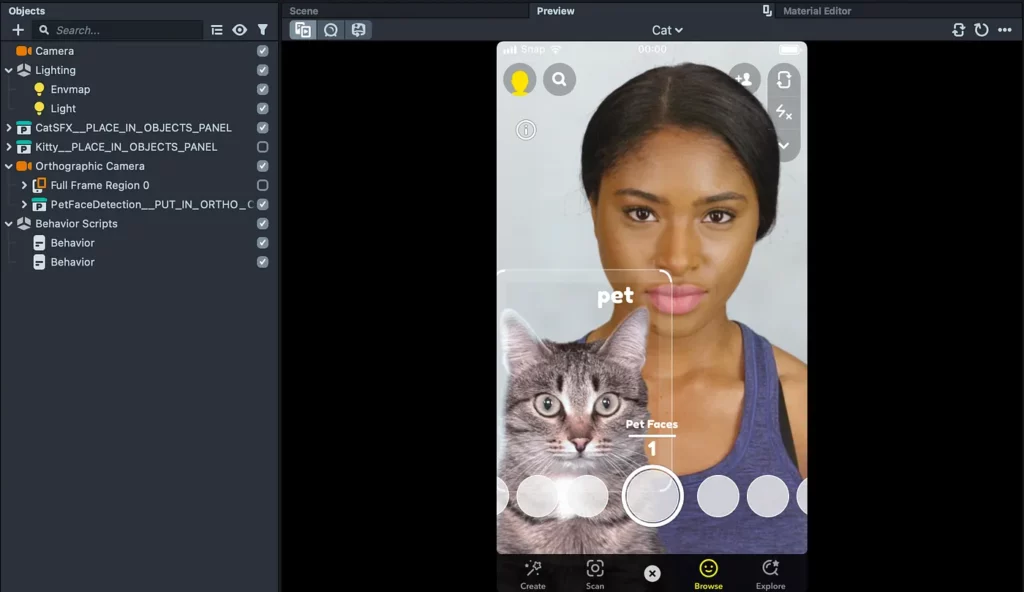
As a reminder, I needed to uncheck the 3D Kitty prefab in order to hide until the user taps the screen. From here, I could and likely would
- Apply different transform properties to the 3D Kitty to adjust its scale and where it appears on the screen
- Add a hint so that the user knows there’s a 3D Kitty Easter egg to be found!
- Adjust the delay time on the audio
- Or jump back into the Asset Library and see what else I might be able to add to jazz things up!
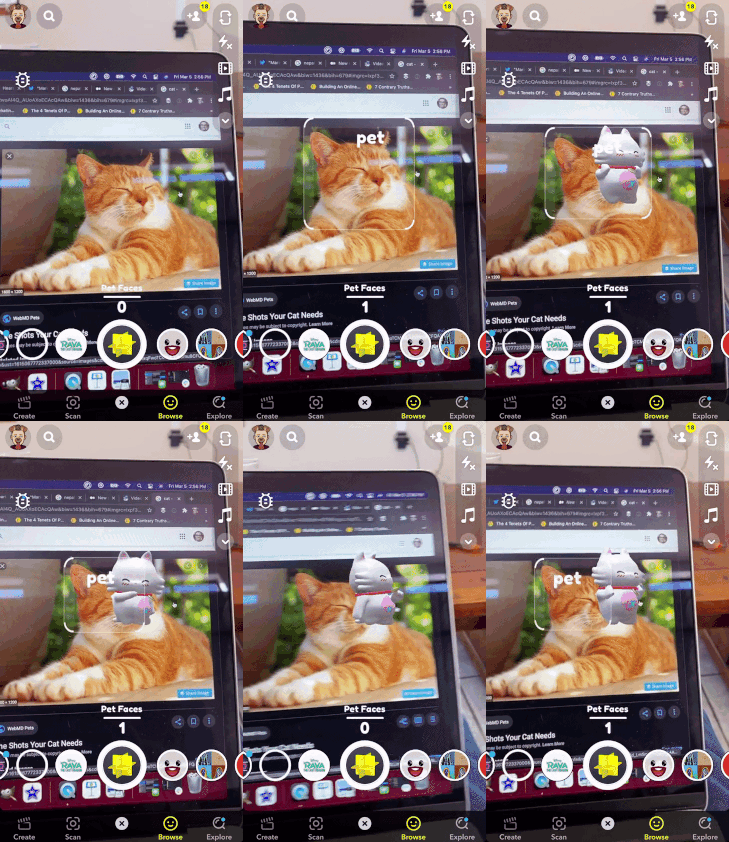
Here’s a quick look (sadly, without sound) of this demo in action:
What’s Next?
As I mentioned at the outset, this is a really lightweight look at working with the new Asset Library in Lens Studio. It was a really cool experience to jump right into a project that included a 3D asset, SnapML model, and audio component in literally less than a minute—with all of it (almost) full functional.
Put simply, this Asset Library is a game changer for Creators in a number of ways. I’m certain it will continue to grow, with new assets and asset types. But already, it allows for an encourages the following:
- Quick experimentation and prototyping
- Working with different kinds of asset types without the need for lots of external knowledge or expertise
- Increased access to and democratization of AR creativity
- Increased familiarity with what’s possible inside Lens Studio—for example, if a Creator has previously felt limited to 2D assets, they can now learn how to work with more complex asset types like Materials, ML models, and 3D objects.
My hope is that this new Asset Library encourages a lot of folks from within the AR world (looking at you, SparkAR creators) and from other disciplines to jump into Lens Studio and explore what’s possible inside this incredibly powerful platform.

Comments 0 Responses