This article is about building a neural machine translation web app and then actually deploying it.
Let’s Get started:
After spending a lot of time gathering and cleaning data and developing and tuning your model, it’s now time to deploy the model and make it ready for your users to interact with.
Here are the series of questions you must ask yourself as this stage of the process, which actually need an answer:
- How do I present the model on the web?
- How does the web interface interact with the model?
- What cloud service do I use?
- How do I debug errors after deployment?
- How do I scale the app?
This article will be answering the above questions—except for the last. I will leave the scaling of the app for another day, as that topic warrants its own investigation.
Goals/Steps
- Saving your model and word vocab
- Building a web interface for the app
- Dockerizing the model
- Deploying the model to Google Cloud
- Debugging errors in the deployed app
Saving Your Model and Word Vocab
During the process of saving the model, I made a mistake of saving the model and the word vocab like this:
This actually caused an error when trying to use it in my app. The error is similar to these on StackOverflow.
And one of the ways to solve it is to ensure that the model is loaded via the same path in which it was saved.
But while building the app, the loading path can’t be the same with the model’s saved path; hence we need to make the loading of the model independent of the path.
The simplest way to do this is to save the word vocab and model separately.
Hence, we’ll be saving the eng_lang vocab (English vocab) and the yor_lang vocab (Yoruba vocab) in a separate pickle file:
Our word vocab for both languages is thensaved in a .pkl file—now, we can use the conventional method of saving the PyTorch model.
Using this method spares us the headache of path-dependent model saving.
One more thing—before going ahead and creating the web interface, you need to convert the notebook used to create the model into script. You can check out the script here .
Also, a function called translate is added to the script. This function contains the inference code for our model:
def translate(text,model,src,trg):

    word_list = text.lower().split()

    max_len = len(word_list)+1

    word_tensor = torch.LongTensor([[src.word2index[w] for w in word_list]])

    src_mask = (word_tensor != src.word2index["<blank>"]).unsqueeze(-2)

    model.eval()
    out_put = greedy_decode(model, word_tensor, src_mask,
                    max_len=max_len, start_symbol=trg.word2index["SOS"])

    trans = ""
    for i in range(1, out_put.size(1)):
        sym = trg.index2word[out_put[0, i].item()]
        if sym == "EOS": break
        trans += sym + " "

    return trans
To understand the code better, please circle back to part one of the series.
From the script, we’ll import the make_model ( used to build the model) and the translate functions during the process of building the web interface.
Building a Web Interface for the App
Before we create the interface, let’s create the REST API the interface will be interacting with, using Flask and Flask_restful.
from flask import Flask, render_template, flash, redirect,request
from flask_restful import Resource, Api, reqparse
from model import make_model, translate
import torch
from os import listdir, environ
import pickle

app = Flask(__name__)

api = Api(app)

path = "model_s/new_model.pt"  # 1

model_pt = torch.load(path,map_location=torch.device('cpu')) # 2

src = pickle.load( open( 'model_s/src.pkl', "rb" )) # 3
trg = pickle.load( open( 'model_s/trg.pkl', "rb" )) # 4

modelp = make_model(src.n_words,trg.n_words,N=6) # 5
modelp.load_state_dict(model_pt) #6

@app.route("/")
def home():
    return render_template("home.html")

class Translate(Resource):
    def get(self):
        parser = reqparse.RequestParser()
        parser.add_argument('text', type=str)

        args = parser.parse_args()
        text = args["text"]

        r_text = translate(text,modelp,src,trg) # 7
        return r_text

api.add_resource(Translate,'/translate')

if __name__ == "__main__":
    app.run(debug=True, host='0.0.0.0', port=int(environ.get('PORT', 8080))) # 8
In the code snippet above, we can see the # digit comment. This represents the step in which we’ll analyze the code:
- Assign the model path to a variable
- Load the model and specify the device to use for inference—in this case, we choose SPU.
- Load the src (English) word vocab
- Load the target (Yoruba) word vocab.
- Create the model using make_model
- Load the model state
- The translate function accepts an incoming text argument from the web interface and then passes it into the model for translation
- Create a port for the app
In the code above, the route “/” is used to load the page to render our interface, and the “/translate” route is used to accept the incoming text and also return the translated text.
The class Translate is used to create the Rest API. In this class, we defined a method get that contains the code to obtain the text from the web interface and then pass it into the translate function.
Let’s see what the intended web interface looks like:

Firstly, let’s create the HTML file for the design:
<html>
    <head>
        <link rel="stylesheet" type="text/css" href="../static/css/bootstrap-theme.min.css" />
        <link rel="stylesheet" type="text/css" href="../static/css/bootstrap.min.css" />
        <link rel="stylesheet" type="text/css" href="../static/css/responsive.bootstrap.min.css" />
        <link rel="stylesheet" type="text/css" href="../static/css/style.css" />
    </head>
    <body>
        <div class="container" style="margin-top:40px;width: 60%;">

            <div class="row">
                <h1 class="text-center">Neural Machine Translation</h1>
                <p class="text-center">Translate from English to Yoruba (Intonation is important)</p>
            </div>
            <div class="row">
                <div class="col-md-5">
                    <textarea id="eng" cols="30"></textarea>
                </div>
                <div class="col-md-2">
                    <button class="btn btn-large btn-success" id="translate">Translate ---></button>
                </div>
                <div class="col-md-5">
                    <textarea id="yor" cols="20"></textarea>
                </div>
            </div>
        </div>
    </body>
</html>
In the HTML code above our major focus will be the textarea tag and the button tag:
- <textarea id=”eng” cols=”30″></textarea> for the English text
- <textarea id=”yor” cols=”20″></textarea> for the Yoruba text
- <button class=”btn btn-large btn-success” id=”translate”>Translate — -></button> When clicked, the button is used to send the English text to the Rest API.
Now, let’s add action to the button. We want to ensure that whenever the button is clicked, the text in the English textarea should be sent over to the Translate class for translation via the route /translate, and then fill in the Yoruba text area with the translated text.
We’ll need to add the JavaScript (jQuery) code below to the body of the HTML file above:
<script src="../static/js/jquery-2.1.3.min.js"></script>
<script>
    $(document).ready(function(){

        $("#translate").click(function(){

            let data = $("#eng").val()

            $.get("/translate",{text: data}, function(data){

                $("#yor").text(data);
            });
        });
    });
</script>
$(“#translate”) is used to grab the button element and bind it to a click action click; hence, whenever the button is clicked, the following action occurs:
- We obtain the English textarea value using $(“#eng”).val()
- We then use the JQuery get method to send the data to the route “/translate”
- If everything is successful, the translated text is obtained and appended to the Yoruba text area.
Now that we’re done with the interface, it’s time to containerize the app.
Dockerizing the App
The image we’ll be creating during this process is not actually needed when deploying the app, although the Dockerfile is needed.
The main aim is to see how our app behaves before we deploy it to the cloud.
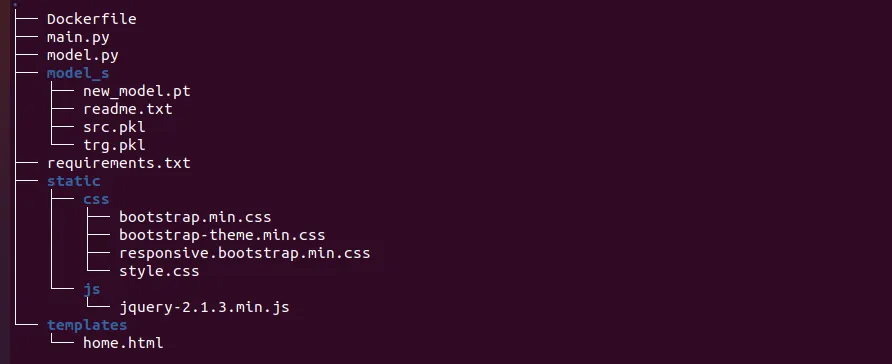
First, let’s make sure our file system is prepared like so:

Let’s create our Docker file:
In the Docker file, we obtain a Python image (Python 3.8-slim) to create our environment. We then install the necessary package from the requirement.txt file
We also specify the virtual working directory for the app using ENV APP_HOME /app and then WORKDIR $APP_HOME.
We then copy all the files in the directory containing the DockerFile (I mean the project directory) to the virtual working directory $APP_HOME .
Lastly, we specify that the app should be executed using gunicorn
Lets now create the Docker image to run our app:
Make sure the above command is executed in the same directory containing the file directory tree, as shown in the image above.
After this is done, we can now go ahead and publish the image, using the command below:
Once this is done you can go ahead to the link provided e.g http://0.0.0.0:8000/
Deploying the Model to Google Cloud
We’re now set to deploy our model, once we’ve confirmed the app is working fine using our Docker container.
For deployment, we’ll be using Google Cloud Platform. First, log in into gcloud using the command below:
The command will prompt you to login to your cloud account and then choose the project you want.
After this is done, let’s build a container for the app using cloud build:
If the command is successful, a message containing the image name is returned. But it might take a bit of time if the app contains a large file size.
Then we can go ahead and deploy the image.
While running this command, you’ll be prompted for the project name. Choose the default. Additionally, you’ll be prompted to enter the region and to allow unauthorized invocation (enter y — yes).
Once this is done, you can visit the deployed app using the service URL provided in your terminal. Now your app is ready. But let’s say unfortunately, that you visited the app but it isn’t displaying, and instead you get a dreaded “503 Service not available”
Let’s explore how to debug this.
Debugging Errors in the Deployed App
The 503 I illustrated above is a result of the whole app being larger than the available storage allocated for the app. To see the full error message, you can always go to your Google Cloud console and click on the project containing the model.
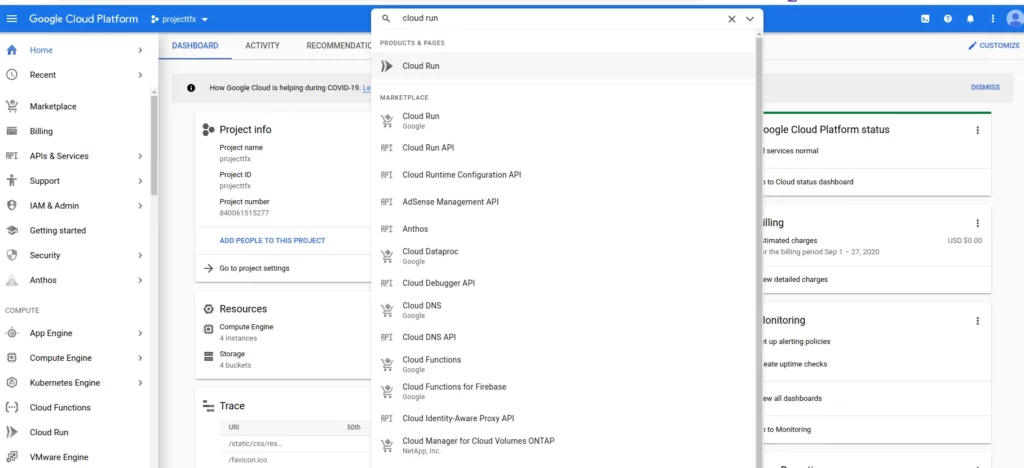
Then search for “cloud run”:

Click on Cloud Run to view all deployed apps

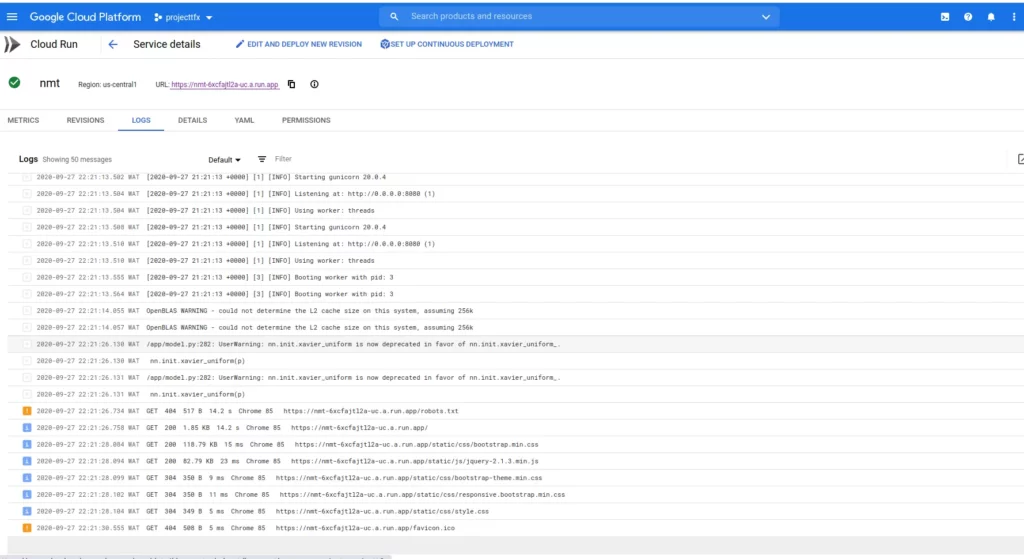
Click on the deployed app that you want—ours is nmt—and go to the log:

I don’t currently have any errors. Once there is an error, we’ll see a red-colored bar instead of the blue and orange bar. You can always click on the logs to view them in full detail.
If we are to follow our assumption that there is an error, then we should see it in the log, and we can expand to see the cause of the error.
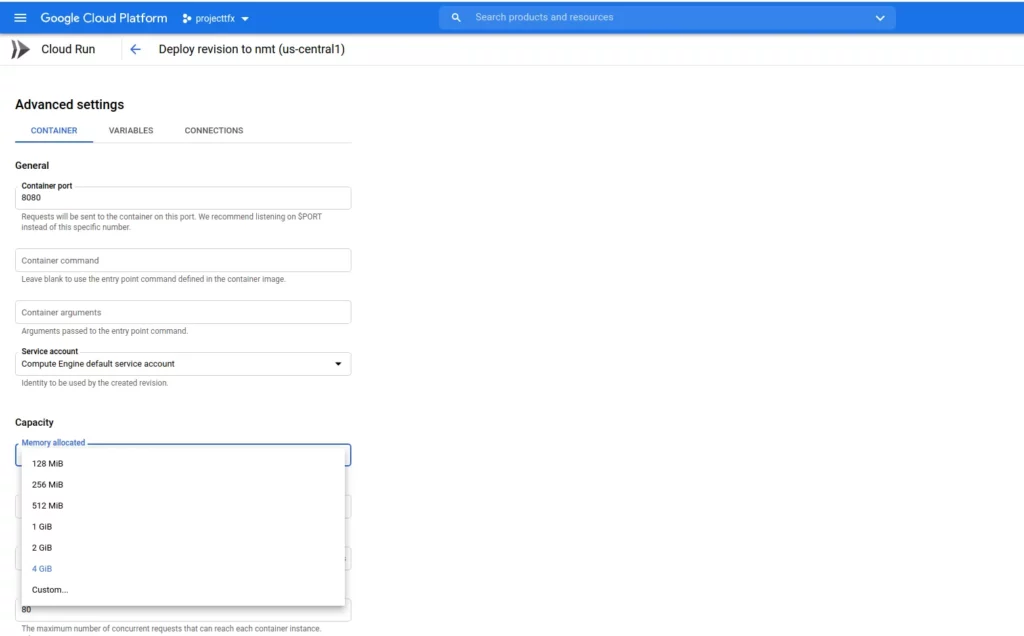
In order to solve the 503 error, click on EDIT AND DEPLOY NEW VERSION.

We select the capacity and then increase it. For the model deployed, I chose 4GIB. Then scroll down and click deploy.
Once all this is done, revisit the web app again to see if the error is resolved. And if you’re faced with another error, check the logs again to locate the cause of the error and determine the next steps to fix it.
Conclusion
Congratulations! We’ve deployed our language model app and are now ready for users to interact with it. To obtain the code for the web app we built in this section, you can fork the repo below:

Comments 0 Responses