TensorFlow.js is a very powerful library when it comes to using deep learning models directly in the browser. It includes support for a wide range of functions, covering basic machine learning, deep learning, and even model deployment.
Another important feature of Tensorflow.js is the ability to use existing pre-trained models for quickly building exciting and cool applications.

Introduction
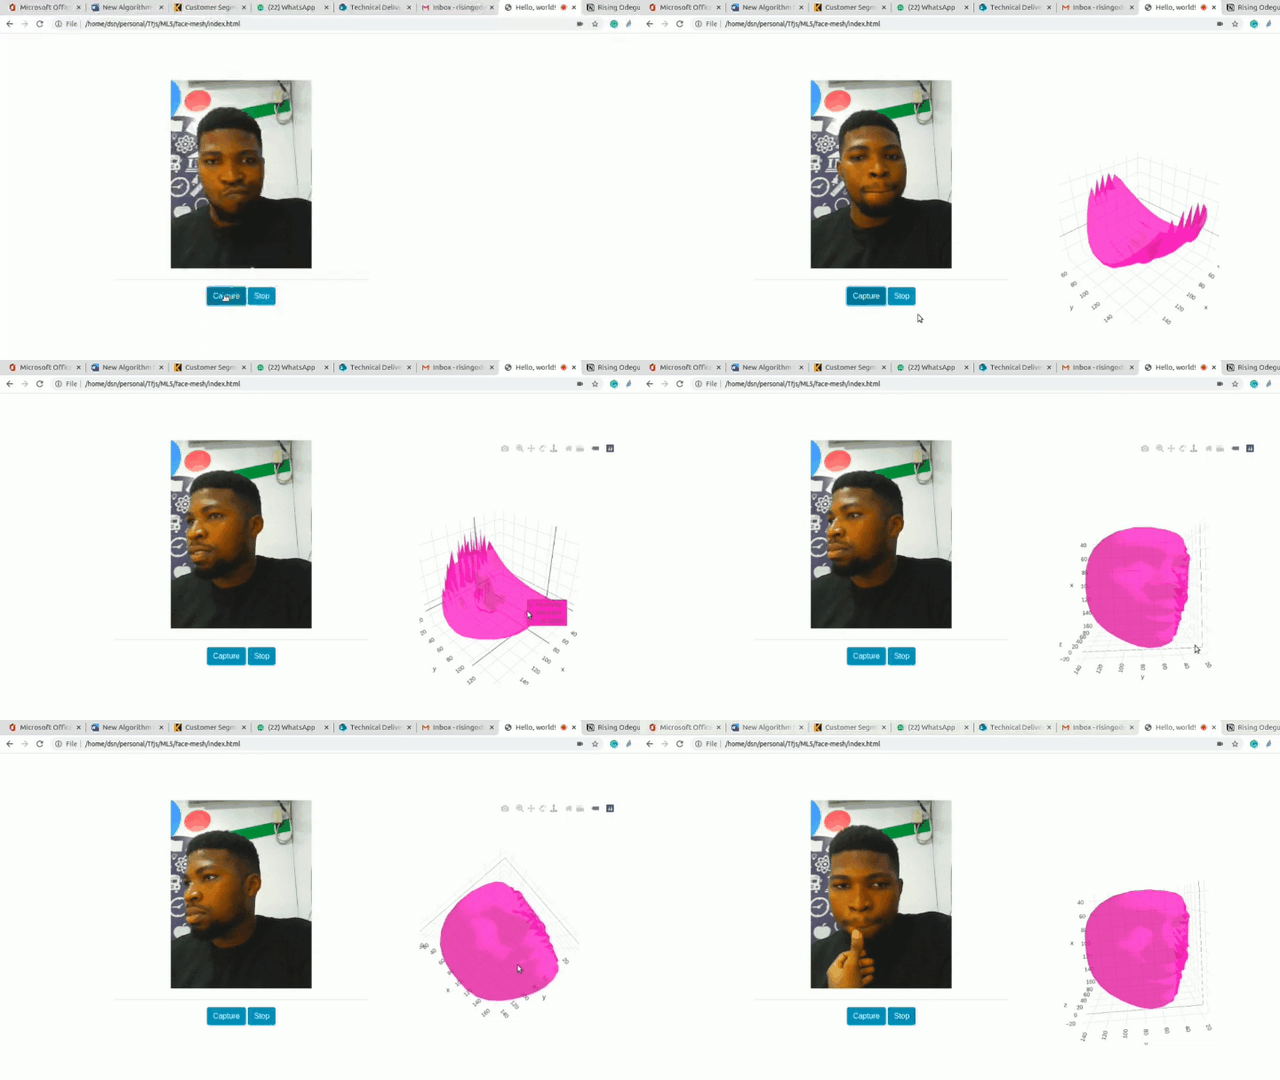
In this article, I’m going to show you how to use TensorFlow’s face landmark detection model to predict 486 3D facial landmarks that can infer the approximate surface geometry of human faces.

Let’s next explore how this works in code.
The home page (index.html)
Copy and paste the code below in your index.html file:
<!doctype html>
<html lang="en">

<head>
    <!-- Required meta tags -->
    <meta charset="utf-8">
    <meta name="viewport" content="width=device-width, initial-scale=1, shrink-to-fit=no">
    <script src="https://cdn.jsdelivr.net/npm/@tensorflow/tfjs"></script>
    <script src="https://cdn.jsdelivr.net/npm/@tensorflow-models/facemesh"></script>
    <!-- Bootstrap CSS -->
    <link rel="stylesheet" href="https://stackpath.bootstrapcdn.com/bootstrap/4.5.0/css/bootstrap.min.css"
        integrity="sha384-9aIt2nRpC12Uk9gS9baDl411NQApFmC26EwAOH8WgZl5MYYxFfc+NcPb1dKGj7Sk" crossorigin="anonymous">
    <!-- Latest compiled and minified plotly.js JavaScript -->
    <script src="https://cdn.plot.ly/plotly-latest.min.js" charset="utf-8"></script>
    <title>3D Face Mesh</title>
</head>

<body>
    <div class="container">
        <div class="row text-center" style="margin-top: 100px;">
            <hr>
            <div class="col-md-6">
                <video autoplay playsinline muted id="webcam" width="300" height="400"></video>
                <hr>
                <button class="btn btn-info" id="capture">Capture</button>
                <button class="btn btn-info" id="stop">Stop</button>

            </div>
            <div class="col-md-6">
                <div id="plot" style="width: 500px; height: 600px;">
                </div>
            </div>
        </div>


    </div>


    <!-- Optional JavaScript -->
    <script src="index.js"></script>
    <!-- jQuery first, then Popper.js, then Bootstrap JS -->
    <script src="https://stackpath.bootstrapcdn.com/bootstrap/4.5.0/js/bootstrap.min.js"
        integrity="sha384-OgVRvuATP1z7JjHLkuOU7Xw704+h835Lr+6QL9UvYjZE3Ipu6Tp75j7Bh/kR0JKI"
        crossorigin="anonymous"></script>
</body>

</html>
In the code block above, we created a simple HTML page with a webcam feed, and also a Div that holds our 3D plots.
- In code lines 8 and 9, we load two important packages. The TensorFlow.js library, and the facemesh model. The facemesh model has already been trained, and TensorFlow provides a nice API with it. This API can be easily instantiated and used in predicting.
- In line 14, we add another important library — Plot.js — which we’ll be using to plot the face landmarks in real-time.
- In the body section of the HTML code (line 23), we initialize an HTML video element with a width and height of 300px. We also give it an ID “webcam”.
- In code lines 25 and 26, we create two buttons to capture and stop capturing feeds from the webcam. This can be used to start and stop the model during inference.
- Lastly, in line 30, we initialize another div (plot). This div will hold our 3D plot of the face landmarks.
In the last part of the body tag in the HTML file, we link the script source, which will contain all JavaScript code needed to load and predict the landmarks. We also add Bootstrap for some styling.
Next, let’s move to the JavaScript side of things.
Making it Work (index.js)
Copy and paste the code below in your index.js file:
let model;
let webcam
let webcamElement = document.getElementById("webcam")
let capturing = false


async function main() {
    // Load the MediaPipe facemesh model.
    model = await facemesh.load();
    console.log("Model loaded")

    webcam = await tf.data.webcam(webcamElement);
    const imgtemp = await webcam.capture();
    imgtemp.dispose()

    document.getElementById("capture").addEventListener("click", function () {
        capture()
    })

    document.getElementById("stop").addEventListener("click", function () {
        capturing = false
    })
}


main();- In code lines 1-4, we do some variable initialization. The variable model will hold the facemesh model, while the webcam element will hold a TensorFlow webcam object that can read and parse video feeds. Next, we get the video element from the client-side, and lastly, we set a Boolean variable (capturing) to be false. This variable helps track whether we are predicting or not.
- In line 7, we create an asynchronous function (main). It’s important for this function to be asynchronous because model loading over the internet can take some time.
- In line 9, we initialize the facemesh model by calling the load attribute on it. This is saved to the variable model.
- Next, in lines 12–14, we activate the webcam by initializing the TensorFlow webcam object, capturing an image and disposing of it. This is important, as the browser’s webcam takes a few seconds to properly load, and we don’t want bad feeds messing with our predictions.
- In lines 16 and 20, we add event listeners to the buttons for both capture and stop. These event listeners respond to click events and start or stop the prediction.
Notice that in line 16, where we added the event listener capture, we made a call to the function capture(). We’re going to write this function in the next section.
Copy and paste the code cell below, just before the function main:
async function capture() {
    capturing = true

    while (capturing) {
        const img = await webcam.capture();
        const predictions = await model.estimateFaces(img);

        if (predictions.length > 0) {

            let a = []; b = []; c = []
            for (let i = 0; i < predictions.length; i++) {
                const keypoints = predictions[i].mesh;
                // Log facial keypoints.
                for (let i = 0; i < keypoints.length; i++) {
                    const [x, y, z] = keypoints[i];
                    a.push(y)
                    b.push(x)
                    c.push(z)
                }
            }

            // Plotting the mesh
            var data = [
                {
                    opacity: 0.8,
                    color: 'rgb(300,100,200)',
                    type: 'mesh3d',
                    x: a,
                    y: b,
                    z: c,
                }
            ];
            Plotly.newPlot('plot', data);

        }
    }
}
Let’s understand what’s going on in this code cell:
- First, we set capturing to true. This indicates that we’ve started capturing feeds. The while true (until we click stop) means the model continues making predictions and plotting the results.
- In line 5 and 6, we capture a frame from the webcam containing a face, then we pass this image/frame to the estimateFaces function of the facemesh model. This returns a JavaScript object with information about the detected face.
From the documentation, estimatedFaces returns an array of objects describing each detected face. Some of these objects are:
- faceInViewConfidence: The probability of a face being present.
2. boundingBox: The bounding box surrounding the face
2. mesh: The 3D coordinates of each facial landmark.
3. scaledMesh: The normalized 3D coordinates of each facial landmark
4. annotations: Semantic groupings of the scaledMesh coordinates.
- In line 8, we check to see if there’s at least one prediction object before we start retrieving the landmarks.
- In line 10, we initialize three arrays (a, b, c) corresponding to the x, y, z coordinate points that are going to be predicted by facemesh.
- In line 11, we start a for loop that loops over all the returned landmarks (faceInViewConfidence, boundingBox, mesh, scaledMesh, annotations, and so on), and retrieve the mesh object. We can use either mesh or scaledMesh for plotting.
- Then in the inner for loop (line 14), we loop over the returned keypoints in the mesh array, and then push the (x, y, z ) coordinates to the three intermediate arrays (a, b, c) we initialized earlier.
Now that we have all the saved mesh points, we’ll plot them using a 3D mesh plot of plot.js.
- First, in line 23, we create a data object. This object contains both the data as well as styling for the plot we’ll be creating. I made this styling as minimal as possible, but you can check out the plotly documentation on adding custom styles. Be sure to specify the plot type to mesh3d in order to get the desired result. And finally, we assign each array (a,b,c) to the 3D coordinates (x,y,z) of plotly.
- In line 33, we pass the data object we just created to plotly’s newPlot function and specify the div where we want it to show up (plot)
And that’s it! Now let’s see this in action.
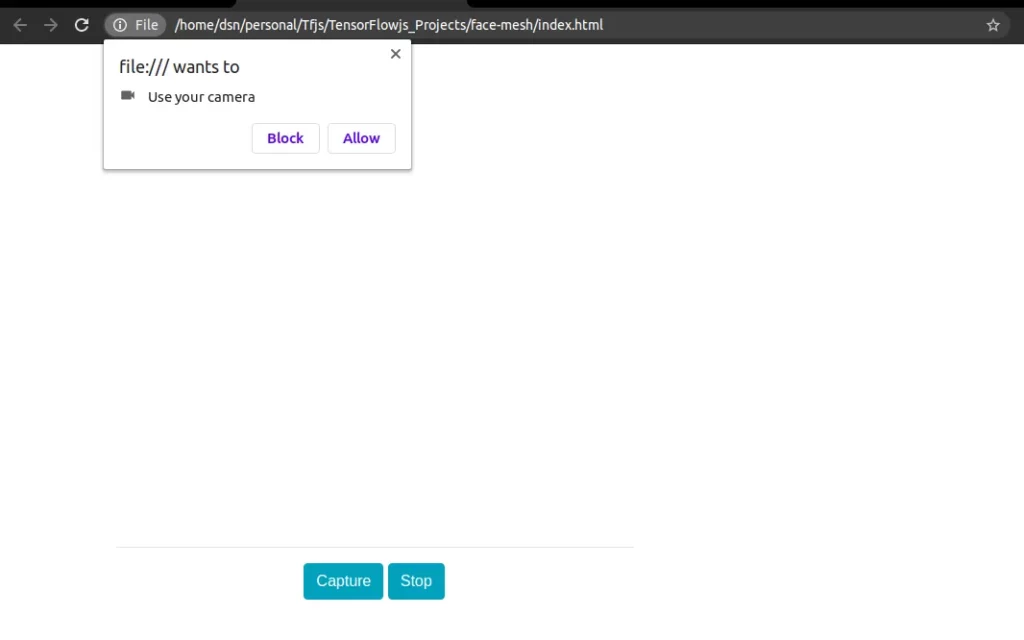
From your file folders, open the index.html file in your browser. It will prompt you to allow the use of the webcam. Click allow.

Next, click Capture to start real-time inference.

The predicted landmarks are passed to plotly’s 3D mesh and are rendered on the browser. To stop the prediction and interact with the 3D plot, click on the stop button.
Conclusion
Congratulations! You now know how to predict and plot 3D face landmarks using TensorFlow.js and Plot.js—all in the browser, all in real-time. I trust you’re beginning to picture the numerous applications and uses of this ML technique, and I’d definitely love to see what you come up with.
In the meantime, if you’d like to know more about deep learning in the browser using TensorFlow.js, check out my ongoing series on the topic:
If you have any questions, suggestions, or feedback, don’t hesitate to use the comment section below. Stay safe for now, and happy learning!

Connect with me on Twitter.
Connect with me on LinkedIn.

Comments 0 Responses