TLDR: OpenCV’s camera doesn’t handle a mobile device’s portrait mode well by default. Grab the code below and drop it into CameraBridgeViewBase to utilize the OpenCV rear and front facing Camera in full screen portrait orientation.
Jump to:
- Android’s Matrix
- When to update
- Getting dimensions
- Orienting based on front or rear camera
- Scaling
- Mirroring
- Fullscreen
- Complete code
The Issue with OpenCV’s Camera Module on Mobile
Even with all of the recent developments in Android’s ARCore, there are plenty of reasons you might need OpenCV in your mobile Augmented Reality project. With image processing, machine learning, object detection, optical flow, and numerous other features — the library does a lot, and it isn’t bound to just one platform, meaning that with minimal changes you can port your code to iOS, Unity, Python, and more.
And while OpenCV makes a lot of things easier, I’ve found one particular sticking point after having spent a couple of months building an AR-based Android app focused on feature detection—configuring the camera itself.
OpenCV doesn’t use the native camera module, but rather implements its own — which means many of the adjustments you might be used to your camera handling by default do not happen automatically with OpenCV, such as auto-brightness, focus, or portrait mode.
Displaying the image in the proper orientation isn’t obvious, or necessarily easy, depending on how much you want to customize things. In this post, I’ll walk through the basics of getting things displayed properly.
Rotate and Scale Images with Android’s Matrix
First, you’ll need to integrate OpenCV into your project. We won’t cover that here, but there are a number of good tutorials on that, as well as OpenCV’s own documentation.
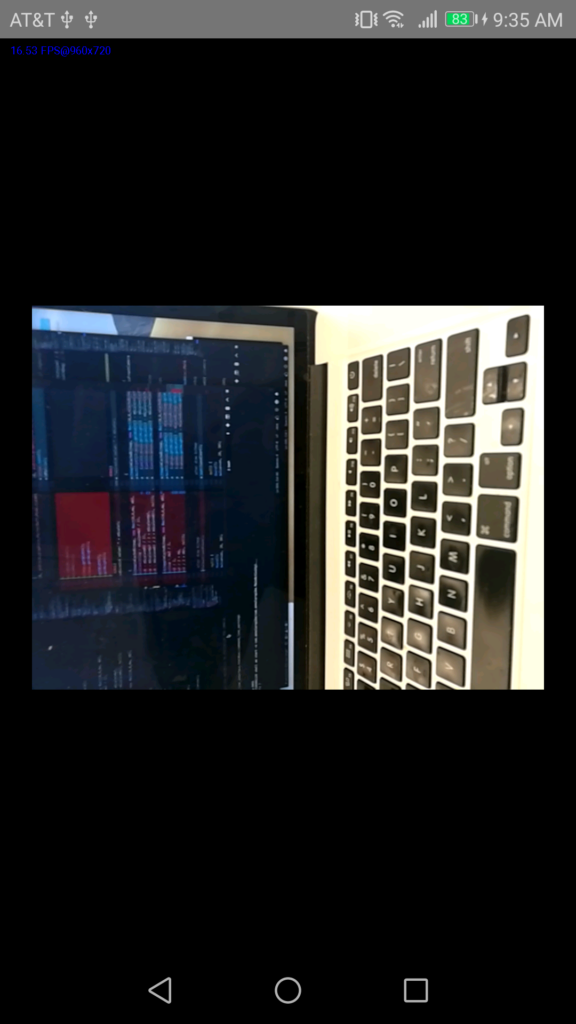
Once you’ve got the camera displaying, you’ll probably see something like the image at left: the image is sideways and not in full frame.
How do we fix this? The answer lies, in part, in the CameraBridgeViewBase.java file that ships with OpenCV for Android. Specifically, we’ll use a function called deliverAndDrawFrame . This function takes the camera frame, converts it to a bitmap, and renders that bitmap to an Android canvas on the screen.
And while we can rotate and scale the canvas in this function, it’s a very expensive operation that will slow your app down significantly. What would be ideal is if we simply modified the matrix into which all of those pixels get drawn.
To do so, we’ll need to add some code to the CameraBridgeViewBase.java file. We’ll do so just above the deliverAndDrawFrame method. First, declare a matrix variable:
We’ll then want a function to be able to update that matrix based on various events. You can stub that function out next:
When to Call the UpdateMatrix function
When will this function get called? We’ll want to do it in deliverAndDrawFrame, but we also want to make sure it’s set up right initially. To ensure that, we’ll add a couple of override methods just below your updateMatrix function:
@Override
public void layout(int l, int t, int r, int b) {
  super.layout(l, t, r, b);
  updateMatrix();
}


@Override
protected void onMeasure(int widthMeasureSpec, int heightMeasureSpec) {
  super.onMeasure(widthMeasureSpec, heightMeasureSpec);
  updateMatrix();
}
These call the updateMatrix function when the screen is laid out, and when there is a call to measure for screen dimension changes.
Now we can specify what to do inside our updateMatrix function.
Getting matrix and window dimensions, and determining scale
First, we’ll want to reset the matrix from whatever manipulations occurred in the previous frame. We’ll also want to get some basic measurements so we can position things properly.
updateMatrix(){
  float mw = this.getWidth();
  float mh = this.getHeight();
  float hw = this.getWidth() / 2.0f;
    float hh = this.getHeight() / 2.0f;
  float cw  = (float)Resources.getSystem().getDisplayMetrics().widthPixels;
  float ch  = (float)Resources.getSystem().getDisplayMetrics().heightPixels;
  float scale = cw / (float)mh;
  float scale2 = ch / (float)mw;
    if(scale2 > scale){
      scale = scale2;
    }
  mMatrix.reset();
}
As for the scale, essentially what we’re doing is getting a relationship between the matrix and the canvas. If the ratio of the canvas width to the matrix height is greater than that of the canvas height to the matrix width, then we scale to the former; otherwise, the latter.
Orienting the image based on front vs. rear facing camera
But before we scale, we need to make sure we turn this thing right side up.
If we were to rotate right now, OpenCV would use the top left corner of the image as its rotation point, which would send the camera image off the screen on my device. So let’s move it to the center:
Then we can rotate it. But we’ll need to know whether we’re dealing with the front or rear camera.
At the top of this file, you’ll notice some constants:
mCameraIndex is our active camera. By default it’s set to CAMERA_ID_ANY, which on most devices should default to the rear camera 99 . If we wanted to display the front facing camera, we could change mCameraIndex = CAMERA_ID_FRONT (or 98 ).
You’ll notice if you switch to the front camera and build the app, the camera is still lying on its side but turned the other way! So we need to rotate differently based on that:
It’s still not in the right spot. We need to now translate it back to where we started to keep it in frame.
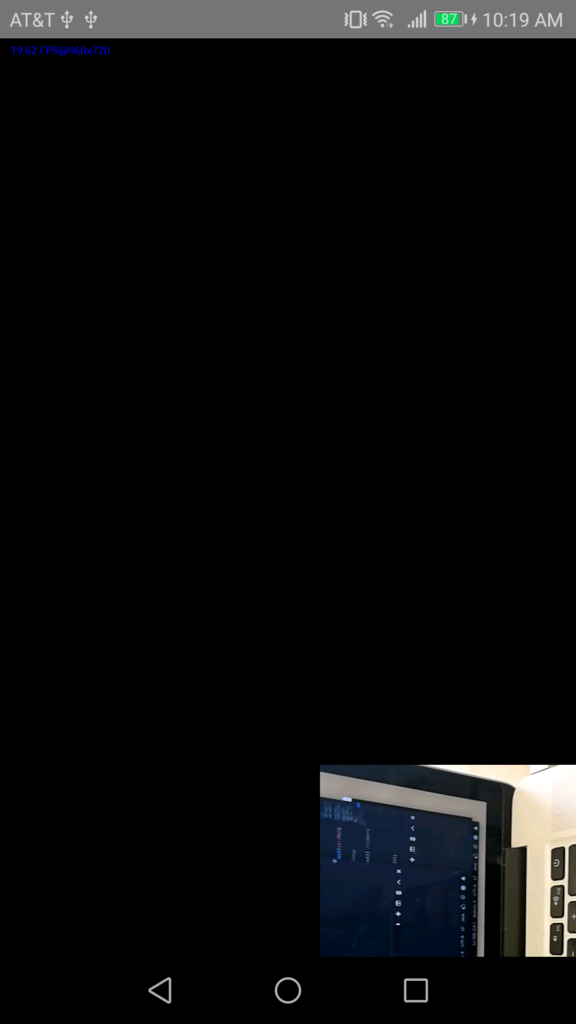
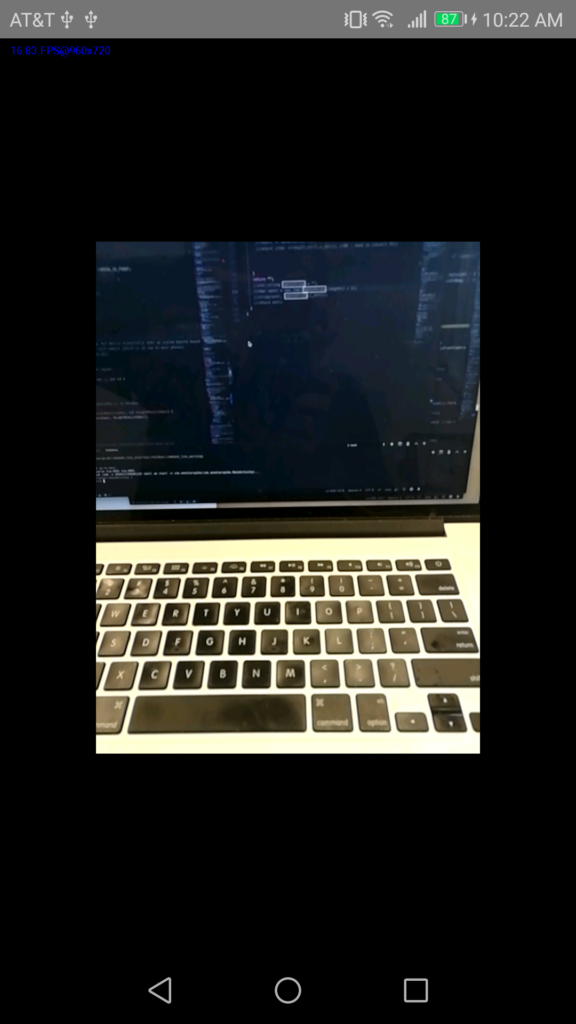
Scaling the camera image to fill the width of the screen
Now we just need to scale it to fill the width of the screen…
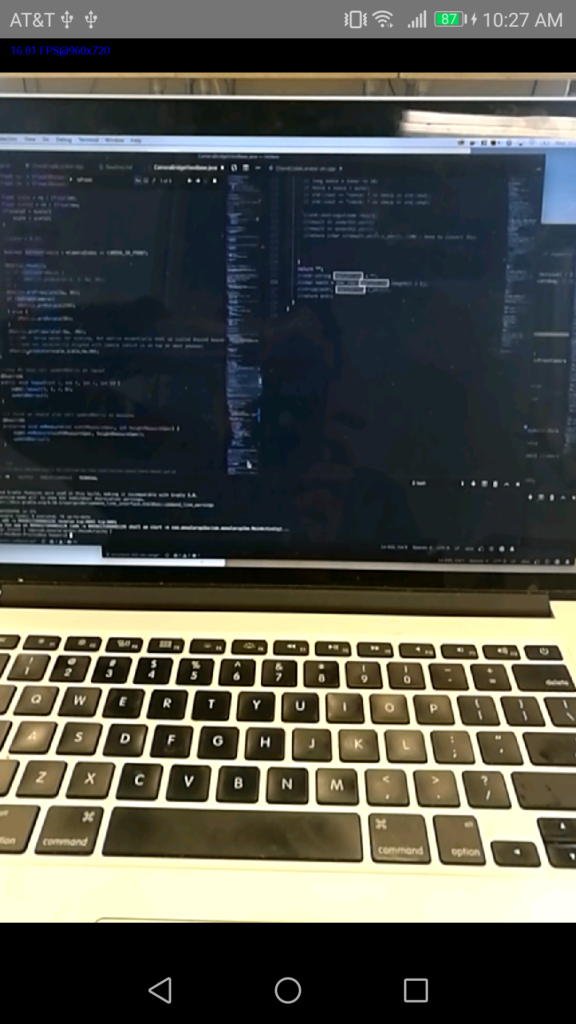
Mirroring the Front Facing Camera Image
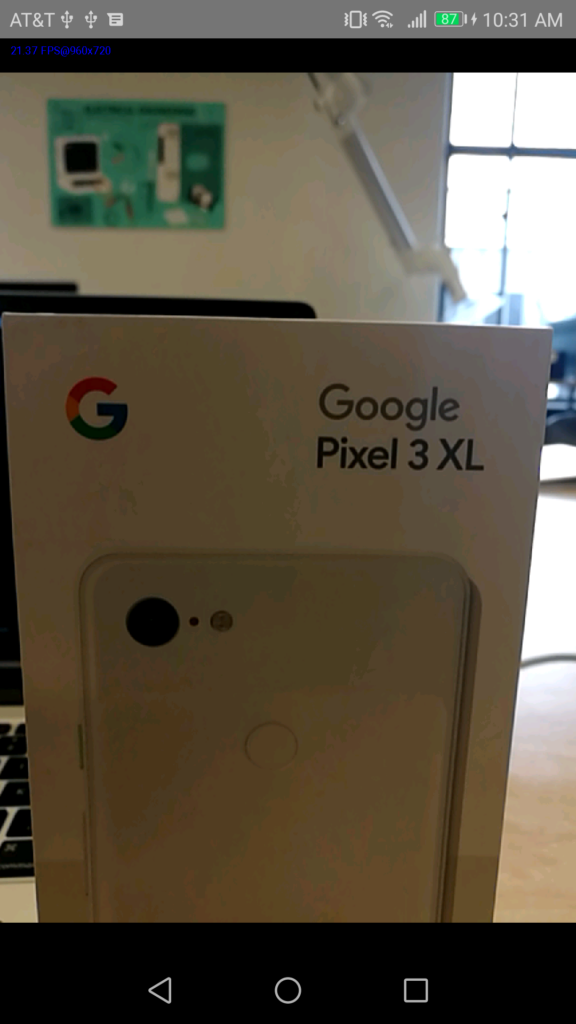
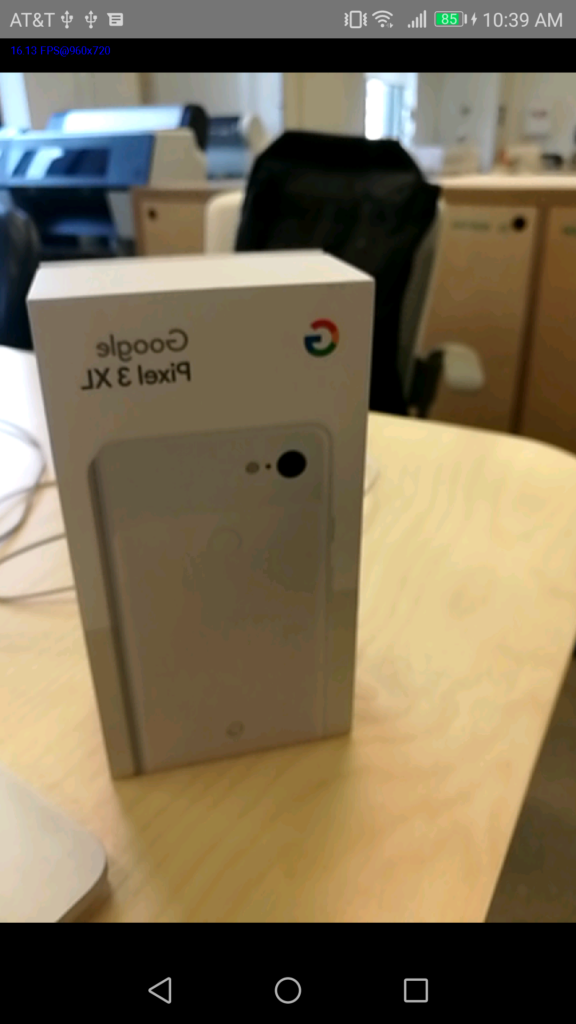
There is another optional transformation we might want to include. If we’re using the front facing camera, rather than seeing a mirror image of ourselves as we’re accustomed to, we’ll see an image as though we’re looking through the rear camera — where text still reads right to left. To mirror the image, you can add the following:
Shortcut to a Full Screen OpenCV Camera Image
One last thing. What if we want it to fill both the width and the height of the screen? The quickest way to accomplish that is to look to a different file. Depending on the age of the device, OpenCV will utilize the file JavaCameraView or JavaCamera2View , so we’ll need to manipulate both.
Search for these lines in both files:
Rather than the conditional, we can just set it to:
This way, it will scale to the larger of the two dimensions, rather than the smaller. However, take note — this will slow your app down because we’re processing a lot more pixels. It also means a great deal of those pixels end up off screen.
Complete Code for OpenCV Camera Rotation and Scaling on Android
The complete code to be added to to CameraBridgeViewBase can be found here (or below). Make sure you import any Android or OpenCV classes necessary to use these methods.
Hope this helps you get up and running with the OpenCV camera in Android!
private final Matrix mMatrix = new Matrix();

private void updateMatrix() {
    float mw = this.getWidth();
    float mh = this.getHeight();

    float hw = this.getWidth() / 2.0f;
    float hh = this.getHeight() / 2.0f;

    float cw  = (float)Resources.getSystem().getDisplayMetrics().widthPixels; //Make sure to import Resources package
    float ch  = (float)Resources.getSystem().getDisplayMetrics().heightPixels;

    float scale = cw / (float)mh;
    float scale2 = ch / (float)mw;
    if(scale2 > scale){
        scale = scale2;
    }

    boolean isFrontCamera = mCameraIndex == CAMERA_ID_FRONT;

    mMatrix.reset();
    if (isFrontCamera) {
        mMatrix.preScale(-1, 1, hw, hh); //MH - this will mirror the camera
    }
    mMatrix.preTranslate(hw, hh);
    if (isFrontCamera){
        mMatrix.preRotate(270);
    } else {
        mMatrix.preRotate(90);
    }
    mMatrix.preTranslate(-hw, -hh);
    mMatrix.preScale(scale,scale,hw,hh);
}

@Override
public void layout(int l, int t, int r, int b) {
    super.layout(l, t, r, b);
    updateMatrix();
}

@Override
protected void onMeasure(int widthMeasureSpec, int heightMeasureSpec) {
    super.onMeasure(widthMeasureSpec, heightMeasureSpec);
    updateMatrix();
}

/**
* This method shall be called by the subclasses when they have valid
* object and want it to be delivered to external client (via callback) and
* then displayed on the screen.
* @param frame - the current frame to be delivered
*/
protected void deliverAndDrawFrame(CvCameraViewFrame frame) { //replaces existing deliverAndDrawFrame
    Mat modified;

    if (mListener != null) {
        modified = mListener.onCameraFrame(frame);
    } else {
        modified = frame.rgba();
    }

    boolean bmpValid = true;
    if (modified != null) {
        try {
            Utils.matToBitmap(modified, mCacheBitmap);
        } catch(Exception e) {
            Log.e(TAG, "Mat type: " + modified);
            Log.e(TAG, "Bitmap type: " + mCacheBitmap.getWidth() + "*" + mCacheBitmap.getHeight());
            Log.e(TAG, "Utils.matToBitmap() throws an exception: " + e.getMessage());
            bmpValid = false;
        }
    }

    if (bmpValid && mCacheBitmap != null) {
        Canvas canvas = getHolder().lockCanvas();
        if (canvas != null) {
            canvas.drawColor(0, android.graphics.PorterDuff.Mode.CLEAR);
            int saveCount = canvas.save();
            canvas.setMatrix(mMatrix);

            if (mScale != 0) {
                canvas.drawBitmap(mCacheBitmap, new Rect(0,0,mCacheBitmap.getWidth(), mCacheBitmap.getHeight()),
                        new Rect((int)((canvas.getWidth() - mScale*mCacheBitmap.getWidth()) / 2),
                                (int)((canvas.getHeight() - mScale*mCacheBitmap.getHeight()) / 2),
                                (int)((canvas.getWidth() - mScale*mCacheBitmap.getWidth()) / 2 + mScale*mCacheBitmap.getWidth()),
                                (int)((canvas.getHeight() - mScale*mCacheBitmap.getHeight()) / 2 + mScale*mCacheBitmap.getHeight())), null);
            } else {
                canvas.drawBitmap(mCacheBitmap, new Rect(0,0,mCacheBitmap.getWidth(), mCacheBitmap.getHeight()),
                        new Rect((canvas.getWidth() - mCacheBitmap.getWidth()) / 2,
                                (canvas.getHeight() - mCacheBitmap.getHeight()) / 2,
                                (canvas.getWidth() - mCacheBitmap.getWidth()) / 2 + mCacheBitmap.getWidth(),
                                (canvas.getHeight() - mCacheBitmap.getHeight()) / 2 + mCacheBitmap.getHeight()), null);
            }

            //Restore canvas after draw bitmap
            canvas.restoreToCount(saveCount);

            if (mFpsMeter != null) {
                mFpsMeter.measure();
                mFpsMeter.draw(canvas, 20, 30);
            }
            getHolder().unlockCanvasAndPost(canvas);
        }
    }
}
Comments 0 Responses