Deploying machine learning-based Android apps is gaining prominence and momentum with frameworks like TensorFlow Lite, and there are quite a few articles that describe how to develop mobile apps for computer vision tasks like text classification and image classification.
But there’s very much less that exists about working with audio-based ML tasks in mobile apps, and this blog is meant to address that gap — specifically, I’ll describe the steps and code required to perform audio classification in Android apps.

Intended Audience and Pre-requisites:
This article covers different technologies required to develop ML apps in mobile and deals with audio processing techniques. As such, the following are the pre-requisite to get the complete understanding of the article:
→ Familiarity with deep learning, Keras, and convolutional neural networks
→ Experience with Python and Jupyter Notebooks
→ Basic understanding of audio processing and vocal classification concepts
→ Basics of Android app development with Kotlin
A Major Challenge
One major challenge with regard to development of audio-based ML apps in Android is the lack of libraries in Java that perform audio processing.
I was surprised to find that there are no libraries available in Java for Android that help with the calculation of MFCC and other features required for audio classification. Most of my time with regard to this article has been spent towards developing a Java components that generates MFCC values just like Librosa does — which is very critical to a model’s ability to make predictions.
What We’ll Build
At the end of the tutorial, you’ll have developed an Android app that helps you classify audio files present in your mobile sdcard directory into any one of the noise type of the Urbancode Challenge dataset. Your app should more or less look like below:
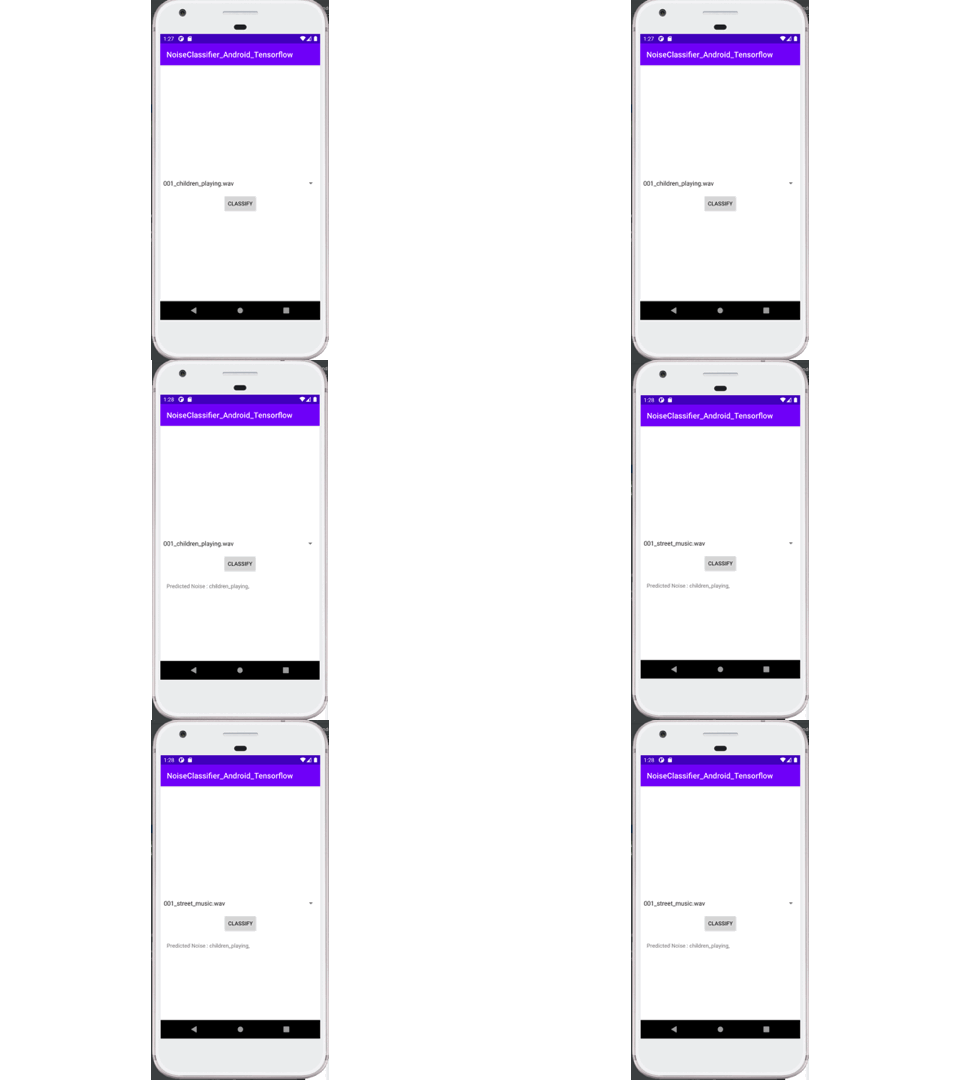
Full source code for the solution is available in this repository, and you can find the Python code related to model creation in the Python_Notebook_Files directory.
TensorFlow Lite Model Creation for Audio Classification in Python
Let’s get started with the Python code required to create a TensorFlow Lite model for audio classification.
Model creation is a pretty straight-forward process, in which we’ll be calculating MFCC values for audio signals and using them to create a Keras-CNN model that allows us to classify those signals. We’ll use the UrbanSound audio dataset for our classification purposes. You can download the dataset here:
Once downloaded, place the extracted audio files in the UrbanSound8K directory and make sure to provide the proper path in the Urban_data_preprocess.ipynb file and launch it in Jupyter Notebook.
For the purpose of this demo, we will use only 200 data records for training — as our intent is to simply showcase how we can deploy our TFLite model in an Android app—as such, accuracy does not matter here, for our demo purposes.
Refer to the UrbanSound_200.csv file for the 200 records and make sure to place this file under the metadata directory of the UrbanSound dataset. You can follow the same steps by training with the entire 8K records of the source dataset if you’d like.
As mentioned above, we’ll be calculating the MFCC values for each audio file from training set and take the mean value across the frames over an ‘FFT’ window.
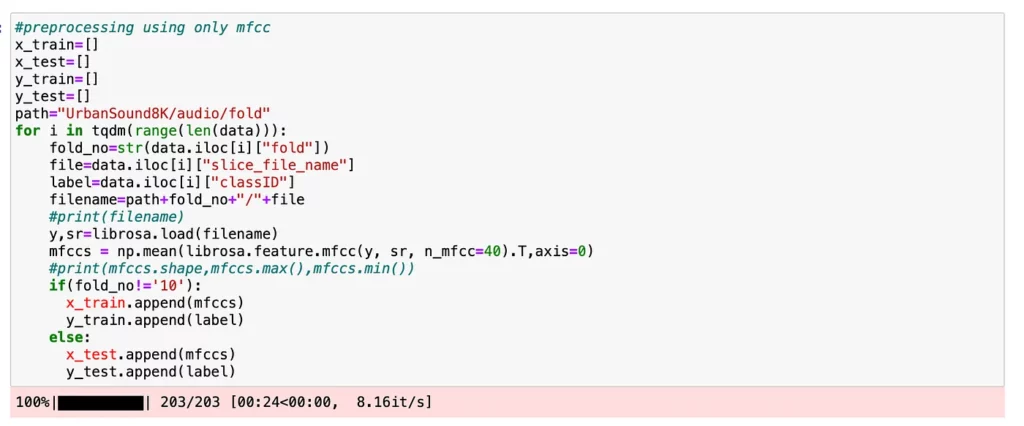
**Important point to observe here — After generating MFCC values for each of the audio files, we’re taking the mean of the values across its duration, using the np.mean function. We’ll be feeding the neural network with these mean values, and when we use the model for prediction in the Android app — we’ll need to take the mean of the MFCC values in Java before feeding it. We will see this when we get to that section — but just a note of observation.**
Once pre-processing is done, refer to the Urban_CNN_Model.ipynb file for the model building code. Here, we’ll take the pre-processed data and feed it to a simple Keras convolutional neural network to create the model. Upon training, the model would provide accuracy of around 74% on test data — which is fairly good considering we’ve processed only 200 records.

Good, we’ve trained the model. But how to export this model and use it in Android app? The model has been trained in Python, so how do we port it to our Android environment? This is where the TFLite framework comes into the picture. This is an official framework from TensorFlow, which helps in exporting the models trained in Python to edge devices such as mobile phones.
We’ll be converting this model to a TFLite version in order to use it in the app we’re going to build. We do this using the TFLite converter:

The above code block generates the TFLite version from the original model— and now we’re good to use this model in the Android app.
To summarize up until this point, we’ve pre-processed audio data from the UrbanSound dataset, trained a neural network, measured its accuracy, and converted the model into tflite format.
Next, we need to do the port the model to our Android app, process the audio files, and feed them to the model for prediction.
Android App Development in Kotlin for Audio Classification
Let’s shift gears and jump into our Android development environment with Kotlin in Android Studio. This article assumes that you’re familiar with the basics of Android app development and how to access a device emulator.
Let’s create an empty project in Android Studio and make the following updates with regard to how TensorFlow is supported in Android.
Build.gradle
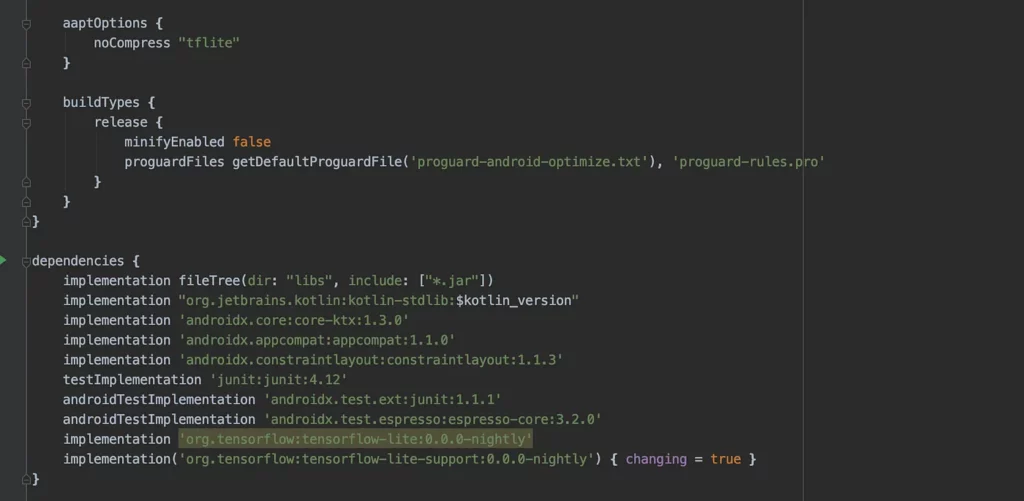
Once the app is created, open the build.gradle file and mention the TensorFlow dependencies that are required to be bundled as part of the app. There are two specific TensorFlow libraries: tensorflow-lite and tensorflow-lite-support.
Also, we need to enable the setting that does not compress the tflite model during app creation through aaptOptions— as shown below:
AndroidManifest.xml
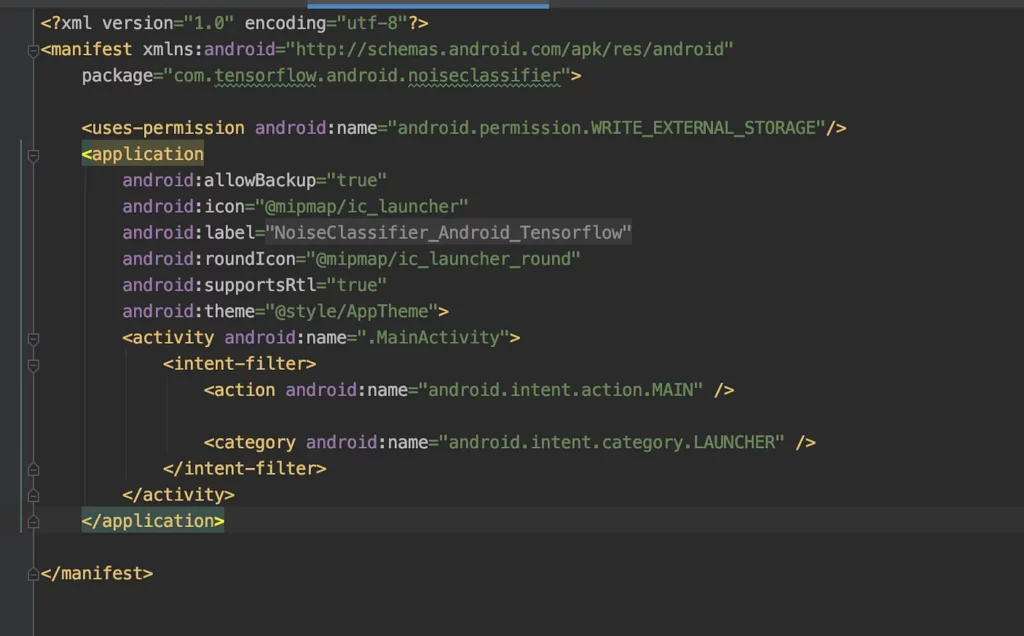
Make sure to mention the write permission on the app with uses-permission in the AndroidManifest.xml file:
Assets folder:
Create an assets folder in your app by right clicking on your project in Android Studio and selecting ‘New → Folder → Assets Folder’. Once this assets folder is created, copy the tflite model created in the Python section along with a text file listing the labels in the UrbanSound classification dataset in .txt file format.
Sample Audio files:
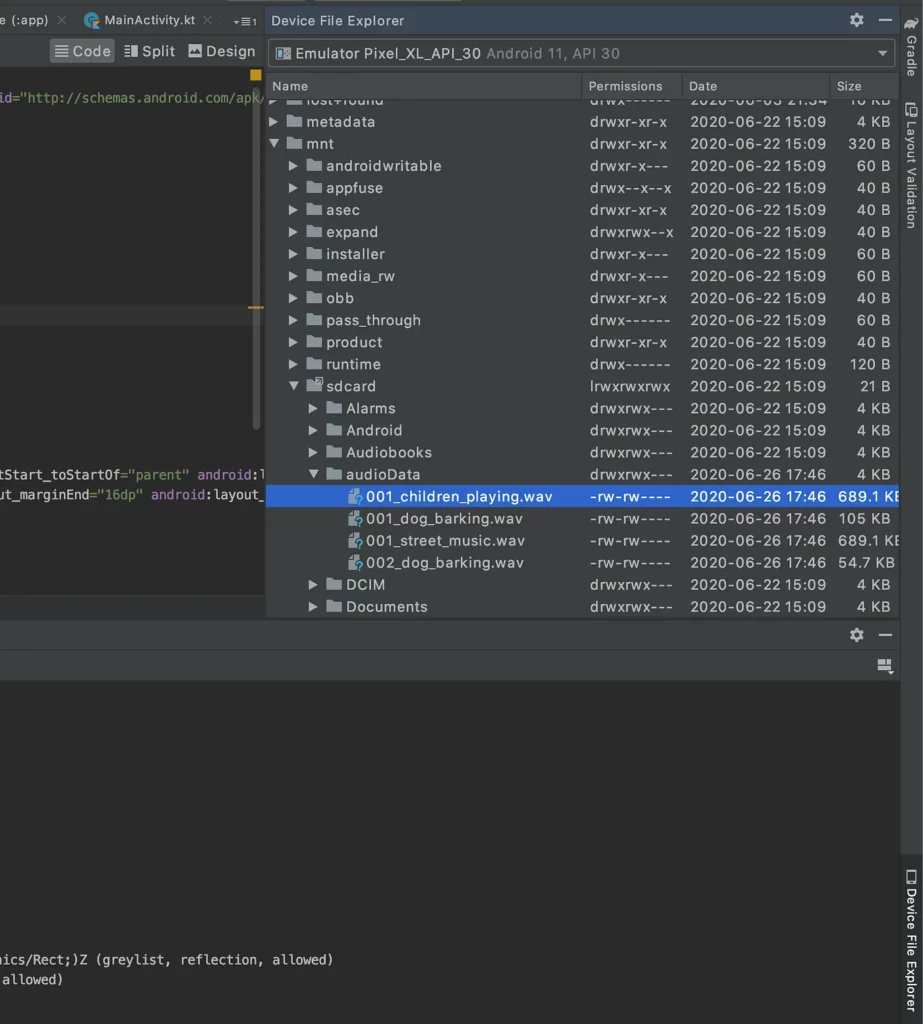
Since this demo app is about audio classification using the UrbanSound dataset, we need to copy some of the sample audio files present under the Sample Audio directory into the external storage directory of our emulator with the below steps:
→ Launch the emulator.
→ Open ‘Device File Explorer’, present at the bottom right corner of Android Studio.
→ Navigate to the mnt/sdcard directory and create a directory named audioData.
→ Right click and upload the sample audio files under the audioData directory.
Activity_main.xml
In the activity_main.xml file, under the res/layout directory, mention the UI controls required for the app. Here, we’ll create some very simple UI controls, with one spinner listing ‘wav’ files in the audioData directory, along with a button to classify the sounds in it.
MFCC generation from audio files
As mentioned at the beginning of this post, one of the major challenges with audio classification apps in Android is with regard to feature generation from audio files. We don’t have any readily-available library to perform this task.
Also, another critical requirement— MFCC values generated by the Java library should exactly match the corresponding python values, as only then will our model perform properly.
MainActivity.kt
Let’s now jump into the Android app code. As you can see, I simply list the ‘wav’ files present in external directory as Spinner options and trigger the ClassifyNoise function at the click of the button.
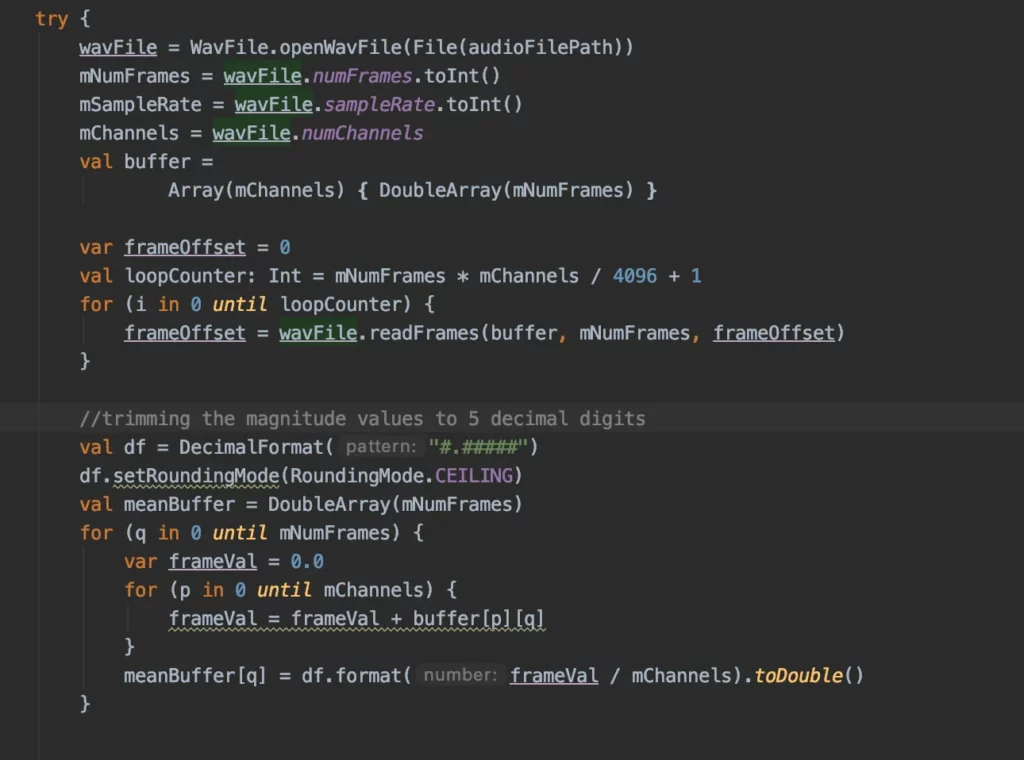
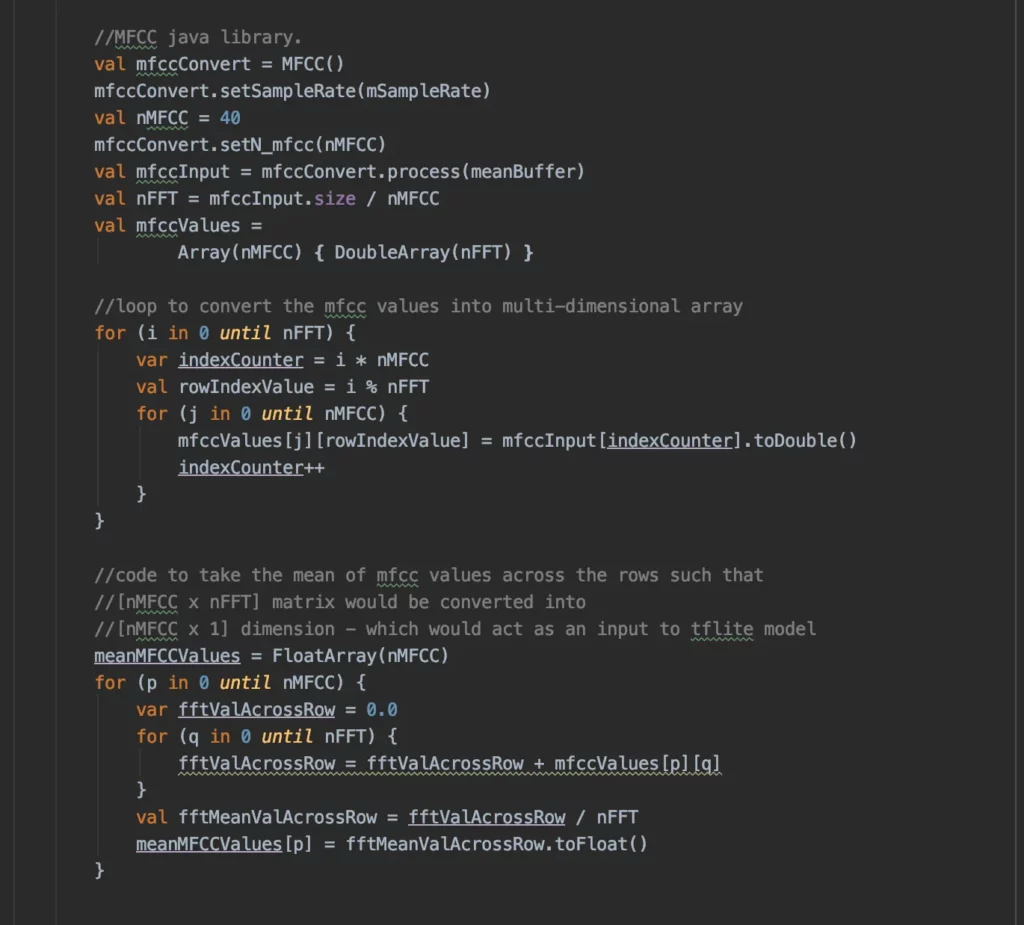
In the ClassifyNoise function, I first loaded the wav file and capture the magnitude values of the audio file. Then, the captured magnitude values are passed on to the MFCC class to generate those values.
Please note that I am using an nMFCC value of 40 — as used in the Python section — so that the generated feature is of same size. We also need to take the mean of MFCC values across the duration of the file. So I’ve done the same here.
TFLite Interpreter
Ok…we’ve created an Android app, made necessary imports and configurations, processed the audio files, and generated the mean MFCC values. similar to the Python library — next, let’s feed the values to our TensorFlow Lite model and generate the predictions.
This is where it gets interesting. Our TFLite model expects the input in the form of ‘1x40x1x1’ tensor — whereas whatever MFCC values we’ve generated are in 1D float array format. So we need to create a tensor in Java and have it fed to the model.
TensorBuffer is the feature to use here, and you can refer to the code, where I’ve provided the detailed comments on each of the processing steps.
Once the predictions are made, we need to process the probability values to retrieve the top predictions and to display the value.
File and App Permissions:
Lastly, we need to make sure our app has the right permissions to do this work. In the emulator, go to ‘Settings → App & Notifications → NoiseClassifier_Android_Tensorflow’ [or the respective app name of your project] and choose ‘Permissions’. Ensure to provide access to ‘Files and Media’ for the app.
Upon completion, this is how the demo app should look—where users can select a wav file and the model will predict the class of the noise type.

Conclusion
Thus, we come to the end of our demo and article. Mobile + ML + audio is an exciting field, and we have extraordinary use cases in this area.
As most of the focus is on text and image classification on mobile apps, audio-related content is few and far between. I would like to address this gap with a series of articles in this area. So stay tuned!
Thanks, and Happy Learning.

Comments 0 Responses