This blog post is a continuation of a series centered on the development work I’ve been doing on the AfterShoot app.
If you haven’t read the earlier ones, you can find a few of them here:
Whenever you’re dealing with images in an app, it’s likely that you’ll want to give your users options to perform certain actions on multiple images at once. For example, in a Gallery app, users are commonly able to select multiple images and delete them all at once instead of performing the delete operation on every image one-by-one.
In this blog, I’ll be outlining how I implemented this same feature in the AfterShoot app, where I allow users to bulk delete all the bad images the app has filtered out. While aimed at images, this blog post is not limited to images and can be extended to any generic use case (i.e. other files, etc).
Once done, this is how the app should work:
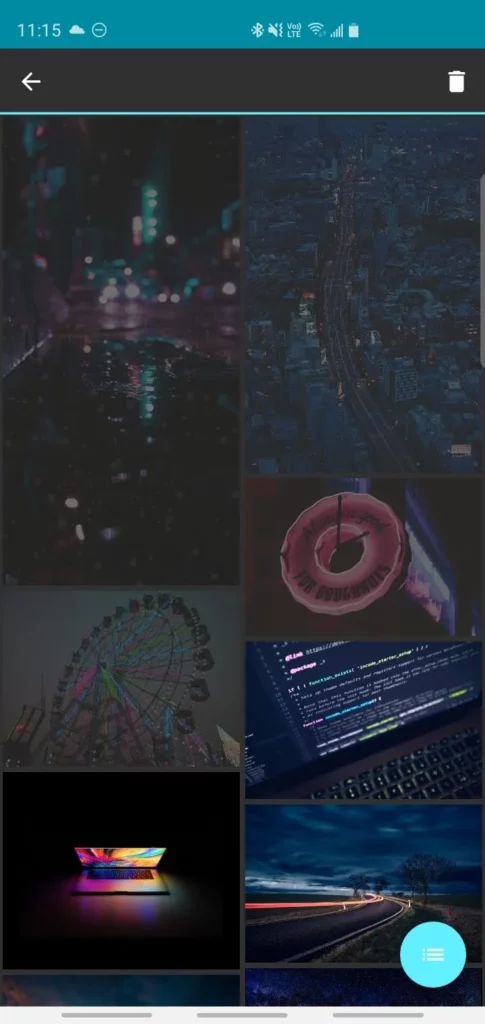
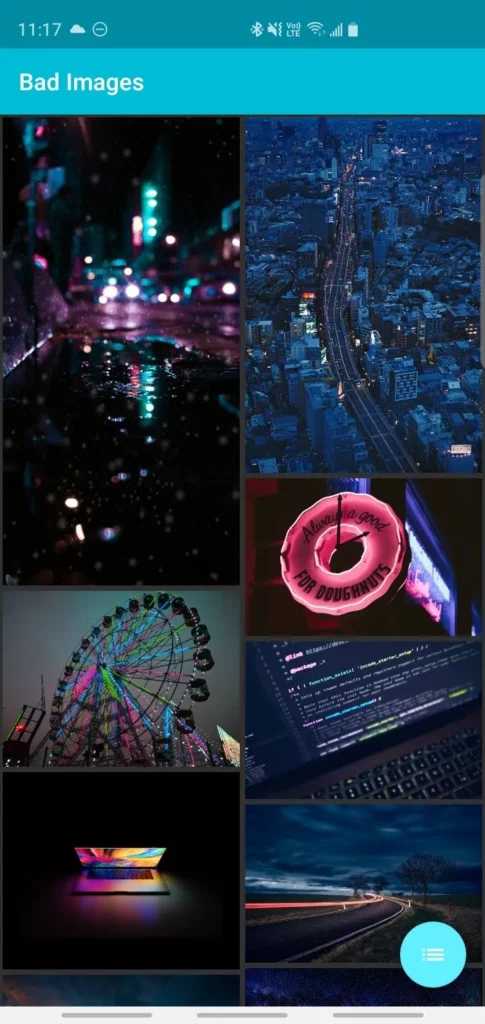
Adding a Multi-Select Option to a RecyclerView
The blog post assumes that you have an app that shows a list of data using RecyclerView. If you’re not sure how to set this up, you can refer to the following article:
Step 1: Preparing your adapter
Before we go ahead and implement multi-select into our app, it’s essential that we add two important variables to our RecyclerView adapter.
class ResultImageAdapter(private var images: ArrayList<Image>, val activity: AppCompatActivity) :
        RecyclerView.Adapter<ResultImageAdapter.ImageHolder>() {

    // true if the user in selection mode, false otherwise
    private var multiSelect = false
    // Keeps track of all the selected images
    private val selectedItems = arrayListOf<Image>()

    ...
}
The Boolean on line number 5 keeps track of whether the user is in multi-selection mode or not, and the ArrayList on line number 7 keeps track of all the selected items.
Step 2: Modifying the onBindViewHolder
Next up, we should update our onBindViewHolder method to add proper click handlers (long press and tap).
class ResultImageAdapter(private var images: ArrayList<Image>) :
        RecyclerView.Adapter<ResultImageAdapter.ImageHolder>(){
  ...
      override fun onBindViewHolder(holder: ImageHolder, position: Int) {
        // Get the current image
        val currentImage = images[position]
        // for every item, check to see if it exists in the selected items array
        if (selectedItems.contains(currentImage)) {
            // if the item is selected, let the user know by adding a dark layer above it
            holder.itemView.ivGrid.alpha = 0.3f
        } else {
            // else, keep it as it is
            holder.itemView.ivGrid.alpha = 1.0f
        }

        // set handler to define what happens when an item is long pressed
        holder.itemView.ivGrid.setOnLongClickListener {
            // if multiSelect is false, set it to true and select the item
            if (!multiSelect) {
                // We have started multi selection, so set the flag to true
                multiSelect = true
                // Add it to the list containing all the selected images
                selectItem(holder, currentImage)
            }
            true
        }

        // handler to define what happens when an item is tapped
        holder.itemView.ivGrid.setOnClickListener {
            // if the user is in multi-select mode, add it to the multi select list
            if (multiSelect)
                selectItem(holder, currentImage)
            else
            // else, simply show the image to the user
                showPopup(currentImage.file)
        }
      ...
    }

    // helper function that adds/removes an item to the list depending on the app's state
    private fun selectItem(holder: ImageHolder, image: Image) {
          // If the "selectedItems" list contains the item, remove it and set it's state to normal
          if (selectedItems.contains(image)) {
              selectedItems.remove(image)
              holder.itemView.ivGrid.alpha = 1.0f
          } else {
          // Else, add it to the list and add a darker shade over the image, letting the user know that it was selected
              selectedItems.add(image)
              holder.itemView.ivGrid.alpha = 0.3f
          }
      }
  ...
}
This is a lot to take in at once, so let’s see what’s happening here.
First, for every item in our RecyclerView, we check and see if that item is in the list containing all the selected items (hereafter referred to as selectedItems). If that item is in that list, we add an alpha layer to the item, which gives our user visual feedback that the item is selected. Otherwise, we remove the alpha layer from the item, which tells the user that the item isn’t selected.
Next, we add an onLongClickListener to the item, which when invoked checks to see if the user is in multi-select mode. If the user isn’t, it sets the multiSelect boolean to true and adds the item to the selectedItems list.
However, if the user is already in multi-select mode, it does nothing.
Lastly, we have our onClickListener added to the item, which is invoked when the user clicks or taps an item. If the user is in multi-select mode, clicking an item adds it to the selectedItems list; otherwise, it shows the image that was clicked.
We also have a helper method called selectItem() that takes in the image and decides whether to add/remove it to/from the selectedItems list, depending on the value of the multiSelect boolean.
Modifying the toolbar with contextual menus
At this point, if you try to run the app, you should be able to long-press and select the items in your RecyclerView. But there isn’t yet an intuitive way to interact with those items. This is where we’ll make use of the contextual ActionBar to provide our users with options whenever they start the multi-selection process.
If you’re wondering what a contextual ActionBar is, this is what it looks like:
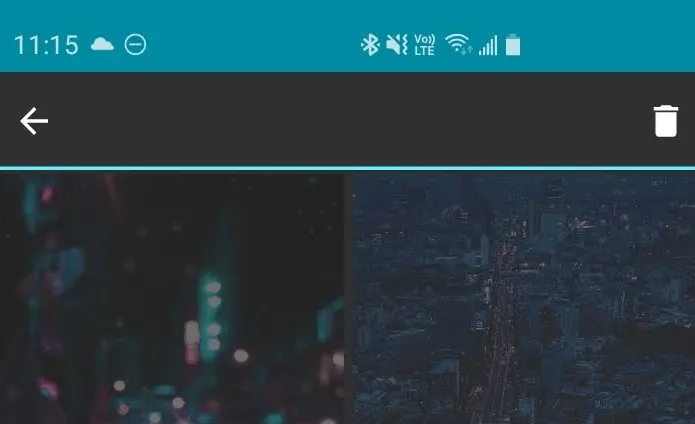

Now that you know what this looks like, let’s see how to implement it in the current app.
Step 1: Creating a menu file in the app
We’ll start by creating a menu file in the app. You can do so by right-clicking on the res folder in your app and selecting the following options:
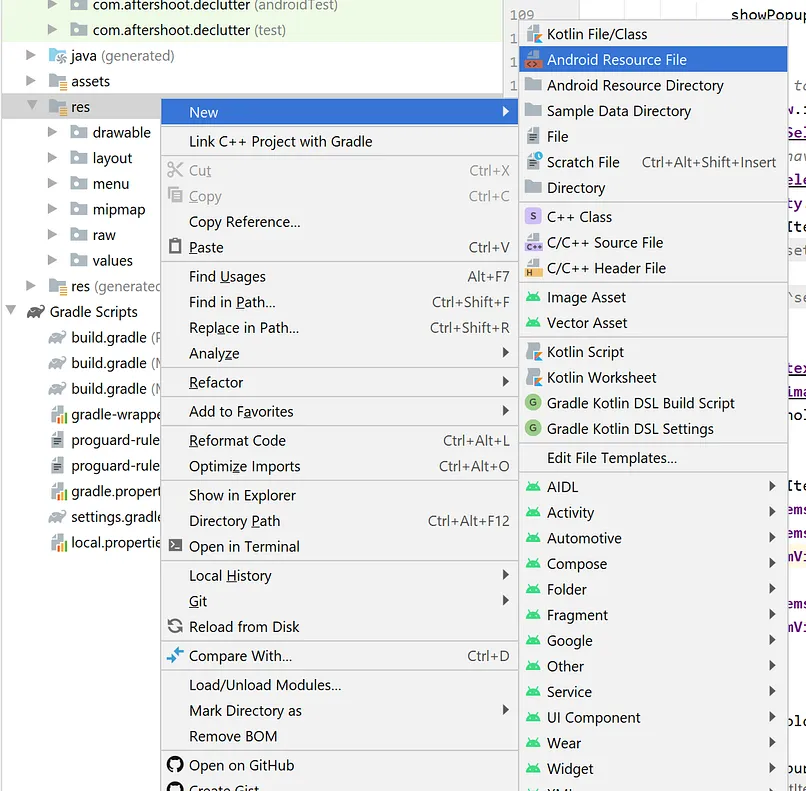
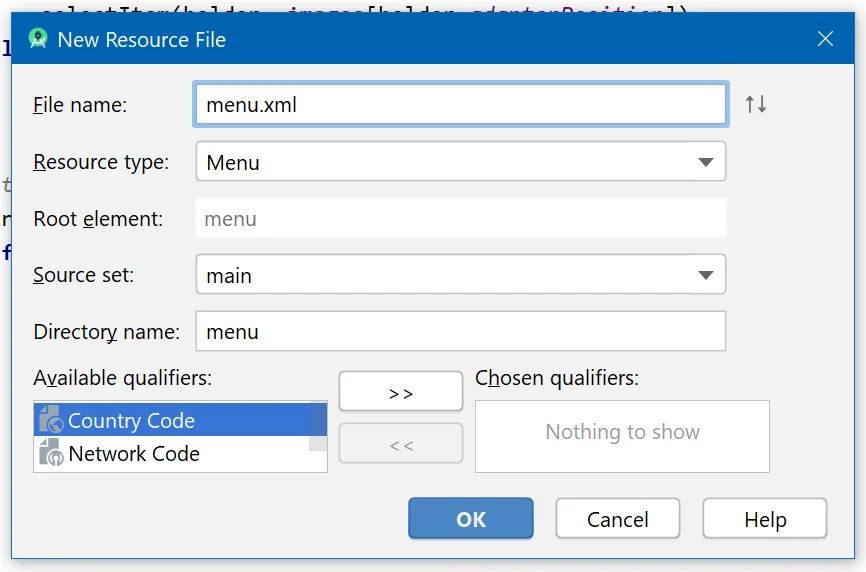
Doing this will create a new menu.xml file that behaves as a typical menu file. For now, add the following to it:
<?xml version="1.0" encoding="utf-8"?>
<menu xmlns:android="http://schemas.android.com/apk/res/android"
    xmlns:app="http://schemas.android.com/apk/res-auto">
    <item
        android:id="@+id/action_delete"
        android:icon="@drawable/ic_delete"
        android:title="@string/menu_item_delete"
        app:showAsAction="always" />
</menu>
Step 2: Implement the ActionMode.Callback in your Adapter
Next up, let’s have our adapter implement the ActionMode.Callback interface that defines the lifecycle of a Contextual Action Bar menu.
Upon doing so, you’ll also have to override the following methods:
class ResultImageAdapter(private var images: ArrayList<Image>, private val activity: AppCompatActivity) :
        RecyclerView.Adapter<ResultImageAdapter.ImageHolder>(), ActionMode.Callback {

    // Called when a menu item was clicked
    override fun onActionItemClicked(mode: ActionMode?, item: MenuItem?): Boolean {
        TODO("not implemented") //To change body of created functions use File | Settings | File Templates.
    }

    // Called when the menu is created i.e. when the user starts multi-select mode (inflate your menu xml here)
    override fun onCreateActionMode(mode: ActionMode?, menu: Menu?): Boolean {
        TODO("not implemented") //To change body of created functions use File | Settings | File Templates.
    }

    // Called when the Context ActionBar disappears i.e. when the user leaves multi-select mode
    override fun onDestroyActionMode(mode: ActionMode?) {
        TODO("not implemented") //To change body of created functions use File | Settings | File Templates.
    }

    // Called to refresh an action mode's action menu (we won't be using this here)
    override fun onPrepareActionMode(mode: ActionMode?, menu: Menu?): Boolean {
        TODO("not implemented") //To change body of created functions use File | Settings | File Templates.
    }


}
Our next task is to fill these methods with their implementations one-by-one. Let’s start with the onCreateActionMode method.
This method contains the code for inflating and displaying our menu, so the code looks like this:
class ResultImageAdapter(private var images: ArrayList<Image>, private val activity: AppCompatActivity) :
        RecyclerView.Adapter<ResultImageAdapter.ImageHolder>(), ActionMode.Callback {
    ...
    // Called when the menu is created i.e. when the user starts multi-select mode (inflate your menu xml here)
    override fun onCreateActionMode(mode: ActionMode?, menu: Menu?): Boolean {
        // Inflate the menu resource providing context menu items
        val inflater: MenuInflater = mode.menuInflater
        inflater.inflate(R.menu.menu_result, menu)
        return true
    }
    ...
}
Next, let’s add the implementation for the onAcionItem clicked and the onDestroyActionMode methods.
These two methods will define what happens when a particular menu item is clicked and what happens when the user has exited the multi-select mode and the menu has to be hidden, respectively.
This is what the code for these two methods looks like:
class ResultImageAdapter(private var images: ArrayList<Image>, private val activity: AppCompatActivity) :
        RecyclerView.Adapter<ResultImageAdapter.ImageHolder>(), ActionMode.Callback {

        ...
        override fun onActionItemClicked(mode: ActionMode?, item: MenuItem?): Boolean {

            if (item?.itemId == R.id.action_delete) {
                // Delete button is clicked, handle the deletion and finish the multi select process
                Toast.makeText(context, "Selected images deleted", Toast.LENGTH_SHORT).show()
                mode?.finish()
            }
            return true
        }

        override fun onDestroyActionMode(mode: ActionMode?) {
            // finished multi selection
            multiSelect = false
            selectedItems.clear()
            notifyDataSetChanged()
        }
        ...
}
Since we aren’t updating the menus dynamically, you can leave the onPrepareActionMode method as is and simply return true.
Step 3: Registering the menu in our activity
Once we have the callbacks in place, the next step is to show or hide the menu based on the user’s action
Since menus are a part of the app’s Activity, we can’t show or hide them in the Adapter. We hence need to find a way to register the menu in the Activity that contains the Adapter. While there are a lot of ways to do this, for now, let’s simply pass an instance to our Activity to the adapter’s constructor.
Once we have the Activity’s object, we can call the startSupportActionMode() method on it with an instance of the ActionMode.Callback object. As soon as we call this method, it will show the menu on the toolbar, so we need to ensure that we call it only when the user has started the multi-select process.
We can ensure this by calling the method inside our onLongClickHandler method. This is what the code looks like:
class ResultImageAdapter(private var images: ArrayList<Image>, private val activity: AppCompatActivity) :
        RecyclerView.Adapter<ResultImageAdapter.ImageHolder>(), ActionMode.Callback {

    override fun onBindViewHolder(holder: ImageHolder, position: Int) {
        ...
        // set handler to define what happens when an item is long pressed
        holder.itemView.ivGrid.setOnLongClickListener {
            if (!multiSelect) {
                // We have started multi selection, so set the flag to true
                multiSelect = true
                // As soon as the user starts multi-select process, show the contextual menu
                activity.startSupportActionMode(ResultImageAdapter.this)
                selectItem(holder, images[holder.adapterPosition])
                true
            } else
                false
        }
        ...
    }
    ...
}
And that’s it!
Conclusion
If you want to see the entire implementation, head over to the GitHub repo for the AfterShoot app and look for the ResutImageAdapter.kt file.
Thanks for reading! If you enjoyed this story, please click the 👏 button and share it to help others find it! Feel free to leave a comment 💬 below.
Have feedback? Let’s connect on Twitter.

Comments 0 Responses