
Introduction
In this post, I’ll explore how I made a Lens that features an animated phoenix flying through an AR scene anchored to the ground. This is the finished Lens:
To get there, we will leverage the Refinement Pack and Particles template from Lens Studio, as well as a 3D phoenix asset from Sketchfab.
Specifically, this post will cover:
- Moving an object along a 3D path through the scene using a Prefab from the Refinement Pack
- Applying a texture to a 3D model of a phoenix downloaded from Sketchfab
- Working with particle emitters to add a stationary column of smoke, embers throughout the scene, and a bokeh effect that follows the phoenix
Let’s dive in!
Project Setup
Open up a blank project in Lens Studio, and add a Device Tracking component to the default camera, with Tracking Mode set to Surface. This will allow us to anchor the scene on a flat surface, like the ground or the floor.
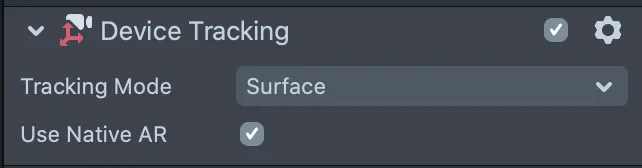
More details on tracking modes can be found here.
Move an object along a path
We’ll start by loading a Prefab that moves an object along a specified path. Eventually we’ll edit the path and hook it up to the phoenix so that it flies along the path, but for now we are just setting up the scaffolding.
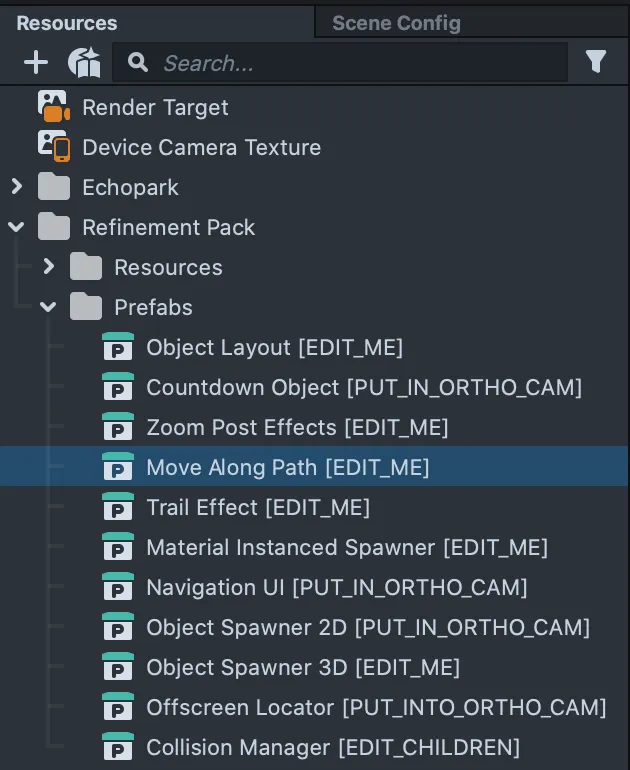
Lens Studio’s Refinement Pack provides a handful of helper scripts to let you hit the ground running when working on a custom Lens. We’ll be making use of the Move Along Path helper.
Once we’ve downloaded and unzipped the Refinement Pack, drag and drop the Refinement Pack.lso into the Resources panel. You’ll find a prefab named Move Along Path [EDIT_ME] nested under Refinement Pack / Prefabs.
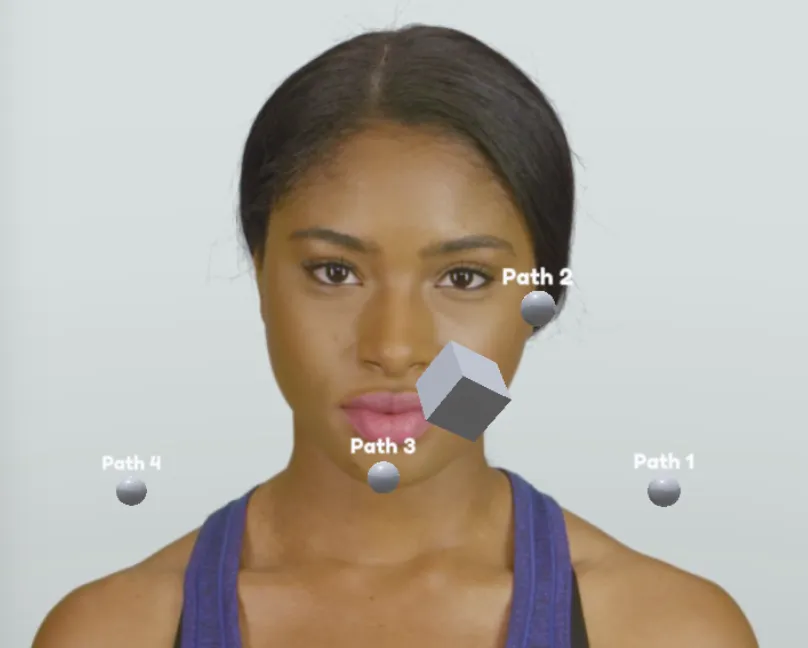
Go ahead and drag that to the Objects panel, and you should see a rotating cube moving along a path outlined by four spheres.
Animate the phoenix
Now we’re ready to add the phoenix to the Lens. Go ahead and download this animated phoenix 3D asset from Sketchfab (in the FBX format), unzip it, and drop it into the folder into the Resources tab in Lens Studio. In the phoenix-bird folder, there is a prefab called “fly”. Drag that to the objects panel.

Scale the phoenix
The phoenix is quite large, so we need to scale it down so it will fit in the scene. Select the “fly” prefab in the Objects panel to bring it up in the Inspector panel. In the Transform component at the top, set the scale to 0.05 for x, y, and z.
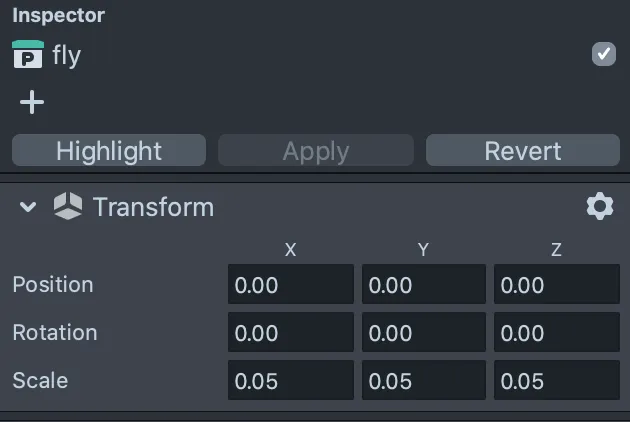
Now you should be able to see the phoenix flapping its wings in the Preview panel.
Apply a texture to the phoenix
The phoenix asset we downloaded came with some textures in the form of PNG files that we can apply to the 3D meshes to add some color to the object. The asset came with four PNG textures, but I ended up only using two of them. From my experience, it often takes a little guesswork to match up textures to the appropriate meshes. The phoenix asset came with two materials — one for the body, another for the wings.
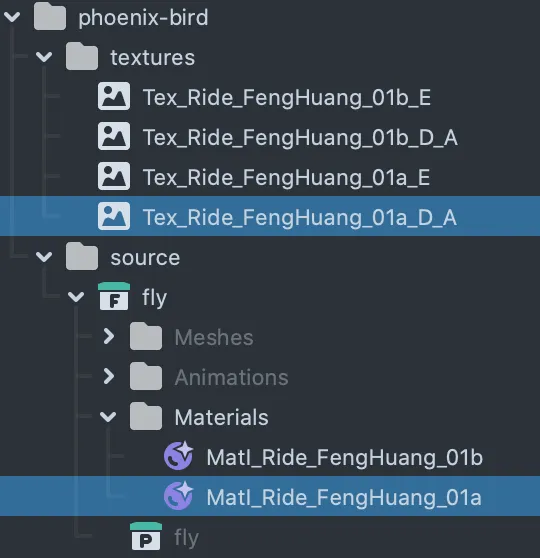
Based on these filenames, I tried matching up the Tex_Ride_FengHuang_01a_D_A texture with the MatI_Ride_FengHuang_01a material, and similarly for Tex_Ride_FengHuang_01b_D_A and MatI_Ride_FengHuang_01b.
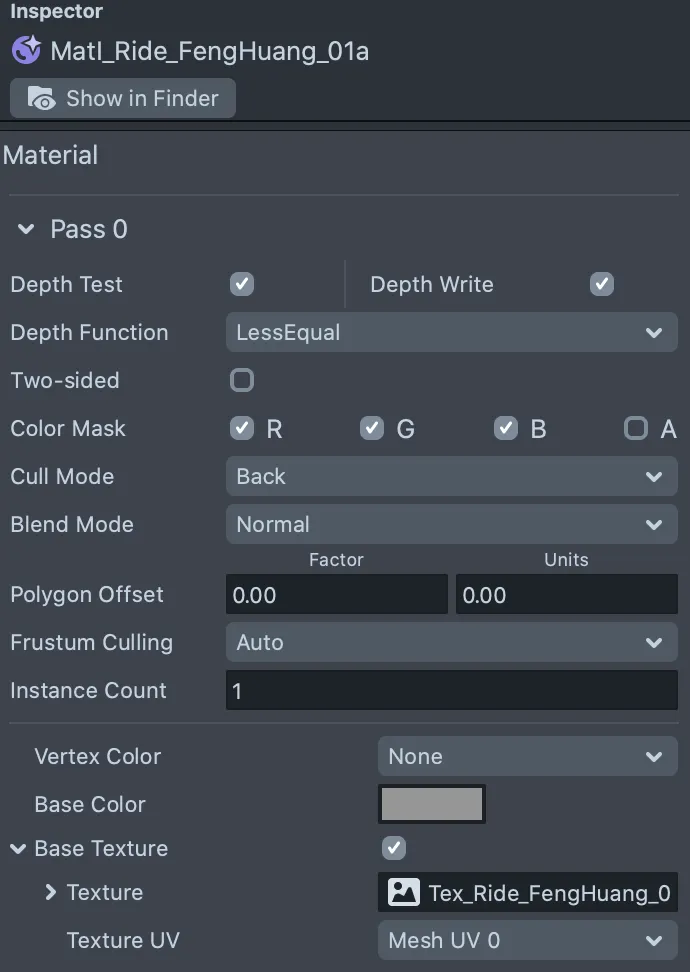
To apply the textures to the materials, select one of the materials in the Resources panel to open it in the Inspector panel. Then, set the Blend Mode to Normal, check the Base Texture box, and drag the corresponding PNG to the Texture input.
I ended up using only two of the four textures that came with the phoenix asset. As my coworker put it, it’s like I assembled a piece of IKEA furniture but had some parts left over at the end, and I’m not sure where they go.
Move the phoenix along a path
In this section, we’ll focus on moving the phoenix along a path through the scene to make it look like it’s flying. It will help to visualize the Lens if you switch to the back camera (the button to do that is on the top right of the Preview panel).
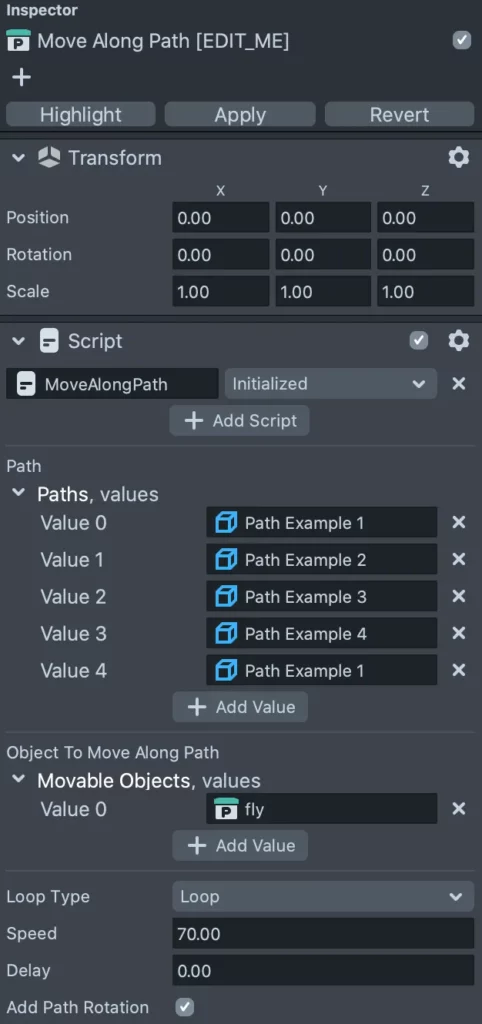
The first thing to do is attach the phoenix to the Move Along Path refinement example. Select Move Along Path [EDIT_ME] in the Objects panel to bring it up in the Inspector, then drag the “fly” prefab to the input Value 0 for Movable Objects.

At this point, the phoenix should be moving (and rotating wildly — we will fix that soon) along the path. Next, we will adjust the path so that it flies along a square path. The Move Along Path refinement has a Transform on it that we need to update. We will set the Position and Rotation transforms for the x, y, and z directions all to 0, because any transformations we do on objects nested under this refinement will be relative to this base transformation.
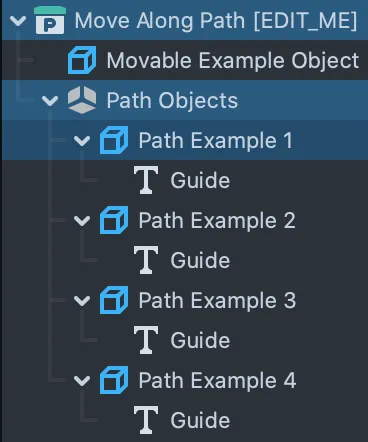
To arrange the points (Path Example 1, 2, 3, 4) that make up the flight path for the phoenix, select them one-by-one and edit their position values in the Transform component. Set the x, y, z positions to (40, 50, 0), (0, 50, 40), (-40, 50, 0), and (0, 50, -40) for Path Examples 1, 2, 3, and 4, respectively. Feel free to adjust the y-values to make the path move vertically.
Next, in those same Transform components, adjust the Rotation so that the phoenix is facing the center of its path by setting the x- and z-components of the rotation to 0 and the y-component to 180, 90, 0, and -90 for Path Example 1, 2, 3, and 4, respectively.
Now, back in the Move Along Path [EDIT_ME], we need to set the Loop Type to Loop, and add a fifth value to the list of objects that make up the path to complete the loop. After making those changes, the prefab should look like this:
Now that the phoenix is moving correctly, we can hide the Path Objects (don’t delete them!) and delete the Movable Example Object.
Add a bokeh particle emitter
In this next step, we’ll add a particle emitter that follows the phoenix and produces a bokeh effect (the fading circles around the bird).
Add particle emitter
Open up the Particles template in Lens Studio and export the Partice_Preset_Bokeh object in the Objects panel.
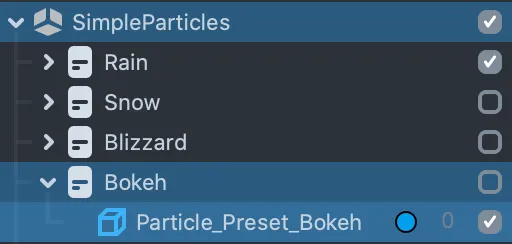
Next, add the Partice_Preset_Bokeh.lso file (the one you just exported) in the Resources panel. You should now see the bokeh effect in the scene. The current settings create a global effect, but we want to make a local effect so we will edit the bokeh material.
Navigate to the material in the Resources panel (ParticleMaterials / World / Bokeh / Bokeh [EDIT_ME]) and select it to open it in the Inspector panel. Uncheck the three boxes nested under Spawn Location / Shape, set Gravity — cm/s to -2 (nested under Force / Gravity), and set Amount to 2 under Spawn / Time / Particle Count.
That last step will cause the effect to virtually disappear, but it will be visible again once we add the code to move the particle emitter along the phoenix’s flight path.
Move particle emitter along a path
Particle emitters in Lens Studio can only emit particles from a stationary point. To achieve the effect of emitting particles along a path, we will need to create many particle emitters. I found an example project with a script that does most of the work in this forum post. I edited the script to allow the particle emitter to track the moving phoenix that we have set up. Here is the full script:
// -----JS CODE-----
//@input float animationLength = 5
//@input int maxParticleSystems = 50
//@input float spawnInterval = 0.01
//@input SceneObject particle
//@input SceneObject tracker

// Store copy of original particle system
var copyableMeshVisual = script.particle.getFirstComponent("Component.MeshVisual");
var copyableMaterial = copyableMeshVisual.mainMaterial.clone();

// Intialize variables to store the particle systems in
var instances = []; // Each particle system
var startTimes = []; // When that particle system started
var matPasses = []; // The particle system's material

// Keep track of our particle systems
var lastSpawnTime = 0; // When we last started a particle system
var nextSpawnIdx = 0; // Index of the particle system we should modify next

// Generate all our particle systems
for (var i = 0; i < script.maxParticleSystems; i++) {
	var newObject = global.scene.createSceneObject("Particle_Trails");
	newObject.enabled = false;

	var mv = newObject.copyComponent(copyableMeshVisual);
	mv.clearMaterials();
	mv.addMaterial(copyableMaterial.clone());

	var material = mv.getMaterial(0).getPass(0);
	material.externalSeed = Math.random();

	instances.push(newObject);
	startTimes.push(0.0);
	matPasses.push(material);
}

function updateWorldParticles(){
	var currentTime = getTime();
	var t = currentTime - lastSpawnTime;

	// Update all particle system's  time
	for (var i = 0; i < script.maxParticleSystems; ++i) {
		var timeOffset = startTimes[i];
		var obj = instances[i];
		var pass = matPasses[i];
		var shaderTime = currentTime - timeOffset;

		if (shaderTime > script.animationLength)
			obj.enabled = false;
		else
			pass.externalTime = new vec4(0.0,shaderTime,1.0,1.0);
	}

	// Restart particle system's position at current pos as needed
	if (t > script.spawnInterval) {
		var currentPos = script.tracker.getTransform().getWorldPosition();
		var index = nextSpawnIdx % script.maxParticleSystems;
		var instance = instances[index];

		lastSpawnTime = currentTime;
		startTimes[index] = currentTime;

		instance.enabled = true;
		instance.getTransform().setWorldPosition(new vec3(currentPos.x,currentPos.y,currentPos.z));

		nextSpawnIdx++;
	}
}

function onUpdate(eventData) {
	updateWorldParticles();
}
var event = script.createEvent("UpdateEvent");
event.bind(onUpdate);
To make use of this code, create a new Script in the Resources panel, name it WorldParticleController, and paste the code above into it. Next, bring up the Particle_Preset_Bokeh object in the Inspector panel, add a script component, and point it to the WorldParticleController script.
Drag the Particle_Preset_Bokeh object to the Particle input box on the script component, and drag the “fly” prefab to the Tracker input box. The finished component should look like this:
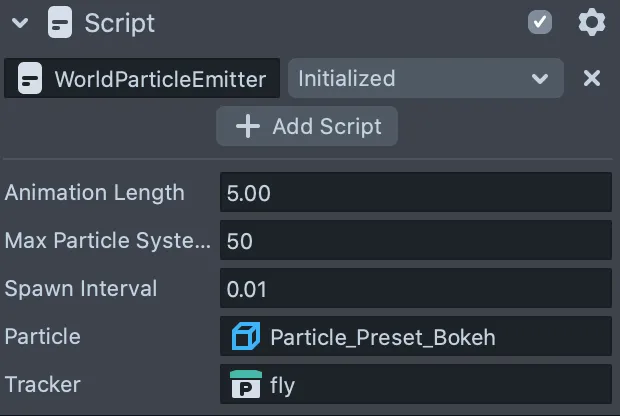
You should now see bokeh particles falling gently from the phoenix.
Add a column of smoke to drive home the 3D feel
Finally, we’ll add some smoke to the middle of the scene to make the 3D nature of the phoenix movement and particles more apparent. Feel free to put whatever you want in the scene — I originally added a 3D plant asset that I got from Sketchfab, but it ended up being too large of a file to keep the Lens under the 4 mb limit, so I scrapped it.
To add the smoke, open up the Particles template again and export the Particle_Preset_Smoke_Lighting and Particle_Preset_Embers objects. Then, in the phoenix project, add those objects in the Resources panel to see them in the scene—and that’s it! We have a Lens featuring a phoenix flying around a column of smoke.
Here again is the finished product:
Conclusion
To sum up our work…
We downloaded a textured/animated phoenix from Sketchfab, caused it to move along a path in the scene with help from a Prefab in the Refinement Pack, and added some particle emitters to round out the Lens.
Hopefully you were able to learn how to use a few different building blocks along the way — instead of a phoenix, you could use similar components to build a Lens that has a butterfly or bumblebee flying around to different flowering plants, fish swimming around a shipwreck, or anything else you can imagine.
Comments 0 Responses