In the final part of our series (we’ve arrived!) we’ll add some polish to our game. To do this, we’ll refine our level by adding a menu system (main and pause menus), which is a necessary part of any game. We will also add background sound to our game.
Before proceeding forward, a quick recap. We started by learning Unreal basics—how to navigate and create a HUD (heads up display).
We also created some enemy AI and winning and losing mechanisms. We even tested the game on an Android device. These are core components of any mobile side-scroller game. In this final part we’ll polish our game so that it can be presentable.
Table of contents:
Main Menu
Open the content browser and navigate to the maps folder. The idea behind creating a main menu is pretty similar to creating a level/map. If you think about it, a main-menu is also a type of level/map. The function of the menu is to list options and load our gameplay levels.
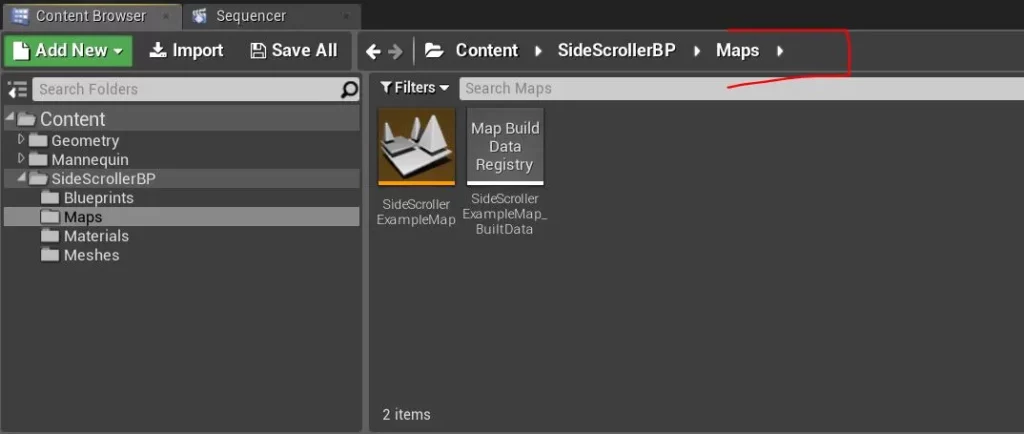
Go to the content browser panel and navigate to the Maps folder (Content->SideScrollerBp->Maps). Right click on the Maps folder, click “Level”, and name it “MainMenu”. Open it by pressing Enter.
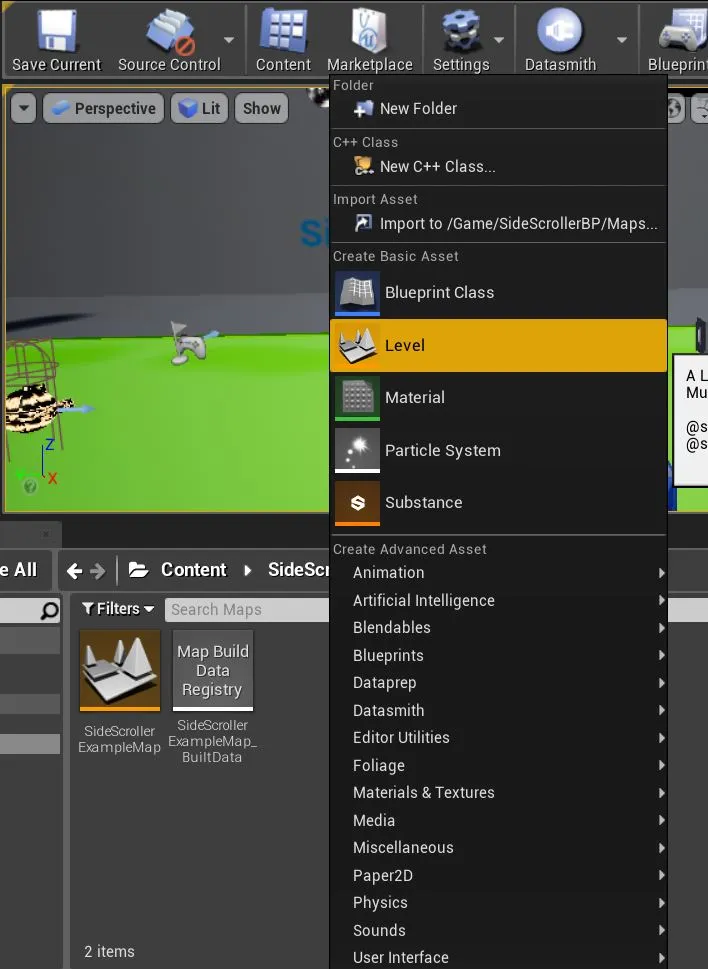
When you open the level you will see a black screen in viewport (that’s normal). This level is empty it has nothing inside it. That’s exactly what we want for our menu. We only want to display buttons that can perform some action or another.
Switch over to the Blueprints folder (Content->SideScrollerBP->Blueprints) and create a new widget blueprint and name it “Menu”. Double click to open it.
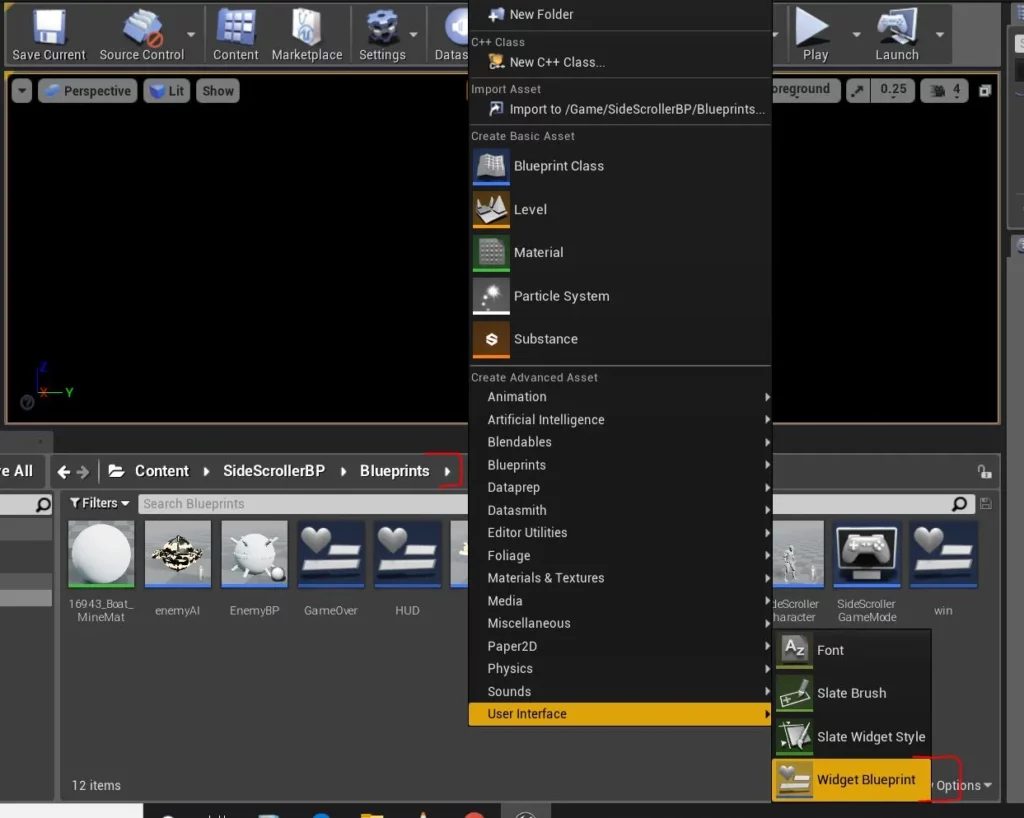
If you remember from previous articles, we used widget blueprints to display information such as time, coins, and health. We can also create buttons that can perform various actions.
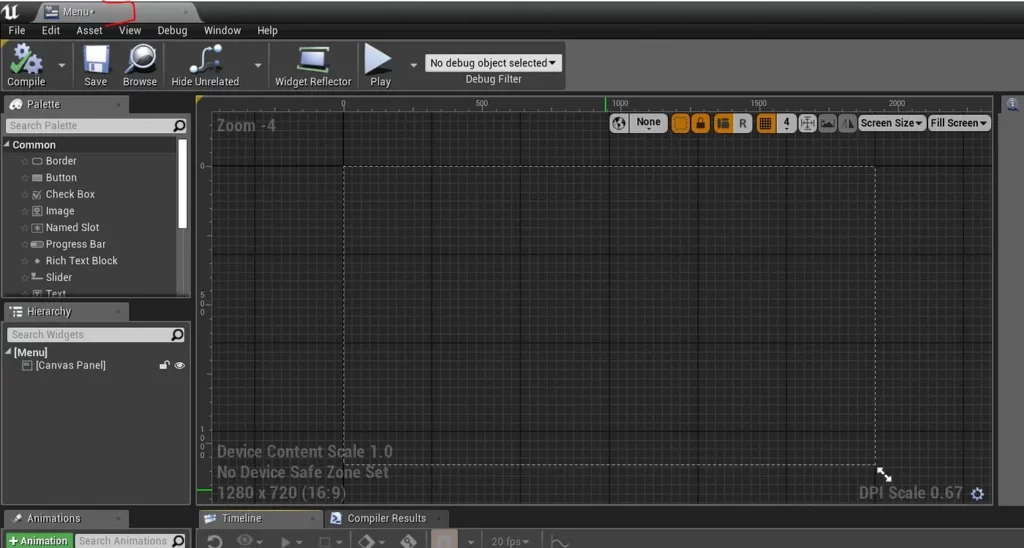
Add 2 buttons and 2 text fields on the canvas. You can probably see where this is going…
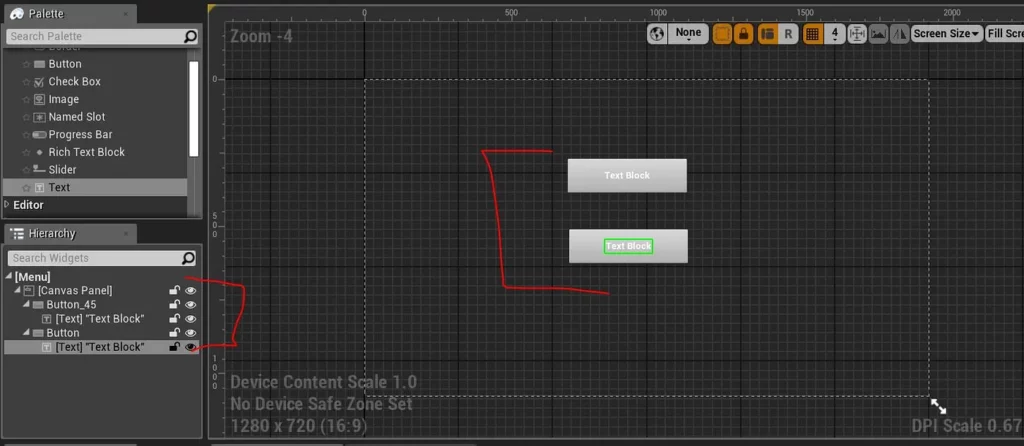
We’re aiming for a quite simple main menu that has only 2 buttons: “Play” and “Quit”.
Change the text to “Play” for first button and “Quit” for the second button. Change their properties, as shown below (both buttons should have the same properties, except for their texts). You can change the font to your personal preference, but keep in mind it should not overflow the button.
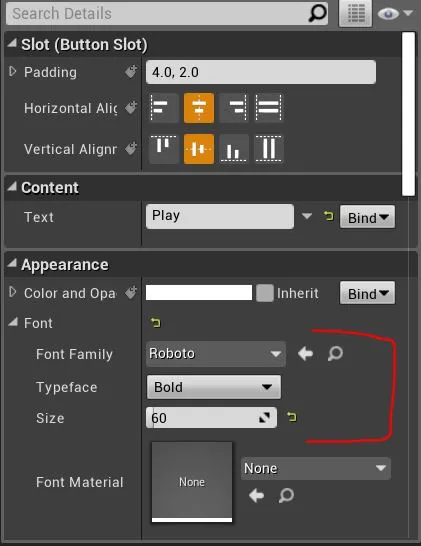
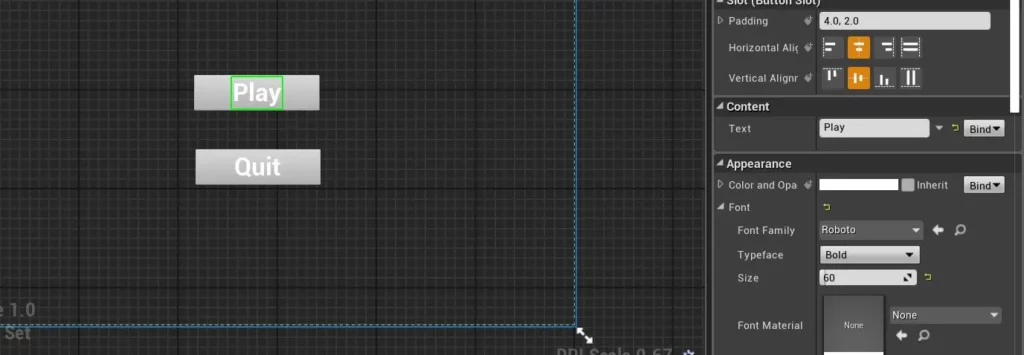
Highlight the “Play” button and add an “on clicked” property. The “on clicked” property is used to perform an action when a button is clicked. This action can be anything—in our case, we want to open a level.
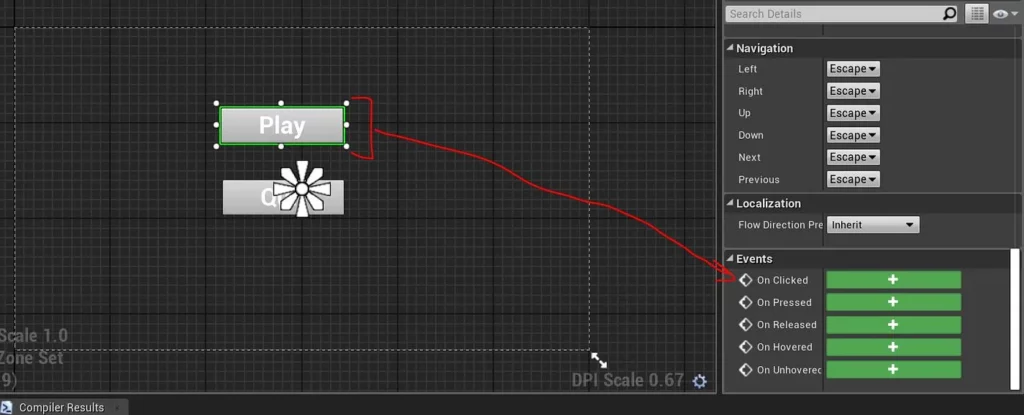
Drag a node from the button and type “open level”.
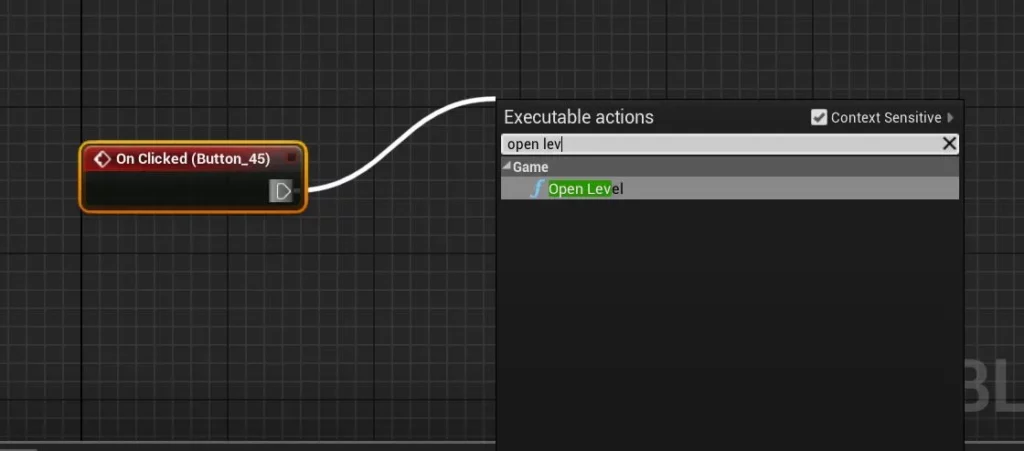
Type the level name — “SideScrollerExampleMap”. Hit compile and save.
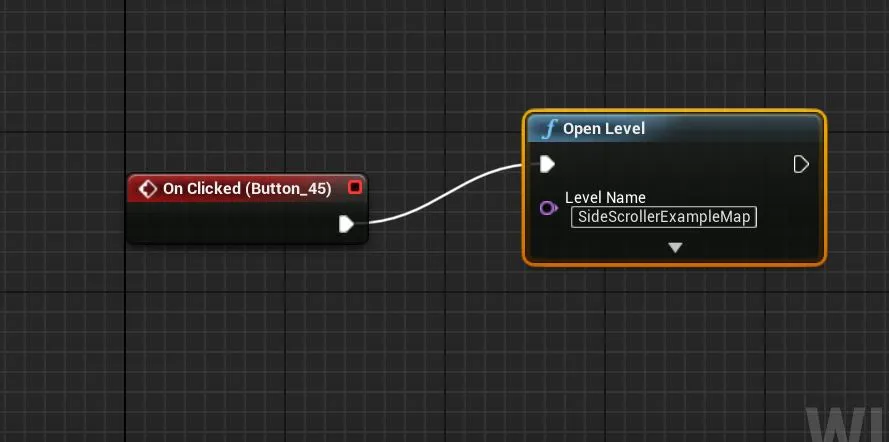
Here, we’re specifying which level well be opened when the “Play” button is clicked—hence the name “SideScrollerExampleMap”. If you go into the Maps folder, you’ll find your level names there.
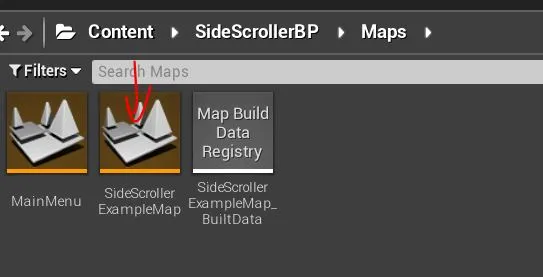
You can change the name of the level by pressing F2. (If you change the level/map name make sure to change it in “open level”, too)
Now click on “Quit” button and select add another “on clicked” event. This time we want to exit our game.
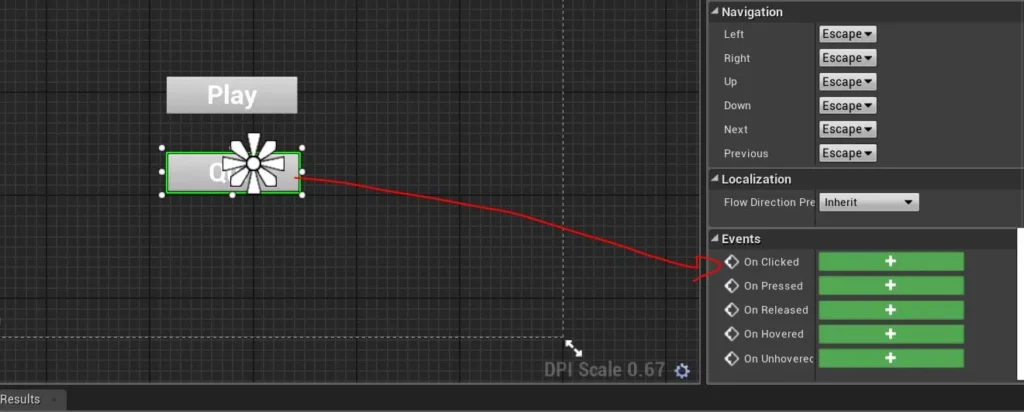
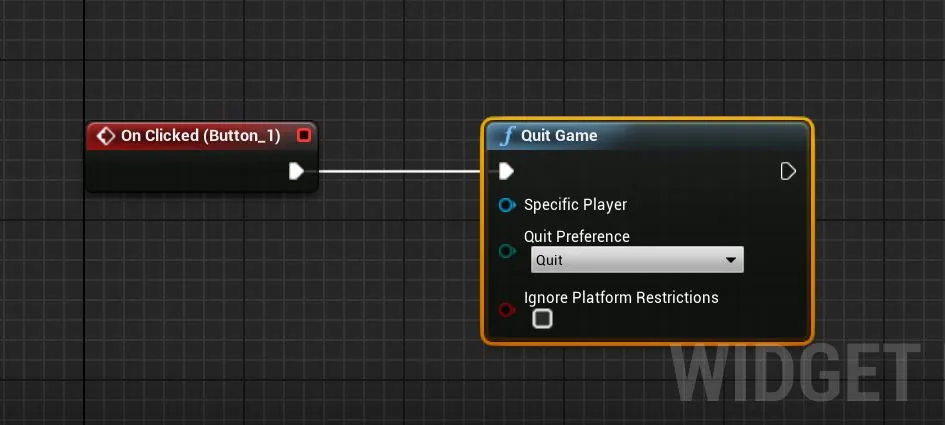
Bring out the node from the button and type “Quit game”.
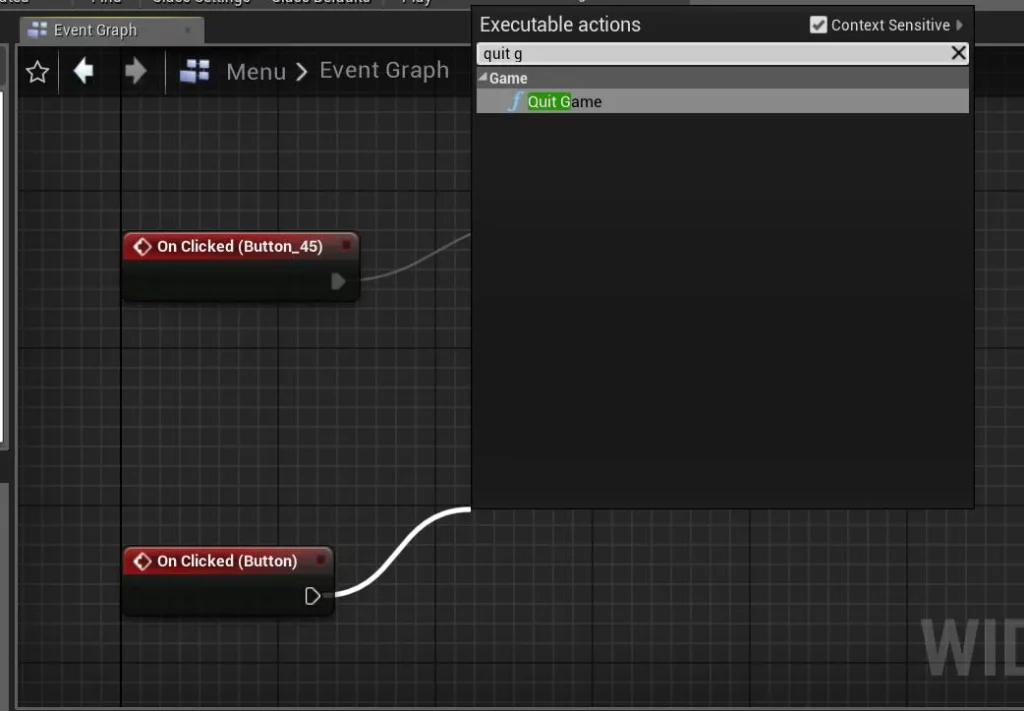
You’ll notice there’s a dropdown menu when selecting “Quit Game”. We can either quit the game or move it to the background. We don’t want our game to go in the background, mainly because we want to completely exit the game. Another important reason is that games consume lots of device resources. If we don’t exit our game properly, it can waste RAM and battery.
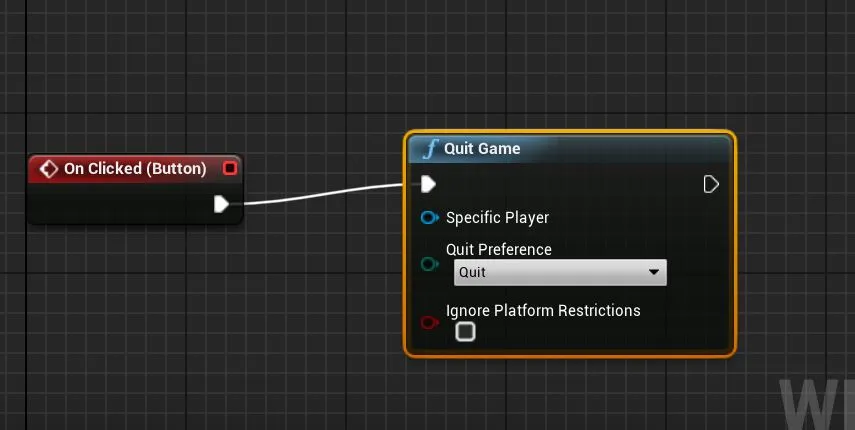
Compile and save. Close the blueprint.
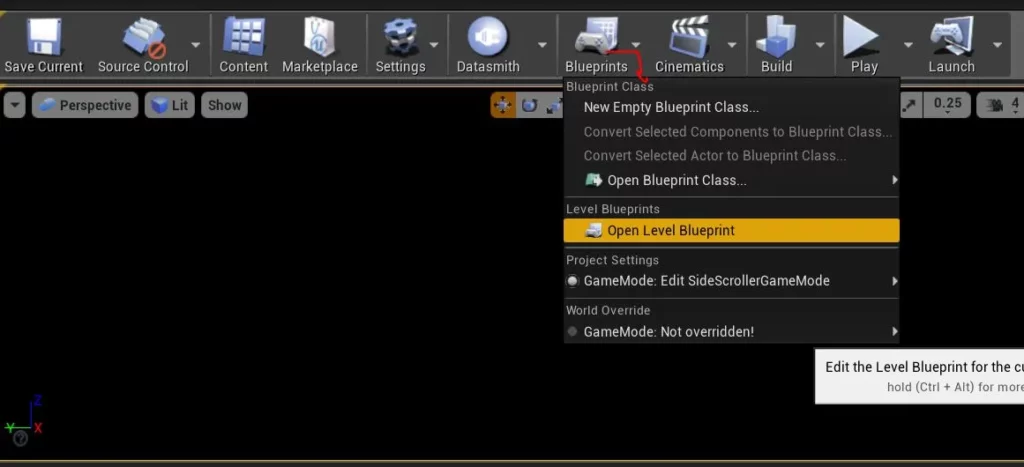
Now in the Blueprints dropdown, choose Open Level Blueprint.
If you’ll remember from previous articles, we must tell our level to display our widget(s). Drag a node from “Event BeginPlay” and type “create widget”. For the class, choose “menu”. Hit compile and save.
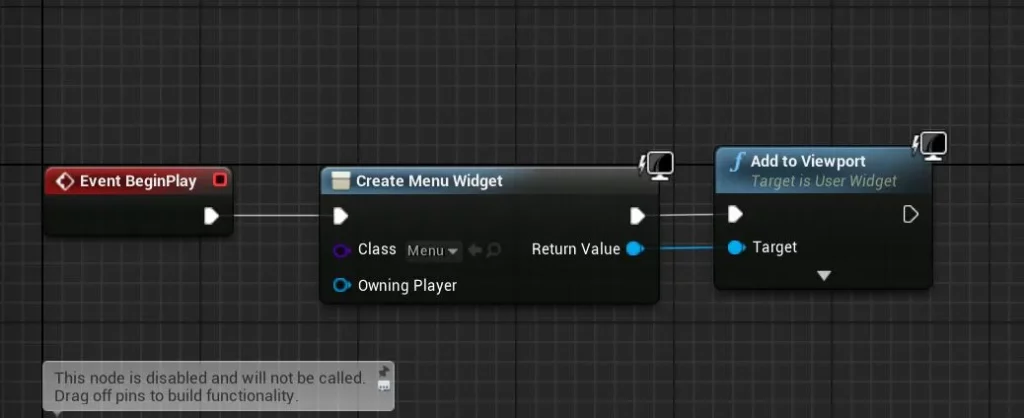
Explanation: Here, we’re telling our level “When this level loads, create a widget of type menu and display it.”
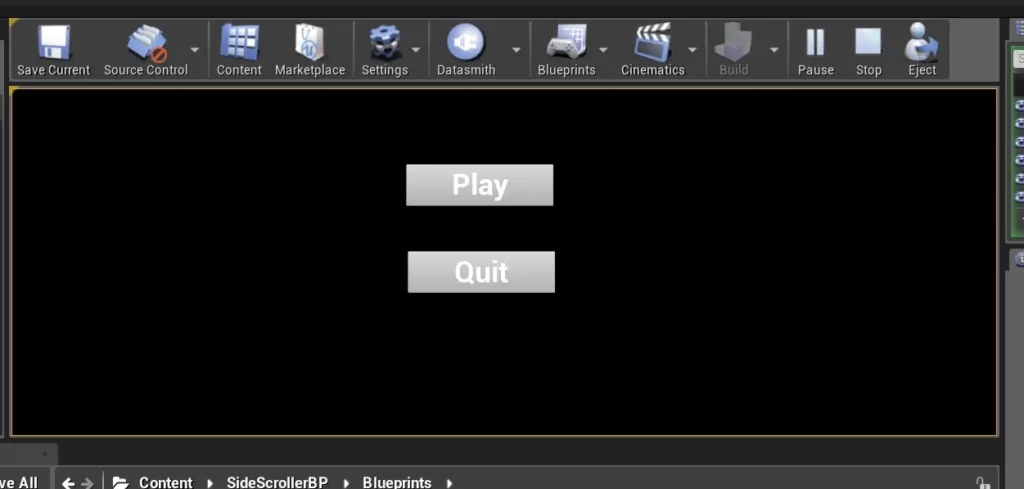
Click on Play button and our level will open up. Pressing the quit button will exit the game. Our main menu is working now.
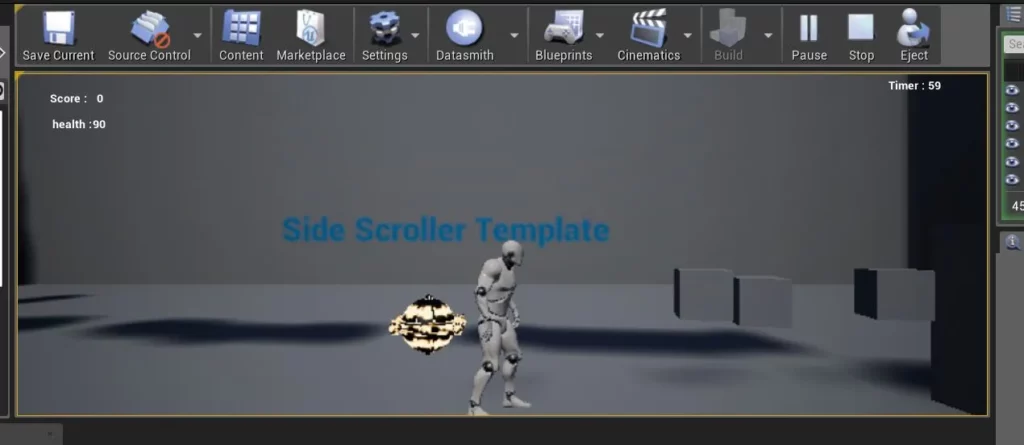
Next we will create a pause menu that will be triggered when a user presses the back button on Android (back button varies from device to device, but the event is the same, so it’ll work for all Android devices.)
Go the blueprints folder (Content->SideScrollerBP->Blueprints) and create a new widget blueprint:
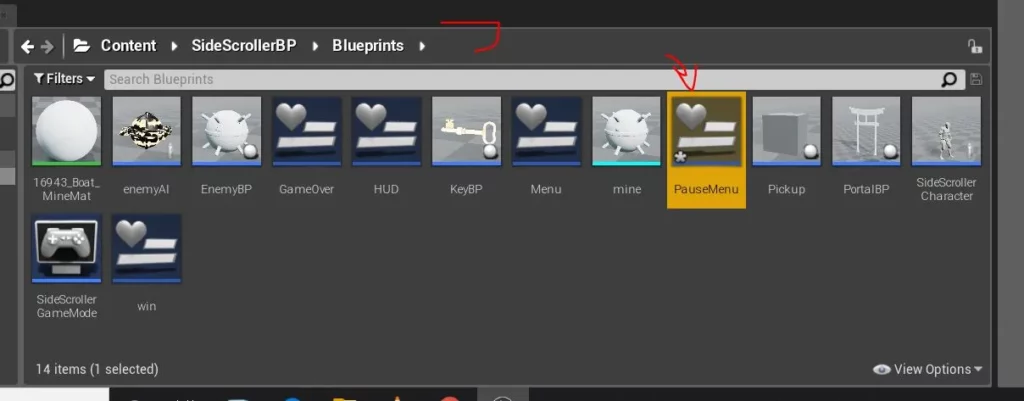
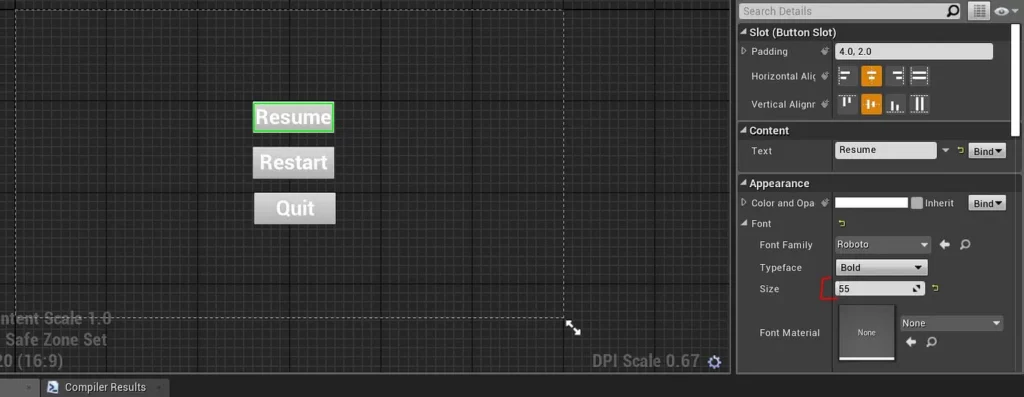
The process will be very similar to how we created our main menu—the only difference is we don’t need to create a new map/level. We’ll add 3 buttons and 3 text fields. Compile and save.
The buttons are self explanatory, and we’ve already worked with a restart button in a previous article:
The “Quit” button will be similar to the main menu variety.
Open our level blueprint (SideScrollerExampleMap. Right click on the blueprint and type “android back”
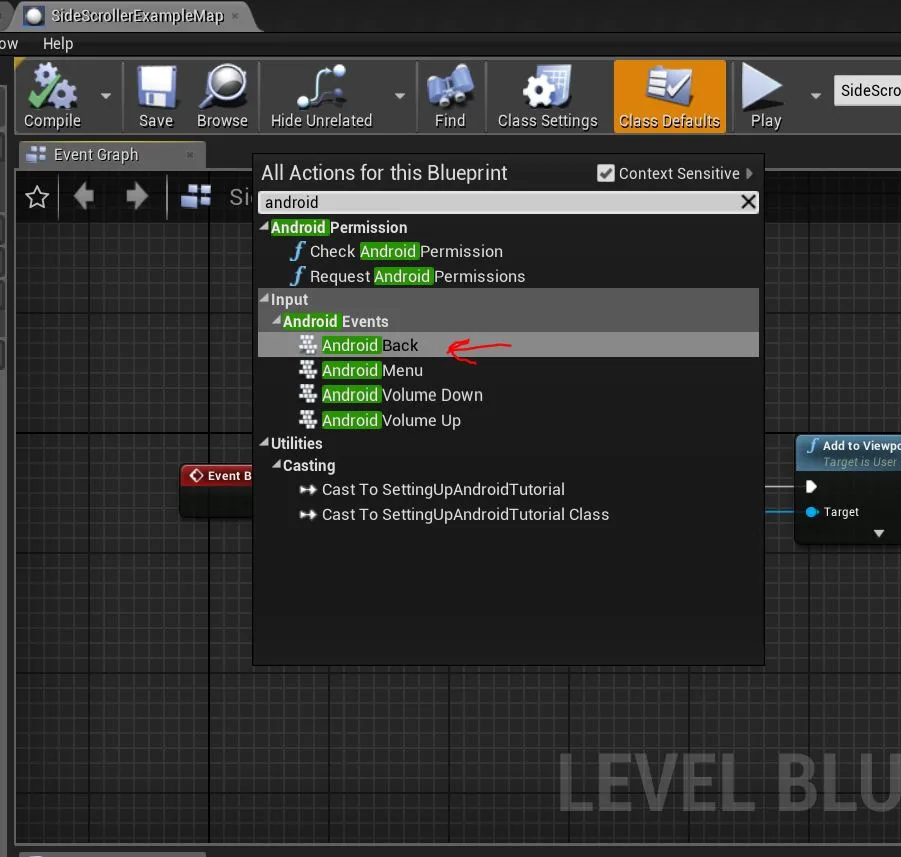
Drag a node from the pressed node (see image below) and create a widget. Compile and save.
Explanation: Whenever an Android back event is fired, we create a widget of type “Pause menu” and display it.

So what we’ve done here is handle the back button event. Whenever a player taps the back button the pause menu will pop up.
But up until this point, we still haven’t been able pause our game, so we have to add that functionality. We’ll drag out a node from “Add to Viewport” and type “Set Game Paused”(tick the checkbox to pause the game).
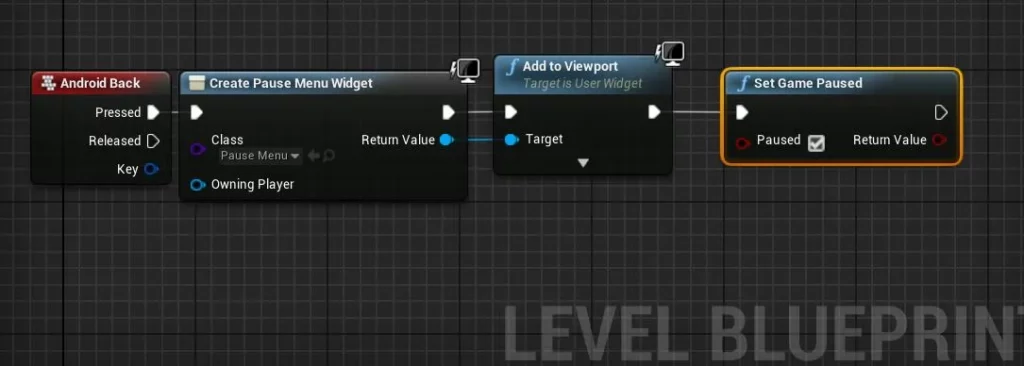
Hit compile and save, and close the level blueprint.
Open the pause menu blueprint that we created above (Content->SideScrollerBP->Blueprints).
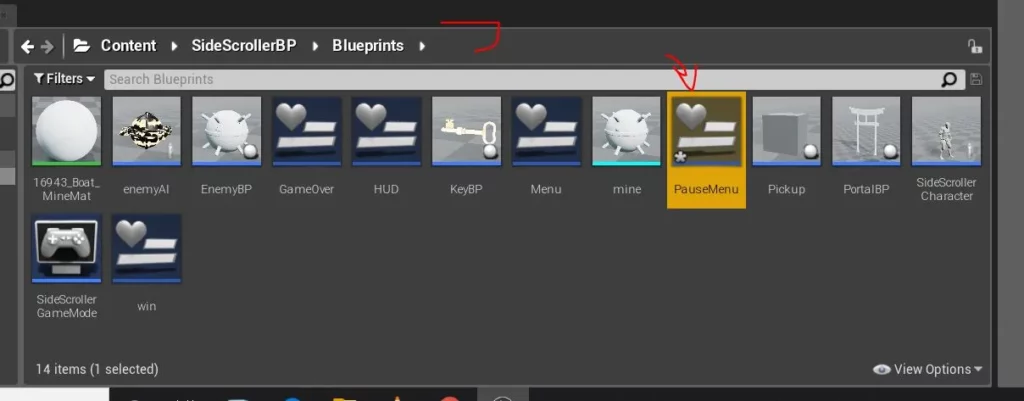
Add an “on clicked” event for the resume button, just like before.
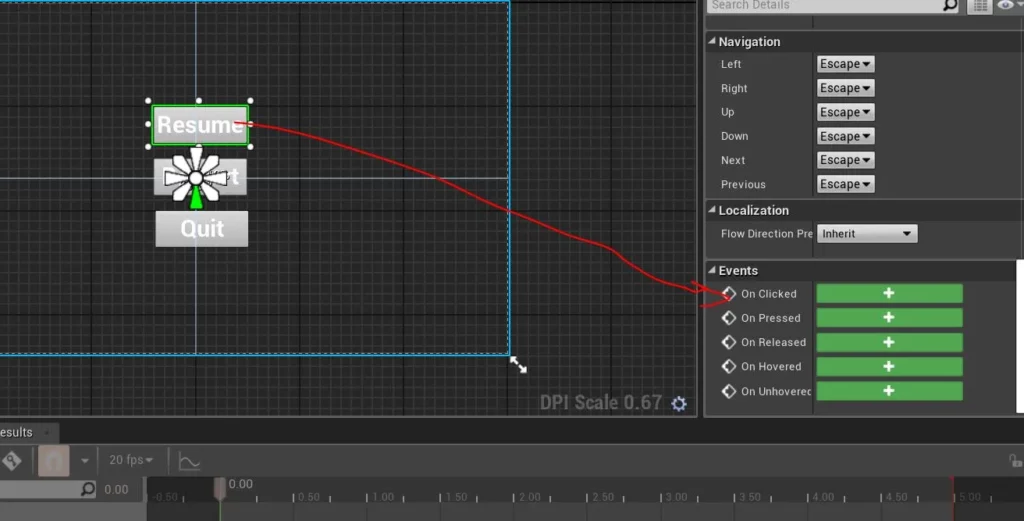
If the user presses the resume button, we want to go back into the game and remove the widget—but the question arises, which widget do we remove? We have to tell Unreal which widget to remove (there are many widgets in our game). We do this with a function called “get all widgets of class”. Using this function, we tell Unreal to remove widgets of type “pause menu”.

Once we remove the widget, we need to resume our game. Simply uncheck “Paused”.
Now the restart button should work similarly to the restart button in the “Game Over” screen that we created in a previous articles. If you need to refresh your memory or want to go into more detail, you can read it here:
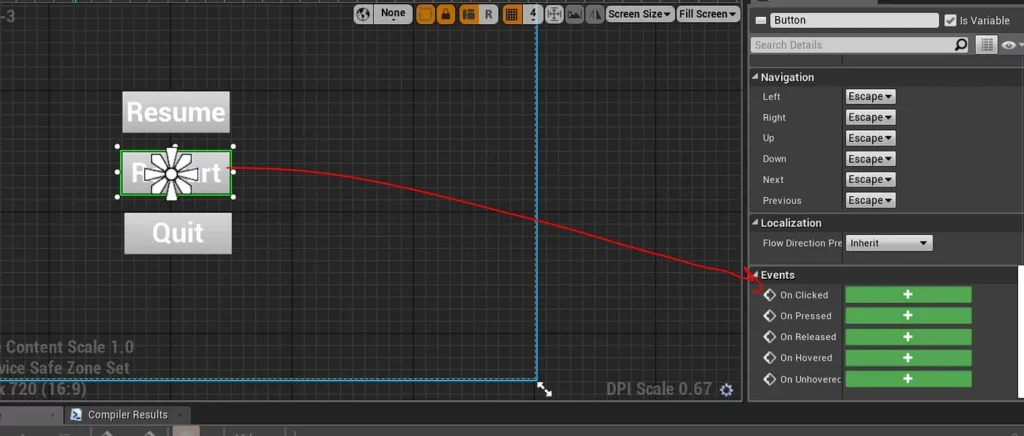
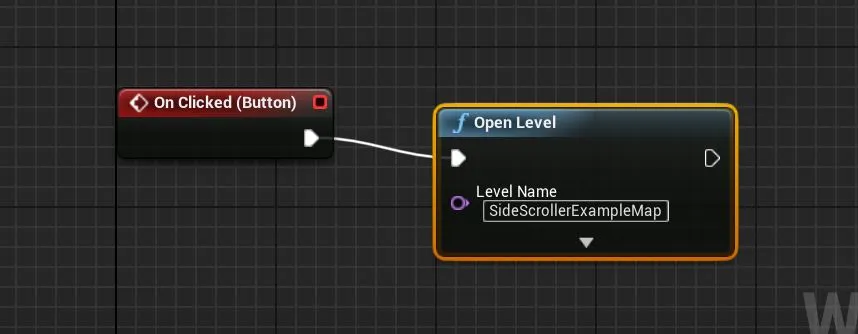
The “Quit” button is the same as the one we created for main menu. Just make sure to add an “on clicked” event to the button.
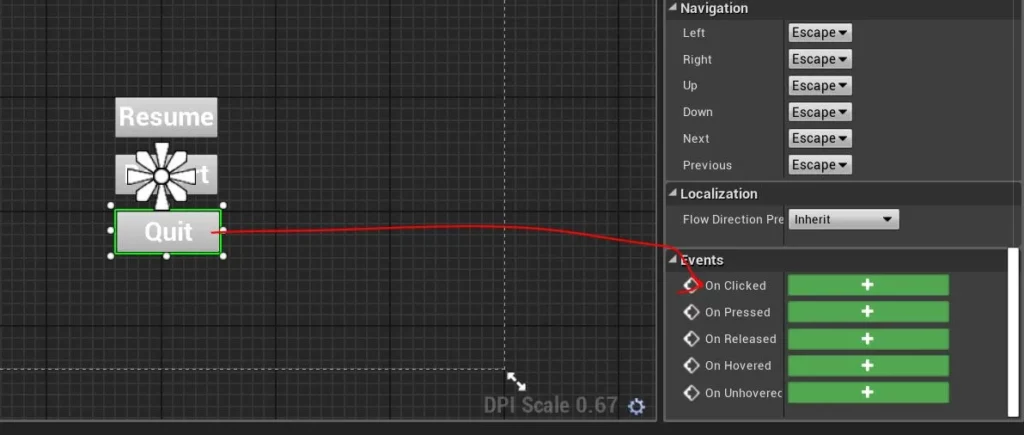
Tell the button to quit the game. Make sure to set it to quit in the dropdown menu below, not the background).
Hit compile and save. To test our pause menu, open the level blueprint and add a key node ‘P’. We’re only doing this to test our pause menu functionality— we don’t have an Android back button on our computer. We could build the project again and test it on the device but the time it takes to build a project isn’t worth it here.
During your game dev journey, you’ll encounter this scenario many times. Although it’s always necessary to test your application on the intended device, it’s a good practice to first test it on your system (development machine).
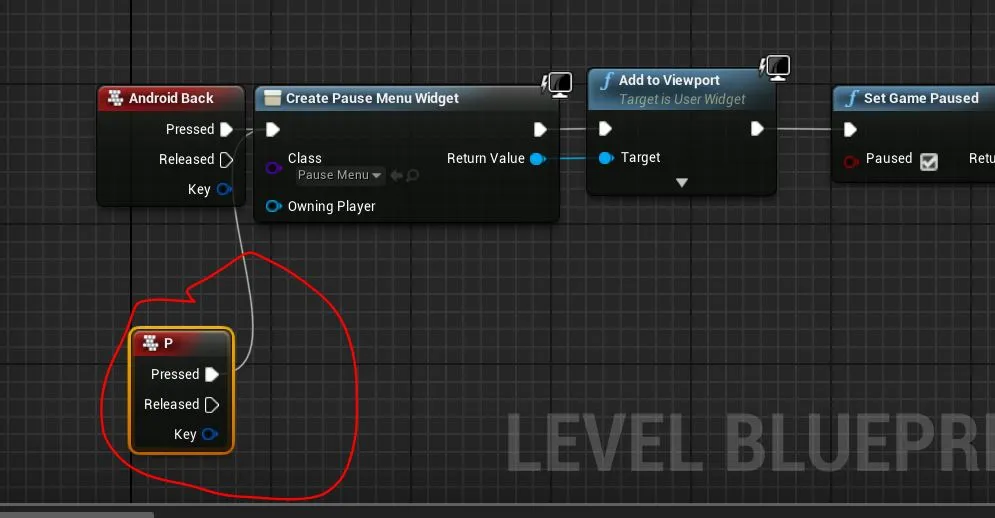
Press the ‘p’ key, and you will see your pause menu. The game will also pause.
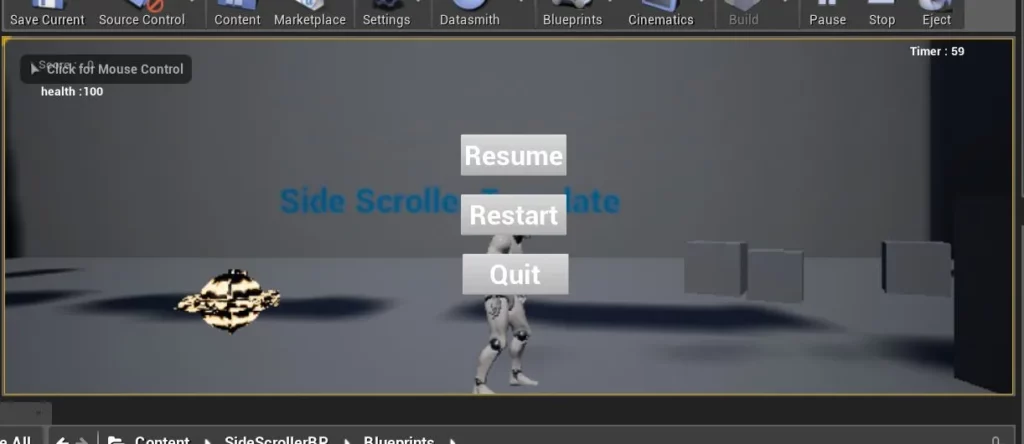
Tap each button to make sure everything is working like we intended. We’ve created both pause and main menus! Our game is coming together nicely…
Sound
But we need one final touch. Some nice background music/sound.
Here’s a good resource for a wide range of sound assets:
( I downloaded solve_the_puzzle.ogg ) All these sounds are royalty-free, so you can use them in your game without any issues.
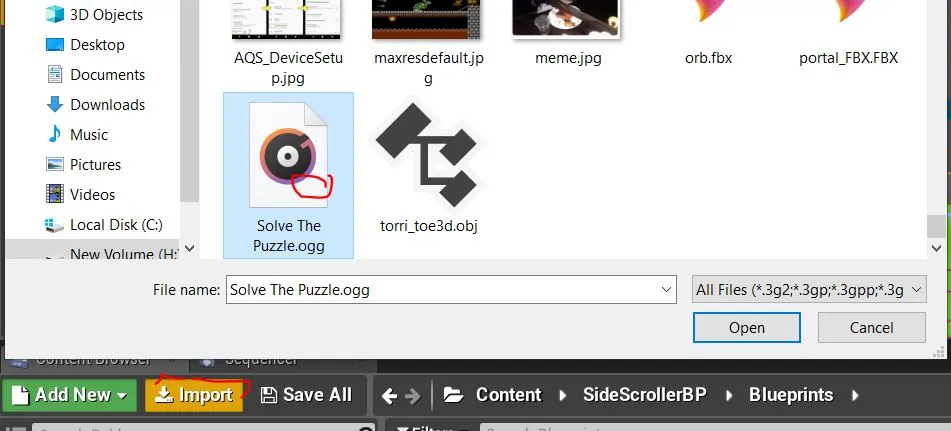
Next, import your new sound asset into the engine. Simply click on the import button and navigate to the folder where you downloaded the sound.
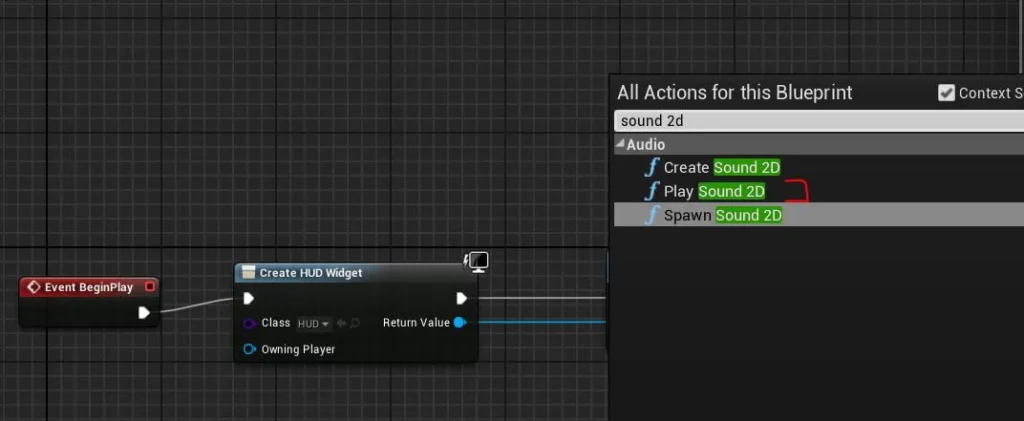
Open the level blueprint (SideScrollerExampleMap) and right click and type “play sound 2d”
Select the sound asset we imported.
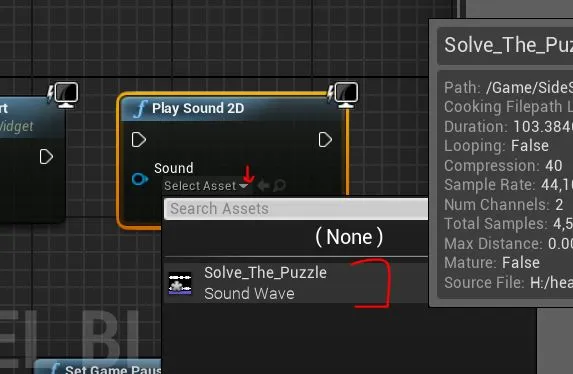
Connect the nodes as shown below. We want the sound to play when our level loads (i.e. “Event beginplay”). We’re telling Unreal to first create our HUD (heads up display) and add it to our game whenever the level loads. After that, we play our sound.

Save the blueprint and hit the play button. You’ll be able to hear the background music when you begin to play.
Bringing it all together
We now need to organize our levels and tell Unreal how to package the game, and which level it should load first. This part is fairly simple. We just need to change a few project settings.
Open Settings -> Project Settings
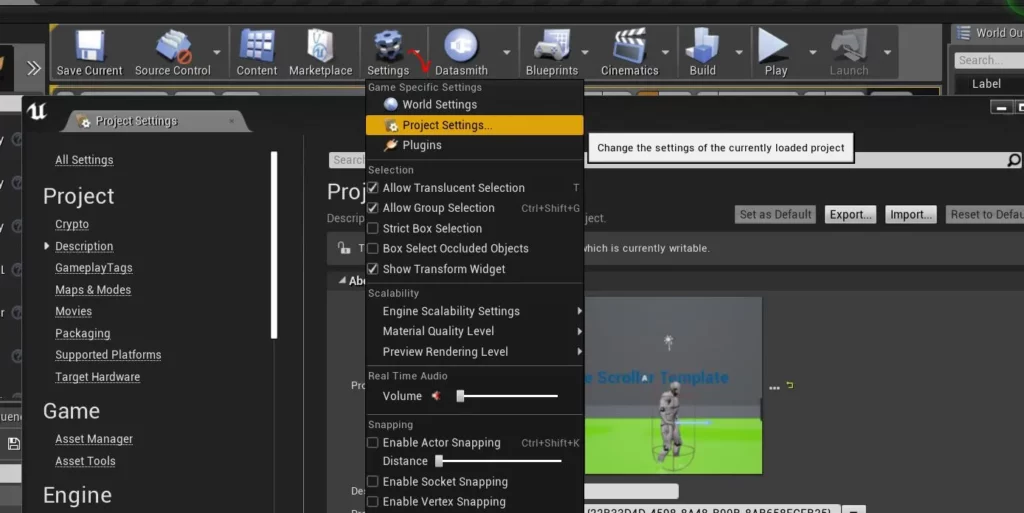
Go to Maps & Modes settings and choose Game Default Map. Change it to “MainMenu”. You can see that there are 2 options for the map: “Editor Starter Map” and “Game Default Map”.
The “Editor Starter Map” is the map that will open by default whenever you open the Unreal editor.
The “Game Default Map” is the map that will open whenever you actually play the game.
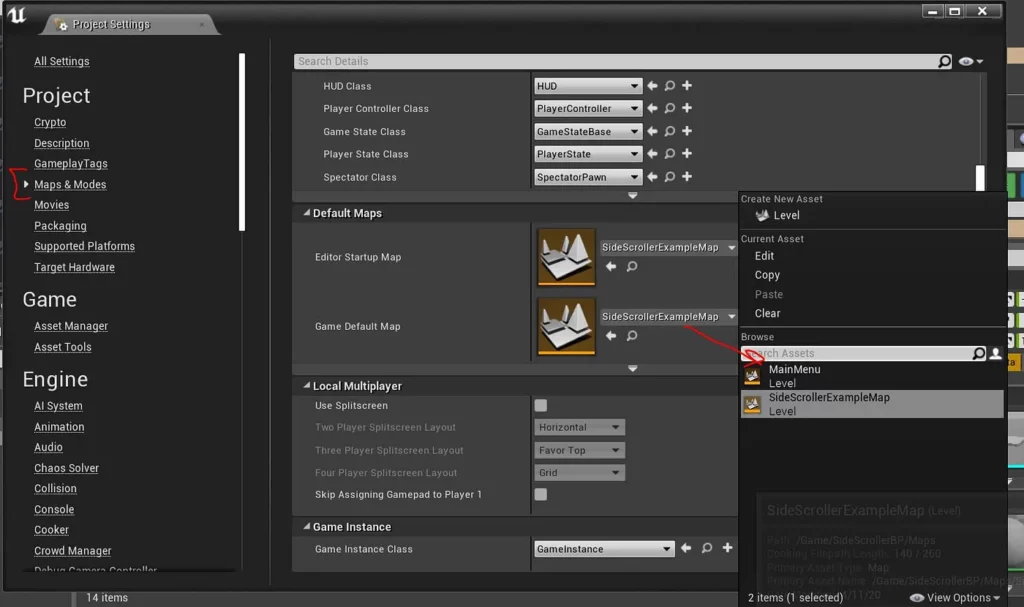
We want our game to open the MainMenu level first, instead of our gameplay level.
Go ahead and build your project again for Android.
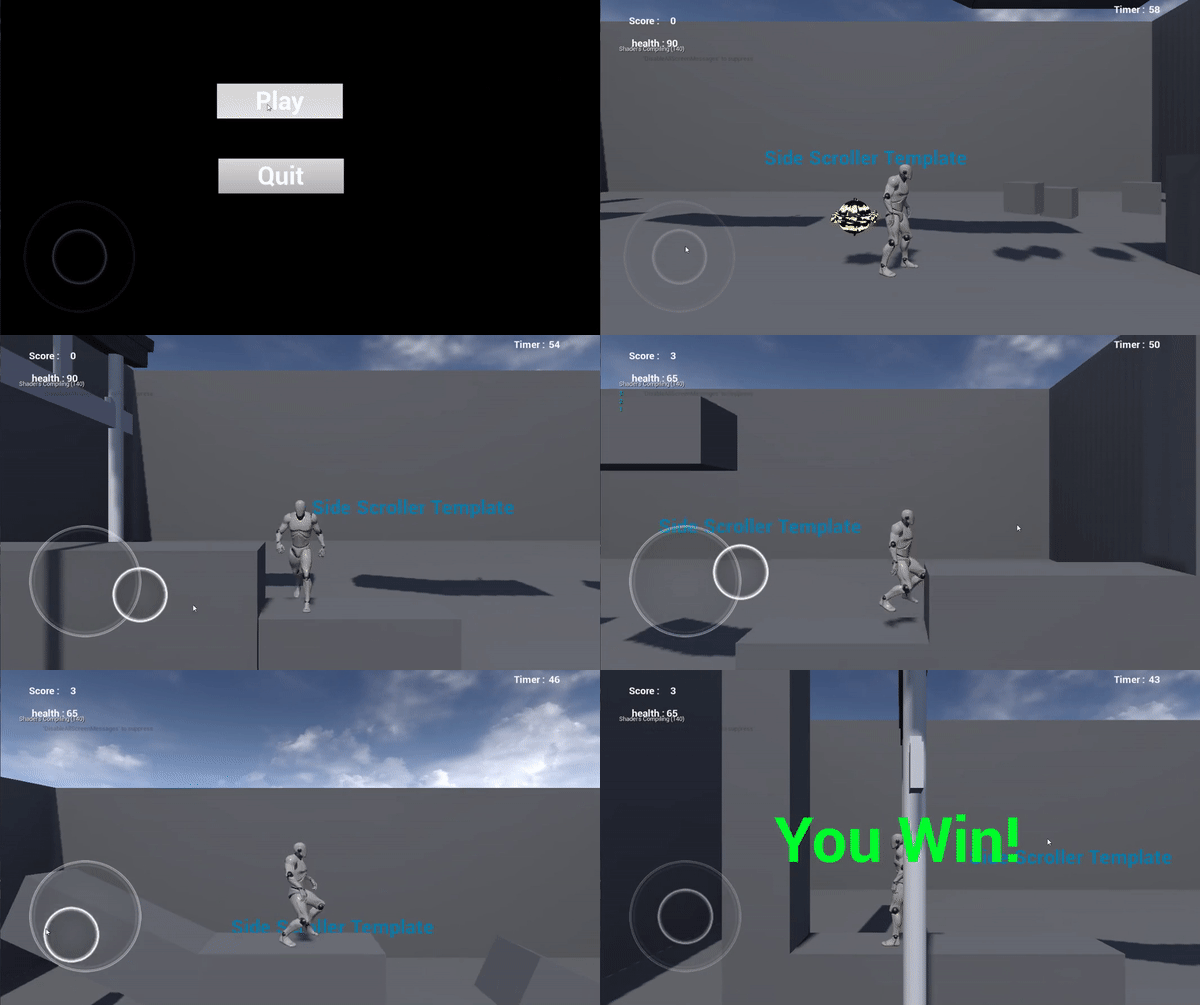
This time during launch, you’ll see the game’s main menu instead of directly jumping into the game.
Conclusion
Our game is working and has enough core functionality and polish to call it a complete! And with this, we will conclude this series. In this series we learned about basics of UE4—the blueprint system, assets, textures, basic enemy AI, creating losing and winning mechanisms, importing and using assets from the web, and lastly how to deploy the game on Android.
Where to go from here?
Glad to see you’ve made it this far. You might be thinking what’s next—what should I learn next, read next, or target? In my opinion, to extend this prototype game from here, it would make sense to try to create your own level from scratch and add new game mechanisms to it. This will serve as a good learning experience and help you build on the skills you’ve learned in this series.
I also highly recommend subscribing to Unreal Engine’s official YouTube channel, where they do lots of live-streaming to explain engine specifics, provide tutorials, and more:
You will learn things by doing and experimenting, once you are bit comfortable I highly suggest you to take part in a game jam. Game jam are like hackathons but bit longer(usually a week long). You can find some of them here:
I wish you luck on your game dev journey 🙂
Have some suggestions ? Let’s connect Twitter, Github, LinkedIn

Comments 0 Responses