
A few months ago, Snapchat released a new feature where AI developers and creatives can easily integrate their own custom lenses using machine learning models — one of these features is the ability to track labeled objects on the view and project fun and immersive AR effects. We’ll cover this ML task in this article.
For people unfamiliar with Snapchat’s Lens Studio, it is an augmented reality creativity suite released by Snapchat in 2017 and allows users to create their own augmented reality (AR) Lenses.
Lens Studio is built for designers or even developers and artists who wish to work with a powerful AR creation tool to reach the huge Snapchat audience and communities.
The project is pretty simple, and I will be using Fritz AI Studio to create an object detection model that will detect and track Texas License Plates. If you’re wondering ‘why Texas?’ the reason is that it seems it’s the new hot state since a significant number of Californians are moving. Even Elon Musk and a wide range of comedians ( Ron White, Joe Rogan, Tim Dillan, and many more) are already finding refuge in the infamous Lone Star State.
Musk is just one of the latest in a string of startup executives and employees who have moved from the San Francisco Bay Area to cheaper locations since the pandemic favored remote working.
Even Hewlett Packard announced it was planning to move its headquarters to Texas, and earlier this year Palantir Technologies, founded in Silicon Valley in 2003, moved its base of operations to Denver. Maybe Austin will be the next silicon valley.
In this article, I will show you how easily you can create a custom machine learning-powered lens with NO code. Then, we’ll create a lens that will detect Texas license plates. We will use Fritz AI to generate a dataset, annotate, and train a custom segmentation model.
Overview:
- Collect and Preprocess Images
- Upload and Annotate Images on Fritz AI Studio
- Train and Download the Lens Studio Project
- Load the Lens and Publish
- Final Thoughts
Collect and Preprocess Images
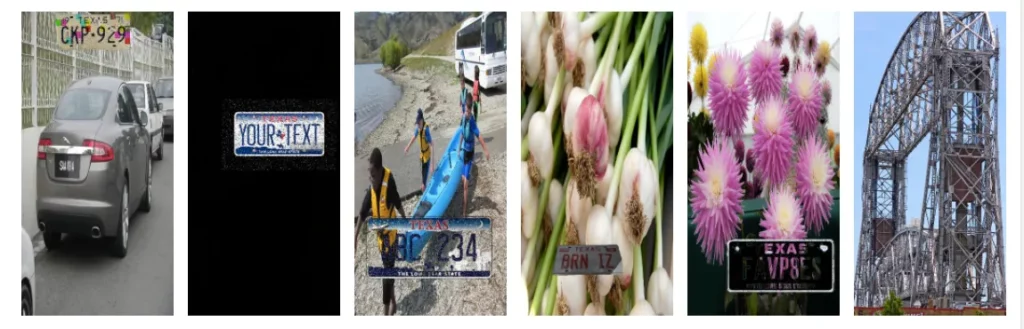
The best way to collect images is straight out of the old Google images search. I managed to find around 20 nice high-quality images of license plates from the state of Texas. Then, you will need to remove the background of those images to use them in Fritz AI studio, as these images will be overlaid on thousands of random images. I have used remove.bg because it’s simple and fast. In my experience, it’s better to have a full image with some context as you will get a chance to annotate part of the image. See Fig. 1.

Upload and Annotate Images in Fritz AI Studio
You will need to create a new project and specify the type of model, in this case Object Detection.

Then select your preprocessed images and upload them as your dataset. You can also upload them by going to Datasets -> Add Image Collection -> Upload images. When all images are uploaded, a whole new menu at the top will appear with an image annotation interface.
The process is a bit tedious and time-consuming (as data labeling tends to be), especially object detection models. You start by creating a new class (Texas) then the system will select color for each one, but since we only have one class, only one color will be generated.
Depending on the number of images you have collected the process will take around 20 seconds per image, but with the help of hotkeys such as e to save your annotation, it could even go faster.
Fritz AI has one of the best features when it comes to data collection and synthetic data generation. Using your small selection of images, Fritz AI will create synthetic images based on your original images, with some sort of data augmentation built-in.
You can also monitor how many images have been generated. You will receive an email when the process is finished. I chose at first to create a relatively large dataset (8000 images) because I know from experience that object detection models will take time to converge and start learning.
Fritz AI will give you a hint of how the images will look and you’ll notice that they overlay your seed images to a bunch of random images as well as augment them by cropping the original image, or even pixel some of them as well.
Train and Download the Lens Studio Project
When the dataset is ready, it’s finally time to start the training job by selecting your snapshot and choosing the number of hours for the training budget — note that Fritz AI will send you an email when the training process is finished.
It will also stop the training if the model converges before the assigned training hours. In this case, the model took 5 hours and 25 minutes.
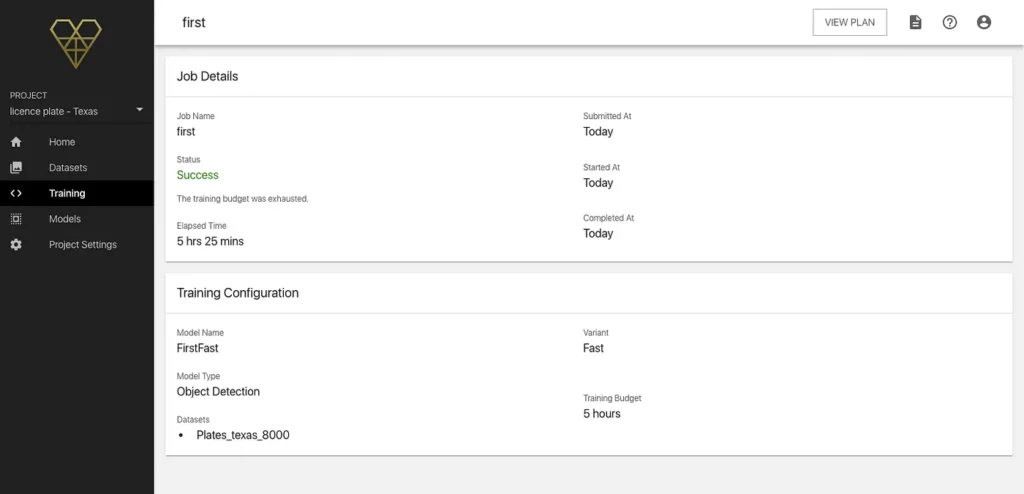
At this point, your model should be ready and available on the Models tab. Download the Lens Studio Project (Figure 5) and open it on the Lens Studio Application.

Launch the Lens Studio Project
Now that the object detection model is ready, we need to import it into Lens Studio and create our lens.
- Open the project: Open the .lsproj file from the project zip file provided by Fritz AI Studio, and import the model. A prompt will pop up, don’t change anything just click on import (Figure 6).

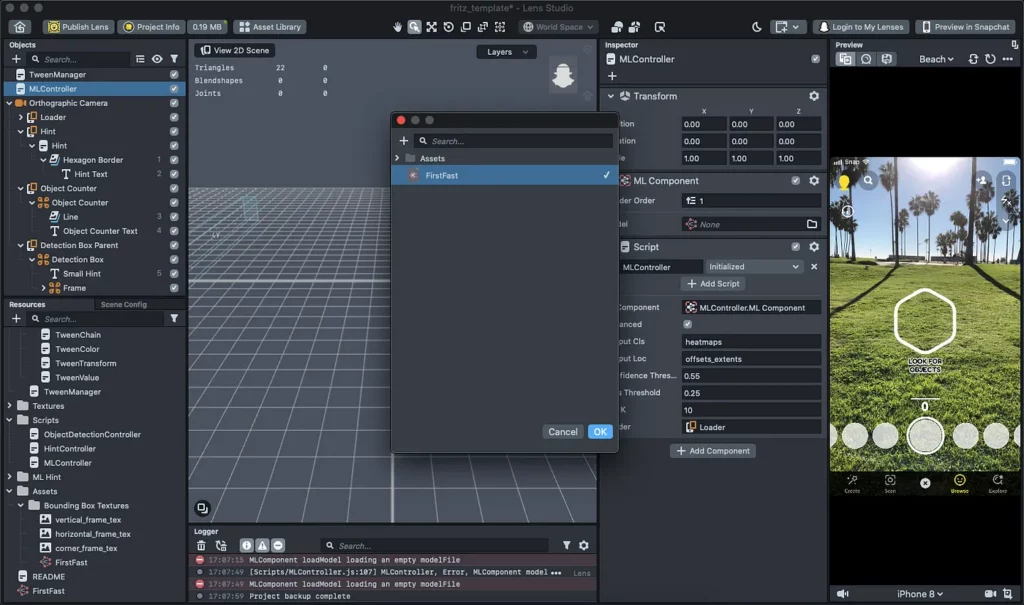
- Import the model as an ML Component: In the left Objects panel of Lens Studio, you will find an object called ML Component. Click on it and import the model from the right panel (Figure 7). Since the model file is already in the project structure, Lens Studio can recognize it.
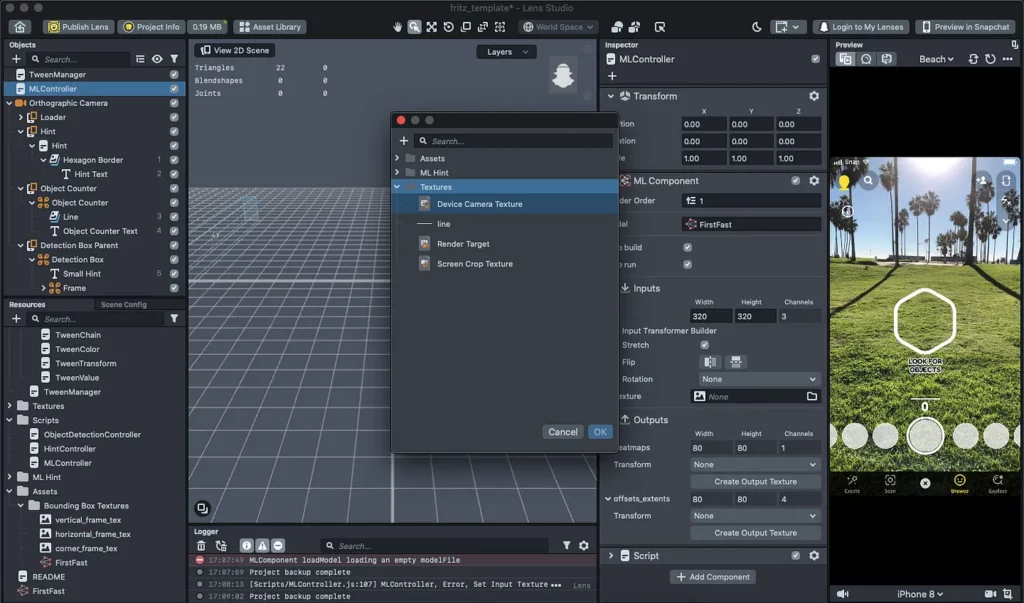
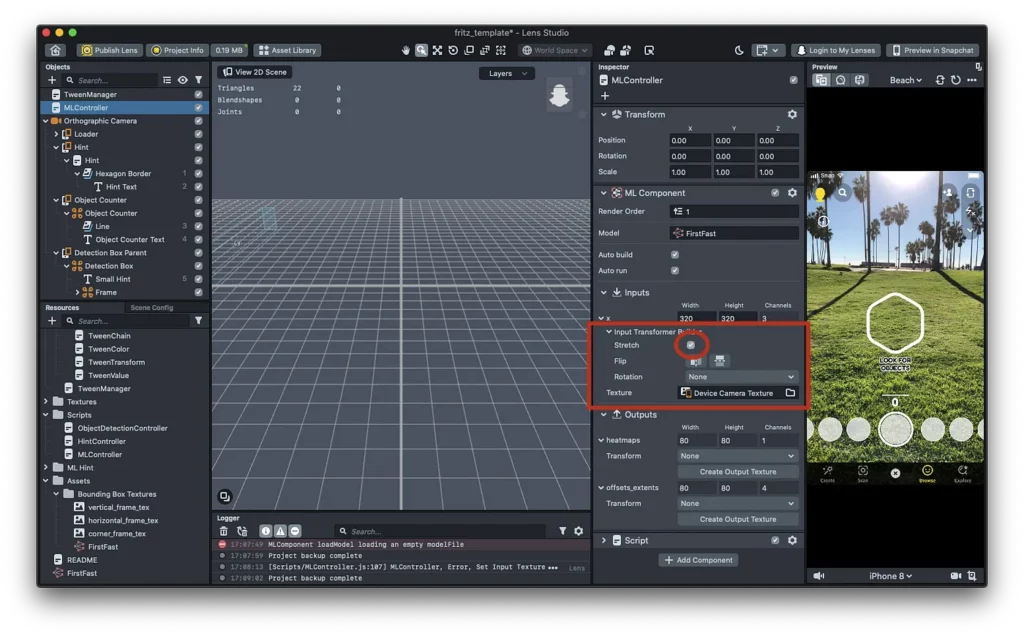
- Change the input Texture: In the ML Component file, change the input texture to Textures > Device Camera Texture (Figure 8), this will ensure that the model can use the camera as the input.
- Change the input image transformer: In the ML Component file, make sure to uncheck Stretch in Inputs > Input Transformer Builder. This will avoid the bounding boxes stretching vertically when the phone
is in portrait mode and it will try to match the ratio of the object. To illustrate the difference, look at the (Figure 10).
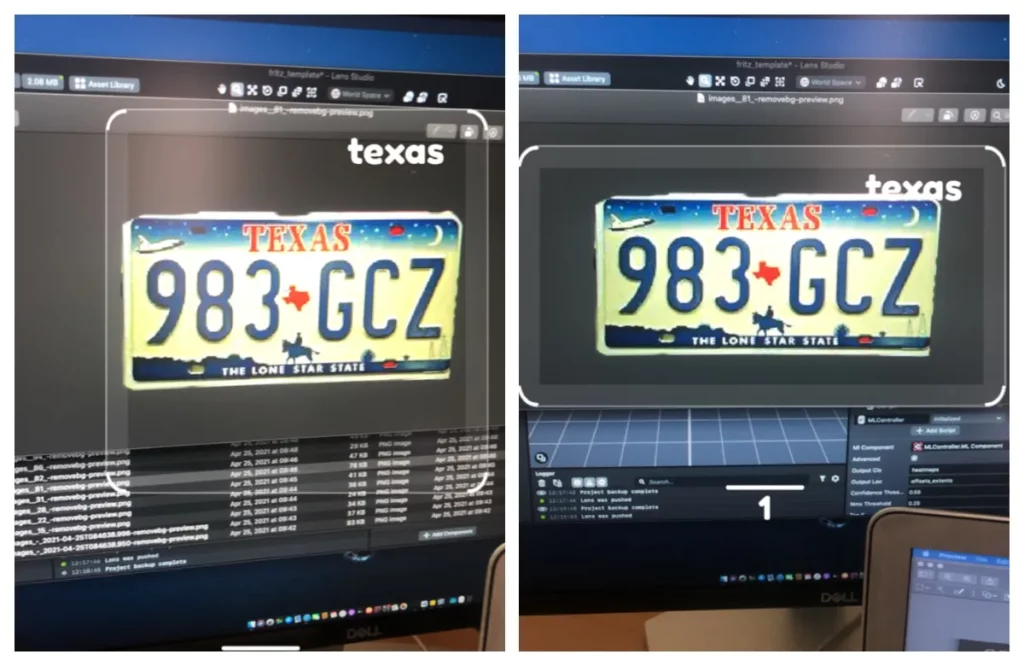
At this stage, you can preview the Lens by pairing your phone in the Snapchat Application. The result should resemble Figure 10:
Final Thoughts
For one iteration, the model is pretty good! The model could be improved by changing the scale of the seed images to reduce their size to avoid getting too close to the camera to have to trigger a positive classification.
When the object detection model detects a nearby Texas license plate the model is accurate, but when the license plate is a bit far from the camera, the model doesn’t detect anything.
Also, I would continue to add more seed images to improve the accuracy of the model and generate more and more good-quality annotated images.
The project is nowhere near ready to be used by end-users, and there are a lot of things that could be added to improve the whole experience in terms of design, or even other elements — the Texas flag for example — or even activate a colorful layer that could be used as a filter. The possibilities are endless and are likely easy to implement for Snapchat Lens Creators.
Comments 0 Responses