You built this amazing machine learning model—this one, let’s say—but now what?
How do you take your model and turn it into something that you can display on the web? How do you turn it into something that other people can interact with? How do you make it useful?
You deploy it!

Having the knowledge and ability to deploy your machine learning model is an absolute necessity. Whether you’re building a model or generating reports, you need this skill. It takes that model that you poured your blood, sweat, and tears into and turns it into something that absolutely anyone can play with and admire.
This article will walk you through the basics of deploying a machine learning model. We’re going to deploy a PyTorch image classifier with Flask. This is the first critical step towards turning your model into an app.
By the end of this article, you’ll be able to take a PyTorch image classifier and turn it into a cool web app. In this app, users will be able to upload an image of a flower to see what kind of flower it is.
Your deep learning image classifier will now be an awesome image prediction app.

Let’s get started!
First, we should hit the basics. (You can find the official installation guide here if you want to take a look!)
It’s a good idea to set up a virtual environment to manage the dependencies of your project. You can do that by setting up a folder for your project, then going to your terminal and running:
Next, activate your environment.
Now we can install Flask.
You’re ready to go!
The quickstart guide is a really helpful document to check out if you’re interested in learning a bit more about the basics. I’m going to start you out with a little information that’s very similar to the information provided in that guide. There isn’t a better or clearer explanation of the basics of Flask than that one.
To create a seriously minimal Flask application, you start by creating a file.
Create the file and open it in your favorite text editor. Then type
What does the code above do?
First of all, we imported the Flask class. Next, we created an instance of the class. The first argument is the name of the application’s module. If you’re using a single module, you’ll use (__name__) so that Flask knows where to look for stuff. The “route” part tells Flask what URL is supposed to trigger our function. We give the function a name that’s also used to generate URLs for that function and returns the message we want to display in the user’s browser.
You can save this as hello.py or whatever.py or anything else that makes you happy. Just don’t save it as flask.py because that will conflict with Flask. I like to go with app.py for the main flask file because that’s going to be what Flask wants to find later.
If you want to run it, go to your terminal and type
and then
If everything’s working, you’ll see something like this
Now you can click (command-click) on that web address or copy and paste it into your browser. See if it works!

(Any time you want to shut it down, just type control-C in your terminal window.)
Now, here’s the thing I really like to run when I’m trying to create something in Flask:
I run that command before I run flask run. This puts you in development mode. That means that instead of having to do a manual restart every single time you make a change to your code, your server will reload itself when you change your code. It will also provide you with a seriously helpful debugger when things go wrong!

That being said, putting flask into development mode presents a major security risk, so you never, ever, ever want to use it on production machines.
The quickstart guide also tells you how to bind functions to meaningful URLs. That makes it easier for people to come back to your web app, how to create unique URLs, how to render templates, and more! It walks you through how to read and store cookies, how to upload files, and how to set up redirects and errors. Check it out if you’re looking for more of the basics.

On to our project!
You’ll want to begin with your imports. If you don’t already have Flask, PyTorch, Gunicorn, and Pillow installed, go to your terminal and run any of these that you need:
We’ll make a folder for this project and work within it. (If you didn’t create the folder and file earlier, do that now.) Create a folder for this project, navigate to your folder in the terminal and run the commands below one line at a time. Copy the app.py code from the example above and put it in the app.py file if you want to make sure your new web app is working.
(The command “sublime app.py” below will only work if you want to work in Sublime and have the shortcut set up. You can skip that and just go to your preferred text editor and create a new file called “app.py” if you prefer another text editor.)
You can command-click on the link that shows up, just like we did earlier, or copy and paste it into your browser.
You don’t want to just throw everything up in a string, so create a folder called “templates.” In “templates,” create one file called “index.html” and one file called “result.html.”
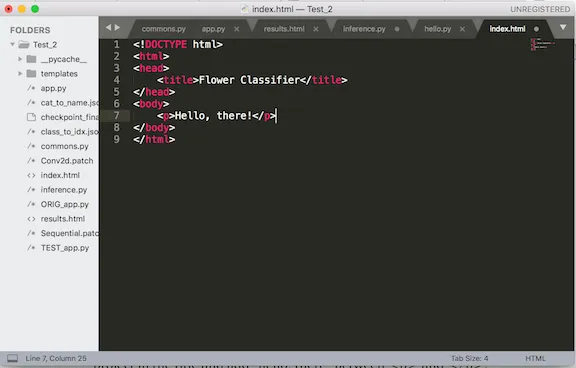
Open up index.html in your text editor and set up an HTML template. If you’re using Sublime, you can type html <TAB> to create a basic HTML template.
Put the name of your project in the title and add “hello, there” between <p> and </p> in the body section.

Go back to your app.py file, add render_templateto the first line and replace “Hello, there!” with render_template(‘index.html’)
Flask will take a look at app.py, then reach into your templates folder and pull up index.html, which we have set to display “Hello, there!” If you restart your page, you’ll see this

You can tell flask to restart whenever we save our changes by adding
to the bottom of the app.py page to work in debug mode.
You can easily pass in values by changing your app.py file to something like this
and your index.html file to this
We’re up and running! However, if we want to build a web app that will allow users to upload a file or an image and display the results, we’ll want to build an app that accepts both “GET” and “POST” methods.
To do that, we change our app.py file to
and we’ll change our index.html file to

Remember that result.html file we created? Now you want to have something in there, so open up that file and add
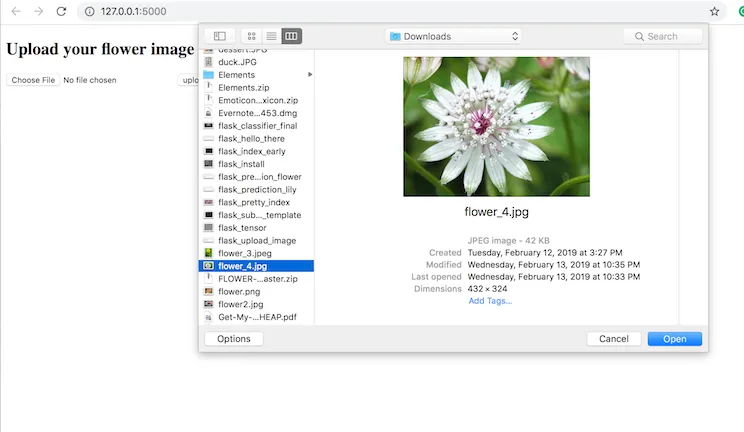
Now you should be able to reload your browser window (if you’re running in debug mode), upload an image, and see this as your result

Right now, our results page will just say that your image is a lily no matter what you upload.
Congratulations if you’ve gotten this far!
You’re going to want to be able to render the results, and doing that is incredibly simple. If you want to test it out, change your app.py file so that you render your results this way: return render_template(‘result.html”, flower=flower_name) (you’re just adding the second part). Next, replace the “Flower Name” line in your results.html file to read <p>Flower Name: {{ flower}} </p> .
Now you’re going to create some inference! I’m going to assume that you have an image classifier created using PyTorch with a saved checkpoint. You’ll need that to actually make this work! Put that checkpoint in your project folder.
If you don’t have a checkpoint file, check out this article on creating a seriously accurate image classifier in PyTorch. It gives you all of the code you need to create an image classifier and create that checkpoint.
Now we need to write a way to grab the image and send the info to the template. First, you’ll need a function to get the model and create your prediction. Create a commons.py file and write a function to get the model as well as something that will allow you to convert the uploaded file into a tensor. Try this!
import io

import torch
import torch.nn as nn
from torchvision import models
from PIL import Image
import torchvision.transforms as transforms

def get_model():
	checkpoint_path = 'checkpoint_final.pth'
	model = models. densenet161(pretrained=True)
	model.classifier = nn.Linear(2208, 102)
	model.load_state_dict(torch.load(
		checkpoint_path, map_location='cpu'), strict=False)
	model.eval()
	return model

def get_tensor(image_bytes):
	my_transforms = transforms.Compose([transforms.Resize(256),
        				    transforms.CenterCrop(224),
        				    transforms.ToTensor(),
        				    transforms.Normalize(mean=[0.485, 0.456, 0.406],
                             					  std=[0.229, 0.224, 0.225])])
	image = Image.open(io.BytesIO(image_bytes))
	return my_transforms(image).unsqueeze(0)
Next, create an inference.py file. You need to be able to sort out the flower names, classes, and labels, so you can write something like this:
import json

from commons import get_model, get_tensor

with open('cat_to_name.json') as f:
	cat_to_name = json.load(f)

with open('class_to_idx.json') as f:
	class_to_idx = json.load(f)


idx_to_class = {v:k for k, v in class_to_idx.items()}

model = get_model()

def get_flower_name(image_bytes):
	tensor = get_tensor(image_bytes)
	outputs = model.forward(tensor)
	_, prediction = outputs.max(1)
	category = prediction.item()
	class_idx = idx_to_class[category]
	flower_name = cat_to_name[class_idx]
	return category, flower_name
Update your app.py file so that it reads
from flask import Flask, request, render_template
app = Flask(__name__)

from commons import get_tensor
from inference import get_flower_name

@app.route('/', methods=['GET', 'POST'])
def hello_world():
	if request.method == 'GET':
		return render_template('index.html', value='hi')
	if request.method == 'POST':
		print(request.files)
		if 'file' not in request.files:
			print('file not uploaded')
			return
		file = request.files['file']
		image = file.read()
		category, flower_name = get_flower_name(image_bytes=image)
		get_flower_name(image_bytes=image)
		tensor = get_tensor(image_bytes=image)
		print(get_tensor(image_bytes=image))
		return render_template('result.html', flower=flower_name, category=category)

if __name__ == '__main__':
	app.run(debug=True)
(If you’re paying attention, you’ll see that I added a couple of lines in the code above to make sure that you’ll get an error message if your file wasn’t uploaded.)
Make sure your result.html file reads something like this:
<!DOCTYPE html>
<html>
<head>
	<title>Flower App</title>
</head>
<body>
	<h2>Prediction</h2>
	<p>Flower Name: {{ flower }}</p>
</body>
</html>
and you should be able to upload an image and get a result!


That’s it!
You now have a working web application built on your image classifier that can upload an image of a flower and predict its species!
Now it’s up to you to refine your classifier and model. You can figure out how to make your classifier faster and more accurate. (Looking for ways to finetune your model? Check out the official tutorial first! After that, check out this article by Florin Cioloboc and Harisyam Manda. It’s full of great suggestions.) You may want to add code that can let people know if they’ve uploaded the wrong kind of file. You may decide you want people to see the top five species results or the probability that their flower is, in fact, the species that your classifier predicted. What you do from here is up to you!
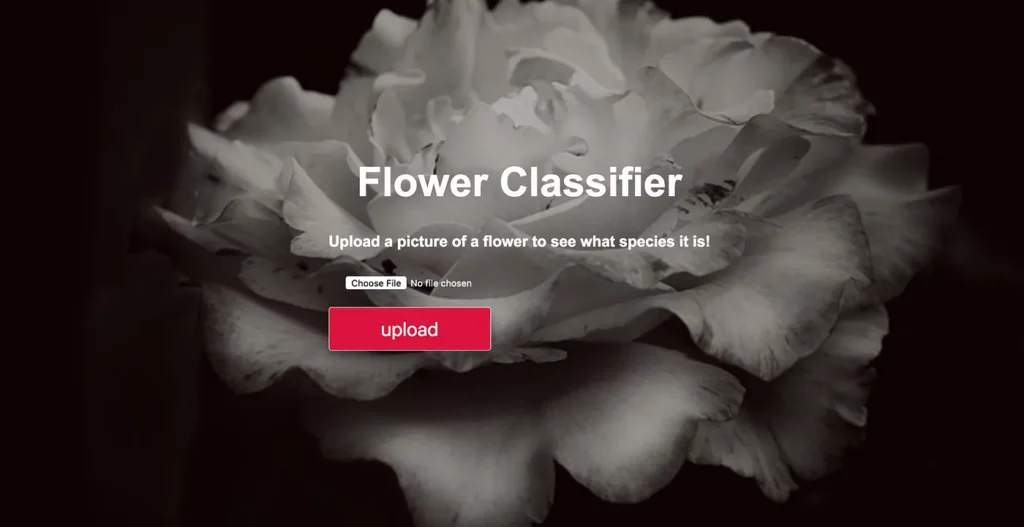
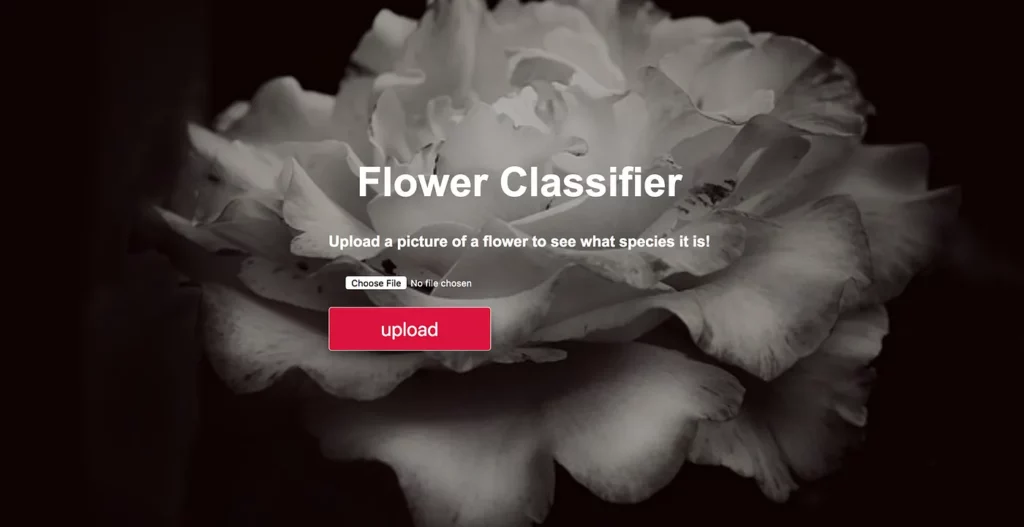
…you might also want to make this thing look a little sexier.
By taking three minutes to insert a little CSS in my index.html file plus an image in a separate folder,
<!DOCTYPE html>
<html>
<head>
<title>Flower App</title>
<meta name="viewport" content="width=device-width, initial-scale=1"><style>
body {
margin: 0;
font-family: Arial, Helvetica, sans-serif;
}
.hero-image {
background-image: linear-gradient(rgba(0, 0, 0, 0.3),rgba(0, 0, 0, 0.3)), url("/static/pixabay_flower.jpg");
background-color: #cccccc;
height: 800px;
background-position: center;
background-repeat: no-repeat;
background-size: cover;
position: relative;
}
.hero-text {
text-align: center;
position: absolute;
top: 50%;
left: 50%;
transform: translate(-50%, -50%);
color: white;
}
input[type=file] {
width: 100%;
padding: 12px 20px;
margin: 8px 0;
display: block;
width: 200px;
color: white;
justify-content: center;
align-items: center;
text-align: center;
box-sizing: border-box;
border-style: solid white;
border-width: 2px;
border-radius: 2px;
}
input[type=submit] {
width: 100%;
padding: 12px 20px;
margin: 8px 0;
display: block;
width: 200px;
font-size: 1.5em;
color: white;
justify-content: center;
align-items: center;
text-align: center;
box-sizing: border-box;
background-color: #DC143C;
border-radius: 4px;
}
</style>
</head>
<body>
<div class="hero-image">
<div class="hero-text">
<h1 style="font-size:50px">Flower Classifier</h1>
<h3>Upload a picture of a flower to see what species it is! </h3>
<form method ='post' enctype=multipart/form-data>
<input type="file" name="file">
<input type="submit" value="upload"><ul class="actions">
</div>
</div>
</body>
</html>
I went from this

to this!

This is just the most basic example of how to deploy a PyTorch image classifier to Flask. You can do anything from here!
Our next step will be to turn this baby into an app, so stay tuned. Also, if you want to take a look at this code and the folder structure, you’re welcome to check out this basic model deployment GitHub repo.
As always, if you create anything awesome, please share it in the responses below or reach out any time on Twitter @annebonnerdata!
Editor’s Note: Heartbeat is a contributor-driven online publication and community dedicated to providing premier educational resources for data science, machine learning, and deep learning practitioners. We’re committed to supporting and inspiring developers and engineers from all walks of life.
Editorially independent, Heartbeat is sponsored and published by Comet, an MLOps platform that enables data scientists & ML teams to track, compare, explain, & optimize their experiments. We pay our contributors, and we don’t sell ads.
If you’d like to contribute, head on over to our call for contributors. You can also sign up to receive our weekly newsletters (Deep Learning Weekly and the Comet Newsletter), join us on Slack, and follow Comet on Twitter and LinkedIn for resources, events, and much more that will help you build better ML models, faster.

Comments 0 Responses